Advertisement
*Please read and save these instructions.
General Safety Information
Read and save these instructions for future reference.
- Carefully read these instructions before attempting to assemble, install, operate, or maintain this unit.
- Protect yourself and others by observing all safety precautions.
- Failure to comply with these instructions could result in personal injury and/or property damage.
- This product is for household use only and is not intended to be used in commercial or industrial environments.
Features:
- Works as an air cooler, air cleaner, and humidifier
- Boasts germ-free water pump circle system
- Cloth curtain materials produce moisturized, cool air
- Variable air speeds for custom-controlled comfort
- 60-degree horizontal air flow with automatic oscillation for greater air distribution
- Wide-range timer (0.5 to 7.5 hours)
- Full-function remote control
- Includes LED indicator lights and low water alert
- Ionizer eliminates airborne pollutants
Safety Instructions
- Make sure the power source conforms to the electrical requirements of this unit (AC120V/60Hz).
- Do not operate this appliance if it has a damaged cord or plug. If the power cord or plug is damaged, it must be replaced by the manufacturer or an authorized service facility in order to reduce the risk of fire.
- When not in use, disconnect the plug from the power outlet. When disconnecting the plug from the outlet, grasp the plug and not the main power cord. Be sure to drain the water out of the tank when not in use for a prolonged period of time.
- Do not disassemble or alter the unit.
- Do not use the unit in areas with extremely high or low temperatures (exceeding 50℃ or below 0℃), or where it may be exposed to direct sunlight.
- To prevent water from splashing out of the tank, use care when moving the unit if it is full.
- Do not operate the unit near flammable liquids or in potentially dangerous locations.
- Do not put heavy objects on the unit as this may cause damages or unit malfunction.
- This appliance is not intended for use by persons (including children) with reduced physical, sensory or mental capabilities, or lack of experience and knowledge, unless they have been given supervision or instruction concerning its use by a person responsible for their safety.
- Children should be supervised to ensure they do not play with the appliance.
- Before filling the unit with water, make sure the unit is switched off and unplugged from the power outlet. Also make sure the water level is below the MAX line indicator.
- Switch the unit off and unplug it before cleaning it or performing any maintenance.
- Because this appliance adds moisture to the air, to avoid excessive humidity, do not use it for an extended period of time in small, enclosed areas.
- Change the water frequently in order to keep it clean.
- This unit must be operated in an upright position and on a flat, level surface.
- Do not operate the unit in wet or damp locations.
- Do not install the unit in a small, confined space such as a closet or cabinet.
![]() DISPOSAL: Do not dispose of this product as unsorted municipal waste. It may be necessary to have it collected separately for special treatment.
DISPOSAL: Do not dispose of this product as unsorted municipal waste. It may be necessary to have it collected separately for special treatment.
 DISPOSAL: Do not dispose of this product as unsorted municipal waste. It may be necessary to have it collected separately for special treatment.
 Please Note:
- This unit should not be repaired or serviced by anyone except a specialized technician.
- If the unit tips over, immediately pull the plug from the power outlet, and then take the unit to an authorized service agency or specialized technician for repairs.
- To reduce the risk of fire or electric shock, do not use this fan with any Solid State speed control device.
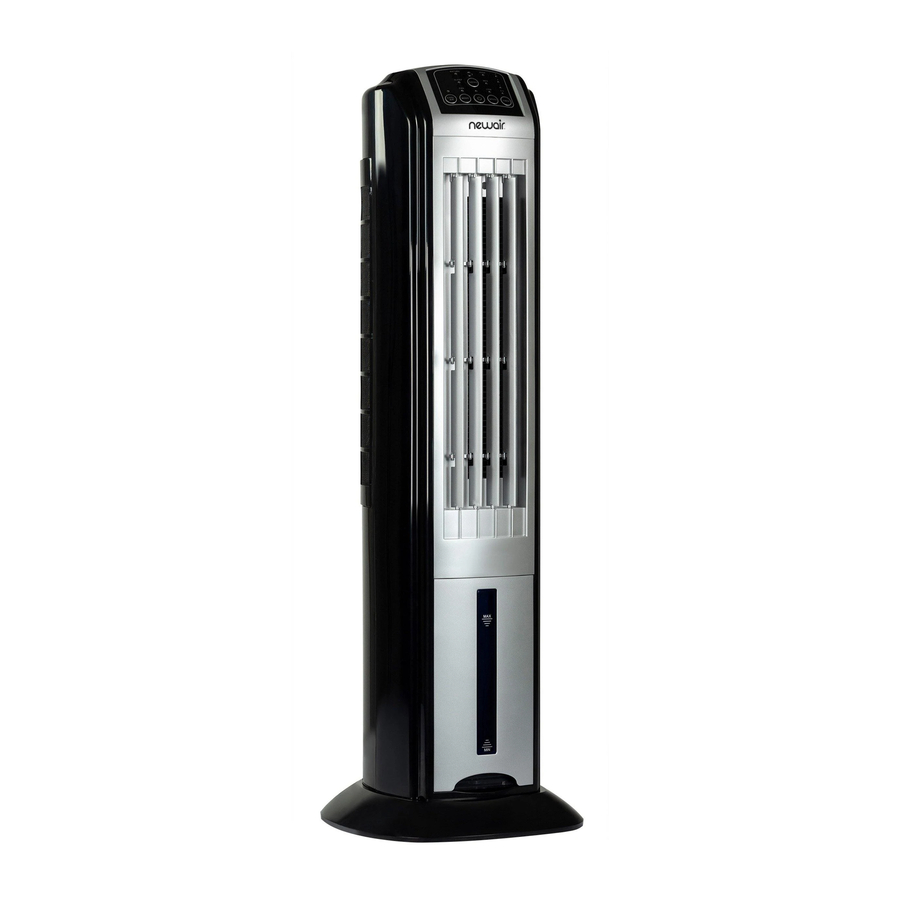
List of Parts

Figure 1
- Control panel
- Display
- Wind bar bracket
- Grille
- Front housing
- Power cord and plug
- Water tank
- Base
- Water level indicator
- Wind bar
- Rear housing
- Top cover
- Remote control
- Rear filter
Using the Remote Control: Use the remote control within 19 feet (6 meters) from the unit. If the remote control does not work from a short distance away, try replacing the batteries. Do not allow children to play with the remote control.

Figure 2
- MODE BUTTON
- POWER BUTTON
- COOL BUTTON
- TIMER BUTTON
- ION BUTTON
- SWING BUTTON
- SPEED BUTTON
Before Operating the Unit
- Pull out the water tank and fill it with water before operating the fan (see Figure 3). Do not pour water above 40℃ into the water tank.

Figure 3 - For enhanced cooling, ice can be added to the ice box located within the base of the water tank (see Figure 4).

Figure 4


Please Note:
- Do not place the ice box into the water tank when the water tank is full. Doing so can cause water to overflow of the unit.
- Freeze the ice box each time before placing it in the water tank.
- The ice box is permanently sealed. Do not open the ice box or try to put the cooling gel directly into the water tank. This can cause damage to the water pump.
- The gel within the ice box is non-toxic.
Operating Instructions

Figure 5
POWER Button:
- Connect the plug into the power outlet. A beeping sound will be heard once the plug is plugged in.
- Press the POWER button. The FAN indicator and HIGH speed indicator will turn on and beep. The unit will operate on the strongest air setting in normal mode.
- Press the POWER button again to shut off the unit.
MODE Button:
- Press the MODE button. At this time, the NATURE indicator will turn on. Press the POWER button 2 times to set the unit to SLEEP mode. To return to "normal" mode, press the POWER button 3 times.
For HIGH Speed + SLEEP Mode:
- On the HIGH speed mode, press the SLEEP mode button.
- Press the SLEEP button when the SPEED mode is to set SLEEP mode with HIGH wind speed. At this time, both the HIGH and SLEEP indicators will turn on. The wind speed will then automatically change as follows:
- First 0.5 Hour: The unit will alternate on HIGH and MED wind speed every 10 seconds.
- Second 0.5 Hour: The unit will switch to the MED wind speed setting.
- After 1 Hour Until Shut-Off: The unit will switch to the LOW wind speed setting.
For MED Speed + SLEEP Mode:
- Press the SLEEP button when the SPEED mode is set to MED. This will program the unit to work in SLEEP mode with MED wind speed. At this time, both the MED and SLEEP indicators will turn on. The wind speed will automatically change as follows:
- First 0.5 Hour: The unit will alternate on MED and LOW wind speeds every 10 seconds.
- After 0.5 Hour Until Shut-Off: The unit will operate on LOW wind speed.
LOW Speed + SLEEP Mode:
- Press the SLEEP button when the SPEED mode is set to LOW. This will program the unit to work in SLEEP mode with LOW wind speed. At this time, both the LOW and SLEEP indicators will turn on. The unit will operate on LOW wind speed every 10 seconds and stop 5 seconds while alternating every 15 seconds until the power turns off.
Please Note: To avoid overcooling, do not adjust the direction of the air directly onto people or objects.
HIGH Speed+ NATURE Mode:
- Press the NATURE button when the SPEED mode is set to HIGH. This will program the unit to work in NATURE mode with HIGH wind speed. At this time, both the HIGH and NATURE indicators will turn on. The wind speed will automatically change according to this schedule:
HIGH speed 5 sec.
LOW speed 5 sec.
MED speed 5 sec.
stop 5 sec.
MED speed 10 sec.
HIGH speed 10 sec.
MED speed 5 sec.
LOW speed 5 sec.
stop 5 sec.
MED speed 5 sec.
HIGH speed 5 sec.
LOW speed 5 sec.
stop 5 sec.
The unit will operate in this cycle until the power is turned off.
MED Speed + NATURE Mode:
- Press the NATURE button when the SPEED mode is set to MED wind speed. This will program the unit to work in NATURE mode with MED wind speed. At this time, both the MED and NATURE indicators will turn on. The wind speed will automatically change according to this schedule:
MED speed 5 sec.
LOW speed 5 sec.
MED speed 5 sec.
LOW 5 sec. stop sec.
MED speed 10 sec.
LOW speed 10 sec.
MED speed 5 sec.
LOW 5 sec.
stop 5 sec.
MED speed 5 sec.
LOW speed 5 sec.
stop 5 sec.
The unit will operate in this cycle until the power is turned off.
LOW Speed + NATURE Mode:
- Press the NATURE button when the SPEED mode is set to LOW wind speed. This will program the unit to work in NATURE mode with LOW wind speed. At this time, both the LOW and NATURE indicators will turn on. The wind speed will automatically change according to this schedule:
MED speed 5 sec.
LOW speed 15 sec.
MED speed 5 sec.
LOW 15 sec.
stop 5 sec.
MED speed 5 sec.
LOW speed 10 sec.
MED speed 5 sec.
LOW 10 sec.
stop 5 sec.
MED speed 5 sec.
LOW speed 20 sec.
stop 5 sec.
The unit will operate in this cycle until the power is turned off.
SPEED Button
- When the POWER button is pressed, the HIGH speed indicator will turn on and the unit will operate on the strongest wind setting.
- Press the SPEED button once again. At this time, the MED speed indicator will turn on and the unit will operate on the medium wind setting.
- Press the SPEED button once more. The LOW speed indicator will turn on and the unit will operate on the lowest wind setting.
SWING Button
- Press the SWING button. At this time, the indicators will turn on and the louvers will swing (covers 60 degrees horizontally).
- Press the SWING button again to stop the unit at is desired position. The indicator will turn off at this time.
TIMER Button
- Press the TIMER button to set the timer. Every press will add another 30 minutes of operating time with a maximum of up to 7.5 hours. The programmed time will be indicated on the display.
- To stop the timer, press the TIMER button 16 times (one more press after reaching 7.5 hours). The TIMER indicator will turn off.
COOL Button
- Press the COOL button. If the tank is filled to a sufficient level, the COOL indicator will turn on and the pump will begin to work.
- After about 3 minutes, the unit will provide cool, humidified air.
- Press the COOL button again to shut off the pump. The COOL indicator will turn off, and the unit will produce fresh, dry air.
Please Note:
- If the COOL button is pressed when there is insufficient water in the tank, an alarm will sound after 90 seconds. The COOL indicator will continue to flash for 10 seconds. After 10 seconds, the alarm will stop and the COOL indicator will also turn off.
- The unit can also be used without water. In this case, it will operate as a normal electric fan. If this is desired, make sure the COOL button is in OFF mode.
ION Button
Press the ION button. The ION indicator will turn on and the ionizer will start to work. A stream of ions will be produced with the cool air.
Air Direction Lever
Adjust the direction of the inside wind bar by turning the lever. You will also be able to adjust the air to flow vertically in an "up-down" direction.
Technical Specifications
| Rated Voltage | Rated Frequency | Rated Power | Water Consumption | Water Tank Capacity | Dimensions (mm) | N.W. |
| 120V~ | 60Hz | 80W | 0.2-0.25L/h | 4L | 308X292X906 | 5.1kg |
Cleaning and Maintenance
![]()
Disconnect the plug from the power outlet before cleaning or maintaining this appliance.- Clean the outside housing with a moist, damp cloth.
- From time to time, depending on the nature of your water supply, you may need to clean the inside of the water tank by following these steps:
- Fill the water tank with 1 cup (8 oz.) of undiluted white vinegar;
- Let the solution sit for 20 minutes.
- With the vinegar in the water tank, clean all or interior surfaces with a soft cloth or use a brush to remove build-up.
- Rinse the water tank thoroughly with clean water to remove any residual build-up or solution.

Cleaning the Filter (refer to the figure below, then follow the steps)
To keep your evaporative fan working efficiently, clean the filter system once every two weeks.

- Remove the back cover and dust filter from the unit.
- Remove the cooling pad from the unit;
- Rinse the filter net and cooling pad with water, and then dry them in direct sunlight.
- Replace the filter and cooling pad.
Troubleshooting
| Problem | Possible Reasons | Solutions |
The unit produces no air. |
|
|
The unit cannot be turned off. |
|
|
The unit makes a lot of noise. |
|
|
The fan doesn't humidify. |
|
|
There is no swing. |
|
|

VideosAF-310 - How to Operate Video
Documents / ResourcesDownload manual
Here you can download full pdf version of manual, it may contain additional safety instructions, warranty information, FCC rules, etc.
Advertisement


Need help?
Do you have a question about the AF-310 and is the answer not in the manual?
Questions and answers