Advertisement
- 1 Overview
- 2 Connecting the ZEN
- 3 Basic Usage
- 4 PlayStation 4 Wireless Controller Pairing
- 5 PlayStation 3 Wireless Controller Pairing
- 6 Xbox One Wireless Bluetooth Controller Pairing
- 7 Xbox One Wireless Controller Pairing
- 8 Xbox 360 Wireless Controller Pairing
- 9 Switch Pro Wireless Controller Pairing
- 10 Wii U Pro Wireless Controller Pairing
- 11 Joy-Con Wireless Controller Pairing
- 12 Connecting Your ZEN to a PC
- 13 Videos
- 14 Documents / Resources
Overview
The Cronus Zen is compatible with PlayStation 4™, Xbox One™, Nintendo Switch™, PlayStation 3™, Xbox 360™ & Windows PC.
Please note the following:
Xbox 360 Consoles require an officially licensed Xbox 360 wired controller to authenticate the Zen to the Xbox 360 console. The Plug and Play charge cable will not work.
Xbox One Consoles require an officially licensed Xbox One controller with a full data micro USB cable to authenticate the Zen to your Xbox One.
PS4 Consoles require an officially licensed PS4 controller with full data micro USB cable to authenticate the ZEN TM .

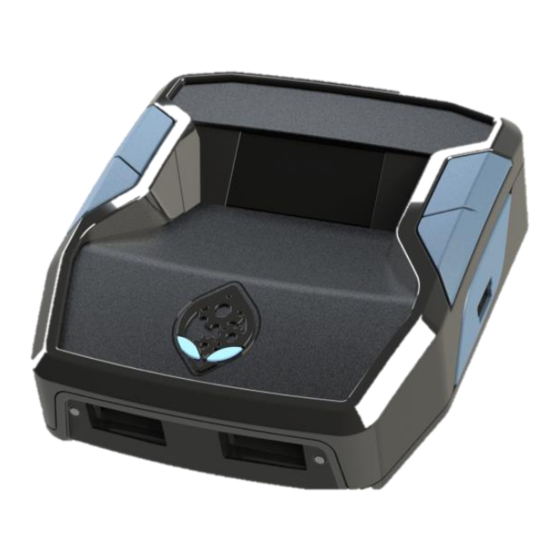
Gear Head RGB *EYES"
Fully Programmable true color RGB Light bar with 16,777,216 color variations. Useful for adding visual indicators to your scripts and ensuring legacy Cronusmax support.
Memory Slot Button (P1 & P2)
Press P1 Load next memory slot. Press and hold P2 to enable BT searching mode.
Connecting the ZEN™
The Cronus Zen is compatible PlayStation 4™, Xbox One™, Nintendo Switch™, PlayStation 3™, Xbox 360™ & Windows PC.
Please note the following:
Xbox 360 Consoles require an officially licensed Xbox 360 wired controller to authenticate the Zen to the Xbox 360 console. The Plug and Play charge cable will not work.
Xbox One Consoles require an officially licensed Xbox One controller with a full data micro USB cable to authenticate the Zen to your Xbox One.
PS4 Consoles require an officially licensed PS4 controller with full data micro USB cable to authenticate the ZEN™.
Front Features

INPUT- A1: USB Input port, first level priority.
Connect the consoles official controller here for authentication and other console specific features, such as controller headset, chat pad, touchpad etc.. Also used when not using cross over mode.
INPUT-A2 & A3: Main input ports for cross over controllers, Mouse and Keyboards.
Main input port, the controller connected to this input will have the highest priority over all other input ports (USB and/or Bluetooth). Connect your preferred gaming controller here.
USB Port Status LED
- ON/Green: Port in use and active and connected
- OFF: Controller not enumerated
Side Features

PROG (Mini USB): Programming port to connect the ZEN™ to the computer. Download and install Zen Studio to configure your Zen with Gamepacks, GPC Scripts and Mouse and Keyboard profiles.
Console Port. (Micro USB): used to connect your Zen™ to your Console or to the PC for updating firmware.
Gear Head RGB *EYES"
Fully Programmable true color RGB Lightbar with 16,777,216 color variations. Useful for adding visual indicators to your scripts and ensuring legacy Cronusmax support.
Navigation and Pairing Buttons (P1 & P2)
Press P1 Load next memory slot. Press and hold P2 to enable BT searching mode.
Basic Usage
- Connect the original controller of the console to the USB port A1. An original controller of the console is required for authentication and for console specific features, such as controller headset, chatpad, touchpad, motion sensor, etc.
- Connect your preferred controller, Keyboard or mouse to USB port A2 or A3. This controller will have precedence over any other controller connected to the ZEN, meaning the functions on this controller (s) will supersede the commands from the subsequent controllers in the priority chain.
- With the provided micro-USB cable, connect the ZEN Output port to the console. The Zen will automatically configure to match the console.
| All respective status LEDs should be green and the LCD DISPLAY Show the Console | |
| Enable Wired Communication | |
| PlayStation 4: | Settings → Devices → Controllers → Communication Method: Use USB Cable. |
| Nintendo Switch: | System Settings → Controllers and Sensors → Check the Option: Pro Controller Wired Communication. |
Please note only DUAL SHOCK 4 model CUHZCT2 supports headsets and the built in speaker.
WIRELESS CONTROL: To use a wireless controller with your ZEN you will have to first pair your wireless controller with ZEN device. Each controller has a simple wireless pairing method as follows. Switch Pro/Wii U Pro/Xbox One/Xbox 360/PlayStation 4/PlayStation 3 controllers can be used wirelessly after pairing.

PlayStation 4™ Wireless Controller Pairing
Simply put your PlayStation 4 controller into pairing mode and press the Bluetooth Sync button on your ZEN device.

Step by Step Instructions below.
- Ensure your wireless PlayStation 4 controller is off.
- Place your PlayStation 4 controller into Bluetooth pairing mode by holding the SHARE and HOME buttons for 5 seconds or until the light bar flashes WHITE.
- Now press the Bluetooth pairing button on the ZEN™ device. The LED will flash BLUE to show Bluetooth pairing has begun.
- Within a few seconds the LED will be WHITE indicating that pairing is complete.
- The light bar on the PlayStation 4 controller should be BLUE and you are now connected to the ZEN device and ready to use your PlayStation 4 controller wirelessly.
PlayStation 3™ Wireless Controller Pairing
Connect the PlayStation 3™ controller via a wired connection first. Then remove the wired connection and your PlayStation 3™ controller will automatically pair to ZEN device.

Step by Step Instructions below.
- Plug your PlayStation 3™ controller into your ZEN™ device. The Player LED indicator on your PlayStation 3™ controller will light up.
- Now remove the wired connection, and your PlayStation 3™ controller Player LED indicators will begin to flash.
- After a few seconds only one Player LED indicator will light up.
- You are now connected to the ZEN™ device and ready to use your PlayStation 3™ controller wirelessly.
- Note that currently if you reconnect and disconnect the cable a second time, the PlayStation 3™ controller will no longer function wirelessly. To resolve this, simply unplug the ZEN™ device from the Switch™ Dock, and restart from Step 1
Xbox One™ Wireless Bluetooth Controller Pairing
Simply put your Xbox™ controller into sync mode and press the Bluetooth Sync button on your ZEN™ device.

Step by Step Instructions below.
- Turn on your Xbox One™ Wireless Bluetooth Controller.
- Press the SYNC button on your controller.
- Now press the Bluetooth pairing button on the ZEN™ device. The LED will flash BLUE to show Bluetooth pairing has begun.
- Within 30 seconds the LED will be WHITE on the ZEN™ device and the Xbox One™ Wireless Bluetooth Controller will vibrate indicating that pairing is complete.
- You are now connected to the ZEN™ device and ready to use your Xbox One™ Bluetooth Controller wirelessly.
- If your controller is not connected, remove the batteries then re-insert them and repeat the process above
Xbox One™ Wireless Controller Pairing
To connect a non-Bluetooth Xbox One™ or Xbox One™ Elite Controller, you must use an Xbox One™ Wireless Adapter (sold separately).

Connect the Xbox One™ controller via a wired connection first. Then remove the wired connection and plug the Xbox One™ Wireless Adapter into your ZEN™ device. Step by Step Instructions below.
- Plug your Xbox One™ controller into the USB PORT A 2 of the ZEN™ device. It will vibrate to indicate it is Connected..
- Insert the Xbox One™ Wireless Adapter into the USB PORT A3 of the ZEN™ device.
- Now unplug your Controller from A2, your Xbox One™ controller HOME button will begin to flash.
- Within a few seconds the Xbox One™ Wireless Adapter LED will go WHITE and your Xbox One™ Wireless Controller HOME button will stay solid indicating that pairing is complete.
- You are now connected to the ZEN™ device and ready to use your Xbox One™ controller wirelessly.
- If your controller is not connected, remove the batteries then re-insert them and repeat the process above.
Xbox 360™ Wireless Controller Pairing
To connect a Xbox 360™ Wireless Controller you must use an Xbox 360™ Wireless Gaming Receiver (sold separately). Connect the Xbox 360™ Wireless Gaming Receiver to the ZEN™ device. Now sync with your Xbox 360™ Wireless Controller. Step by Step Instructions below.

- Plug your Xbox 360™ Wireless Gaming Receiver into your ZEN device.
- Turn on your Xbox 360™ Wireless Controller.
- Press the SYNC button on your Xbox 360™ Wireless Controller until the HOME button begins flashing.
- Now press the SYNC button on the Wireless Gaming Receiver.
- Within a few seconds the Xbox 360™ Wireless Controller HOME button will stay solid indicating that pairing is complete.
- You are now connected to the ZEN™ device and ready to use your Xbox 360™ controller wirelessly.
Switch™ Pro Wireless Controller Pairing
Simply put your Switch™ Pro Controller into sync mode and press the Bluetooth Sync button on your ZEN™ device. Step by Step Instructions below.

- Ensure your ZEN™ device is plugged into the Switch™ Dock.
- Ensure your wireless Switch™ Pro Controller is off.
- Place your Switch™ Pro Controller into Bluetooth pairing mode by pressing the SYNC button at the top for a few seconds.
- The player indicators at the bottom of the Switch™ Pro Controller will now begin to cycle.
- Now press the Bluetooth pairing button on the ZEN™ device. The LED will flash BLUE to show Bluetooth pairing has begun.
- Within a few seconds the LED on the ZEN™ device will be WHITE indicating that pairing is complete.
- The player indicators on the Switch™ Pro Controller will light up one player indicator LED.
- You are now connected to the ZEN™ device and ready to use your Switch™ Pro Controller wirelessly.
Wii U™ Pro Wireless Controller Pairing
Simply put your Wii U Pro controller into sync mode and press the Bluetooth Sync button on your ZEN™ device. Step by Step Instructions below.

- Ensure your wireless Wii U™ Pro Controller is off.
- Place your Wii U™ Pro Controller into Bluetooth pairing mode by pressing the SYNC button at the back for a few seconds.
- The player indicators at the bottom of the Wii U™ Pro Controller will now begin to cycle.
- Now press the Bluetooth pairing button on the ZEN™ device. The LED will flash BLUE to show Bluetooth pairing has begun.
- Within a few seconds the LED on the ZEN™ device will be WHITE indicating that pairing is complete.
- The player indicators on the Wii U™ Pro Controller will light up one player indicator LED.
- You are now connected to the ZEN™ device and ready to use your Wii U™ Pro Controller wirelessly.
Joy-Con™ Wireless Controller Pairing
Simply put your Joy-Con™ controller into sync mode and press the Bluetooth Sync button on your ZEN™ device. Step by Step Instructions below.

- Ensure both Joy-Con™ controllers are off.
- Place your LEFT Joy-Con™ controller into Bluetooth pairing mode by pressing the SYNC button until the player LED's on it begin to cycle.
- Now press the Bluetooth pairing button on the ZEN™ device. The LED will flash BLUE to show Bluetooth pairing has begun.
- Within a few seconds the LED on the ZEN™ device will be WHITE indicating that pairing is complete and you will feel a strong vibration on the LEFT Joy-Con™ controller.
- The player indicators on the Joy-Con™ controller will light up one player indicator LED.
- Place your RIGHT Joy-Con™ controller into Bluetooth pairing mode by pressing the SYNC button until the player LED's on it begin to cycle.
- Now press the Bluetooth pairing button on the ZEN™ device. The LED will flash BLUE to show Bluetooth pairing has begun.
- Within a few seconds the LED on the ZEN™ device will be WHITE indicating that pairing is complete and you will feel a strong vibration on the RIGHT Joy-Con™ controller.
- The player indicators on the Joy-Con™ controller will light up one player indicator LED.
- You are now connected to the ZEN™ device and ready to use your Joy-Con™ controllers.
- If your Joy-Con™ controller player indicators do not all match the player indicator on the ZEN™ device then repeat steps 1 - 11.
Connecting Your ZEN to a PC
Gamepacks, GPC Scripts, Mouse and Keyboard profiles and Macros are created, downloaded are programmed using Zen Studio.
Programming, Configuring and Updating
- Download and install Zen Studio
- Connect the Zen PROG port to computer with the provided micro-USB cable:

The first time the Zen is connected to the computer, the computer will detect a new USB device and automatically install the device drivers. - Run Zen Studio, the software should automatically detect your Zen. Zen Studio is the main tool for programming, configuring and developing for the Zen Device.

Please refer to the ZEN STUDIO online user manual for further instructions.
FCC WARNING
This device complies with part 15 of the FCC Rules. Operation is subject to the following two conditions: (1) this device may not cause harmful interference, and (2) this device must accept any interference received, including interference that may cause undesired operation.
Any changes or modifications not expressly approved by the party responsible for compliance could void the user's authority to operate the equipment.
NOTE: This equipment has been tested and found to comply with the limits for a Class B digital device, pursuant to Part 15 of the FCC Rules. These limits are designed to provide reasonable protection against harmful interference in a residential installation. This equipment generates, uses and can radiate radio frequency energy and, if not installed and used in accordance with the instructions, may cause harmful interference to radio communications. However, there is no guarantee that interference will not occur in a particular installation.
If this equipment does cause harmful interference to radio or television reception, which can be determined by turning the equipment off and on, the user is encouraged to try to correct the interference by one or more of the following measures:
-- Reorient or relocate the receiving antenna.
-- Increase the separation between the equipment and receiver.
-- Connect the equipment into an outlet on a circuit different from that to which the receiver is connected.
-- Consult the dealer or an experienced radio/TV technician for help.
To maintain compliance with FCC's RF Exposure guidelines, This equipment should be installed and operated with minimum distance between 20cm the radiator your body: Use only the supplied antenna.

VideosRONUS ZEN SETUP AND TUTORIAL VIDEO
Documents / ResourcesDownload manual
Here you can download full pdf version of manual, it may contain additional safety instructions, warranty information, FCC rules, etc.
Advertisement


Need help?
Do you have a question about the Cronus Zen and is the answer not in the manual?
Questions and answers