Advertisement
Quick Links
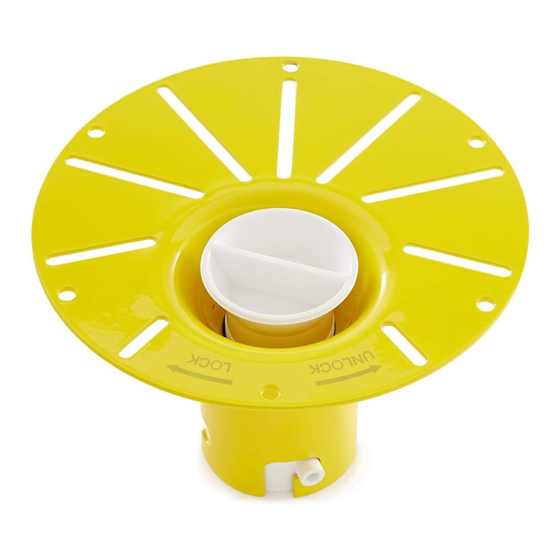
RAPIDCONNECT TUB DRAIN INSTALLATION
BEFORE YOU BEGIN
We recommend consulting a professional if you are
unfamiliar with installing plumbing fixtures. Signature
Hardware accepts no liability for any damage to the floor,
drain, tub, or for personal injury during installation.
Observe all local plumbing and building codes.
Unpack and inspect the faucet for shipping damage. If
any damage is found, contact our Customer Relations
team at 1-866-855-2284.
GETTING STARTED
Ensure that you have gathered all the required
materials that are needed for the installation.
TOOLS AND MATERIALS:
1-3/4" Screws
Long-nose Pliers
(x5)
Lubricant
(provided)
Drill
Installation
1. Use the provided sub-floor cutout template to cut a
5" diameter hole into the wood sub-floor, centered above
the prepared P-Trap.
2. Connect the drain assembly to the prepared P-Trap
below the floor. Secure the drain to the sub-floor with 5
screws (not supplied).
P-Trap
RapidConnect Tub Drain Installation Instructions
SKU(s): 428473
5"
1
Advertisement

Related Manuals for Signature Hardware 428473


Summary of Contents for Signature Hardware 428473
- Page 1 SKU(s): 428473 RAPIDCONNECT TUB DRAIN INSTALLATION BEFORE YOU BEGIN Installation We recommend consulting a professional if you are 1. Use the provided sub-floor cutout template to cut a unfamiliar with installing plumbing fixtures. Signature 5” diameter hole into the wood sub-floor, centered above Hardware accepts no liability for any damage to the floor,...
- Page 2 RAPIDCONNECT TUB DRAIN INSTALLATION 5. Apply the provided lubricant to the tailpiece of the 3. Complete the installation of the finished floor, leaving tub drain. Lower the tub into position and insert the a 2.5” opening to access the drain. tailpiece into the Rapid Connect drain assembly.
Need help?
Do you have a question about the 428473 and is the answer not in the manual?
Questions and answers