
Summary of Contents for imilab CMSXJ33A
- Page 1 IMILAB Video Doorbell Set User Manual RU R U Read this manual carefully before use, and retain it for future reference.
- Page 2 CONTENTS English 01-11 Deutsche 12-22 Français 23-33 Italiano 34-44 Español 45-55 56-66 Polski 67-77 Türkçe 78-88...
-
Page 3: Getting Started
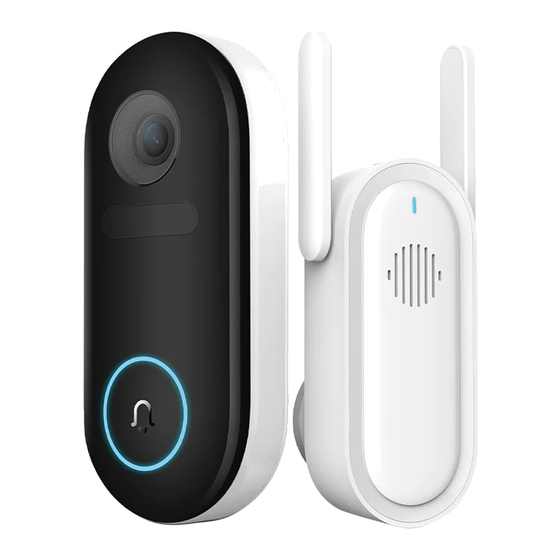
Getting started For video doorbell & hub installation IMILAB Mounting Screw Hole 15° Mounting Micro-USB Doorbell Video Doorbell Bracket Positioning Card Wedge Charging Cable Detaching Mounting IMILAB Screws Smart Hub and Anchors Product overview Reset Button Status LED Speaker MicroSD... -
Page 4: Setting Up The System
Download the app and set up the system 1. Download the Imilab Home APP from the app store (ios devices) or google play (Android devices). 2. Sign up for a imilab home account , then follow the onscreen instructions to complete the setup. EN-02... - Page 5 Mounting the video doorbell Find a Mounting Spot Take the video doorbell to your front door and check the live view on the App at the same time. Find a location where you can get the desired field of view. Consider the below factors: 1.If you want to place the doorbell close to a side wall, make sure the wall doesn’t show up in the field of view.
- Page 6 Place the Screw Hole Positioning Card against the wall to mark the position. Mount the Doorbell on a Wooden Surface If you’re mounting the doorbell on a wooden surface, you don’t need to pre-drill pilot holes. Use the provided screws to secure the Mounting Bracket on the wall, The Screw Hole Positioning Card indicates the position of the screw holes.
- Page 7 Mount the Doorbell on Surfaces Made Out of Hard Materials 1.If you‘re mounting the doorbell on a surface made out of hard materials, like brick, concrete, stucco, drill 2 holes through the Screw Hole Positioning Card with a 15/64” (6mm) drill bit. 2.Insert the provided anchors,and then use provided long screws to secure the Mounting Bracket on the wall.
- Page 8 Mount the Doorbell Align the doorbell on the bottom and then snap it on top. Press it down until it clicks into place. You’re all set! If you want to detach the doorbell or recharge it, please refer to the following sections. EN-06...
- Page 9 Detach the Doorbell 1.Use the doorbell detaching pin provided if you wish to detach the doorbell from the Mounting Bracket. 2.Press and hold the hole on the top of the doorbell and then lift its bottom to take it o . What is required: Doorbell Detaching Pin.
- Page 10 Explanations for LEDS Hub LED Status Status Blinking blue Waiting for connection Solid blue Network connection is successful / connected Blue and orange Network connection is failure flashes alternately Blinking orange Waiting for doorbell to connect Solid orange A firmware update is in progress Press and hold the button for 10 seconds, until the During the reset process, the hub will restart...
-
Page 11: Safety Statement
Safety statement Specifications Name: IMILAB Video Doorbell Model: CMSXJ33A Resolution: 2560x1440 Aperture: F1.6 Item Dimensions: 60 x 33 x 142 mm Power Input: 5 V Operating Temperature: -20 °C ~ 50 °C FCC ID:2APA9-CMSXJ33A Name: IMILAB Doorbell Hub Model: CMWG33B Power Input: 100-240V~,50/60hz,0.3A MAX... -
Page 12: Weee Information
Changes or modifications not expressly approved by the party responsible for compliance could void the user's authority to operate the equipment. This device complies with Part 15 of the FCC Rules. Operation is subject to the following two conditions: (1) This device may not cause harmful interference, and (2) This device must accept any interference received, including interference that may cause undesired operation. -
Page 13: Eu Declaration Of Conformity
EU Declaration of Conformity Hereby, Shanghai Imilab Technology Co., Ltd. declares that the radio equipment type IMILAB Video Doorbell is in compliance withDirective 2014/53/EU. Hereby, Shanghai Imilab Technology Co., Ltd. declares that the radio equipment type IIMILAB Doorbell Hub is in compliance with Directive 2014/53/EU. - Page 14 Inbetriebnahme Für Video-Türklingel- & Hub-Montage Befestigungshalterung 15° Befestigungskeil Türklingel-Trennstift IMILAB Schraubloch Micro-USB Video-Türklingel -Positionskarte -Ladeanschlusskabel Befestigungsschrauben IMILAB und Dübel Smart Hub Produktübersicht Rücksetzungstaste Status LED Lautsprecher SD-Kartenschlitz Strom DE-12...
-
Page 15: Einstellen Des Systems
1. Laden Sie die Imilab Home App vom App Store (IOS Geräte) oder Google Play (Android Geräte) herunter. 2. Melden Sie sich in einem Imilab Home Account an und folgen Sie den Bildschirman- weisungen um das Einstellen zu vollenden. DE-13... - Page 16 Befestigung der Video-Türklingel Finden Sie einen Befestigungspunkt Nehmen Sie die Video-Türklingel zur Vordertür und prüfen Sie gleichzeitig die Live-Ansicht auf der App. Finden Sie einen Ort, an dem Sie das gewünschte Blickfeld erhalten. Berücksichtigen Sie die folgenden Faktoren: 1. Wenn Sie die Türklingel in der Nähe der Seitenwand befestigen möchten, vergewissern Sie sich, dass die Wand nicht im Blickfeld erscheint.
- Page 17 Halten Sie die Schraubloch-Positionskarte gegen die Wand, um die Position zu kennzeichnen. Befestigung der Türklingel auf einer hölzernen Oberfläche Wenn Sie die Türklingel auf einer hölzernen Oberfläche befestigen, müssen Sie keine Vorbohrungen durchführen. Verwenden Sie die bereitgestellten Schrauben, um die Befestigungshalterung an der Wand zu sichern, die Schraubloch-Positionskarte gibt die Position der Schraublöcher an.
- Page 18 Befestigung der Türklingel an Oberflächen aus harten Materialien 1. Wenn Sie die Türklingel auf einer Oberfläche aus harten Materialien befestigen, wie z. B. Ziegelsteine, Beton, Gips bohren Sie 2 Löcher durch die Schraubloch-Positionskarte mit einem Bohreinsatz von 15/64 Zoll (6mm). 2.
- Page 19 Befestigung der Türklingel Richten Sie die Türklingel unten aus und lassen Sie sie dann oben einschnappen. Drücken Sie sie herunter, bis sie einrastet. Sie sind fertig! Wenn Sie die Türklingel entfernen oder aufladen möchten, lesen Sie bitte die folgenden Abschnitte DE-17...
- Page 20 Entfernen der Türklingel 1. Verwenden Sie den mitgelieferten Türklingel-Trennstift, wenn Sie die Türklingel von der Befestigungshalterung entfernen möchten. 2. Drücken und halten Sie das Loch auf der Oberseite der Türklingel und heben Sie dann ihre Unterseite hoch, um sie abzunehmen. Was wird benötigt: Türklingel-Trennstift Türklingel-Trennstift Aufladen der Türklingel 5V-USB-Ladegerät...
- Page 21 Erklärung der LEDs Hub LED Status Status Blinkt blau Warten auf Verbindungsaufbau Dauerhaft blau Netzverbindung erfolgreich / verbunden Blau und Orange blitzen abwechselnd Netzverbindung fehlgeschlagen Orange blinkt Warten auf Verbindungsaufbau der Türklingel Dauerhaft orange Ein Firmware-Update ist im Gange Drücken und halten Sie die Während des Rücksetzvorgangs wird der Hub neu gestartet Taste 10 Sekunden lang gedrückt, bis die LED blau blinkt...
-
Page 22: Spezifikationen
Objektausmaße: 60 x 33 x 142 mm Eingangsleistung: 5 V Betriebstemperatur: -20 °C ~ 50 °C FCC ID:2APA9-CMSXJ33A Name: IMILAB Turklingel Hub Modell: CMWG33B Eingangsleistung: 100-240V~, 50/60hz, 0,3A MAX Objektausmaße: 57 x 34 x 105mm Betriebstemperatur: -10 °C ~ 45 °C Erweiterbarer Speicherplatz: MicroSD-Karte (bis zu 64 GB) Kabellose Konnektivität: Wi-Fi IEEE 802.11 b/g/n 2,4 GHz... - Page 23 dauer zu vermeiden. Verwenden Sie das Gerät nicht in einer Umgebung mit zu hohen oder zu niedrigen Temperaturen, setzen Sie es nicht starker Sonneneinstrahlung oder einer zu feuchten Umgebung aus. Änderungen oder Modifikationen, die nicht ausdrücklich von der für die Einhaltung der Bestimmungen verantwortlichen Partei genehmigt wurden, können die Berechtigung des Benutzers zum Betrieb des Geräts aufheben.
-
Page 24: Eu-Konformitätserklärung
Behörden, um weitere Informationen über den Standort sowie die Bedingungen und Konditionen solcher Sammelstellen zu erhalten. EU-Konformitätserklärung Hiermit erklärt Shanghai Imilab Technology Co., Ltd., dass die Funkgeräte vom Typ IMILAB Video-Türklingel Sicherheitskamera der Richtlinie 2014/53/EU entsprechen. Hiermit erklärt Shanghai Imilab Technology Co., Ltd., dass die Funkgeräte vom Typ IMILAB Turklingel Hub der Richtlinie 2014/53/EU entsprechen. -
Page 25: Présentation Du Produit
Commencer Pour l’installation d’une sonnette vidéo et d’un hub IMILAB Support de Carte de Cale de Câble de charge Goupille de Sonnette vidéo montage positionnement montage micro-USB détachement des trous de vis de 15° de la sonnette Vis et ancres... -
Page 26: Mise En Place Du Système
Téléchargez l’application et installez le système 1. Téléchargez l’application lmilab à domicile sur l’APP store (appareils ios) ou sur google play (appareils Android). 2. Inscrivez-vous à un compte imilab home, puis suivez les instructions à l’écran pour terminer l’installation. FR-24... - Page 27 Montage de la sonnette vidéo Trouver un point de fixation Amenez la sonnette vidéo à votre porte d’entrée et consultez en même temps l’a chage en direct sur l’application. Trouvez un endroit où vous pouvez obtenir le champ de vision souhaité.
- Page 28 Placez la carte de positionnement des trous de vis contre le mur pour marquer la position. Fixez la sonnette sur une surface en bois Si vous montez la sonnette sur une surface en bois, il n’est pas nécessaire de percer des avant-trous.
- Page 29 Monter la sonnette sur des surfaces en matériaux durs 1. Si vous fixez la sonnette sur une surface en matériaux durs, comme la brique, le béton ou le stuc, percez 2 trous à travers la carte de positionnement des trous de vis à l’aide d’une mèche de 15/64 po (6 mm).
- Page 30 Monter la sonnette Alignez la sonnette sur le bas, puis enclenchez-la sur le haut. Appuyez dessus jusqu’à ce qu’il se mette en place. Vous êtes prêt! Si vous souhaitez détacher la sonnette ou la recharger, veuillez vous reporter aux sections suivantes.
- Page 31 Détacher la sonnette 1. Utilisez la goupille de détachement de la sonnette fournie si vous souhaitez détacher la sonnette du support de montage. 2. Appuyez sur le trou situé sur la partie supérieure de la sonnette et maintenez-le enfoncé, puis soulevez la partie inférieure pour la retirer. Ce qui est requis : Goupille de détachement de la sonnette Goupille de détachement de...
- Page 32 Explications pour les DEL État des DEL du hub État Bleu clignotant En attente d’une connexion Bleu fixe Connexion au réseau réussie/connectée Bleu et orange clignotent La connexion réseau est défaillante en alternance Orange clignotant Attendre que la sonnette se connecte Orange fixe Une mise à...
-
Page 33: Déclaration De Sécurité
Alimentation électrique : 5 V Température de fonctionnement : -20 °C ~ 50 °C FCC ID:2APA9-CMSXJ33A Nom : Hub de sonnette IMILAB Modèle : CMWG33B Alimentation électrique : 100-240V~, 50/60 hz, 0,3 A MAX Dimensions de l’article : 57 x 34 x 105 mm Température de fonctionnement : -10 °C ~ 45 °C... - Page 34 N’utilisez pas l’appareil dans l’environnement à une température trop élevée ou trop basse, n’exposez jamais l’appareil à un fort ensoleillement ou à un environnement trop humide. Les changements ou modifications non expressément approuvés par la partie respons- able de la conformité peuvent annuler l’autorité de l’utilisateur à utiliser l’équipement. Cet appareil est conforme à...
- Page 35 Déclaration de conformité pour l’Union européenne Par la présente, Shanghai Imilab Technology Co., Ltd. déclare que le type d’équipement radio IMILAB Sonnette vidéo est conforme à la directive 2014/53/UE. Par la présente, Shanghai Imilab Technology Co., Ltd. déclare que le type d’équipement radio intelligent du Hub de sonnette IMILAB est conforme à...
-
Page 36: Panoramica Del Prodotto
Per l'installazione del videocitofono e dell’hub Sta a di fissaggio Cuneo di Montaggio a 15° Perno per staccare il campanello Videocitofono Scheda di posizionamento Cavo di ricarica IMILAB del foro della vite micro USB Viti di Fissaggio IMILAB e Ancoraggi Smart Hub Panoramica del Prodotto... -
Page 37: Configurazione Del Sistema
Configurazione del sistema Scarica l’app e configura il sistema 1. Scarica l'APP Imilab Home dall'app store (dispositivi ios) o da google play (dispositivi Android). 2. Creare un account home imilab , quindi seguire le istruzioni sullo schermo per completare la configurazione. IT-35... - Page 38 Fissaggio del videocitofono Trovare un Punto di Fissaggio Portare il videocitofono alla porta di casa e contemporaneamente controllare la visualizzazione live sull'app. Trovare una posizione in cui puoi ottenere il campo visivo desiderato. Considerare i seguenti fattori: 1.Se si desidera posizionare il campanello vicino a una parete laterale, assicurarsi che la parete non venga visualizzata nel campo visivo.
- Page 39 Posizionare la Scheda di Posizionamento del Foro per le Viti contro il muro per contrassegnare la posizione. Montare il Campanello su una Superficie di Legno Se si sta montando il campanello su di una superficie di legno, non è necessario preforare i fori pilota.
- Page 40 Montare il Campanello su Superfici Realizzate con Materiali Duri 1.Se si sta montando il campanello su una superficie fatta di materiali duri, come mattoni, cemento, stucco, pratica 2 fori attraverso la Scheda di Posizionamento dei Fori delle Viti con una punta da 15/64" (6 mm). 2.Inserire gli ancoraggi forniti, quindi utilizzare le viti lunghe in dotazione per assicurare la Sta a di fissaggio alla parete.
- Page 41 Montare il Campanello Allineare il campanello in basso e poi aggancialo in alto. Premerlo finché non scatta in posizione. Sei a posto! Se si desidera staccare il campanello o ricaricarlo, fare riferimento alle sezioni seguenti. IT-39...
- Page 42 Staccare il campanello 1.Utilizzare il perno di rimozione del campanello fornito se si desidera staccare il campanello dalla sta a di fissaggio. 2.Premere e tenere premuto il foro sulla parte superiore del campanello, quindi sollevare la parte inferiore per toglierlo. Cosa è richiesto: Perno per staccare il campanello Perno per staccare il campanello...
- Page 43 Spiegazioni per LED Stato dell’LED dell’ hub Stato Blu lampeggiante In attesa di connessione Blu fisso La connessione di rete è riuscita /connessa Blu e arancione lampeggiano La connessione di rete è fallita alternativamente Arancione lampeggiante In attesa che il campanello si connetta Arancione fisso è...
- Page 44 Dimensione prodotto: 60 x 33 x 142 mm Ingresso alimentazione: 5 V Temperatura operativa: -20 °C ~ 50 °C ID FCC: 2APA9-CMSXJ33A Nome: Hub del campanello IMILAB Modello: CMWG33B Ingresso alimentazione: 100-240 V~, 50/60 Hz, 0,3 A MAX Dimensione prodotto: 57 x 34 x 105mm Temperatura operativa: -10 °C ~ 45 °C...
- Page 45 Non utilizzare la funzione di monitoraggio in tempo reale per molto tempo durante la ricarica, al fine di evitare la perdita di durata della batteria. Cambiamenti o modifiche non espressamente approvati dalla parte responsabile della conformità potrebbero annullare l'autorità dell'utente a utilizzare l'apparecchiatura. Questo dispositivo è...
- Page 46 Dichiarazione di conformità europea Con la presente, Shanghai Imilab Technology Co., Ltd. dichiara che il tipo di apparecchi- atura radio Videocitofono IMILAB è conforme alla Direttiva 2014/53/UE. Con la presente, Shanghai Imilab Technology Co., Ltd. dichiara che il tipo di apparecchi- atura radio Hub del campanello IMILAB è...
-
Page 47: Descripción Del Producto
Para la instalación de videoportero y hub Bastidor de montaje Cuña de montaje de 15° Pasador de desmontaje del timbre Videoportero Tarjeta de posicionamiento Cable de carga IMILAB de orificios para tornillos micro-USB Tornillos y anclajes Smart Hub de montaje IMILAB Descripción del producto Botón de reinicio... -
Page 48: Configuración Del Sistema
1. Descargue la aplicación Imilab Home en la tienda de aplicaciones (dispositivos ios) o google play (dispositivos Android). 2. Regístrese en una cuenta de Imilab Home y siga las instrucciones que aparecen en la pantalla para completar el ajuste. ES-46... - Page 49 Montar el videoportero Localice el lugar de montaje Lleve el videoportero a la puerta de su casa y, al mismo tiempo, compruebe la vista en vivo en la aplicación. Localice una ubicación donde pueda obtener el campo de visión deseado. Tenga en cuenta los siguientes factores: 1.
- Page 50 Coloque la tarjeta de posicionamiento de orificios para tornillos contra la pared para marcar la posición. Montaje del timbre en una superficie de madera Si va a montar el timbre en una superficie de madera, no necesitará taladrar agujeros pilotos previamente. Use los tornillos suministrados para asegurar el soporte de montaje en la pared.
- Page 51 Montar el timbre en superficies hechas de materiales duros 1. Si va a montar el timbre en una superficie hecha de materiales duros como ladrillo, hormigón o estuco, perfore 2 orificios con la tarjeta de posicionamiento de orificios para tornillos y una broca de 15/64" (6 mm). 2.
- Page 52 Montar el timbre Alinee el timbre en la parte inferior y después encaje la parte superior. Presione hacia abajo hasta que haga clic y quede en su lugar. ¡Ya está listo! Si quiere retirar el timbre o recargarlo, consulte las secciones siguientes. ES-50...
- Page 53 Retirar el timbre 1. Para retirar el timbre del soporte de montaje, utilice el pasador de desmontaje del timbre que se suministra. 2. Presione y mantenga presionado el orificio de la parte superior del timbre y después levante la parte inferior para extraerlo. Qué se necesita: Pasador de desmontaje del timbre Pasador de desmontaje del timbre...
- Page 54 Descripción de los LED Estado del LED del hub Estado Parpadeo azul Esperando la conexión Luz fija azul Conexión de la red con éxito/conectado Parpadeo azul y naranja La conexión de la red está fallando de manera alterna Parpadeo naranja Esperar a que el timbre se conecte Luz fija naranja Una actualización del firmware está...
-
Page 55: Declaración De Seguridad
Dimensiones del artículo: 60 x 33 x 142 mm Entrada de energía: 5 V Temperatura de funcionamiento: -20 °C ~ 50 °C FCC ID:2APA9-CMSXJ33A Nombre: Hub del timbre IMILAB Modelo: CMWG33B Entrada de energía: 100-240V~, 50/60hz, 0.3A MÁX. Dimensiones del artículo: 57 x 34 x 105mm Temperatura de funcionamiento: -10 °C ~ 45 °C... - Page 56 batería. No utilice el dispositivo en un ambiente a una temperatura demasiado alta o demasiado baja, nunca exponga el dispositivo a un sol fuerte o un ambiente demasiado húmedo. Los cambios o modificaciones no aprobados expresamente por la parte responsable de su cumplimiento podrían anular la autoridad del usuario para utilizar el equipo.
-
Page 57: Declaración De Conformidad De La Ue
Declaración de conformidad de la UE Por la presente, Shanghai Imilab Technology Co. Ltd. declara que el tipo de equipo de radio de la Videoportero IMILAB cumple con la Directiva 2014/53/EU. Por la presente, Shanghai Imilab Technology Co, Ltd. declara que el tipo de equipo de radio del Hub del timbre IMILAB cumple con la Directiva 2014/53/EU. - Page 58 15° IMILAB Micro-USB IMILAB Smart Hub MicroSD RU-56...
- Page 59 Micro USB Imilab Home App Store ( iOS) Google Play ( Android). Imilab Home, RU-57...
- Page 60 1.76m (5‘9”) 1.2m (48”) 0.3m (40”) (12”) /1,2 15° 15° 15° 15° RU-58...
- Page 61 15°, 15° 15° 15° RU-59...
- Page 62 15/64 15/64 15°, 15/64 15° 15° 15° RU-60...
- Page 63 RU-61...
- Page 64 USB 5 RU-62...
- Page 65 USB; RU-63...
- Page 66 IMILAB : CMSXJ33A : 2560x1440 : F1.6 : 60 × 33 × 142 : -20 °C ~ 50 °C FCC:2APA9-CMSXJ33A IMILAB : CMWG33B : 100-240 ~, 50/60 , 0,3 : 57 × 34 × 105 : -10 °C ~ 45 °C MicroSD ( : Wi-Fi IEEE 802.11 b/g/n 2.4...
- Page 67 FCC. FCC. RU-65...
- Page 68 (WEEE) (WEEE 2012/19/ Shanghai Imilab Technology Co., Ltd. IMILAB 2014/53/ Shanghai Imilab Technology Co., Ltd. IMILAB 2014/53/ https://www.imilabglobal.com/pages/eu-declaration-of-conformity RU-66...
-
Page 69: Przegląd Produktu
Klin montażowy 15° Kołek odłączający dzwonek do drzwi Dzwonek do Karta pozycjonowania Kabel ładujący drzwi IMILAB otworów pod śruby Micro-USB Śruby montażowe IMILAB Smart Hub i kotwy Przegląd Produktu Koncentrator Zasilanie Status LED Głośnik Wejście na kartę MicroSD Przycisk restartu... -
Page 70: Konfigurowanie Systemu
Pobierz aplikację i skonfiguruj system 1. Pobierz aplikację lmilab ze sklepu APP Store (urządzenia z systemem iOS) lub Google Play (urządzenia z systemem Android). 2. Zarejestruj konto domowe imilab, a następnie postępuj zgodnie z instrukcjami wyświetlanymi na ekranie, aby ukończyć konfigurację. PL-68... - Page 71 Montaż wideo dzwonka do drzwi Znajdź miejsce montażu Zabierz dzwonek do drzwi wejściowych i jednocześnie sprawdzaj obraz na żywo w aplikacji. Znajdź miejsce, w którym można uzyskać pożądane pole widzenia. Weź pod uwagę poniższe czynniki: 1.Jeśli chcesz umieścić dzwonek do drzwi blisko bocznej ściany, upewnij się, że ściana nie pojawia się...
- Page 72 Przyłóż kartę pozycjonowania otworów na śruby do ściany, aby zaznaczyć ich położenie. Montaż dzwonka do drzwi na drewnianej powierzchni Jeśli montujesz dzwonek do drzwi na drewnianej powierzchni, nie musisz wiercić otworów pilotażowych. Do zamocowania uchwytu montażowego na ścianie użyj dostarczonych śrub, a karta pozycjonowania otworów na śruby wskaże ich położenie. Co jest potrzebne: Śrubokręt, wspornik montażowy, klin montażowy 15°, śruby montażowe i kotwy.
- Page 73 Montaż dzwonka do drzwi na powierzchniach wykonanych z twardych materiałów 1.Jeśli dzwonek ma być zamontowany na powierzchni wykonanej z twardych materiałów, takich jak cegła, beton, tynk, wywierć 2 otwory w karcie pozycjonowania otworów na śruby wiertłem 15/64" (6 mm). 2.Włóż dołączone kotwy, a następnie użyj dołączonych długich śrub, aby przymocować uchwyt montażowy do ściany.
- Page 74 Zamontuj dzwonek do drzwi Wyrównaj dzwonek do drzwi na dole, a następnie zatrzaśnij go na górze. Dociśnij go, aż zatrzaśnie się na swoim miejscu. Wszystko gotowe! Jeśli chcesz odłączyć dzwonek do drzwi lub naładować go, zapoznaj się z poniższymi rozdziałami. PL-72...
- Page 75 Odłączanie dzwonka do drzwi 1.Jeśli chcesz odłączyć dzwonek od uchwytu montażowego, użyj dołączonego do zestawu kołka do odłączania dzwonka. 2.Naciśnij i przytrzymaj otwór na górze dzwonka, a następnie podnieś jego dolną część, aby go zdjąć. Co jest potrzebne: Kołek odłączający dzwonek do drzwi. Kołek odłączający dzwonek do drzwi Ładowanie dzwonka do drzwi...
- Page 76 Objaśnienia do diod LED Stan diody LED koncentratora Status Miga na niebiesko Oczekiwanie na połączenie Świeci na niebiesko Połączenie sieciowe powiodło się / połączono Niebieski i pomarańczowy Awaria połączenia sieciowego migają na przemian Miga na pomarańczowo Oczekiwanie na połączenie z dzwonkiem do drzwi Świeci na pomarańczowo Aktualizacja oprogramowania w trakcie przetwarzania Naciśnij i przytrzymaj przycisk przez...
-
Page 77: Środki Ostrożności
Oświadczenie dotyczące bezpieczeństwa Specyfikacje Nazwa: Dzwonek do drzwi IMILAB Model: CMSXJ33A Rozdzielczość: 2560x1440 Apertura: F1.6 Rozmiary przedmiotu: 60 x 33 x 142 mm Zasilacz: 5 V 2 A. Temperatura pracy: -20 °C ~ 50 °C FCC ID:2APA9-CMSXJ33A Nazwa: Dzwonek do drzwi IMILAB Model: CMWG33B Zasilacz: 100-240V~, 50/60hz, 0.3A MAX... - Page 78 Nie używaj urządzenia w środowisku o zbyt wysokiej lub zbyt niskiej temperaturze, nigdy nie wystawiaj urządzenia na działanie silnego słońca lub zbyt wilgotnego środowiska. Zmiany lub modyfikacje, które nie zostały wyraźnie zatwierdzone przez stronę odpowiedzialną za zgodność, mogą unieważnić uprawnienia użytkownika do obsługi urządzenia.
-
Page 79: Deklaracja Zgodności Ue
Deklaracja zgodności UE Niniejszym firma Shanghai Imilab Technology Co., Ltd. oświadcza, że urządzenie radiowe typu Dzwonek do drzwi IMILAB jest zgodne z dyrektywą 2014/53/UE. Niniejszym Shanghai Imilab Technology Co., Ltd. oświadcza, że sprzęt radiowy typu Dzwonek do drzwi IMILAB jest zgodny z dyrektywą 2014/53/UE.. -
Page 80: Ürüne Genel Bakış
Vida Deliği 15° Montaj Micro - USB Kapı Zili Kapı Zili Braketi Konumlandırma Kaması Şarj Kablosu Sökme Pimi Kartı Montaj Vidaları IMILAB Akıllı Yuva ve Ankrajlar Ürüne genel bakış Yuva Güç Durum LED Hoparlör MicroSD Kart Yuvası Reset Düğmesi TR-78... - Page 81 Kapı zili Hoparlör Sistemin kurulması Uygulamayı indirin ve sistemi kurun 1. Imilab Home UYGULAMASINI uygulama mağazasından (ios cihazları) veya Google Play'den (Android cihazları) indirin. 2. Bir imilab ev hesabı için kaydolun ve daha sonra kurulumu tamamlamak için ekrandaki talimatları izleyin. TR-79...
- Page 82 Video kapı zilinin takılması Bir Montaj Noktası Bulun Video kapı zilini ön kapınıza götürün ve aynı anda Uygulamadaki canlı görünümü kontrol edin. İstediğiniz görüş alanını elde edebileceğiniz bir konum bulun. Aşağıdaki faktörleri göz önünde bulundurun: 1. Kapı zilini yan duvara yakın yerleştirmek istiyorsanız, duvarın görüş alanında görünmediğinden emin olun.
- Page 83 Pozisyonu işaretlemek için Vida Deliği Konumlandırma Kartını duvara yerleştirin. Kapı Zilini Ahşap Yüzeye Monte Edin Kapı zilini ahşap bir yüzeye monte ediyorsanız, ön delme pilot delikleri açmanıza gerek yoktur. Montaj Braketini duvara sabitlemek için verilen vidaları kullanın, Vida Deliği Konumlandırma Kartı vida deliklerinin konumunu gösterir. Gerekenler: Tornavida, Montaj Braketi, 15°...
- Page 84 Kapı Zilini Sert Malzemelerden Yapılmış Yüzeylere Monte Edin 1. Kapı zilini tuğla, beton, sıva gibi sert malzemelerden yapılmış bir yüzeye monte ediyorsanız, 15/64" (6mm) matkap ucu ile Vida Deliği Konumlandırma Kartında 2 delik açın. 2. Verilen ankrajları takın ve ardından Montaj Braketini duvara sabitlemek için verilen uzun vidaları...
- Page 85 Kapı Zilini Bağla Kapı zilini altta hizalayın ve sonra üste oturtun. Yerine oturana kadar bastırın. Şimdi hazırsınız! Kapı zilini sökmek veya şarj etmek istiyorsanız lütfen aşağıdaki bölümleri inceleyin. TR-83...
- Page 86 Kapı Zilini Ayırın 1. Kapı zilini Montaj Braketinden ayırmak istiyorsanız, verilen kapı zili ayırma pimini kullanın. 2. Kapı zilinin üstündeki deliğe basın ve basılı tutun ve ardından çıkarmak için alt kısmını kaldırın. Gerekenler: Kapı Zili Sökme Pimi. Kapı Zili Sökme Pimi Kapı...
- Page 87 LED'ler için açıklamalar Yuva LED Durumu Durum Yanıp sönen mavi Bağlantı için bekleniyor Sabit mavi Ağ bağlantısı başarılı / bağlı Mavi ve turuncu ışık Ağ bağlantısı arızalı sırayla yanıp söner Yanıp sönen turuncu Kapı zilinin bağlanması bekleniyor Sabit turuncu Aygıt yazılımı güncellemesi devam ediyor LED mavi renkte yanıp sönene Sıfırlama işleminde kadar düğmeye basın ve...
-
Page 88: Teknik Özellikler
Güvenlik beyanı Teknik Özellikler Adı: IMILAB Video Kapı Zili Model: CMSXJ33A Çözünürlük: 2560x1440 Açıklık: F1.6 Ürün Boyutları: 60 x 33 x 142 mm Güç Girişi: 5 V 2 A Çalışma Sıcaklığı: -20 °C ~ 50 °C FCC ID:2APA9-CMSXJ33A Adı: IMILAB Zil Yuvası... - Page 89 Uyumdan sorumlu tarafça açıkça onaylanmamış değişiklikler ya da modifikasyonlar, kullanıcının cihazı kullanma yetkisini geçersiz kılabilir. Bu cihaz, FCC Kurallarının 15. Bölümüyle uyumludur. Kullanımı, aşağıdaki iki koşula tabidir: (1) Bu cihaz, zararlı girişime neden olamaz ve (2) Bu cihaz, istenmeyen çalışmaya neden olabilecek girişimler de dahil olmak üzere alınan her türlü...
- Page 90 AB Uygunluk Beyanı Shanghai Imilab Technology Co, Ltd., telsiz ekipmanı tipi IMILAB Video Kapı Zili 'ün, Direktif 2014/53/AB ile uyumlu olduğunu beyan eder. Shanghai Imilab Technology Co, Ltd., telsiz ekipmanı tipi IMILAB Zil Yuvası, 2014/53/AB Direktifine uygun olduğunu beyan eder.
- Page 91 California to cause cancer. For more information, go www.P65Wamings. ca. gov. Manufacturer: Shanghai Imilab Technology Co., Ltd. Address: Room 001A, Floor 11, Block 1, No. 588 Zixing Road, Minhang District, Shanghai, China For further information, please go to www.imilab.com. Support: help@imilab.com www.imilabhelp.com...
Need help?
Do you have a question about the CMSXJ33A and is the answer not in the manual?
Questions and answers