
Related Manuals for SOOCOO S100Pro

Summary of Contents for SOOCOO S100Pro
- Page 2 S100pro Action Camera User Manual Notices: Before using the camera, please read the following safety precautions carefully. Follow the User Manual to operate the camera properly. Error operation may cause damage to internal components. Do not drop or hit the product, otherwise it will easily lead to damage to internal components.
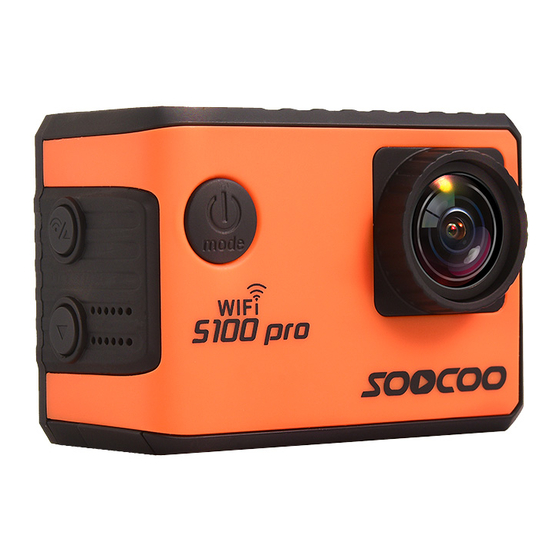
- Page 3 Operation Instruction Operation Interface 1.Appearance...
- Page 5 GPS(optional)
- Page 7 Assembly Guide...
- Page 9 The Correct Way TO Open The Waterproof Case Push the buckle on the top of the Waterproof case and pull the hinge Upward.If you only push the buckle Without the action of pulling upward, You won’t be able to open the case. The two actions must be preformed Simultaneously.
- Page 10 This protective door provides better sound quality by Allowing much sound reach the camera’s Microphone,It also can reduce wind noise when mounted on Helmet,bike and other fast-moving vehicles. How To Change Protective Backdoor 1.Open the backdoor of the housing so that it hangs downwards. 2.Firmly pull the backdoor downwards until it snaps free from the main housing.
- Page 11 Under screen locked, short press to unlock. Under video recording, long press to pause taking video and short press to continue recording. Under play back mode, long press to delete the displaying video. Up button: under standby, short press to enter menu of video or photo. Under menu setting, press to select menu.
- Page 12 Under Photo mode, touch cube symbol to take a photo. 6) Under screen locked, slide from left to right to unlock the screen. 7) Touch voice control symbol on the top of screen to turn on/off the voice control function. Voice Control ( voice control currently only supports English and Chinese ) With voice control function on, camera can be controlled by voice for some...
- Page 13 rate for English and Chinese currently. Other languages recognization rate needs further examining. Auto-Lock Screen is locked after 1 minute no operation defaultly. No function by pressing buttons under screen locked, except OK button. Ways to unlock screen: 1. Press OK button when screen shows SLID TO UNLOCK to unlock screen.
- Page 14 8GB storage up to 128GB.(Note:Please formate the Micro SD card in action camera only before use) 2. Insert Micro SD card to make sure that camera takes videos normally. 3. Extract Micro SD card by light pressing the card until it pops. Warm Tips: Please make sure that memory card is inserted in right direction.
- Page 15 a beep sound. Camera is defaulted with 3 mins loop recording, and ready to take video. Symbols of Video, time of loop recording, Exposure, WDR, video lasting time, resolution, white balance, audio recording, memory card, battery , date and time can be seen on the screen. 2.Turn Off Camera a.
- Page 16 5) Voice prompt: ON/OFF 6) Frequency: 50Hz/60Hz 7) TV Mode: NTSC/PAL 8) TV: OFF/ON 9) Voice Control: OFF/ON 10) Spot Metering; Off/On 11) Delete files: OK/NO. Select OK to delete all unlocke d files. . 12) Lock All: select OK to lock all files. 13) Unlock All: select OK to unlock all files.
- Page 17 time shows on top of screen during video standby. Notes: 1) Long press OK button to pause video, and short press OK button again to continue video. File is not saved when video paused, only save file when video stops. 2) Touch video symbol on screen to start or stop video.
- Page 18 Loop Recording can be set for 3/5/10 minutes, every video time is as long as how it sets. When memory card is full, the first video is covered to keep recording. 6. Motion Detection Select Motion Detection ON, then switch to video standby, camera starts video when something moves in front of camera.
- Page 19 3) Photo lapse time: 5s/10s/30s 4) Loop video:3 minutes /5 minutes /10 minutes 5) WDR: ON/OFF 6) Exposure Value:+2.0/+1.7/+1.3/+1.0/+0.7/+0.3/0/-0.3/-0.7/-1.0/-1.3/-1.7/-2.0 7) Angle:170°/140°/110°/70° 8) Motion Detection: Off/On 9) Record Audio : Off/On 10) Date Stamp: Off/On 11) Gyroscope: Off/On 12) Color: Colorful/Black & White/Brown 13) Sharpness: High/Normal/Medium 14) Image rotation: Off/On 15) White Balance: Auto/Daylight/Cloudy/Tungsten/Fluorescent...
- Page 20 and English. It is in English, say“Photograph” and photos will be saved automatically. II.Brush Mode Click upper left icon to enter to Menu Mode , Choose Brush icon to enter to Brush Mode. Click bottom left icon to enter to Brush Setting Menu, click burst button to choose Single, Burst 3, Burst 5, Burst 10.
- Page 21 3648*2736 / 8M 3264*2448 / 5M 2592*1944 / 3M 2048*1536 2. Exposure Time: Auto / 30 ms / 1Seconds / 2 Seconds / 5 Seconds / 10 Seconds / 30 Seconds 3. Self Timer: Off / 2STimer /5S Timer /10S Timer 4.
- Page 22 videos and pictures. Press "OK" button to review the chosen video or pictures. Press "OK" button one more time to stop, and press another time to review again. Click “ ” for fast playback the video, press "OK" button to stop fast playback. Click “ ”for rewind playback the video, press "OK"...
- Page 23 c. For iPhone, download and install APP “zsanycam” from Apple Store. After installation, there is a “zsanycam” APP symbol on mobile phone interface. Turn On WIFI a. Long press WIFI button to turn on WIFI. b. With Voice Control function on, WIFI can be turned on by voice control. Yellow indicator on the top of camera flashing during WIFI connecting.
- Page 24 Connect to HD Television Turn on camera, connect camera and Television with HDMI cable (excluded in accessories), and set Television to HDMI mode. Television displays all operations of camera. IX.Wireless Remote Control Function 1. Remote control matching method at the first time using: Press Video and Photo buttons at the same time for more than 5 seconds, release until Red indicator and Blue indicaitor flashes alternately.
- Page 25 Plug GPS logger to USB connector on camera, camera records location in the video. Video and motion trails can be displayed on specified PC player. More details please read the GPS instruction manual. Specifications: Image sensor 12 Mega Pixel Sony sensor LCD display 2.0″...
- Page 26 S100 Pro 使用说明书 使用须知 使用相机前,请仔细阅读以下安全注意事项: 请按照说明书指示正确操作相机,非法操作可能会导致内部元件损坏。 请勿摔落或撞击本产品,否则容易导致内部组件损坏。 为了安全考虑,此产品及其附件尽量远离小孩或动物可及之处以避免意外发生。 请勿将本相机长时间置于潮湿或多尘的环境中。可能会导致漏电引起火灾。 请勿将本相机长时间置于高温状态,如暴晒,可能会导致相机外壳和内部元件受损。 为发挥电池最大功效,我们建议你在-10°-70°温度下使用。 插拔内存卡前请确保相机处于关机状态,以免导致卡或存储数据被损坏。 相机在使用一段时间温度升高,属于正常现象。 在使用时请勿摸镜头,以免影响拍摄效果。 请用吹风机(专门的镜头吹风设备)清洁镜头或使用专门的擦镜布旋转擦拭镜头, 清洁表面指印或灰尘。 操作说明 一、操作界面 1、外观...
- Page 27 触摸屏...
- Page 28 GPS 模块(选配) 2.4G 无线遥控器...
- Page 29 配件图...
- Page 30 配件组装指南...
- Page 31 配件组装指南...
- Page 32 打开防水壳的正确方法 找到防水壳顶部小三角标,右手拇 指扣住小长方形条,向右拨动。同 时,右手食指搭在黑色卡扣右上角 小三角标下方位置,向上拨。开启 防水壳卡扣后,打开舱门。 关闭防水壳的正确方法 左手握住防水壳,关上防水壳舱门,左手拇指按紧。同时,右手扣好防水壳卡扣, 向下按压,可以听到清脆的‘咔’声,说明防水壳已经锁上。 更换防水壳舱门的正确方法 官方标配开孔防水壳舱门, 目的为了方便录制声音。...
- Page 33 更换方法如下: 1.观察防水壳舱门与防水壳链接轴两端(银白色铁芯),找到光滑的那端。 2.用螺丝刀向不光滑的那端捅。 3.拔出连接轴,取下现有防水壳舱门。 4.换上新的舱门,插上连接轴,复原即可。 2、按键功能 电源键( ):用于开机(短按)、关机(长按);待机状态下,短按用于摄 像模式、拍照模式、及回放模式循环转换。 OK 键( ):在待机模式下短按用于录影,停止录影或拍照;在回放视频下短 按用于播放和暂停播放;在系统设置下短按用于进入/确认菜单选项;在锁屏下短按 进行解锁;在录影过程中长按暂停录影,此时再短按则恢复正常继续进行录影;在 回放预览下长按用于删除当前文件; 上翻键( ):在待机时短按向上键进入摄像和拍照主菜单选项,在菜单中短 按可向上选择菜单;在回放模式时,用于快退播放;待机模式下,长按用于 WIFI 的开启或者关闭。 下翻键( ):在待机时短按向下键进入当前模式菜单设置和系统菜单设置,在 菜单界面下,短按为右侧子菜单选择,长按为左侧当前模式菜与系统设置选择以及 退出返回待机模式;在处于子菜单时短按为向下选择菜单;在回放模式时,用于快...
- Page 34 进播放;录影过程中,短按抓拍,长按可暂停录影。 3.触摸功能、 或由底下向上滑动进入录像和拍照功 1)点击左上角模式图标 能选项。 2)触摸向右滑动进入预览模式。在预览状态可以左右滑动切换文件, ,在九宫图预览下 ,触 3)在回放时预览点一下屏幕可进入九宫图预览 摸左右滑动为左右选择文件,上下滑动为上下翻页文件。 4)点击左下角图标 进入所选模式的详细选项及相机的基 本功能选项。点击需求的菜单进行相关内容的设置。 可以进行开始录影或者停在录影,在拍照界 5)在录影界面点击屏幕上是红点“ 面可以点 进行拍照。 6)在锁屏状态下由左向右滑动可以解锁。 可以关闭或开启语音功能。 7)点击屏幕上方的语音图标 4. 声控功能 ( 语音声控目前只支持英文及中文 ) 在开启声控状态下,可以用语音来控制相机的一般常用功能,比如:拍照,录影开/ 关, 关机等。 常用的语音功能如下: 语音功能 汉语 英语 Video Start 录影功能 开始录影 Stop Video 录影功能 停止录影 Photograph 拍照功能...
- Page 35 WiFi on WIFI 功能 打开 WIFI WiFi off WIFI 功能 关闭 WIFI 注意: 1).系统语音声控功能是开启的,在使用语音声控功能时需注意,语音应该与相机 当前系统设置的语音一致,如果不一致时,可能会导致声控失效。 2).在使用声控功能时,声控的效果与个人语音匹配度及使用环境有很大影响,在 使用过程中如不能一次识别,建议多试几次。 3).使用声控功能时,仅只能识别以上图示命令,并非所有语音都能识别;并且当 前只对汉语和英语两语种识别率较高,其他语种的识别率有待验证。 5. 锁屏功能 系统默认是 1 分钟无操作就进入屏幕保护状态。在屏幕保护下,按按键是无效的, 仅会在屏幕上提示: slid to unlock, 根据提示向右滑动触摸屏或按 OK 键即可解开屏 幕保护,进入正常操作。 二、电池充电 将充电器连接相机的 USB 接口,再将充电器插入电源,充电时红灯长亮,充满时红 灯熄灭。 温馨提示: 1.为了提高充电效率,请在关机状态下进行充电。 2.请确定充电器与电源插座已通电。 三、插入和取出存储卡...
- Page 36 四.电脑连接 1.查看文件 将相机用 USB 线连接电脑后,LCD 屏上显示“存储器”与“摄像头” ,按 键选 择“存储器”,再按“OK”键确认,也可直接触摸显屏选择“存储器”。在 “我的电脑”上 打开可移动磁盘,出现文件夹 Novatek,双击显示 2 个文件夹 Movie 与 Photo,选 择任意文件夹,打开查看对应的文件。 2.打开摄像头 将相机用 USB 线连接电脑后,LCD 屏上显示“存储器”与“摄像头”, 按 键选 择“摄像头”,再按“OK”键确认,也可直接触摸显屏选择“摄像头”。在 “我的电脑” 上打开 即可。 五、开启、关闭相机 1.开启相机 按一下电源键或连接充电器,相机发出提示音,LCD 显示开机画面后(默认为 3 分 钟循环录影状态),相机处于录影待机状态;此时 LCD 屏上显示摄影、循环录时间、 曝光补偿 、宽动态图标、剩余摄影时间、分辨率、白平衡、录音图标、内存卡符号、 电池符号,在显示屏的下方显示日期/时间。...
- Page 37 后一个系统设置图标 ,即可进入系统设置。系统菜单具体如下: 1\语言设置: ENGLISH/FRANÇAIS/ESPAÑOL/Portuguese/DEUTSCH/ITALANO/ 简体中文/繁體中文/PYCCKЙЙ/日本语/ Polski/한국어 2)日期/时间:可以修改年月日,及其时间,可通过显屏右边上下箭头修改数字调 整,调整完后点勾确认。 3)自动锁屏:关/30 秒/1 分/3 分。系统默认是屏保是 1 分钟。 4)自动关机:可分别设置 1 分,3 分,5 分,10 分。系统默认是 3 分内无操作自动 关机;如不需要自动关机选择关闭。 5)语音提示:开/关 6)光源频率:50Hz/60Hz 7)TV 模式:NTSC/PAL 8)TV :关/开 9)声控:关/开。 10)点测光:关/开。 11)删除文件:OK/NO。选择 OK 会删除所有不加锁的文件,如加锁的文件需解锁 后才能删除。 12)全部加锁:选择 OK 可进行全部加锁。 13)全部解锁:选择 OK 可进行全部解锁。 14)格式化:OK/NO。...
- Page 38 视频模式 1. 正常录影 相机开机后就是进入视频录影待机状态时,按一下顶部“OK”键相机开始录影, 也可通过触摸显示屏右边红色录影图标开启录影,还可以用声控开启录影。在录影 时,录影图标和蓝色工作指示灯间歇闪动,显示屏上面显示当前设置的录影条件, 当储存卡录满时会自动停在录影。 在录影过程中按一次“OK”键相机停止录影并保存录影文件, 相机处于录影待机状态, LCD 屏右上方显示剩余录影时间。 注:1)在录影过程中长按 OK 键相机将暂停录影,再次短按“OK”键将继续录影;暂 停录影时并不保存文件,直到停止录影时才保存文件。 2)使用触摸功能录影时,用触摸屏点击录影图标:点一次为“开始录影”,再 点一次为“停止录影”。 3)使用声控功能录影时,要先确保声控功能开启,可直接点击显示屏上的声控 语音图标 开启或者在系统设置里面把声控设置打开。声控语音汉语为:“开始录 影”或“停止录影”, 英语语音为:“Video Start”和“Stop Video”。 2.间隔录影 “间隔录影”可设置间隔时间,使相机处于间隔录影模式。将相机切换回到录 影待机状态,按一下“OK”键相机开始录影,再按一次“OK”按钮后,停止拍摄,相 机处于录影待机状态。当回放时,录制的视频快速播放(快于正常播放速度)。您 可以使用此功能拍摄建筑项目进展、天气变化、花开过程等视频。 如需恢复正常录影时, 可停止间隔录影并切换到菜单模式的普通“视频”即可恢复正常...
- Page 39 录影。 注:进入间隔录影菜单可选择不同的缩时录制时间,详见菜单设置。另此功能只适 用于长时间的录影使用,录影时间不能少于 5 分钟。 3.高速录影 高速录影,高速录影能记录高速运动目标轨迹,录制的视频低速播放(慢于正 常播放速度)。您可以使用此模式拍摄一些极限运动,捕捉瞬间精彩的镜头。如需 恢复正常录影时,可停止高速录影并切换到菜单模式的普通“视频”即可恢复正常录 影。 4.摄中拍 摄中拍, 摄中拍可以在录影的过程中,根据设置的间隔拍照时间进行抓拍, 一般在录影较长的时间段使用此模式。间隔抓拍时间可设置为:5S、10S、30S。 5. 循环录影 “循环录影”可分别设置 3/5/10 分钟的循环录影,每一段视频会根据设置的时间段 来循环录影,当内存满后,会自动第一段视频开始覆盖掉继续录影。 6.运动检测 “运动检测” 开启时,当相机检测到前方有物体移动时,相机将自动开启摄像;当 10 秒时间内检测到无物体移动将自动停止录影,并继续监控,周而复始。 备注:间隔录影、运动检测两个个功能只能开启一项。 7.抓拍 在录影过程中按一下侧边向下键可以对录影过程中的某个图像进行抓拍; 在抓拍时, 录影仍然继续,如要查看抓拍的图片,可到回放模式下浏览。 8.录影模式下各菜单...
- Page 40 在录影模式下,屏幕会显示当前系统设置的界面及各功能开启图标,点击屏幕左下 角图标, 即进入视频模式下的各菜单设置,具体如下: 1)录影分辨率: UHD 24FPS/QHD 30FPS/FHD 60FPS /FHD 30FPS/HD 120FPS/HD 60FPS/HD 30FPS 2)间隔录影:关 /1 秒 /2 秒 /5 秒/10 秒 /30 秒 /60 秒 3)间隔拍照时间:5 秒/10 秒 /30 秒 4)循环录影: 关 /3 分钟 /5 分钟 /10 分钟 5)WDR: 开/关 6)曝光补偿: +2.0/+1.7/+1.3/+1.0/+0.7/+0.3/0/-0.3/-0.7/-1.0/-1.3/-1.7/-2.0 7)影像视角: 170°/140°/110°/70°...
- Page 41 触摸屏点击屏幕最左上角模式图标,进入 主菜单拍摄模式画面, 再 选择相机拍照图标 或连拍图标 两拍照模式进行拍照。 1.正常拍照 正常拍照时可按下“OK”按键即可进行拍照,也可用触屏触摸拍照符号,亦可用语音 声控拍照。在用语音声控时,注意当前使用的系统语言,如系统是中文喊“拍照”, 系统是英文用“Photograph”。拍照完后系统会自动保存所拍摄的照片。 2.连续拍照 触摸屏点击屏幕最左上角图标,进入拍摄模式画面,再 选择照连 续拍照图标 进行拍照。在开启连续拍照,可以根据需要设置选择三连拍,五 连拍,十连拍。在启动连续拍照时,每一次拍照系统会根据您所设置的连拍数才会 停止拍照并保存所拍摄的照片。在不需要连拍时,可以关闭。 3.定时拍照 在拍照过程中,可以根据需要选择定时拍照。定时拍照开启后,拍照会按您所设置 的时间选项按倒计时计数拍照,同时在屏幕上会显示倒计时的时间。 4.快速预览 拍照过程中,如果您想浏览一下刚刚所拍的照片而又觉得返回到回放预览麻烦时, 可以在拍照模式菜单下选择快速预览。快速预览可以设置 2 秒和 5 秒,开启快速预 览后,在拍照完一张后,会马上停留显示当前拍照的场景,停留时间超过预调时间 时就会进入正常的待拍照模式。 5.拍照模式下各菜单 在拍照模式下,屏幕会显示当前系统设置的界面及各功能开启图标,可点击屏幕左 下角图标 ,通过拍照模式下的各菜单根据需要进行设置。具体如下: 1)拍照分辨率:20M 5120*3840/16M 4608*3456/12M 4032*3024/10M 3648*2736/8M 3264*2448/5M 2592*1944/3M 2048*1536...
- Page 42 2)暴光时间:自动/30 毫秒/1 秒 /2 秒 /5 秒/10 秒/30 秒 3)定时拍照:关/2 秒定时/5 秒定时/10 秒定时 4)连拍功能: 单拍/三连拍/五连拍/十连拍 5)图像质量:优质/标准/经济 6)ISO :自动/100/200/400/800/1600 7)锐度:强烈/标准/柔和 8)色彩:彩色、黑白、棕褐色 9)白平衡:自动/白光/阴天/钨丝灯/荧光灯 10)鱼眼矫正:关/开 11)防手震:关/开 12)日期标签:关/日期/日期和时间 13)曝光补偿:+2.0/+1.7/+1.3/+1.0/+0.7/+0.3/0/-0.3/-0.7/-1.0/-1.3/-1.7/-2.0 14)WDR :关/开 15)场景:关/夜景/光绘/人物 16)影像视角: 170°/140°/110°/70° 17)潜水模式:关/开 18)快速预览:关/2 秒/5 秒 注:在普通拍照和连拍模式中,以上各菜单可能有所不同,请您根据各自需要选择。 回放模式 在回放模式下可以浏览图片或回放视频。在回放模式下,主要有以下功能: 1. 用按键进入回放模式。 在录影待机下, 按二次“电源键”进入回放模式, 按 键选择预览所拍摄的视频文件和照片,选择拍摄的视频文件时按“OK”键开始播放;...
- Page 43 一下“ ” 进行快进播放,按“OK”键可停止快进播放;按一下“ ” 进入快退播放, 按“OK”键可停止快进播放。 2. 用触摸进入回放模式。在待机状态下,向右滑动屏幕会切换到回放预览模式。在 预览模式下触摸左右滑动可以向上或向下选择图片及视频。 3. 用触屏浏览回放时,用手轻碰屏幕中间会显示快捷菜单 ,在存储照片或视 频多的情况下,选择九宫图 可快速预览,用手左右移动,可以左右选择文件; 用手上下移动可以上下翻屏,也可以直接点选择需要的照片或视频回放。 4. 在用触屏回放视频时,可以直接点播放图标进回放,在回放过程中再点一次将会 暂停,点击返回图标将会返回到该视频的片头。 注: 图片与视频回放在屏幕显示区别, 图片左上角是 图标, 视频是 图标; 视频回放除了左上角图标外,在显屏底下还多了播放 图标和返回 图标。 5. 文件写保护:当担心图片或视频会误删除时,可以在系统设置把文件加锁,加锁 的文件无法直接删除,需要解锁后才能删除。 6. 在回放预览模式下,如想直接删除某个图片或视频,可把它选为当前预览,然后 长按 OK 键可以根据提示删除当前文件。 七、WIFI 功能说明 1. APP 下载安装 下载...
- Page 44 2. 开启 WIFI 功能 在待机下,长按相机侧面的 WIFI 按键长按开启 WIFI。 在 WIFI 连接过程中,相机顶部的 WIFI 黄色指示灯闪亮,显示屏会显示 AP mode, SOOCOOAM 默认 SSID: , PWA2:12345678,显示屏下方有 Refesh WiFi_OFF。 当手机设置的 WLAN 功能找到相机设备,连接后输入 WIFI 密码并确认连接,连接 成功后相机显示屏回到录影待机画面,并在屏幕左下角显示 WiFi 打开图标,黄色指 示灯变为长亮。此时打开手机已安装好的 APP 客户端,在连接 APP 后,就可以用 手机进行正常摇控录影。 温馨提示:当 WIFI 连接成功后,相机会进入关屏,在 APP 客户端超过 3 分钟无动 作,相机会自动关机断开...
- Page 45 式。如在录影过程中短按拍照键(相机键)会抓拍一帧。 十.GPS 功能 把 GPS 模块经由 USB 接口插入到相机, 相机将会在视频文件中记录位置信息, 通过专门的播放器软件可以播放视频和运动轨迹。详情请阅读 GPS 使用说明书。 注:Gps 模块是选配配件,需要此功能请另行购买。 十一、技术参数 图像传感器 12 Mega Pixel Sony cqk LCD 显示屏 2.0″ LTPS Screen 触摸屏 单点+手势 图像分辨率 20M 16M 12M 10M 38M 5M 3M 视频分辨率 4K@24fps,2K@30FPS ,1080P@60FPS/30FPS , 720P@ 120FPS/60FPS/30FPS 录影/图片格式...
- Page 46 语/ Polski/한국어 声控 汉语,英语(拍照,录影开/关,关机,打开/关闭 WIFI) 接口 USB 2.0 , HDMI (HDMI Certified) 电池 1050mAh 高密度电池 尺寸 61×42.4×25 mm 重量 58g (不带电池),74g 带电池 使用场景 极限运动、户外体育活动,自行车,汽车 DVR、潜水、家 庭安全等...
Need help?
Do you have a question about the S100Pro and is the answer not in the manual?
Questions and answers