
Summary of Contents for Torque Fitness Stealth Air Bike
- Page 1 Stealth Air Bike Assembly & User Instructions Model No: AB-TS-T800-101-F07 Manual P/N: 5785801-Rev A...
-
Page 3: Table Of Contents
Stealth Air Bike Assembly & User Instructions Table of Contents IMPORTANT SAFETY INSTRUCTIONS ..................ii Stealth Air Bike Product Specifications .................... 1 Stealth Air Bike Assembly Instructions ..................... 2 Assembly Preparation ......................... 2 1. Seat Post & Seat ........................3 2. Front & Rear Stabilizers ......................4 3. -
Page 4: Important Safety Instructions
Stealth Air Bike. • Examine the Stealth Air Bike before each use for loose parts or signs of wear. Do not use if found in this condition. DO NOT exit the Stealth Air Bike until the arms and pedals have come to a complete stop. -
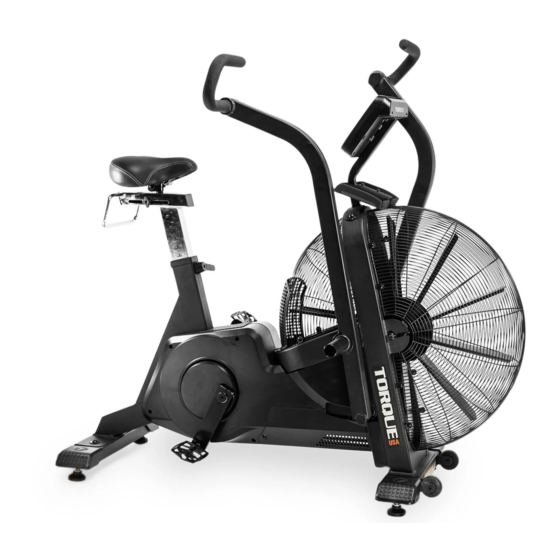
Page 5: Stealth Air Bike Product Specifications
Stealth Air Bike Product Specifications 24.8in 630mm 52.8in 1340mm 54.5in 1383mm 23.8in 604mm Maximum User Weight: 350 lbs. (159 kg) Machine Weight: 132 lbs. (60 kg) Power Requirements: Two (2) AA batteries... -
Page 6: Stealth Air Bike Assembly Instructions
Stealth Air Bike Assembly Instructions Assembly Preparation Tools Required Hardware Included • Box cutter (or comparable cutting tool) • M10 x 25 Screw Qty: 2 • 5mm Allen (hex) wrench (included) • M10 Washer Qty: 10 • 10mm Allen (hex) wrench (included) •... -
Page 7: Seat Post & Seat
1. Seat Post & Seat Loosen lock lever on seat post column. Insert seat post into seat post column with towel holder facing the back of the base. Tighten lock lever. Align hole in seat carraige with seat post; press into place. Align tilt of seat;... -
Page 8: Front & Rear Stabilizers
2. Front & Rear Stabilizers Tip the base up to rest on the towel rack as shown. Align front stabilizer with front base plate, positioning stabilizer wheels on top as shown. Place one (1) washer on each bolt; insert two bolts with washers through holes in front stabilizer into base plate. -
Page 9: Arms & Foot Pegs
3. Arms & Foot Pegs Note: Arms are marked: “L” for the user’s left side and “R” for the user’s right side. Use #2 Phillips screwdriver to remove three (3) screws and bottom shroud, retaining screws and shroud for re-assembly in step 6. Orient and align arm to axle as shown;... -
Page 10: Console, Bottle Tray & Mast
4. Console, Bottle Tray & Mast Align holes in bottle tray with holes in mast. Place one (1) washer on each hex bolt, then insert bolt with washer through tray into mast. Use 5mm hex wrench to tighten. Connect cable from mast to cable in console (not shown), listening for a “click” to ensure a good connection. -
Page 11: Mast & Pedals
5. Mast & Pedals Connect cable from mast to base, listening for a “click” to ensure a good connection. Align holes in curved mast plate with holes in base, feeding any extra cable into base fork to keep it from being pinched or mashed. Insert one (1) washer onto each bolt; insert bolts with washers through holes in mast plate and into base. -
Page 12: Level & Test
6. Level & Test Adjust the levelers on the front stabilizer to eliminate any side-to-side movement of the unit. Be sure the levelers are locked after adjustment. Sit on the seat and start pedaling to wake the console. Notice that “8s” flash in all data fields. Verify the security of arms and pedals as you pedal, noticing the changing data elements in the display. -
Page 13: Stealth Air Bike User Instructions
Stealth Air Bike User Instructions Console Buttons The console features five (5) buttons to control the digital display: START Press this button to wake the console. When the console is on and in a neutral state (all zeros in the display fields), press this button to begin a Quick Start workout, or to start a programmed workout. -
Page 14: Display
Display The digital LCD includes the following data: TIME During a Quick Start or Target Distance workout, displays the elapsed time of the workout, counting up (hours:minutes:seconds). During an Interval or Target Time workout, the display counts down from the specfied target interval or workout time. When programming an Interval or Target Time workout, use the up and down arrows to display the interval option or target workout time in this field. -
Page 15: Programs
Programs The three buttons on the left side of the console access pre-programmed workouts to enhance your exercise experience: INTERVAL Choose from four interval options, each offering a different combination of seconds of work and rest: 20:10 10:20 30:30 40:20 To program your workout, press the INTERVAL button until the work/rest combination you choose is displayed in the “TIME”... -
Page 16: Maintenance
• Inspect bearings in the bottom bracket, arms and fan. Excessive noise or grinding is a sign of bad bearings. Replace when damaged with Torque Fitness- approved service parts. For service and support, contact your dealer, or email service@torquefitness.com, or call... -
Page 17: Limited Product Warranty
If the warranty has expired, Torque Fitness. may assist with replacements or repairs to parts and labor, but there will be a charge for these services. Contact Torque Fitness for information on post- warranty parts and services. Torque Fitness does not guarantee availability of spare parts after expiration of warranty period. - Page 20 Toll free: 1-877-TORQUE5 (1-866-664-9894) 11201 Xeon Street NW Ste 101 or 763-754-7533 (8:30 am – 5:00 CST). Coon Rapids, MN USA 55448 For sales: sales@torquefitness.com www.torquefitness.com For service: service@torquefitness.com © 2021 Torque Fitness. All rights reserved. P/N 5785801 REV A 12/2021...
Need help?
Do you have a question about the Stealth Air Bike and is the answer not in the manual?
Questions and answers