Advertisement
Quick Links
Advertisement

Related Manuals for GAME OF BRICKS Back to the Future Time Machine 10300


Summary of Contents for GAME OF BRICKS Back to the Future Time Machine 10300
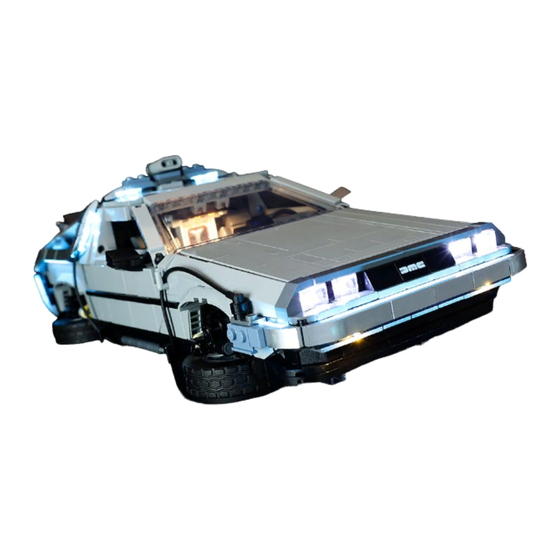
- Page 1 INSTRUCTION MANUAL Light Kit for Back to the Future Time Machine 10300...
- Page 2 Thank You For Purchasing this product. To give you the perfect hidden-line effect, we use severely thin aviation-grade wire with high tension and pressure tolerance. However, due to its thin nature, be careful not to cut through it as it might be susceptible to shearing during installation.
-
Page 3: Let's Get Started
Let's Get Started if you face any challenges, please feel free to reach out via support@gameofbricks.eu Please note that we offer 2 years of free light kit maintenance. - Page 4 Step 1 (Bag 1)
- Page 5 Step 1 (Bag 1)
- Page 6 Step 1 (Bag 1)
- Page 7 Step 1 (Bag 1)
- Page 8 Step 1 (Bag 1)
- Page 9 Step 1 (Bag 1)
- Page 10 Step 1 (Bag 1)
- Page 11 Step 1 (Bag 1)
- Page 12 Step 1 (Bag 1)
- Page 13 Step 2 (Bag 2)
- Page 14 Step 2 (Bag 2)
- Page 15 Step 2 (Bag 2)
- Page 16 Step 3 (Bag 3)
- Page 17 Step 3 (Bag 3)
- Page 18 Step 3 (Bag 3)
- Page 19 Step 3 (Bag 3)
- Page 20 Step 3 (Bag 3)
- Page 21 Step 3 (Bag 3)
- Page 22 Step 3 (Bag 3)
- Page 23 Step 3 (Bag 3)
- Page 24 Step 3 (Bag 3)
- Page 25 Step 3 (Bag 3)
- Page 26 Step 3 (Bag 3)
- Page 27 Step 3 (Bag 3)
- Page 28 Step 3 (Bag 3)
- Page 29 Step 4 (Bag 4)
- Page 30 Step 4 (Bag 4)
- Page 31 Step 4 (Bag 4)
- Page 32 Step 4 (Bag 4)
- Page 33 Step 4 (Bag 4)
- Page 34 Step 5 (Bag 5)
- Page 35 Step 5 (Bag 5)
- Page 36 Step 5 (Bag 5)
- Page 37 Step 5 (Bag 5)
- Page 38 Step 5 (Bag 5)
- Page 39 Step 5 (Bag 5)
- Page 40 Step 5 (Bag 5)
- Page 41 Step 6 - Classic Version The following pictures are only for Classic Version. Please skip to page 43 if you ordered Classic Remote Version.
- Page 42 Step 6 - Classic Version...
- Page 43 Step 7 - Classic Remote Version The following pictures are only for Classic Remote Version. Please skip to page 46 if you ordered Standard Version.
- Page 44 Step 7 - Classic Remote Version...
- Page 45 Step 7 - Classic Remote Version...
- Page 46 Step 8 - Standard Version The following pictures are only for all Standard Versions.
- Page 47 Step 8 (Bag 6)
- Page 48 Step 8 (Bag 6)
- Page 49 Step 8 (Bag 6)
- Page 50 Step 8 (Bag 6)
- Page 51 Step 8 (Bag 6)
- Page 52 Step 8 (Bag 6)
- Page 53 Step 8 (Bag 6)
- Page 54 Step 8 (Bag 6)
- Page 55 Step 8 (Bag 6)
- Page 56 Step 8 (Bag 6)
- Page 57 Step 8 (Bag 6)
- Page 58 Step 8 (Bag 6)
- Page 59 Step 8 (Bag 6)
- Page 60 Step 8 (Bag 6)
- Page 61 Step 9 (Bag 7)
- Page 62 Step 9 (Bag 7)
- Page 63 Step 9 (Bag 7)
- Page 64 Step 9 (Bag 7)
- Page 65 Step 10 - Standard Version The following pictures are only for Standard Version. Please skip to pag 68 if you ordered Standard Remote, Standard RC + Sound Versions.
- Page 66 Step 10 - Standard Version...
- Page 67 Step 10 - Standard Version...
- Page 68 Step 11 - Standard Remote, Standard RC + Sound Versions The following pictures are only for Standard Remote, Standard RC + Sound Versions.
- Page 69 Step 11 - Standard Remote, Standard RC + Sound Versions...
- Page 70 Remote Activation...
- Page 71 Step 12 - Standard RC + Sound Version The following pictures are only for Standard RC + Sound Version.
- Page 72 Step 12 - Standard RC + Sound Version...
- Page 73 Step 12 - Standard RC + Sound Version...
- Page 74 Sound Guide...
- Page 75 Remote and Sound Guide Remote and Sound guides with clickable Youtube links are available on our website: https://gameofbricks.eu/pages/instructions...
- Page 76 Connect light kit to the battery box and installation will be complete. If you would like to use another power source, please make sure the maximum voltage is 6V.
Need help?
Do you have a question about the Back to the Future Time Machine 10300 and is the answer not in the manual?
Questions and answers