Table of Contents
Advertisement
Quick Links
Advertisement
Table of Contents

Summary of Contents for Vocera Zebra ZQ610HC
- Page 1 Vocera Edge Zebra Printer Setup and Configuration User Guide Version 4.11.0...
- Page 2 This software is licensed, not sold, by Vocera Communications, Inc. (“Vocera”). The reference text of the license governing this software can be found at https://www.vocera.com/legal/. The version legally binding on you (which includes limitations of warranty, limitations of remedy and liability, and other provisions) is as agreed between Vocera and the reseller from whom your system was acquired and is available from that reseller.
-
Page 3: Table Of Contents
Contents Zebra ZQ610HC and QLn220HC Printer User Guide Overview ..................... 4 Step 1: Installing the Zebra Setup Utility Software ........................5 Step 2: Configure Wireless Settings ............................... 8 Create Wireless Configuration File................................8 Load Wireless Settings on to the Printer..............................11 Step 3: Label Setup ....................................14... -
Page 4: Zebra Zq610Hc And Qln220Hc Printer User Guide Overview
Zebra ZQ610HC and QLn220HC Printer User Guide Overview This setup guide covers Zebra Setup Utilities software for individual setup of the ZQ610HC and QLn220HC label printer for 802.11 a/b/g/n dual radio. Part Number for the Zebra QLn220HC: QH2-AUNA0M00-00 Part Number for the Zebra ZQ610HC: ZQ61-HUWA000-00 If your facility utilizes many label printers, consider using Zebra’s Link-OS printer management software (like an MDM for printers). -
Page 5: Step 1: Installing The Zebra Setup Utility Software
3. After you register, you will receive an email confirmation of your user account. Once you receive the confirmation, return to the zebra.com website, click Download, and sign in. 4. Continue through the driver installation wizard. 5 VOCERA EDGE ZEBRA PRINTER SETUP AND CONFIGURATION USER GUIDE... - Page 6 STEP 1: INSTALLING THE ZEBRA SETUP UTILITY SOFTWARE 5. At the prompt, connect the Zebra ZQ610HC or QLn220HC printer to the computer via mini USB cable. 6. Click Finish. 7. The printer should show up in the list of installed printers as ZDesigner QLn220 (ZPL).
- Page 7 STEP 1: INSTALLING THE ZEBRA SETUP UTILITY SOFTWARE 7 VOCERA EDGE ZEBRA PRINTER SETUP AND CONFIGURATION USER GUIDE...
-
Page 8: Step 2: Configure Wireless Settings
Create the configuration file on the computer. This configuration file contains the wireless connection configuration information that the printer needs to connect to the computer. 1. Click Configure Printer Connectivity. 8 VOCERA EDGE ZEBRA PRINTER SETUP AND CONFIGURATION USER GUIDE... - Page 9 STEP 2: CONFIGURE WIRELESS SETTINGS 2. Choose Wireless and click Next. 9 VOCERA EDGE ZEBRA PRINTER SETUP AND CONFIGURATION USER GUIDE...
- Page 10 STEP 2: CONFIGURE WIRELESS SETTINGS 3. Enter your wireless configuration settings. Note: There are multiple screens to configure your settings that are not shown here. 10 VOCERA EDGE ZEBRA PRINTER SETUP AND CONFIGURATION USER GUIDE...
-
Page 11: Load Wireless Settings On To The Printer
After the wireless configuration file is created on the computer, you need to load the file on the printer. Use the steps below to apply wireless connection settings to a new printer. 1. Click Open Printer Tools. 11 VOCERA EDGE ZEBRA PRINTER SETUP AND CONFIGURATION USER GUIDE... - Page 12 STEP 2: CONFIGURE WIRELESS SETTINGS 2. Click the Action tab. 3. Select Send file. 4. Click the “...” to locate your wireless config file. 12 VOCERA EDGE ZEBRA PRINTER SETUP AND CONFIGURATION USER GUIDE...
- Page 13 STEP 2: CONFIGURE WIRELESS SETTINGS 5. Click Send. The printer may restart. 13 VOCERA EDGE ZEBRA PRINTER SETUP AND CONFIGURATION USER GUIDE...
-
Page 14: Step 3: Label Setup
If you are using labels without marks on the liner, the printer must be set to "web-sensing" before calibration. Note: If using labels with black marks on the liner, you can skip to the calibration procedures below. 1. Click Configure Printer Settings. 14 VOCERA EDGE ZEBRA PRINTER SETUP AND CONFIGURATION USER GUIDE... - Page 15 STEP 3: LABEL SETUP 2. Set the label size (2” labels default to 1.89” printable width). 15 VOCERA EDGE ZEBRA PRINTER SETUP AND CONFIGURATION USER GUIDE...
- Page 16 STEP 3: LABEL SETUP 3. Most printers can use the default darkness and speed settings. This can be adjusted later as needed. 4. Select Web Sensing from the Media Type drop down list. 16 VOCERA EDGE ZEBRA PRINTER SETUP AND CONFIGURATION USER GUIDE...
-
Page 17: Calibration
If you are using labels with black marks on the liner, follow the steps below to calibrate the printer. If you are using the recommended Zebra label media (2” wide x 1.25” tall), the printer can calibrate it automatically. 1. Click Open Printer Tools. 17 VOCERA EDGE ZEBRA PRINTER SETUP AND CONFIGURATION USER GUIDE... - Page 18 STEP 3: LABEL SETUP 2. Click the Action tab. 3. Select Calibrate media. 18 VOCERA EDGE ZEBRA PRINTER SETUP AND CONFIGURATION USER GUIDE...
- Page 19 STEP 3: LABEL SETUP 4. Click Send. The printer will slowly feed labels to calibrate. 5. Basic setup is now complete. Next, you will need to add the printer to the Clinical Manager. 19 VOCERA EDGE ZEBRA PRINTER SETUP AND CONFIGURATION USER GUIDE...
-
Page 20: Step 4: Add Label Printer To Clinical Manager
Step 4: Add Label Printer to Clinical Manager After the printer is set up, you need to configure the printer labels in Vocera Edge Clinical Manager. 1. Log into the Clinical Manager. 2. Click Configuration > Label Printers. 3. Click New. - Page 21 STEP 4: ADD LABEL PRINTER TO CLINICAL MANAGER The new label printer displays. 21 VOCERA EDGE ZEBRA PRINTER SETUP AND CONFIGURATION USER GUIDE...
-
Page 22: Appendix A: Power Options
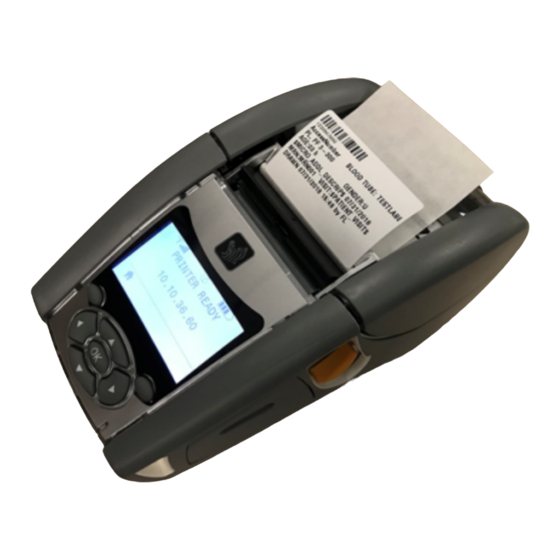
! U1 do "device.reset" "" Note: Remember to have a carriage return at the end of the last line. 3. Click Send to Printer. 4. The printer will restart and end at "Printer Ready". 22 VOCERA EDGE ZEBRA PRINTER SETUP AND CONFIGURATION USER GUIDE... - Page 23 APPENDIX A: POWER OPTIONS 23 VOCERA EDGE ZEBRA PRINTER SETUP AND CONFIGURATION USER GUIDE...
-
Page 24: Appendix B: Two Label Print Modes
1. Select the printer and click Configure Printer Settings. 2. Enter the label width and height: • Width: 1.88 inches (label size is 2 inches wide but will auto-limit to 1.88 inches) 24 VOCERA EDGE ZEBRA PRINTER SETUP AND CONFIGURATION USER GUIDE... - Page 25 APPENDIX B: TWO LABEL PRINT MODES • Height: 1.25 inches 3. Leave the Orientation set to Normal. 4. Click Next. 5. Leave the Speed and Darkness set to the default. 6. Click Next. 25 VOCERA EDGE ZEBRA PRINTER SETUP AND CONFIGURATION USER GUIDE...
- Page 26 APPENDIX B: TWO LABEL PRINT MODES 7. Set the Media Type to Mark Sensing (if using recommended Zebra label). 8. Leave the remaining fields as the default. 9. Click Next. 26 VOCERA EDGE ZEBRA PRINTER SETUP AND CONFIGURATION USER GUIDE...
- Page 27 APPENDIX B: TWO LABEL PRINT MODES 10. Set Media Handling to Peel Off. 11. Leave the remaining fields as the default. 12. Click Finish. 27 VOCERA EDGE ZEBRA PRINTER SETUP AND CONFIGURATION USER GUIDE...
-
Page 28: Change Printer To Peel Off Mode
After you have manually setup Peel Off Mode, you can change the printer so that the label peels off from the liner. 1. Open the cover of the printer. 2. Press the Peeler Lever. The Peeler Bail will pop out. 3. Load the paper as normal. Zebra QLn220HC Printer 28 VOCERA EDGE ZEBRA PRINTER SETUP AND CONFIGURATION USER GUIDE... -
Page 29: Change Printer Back To Tear-Off Mode
Use the steps below to change the printer back to tear-off-mode. 1. Open the cover of the printer. 2. With both thumbs, press the Peeler Bail back into the printer until it clicks in place. 3. Load paper as normal. 29 VOCERA EDGE ZEBRA PRINTER SETUP AND CONFIGURATION USER GUIDE... -
Page 30: Appendix C: Prevent Print Mode Override
Print Mode scripts Below are command sequences to set peel-off mode or tear-off mode, and prevent accidental changes. They can be sent via communications interface or saved and sent as file. 30 VOCERA EDGE ZEBRA PRINTER SETUP AND CONFIGURATION USER GUIDE... - Page 31 ! U1 do "device.reset" "" Set Printer to Tear-Off Mode ! U1 setvar "device.command_override.add" "^MM" ! U1 setvar "device.command_override.active" "no" ^XA^MMT,N^XZ ^XA^JUS^XZ ! U1 setvar "device.command_override.active" "yes" ! U1 do "device.reset" "" 31 VOCERA EDGE ZEBRA PRINTER SETUP AND CONFIGURATION USER GUIDE...