Table of Contents
Advertisement
Quick Links
Advertisement
Table of Contents

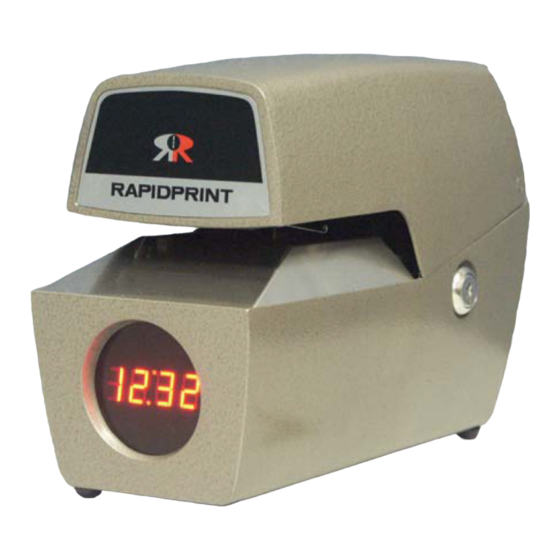
Summary of Contents for A to Z Rubber Stamps RAPIDPRINT A Series
- Page 2 RAPIDPRINT INC. SERVICE MANUAL DATE/TIME/NUMBERING STAMPS Models: A-E, V-E and C724-E AUTOMATIC CHECKSIGNER Model: C650 01/04/2012...
-
Page 3: Table Of Contents
TABLE OF CONTENTS Page LIST OF SPECIFICATIONS…………………………………………. INTRODUCTION……………………………………………………… THEORY OF OPERATION………………………………………….. Actuation Of Printing Mechanism…………………………… Automatic Ribbon Advance……………………………………….. 10 Typewheel Operation……………………………………………… 11 OPERATING INSTRUCTIONS……………………………………… 13 Setting Print Wheels……………………………………………….. 13 Stamping An Impression…………………………………………… 14 Description Of Major Assemblies………………………………….. 14 COMMON ADJUSTMENTS………………………………………….. 16 Changing Force Of Imprint…………………………………………... - Page 4 TABLE OF CONTENTS Page Disassembling AN-E Typesection……………………………….. Removing Rotary Solenoid…………………………………... Removing Retaining Pawls/Shaft…………………………….. Removing Wheels And Swing Assembly……………………… 46 Removing Actuating Pawl Assembly………………………… Disassembling Bottom Frame……………………………………… 48 Removing Ribbon Frame Assembly……………………………… Removing Solenoid Frame Assembly…………………………… Installing Solenoid Frame Assembly……………………………… 49 Replacing Trigger And/Or Switch………………………………….
- Page 5 TABLE OF CONTENTS Page OPTIONAL FEATURES……………………………………………… 97 Visual Counter…………………………………………………….. 99 Repeat Switch……………………………………………………... 100 Pushbutton Number Advance……………………………………… 101 Pushbutton Stamping……………………………………………… 101 Word Roll………………………………………………………….. 103 RST/RSB Removable Die…………………………………………. 105 Electric Security Lock……………………………………………... 106 Footswitch Number Advance……………………………………… 107 Footswitch Stamping………………………………………………. 107 NOTES ………………………………………………………………….. 109 AD-E “Euromegras Typesection Assy……………………………...
-
Page 6: List Of Specifications
LIST OF SPECIFICATIONS MODEL AR-E TIME STAMPS MODEL AN-E NUMBERING MACHINES These machines are housed in a metal case consisting of two castings of contemporary design hinged at the back. The exposed surfaces are finished in a durable taupe (brown) hammer-tone. - Page 7 LIST OF SPECIFICATIONS MODEL AR-E TIME STAMPS MODEL AN-E NUMBERING MACHINES Continued from previous page… A R - E AN-E, ADN-E Circuit Board Contains zero-crossover Same-also detector and potentiometer controls sequential for adjusting force of im- number advance print. Components for con- before imprint.
-
Page 8: Introduction
INTRODUCTION Rapidprint's electronic A-Series Automatic Time Stamps, Date Stamps, and Numbering Machines offer electronic control circuitry which enables the user to select the imprint strength needed for the particular form and applications and assures consistent imprints from one impression to the next. Rapidprint also offers a visual clock optional on all models. - Page 9 01/04/2012...
-
Page 10: Automatic Ribbon Advance
Automatic Ribbon Advance (figure 3) When the printing weight moves upward with each imprint, it takes with it the ribbon feed actuator which moves the ribbon transport lever pushing the ribbon feed link (c) forward advancing the ribbon feed pawl (d) which rotates the ratchet and gear (e). Every printing action advances the ribbon until one spool is filled. -
Page 11: Typewheel Operation
Type-wheel Operation (Model AR-E figure 4) The date/time type-wheels, located in the upper casting, operate independently of the printing and ribbon mechanism. When plugged into a 110 VAC power source, the synchronous motor (a) will operate continuously, rotating the impulse cam (b) one revolution per minute. - Page 12 Type-wheel Operation (Model AN-E figure 5) Unlike the date/time stamp, the numbering typewheels do not operate independently of the printing mechanism. When the trigger releases the snap-action switch button, the number advances before the stamping cycle and occurs in the following manner. A count begins within the circuitry which continues for five cycles of the AC line.
-
Page 13: Operating Instructions
OPERATING INSTRUCTIONS Rapidprint Date/Time and Numbering machines are electrically-operated automatic machines offering crisp, clean straight line imprints. They are designed for easy, convenient usage, and long-life dependable service. Insertion of a business form or other paper document into the throat of the machine automatically actuates the printing mechanism to register the imprint on the upper side of the paper. -
Page 14: Stamping An Impression
Stamping An Impression Insert form into throat of machine far enough to actuate trigger. When the trigger is actuated, the unit will automatically stamp the desired impression. Description Of Major Assemblies Rapidprint Date/Time and Numbering Stamps consist of four major assemblies (figure 7), which are easily serviced. - Page 15 Figure 7 01/04/2012...
-
Page 16: Common Adjustments
COMMON ADJUSTMENTS hanging Force Of Imprint If the imprint is not suff iciently sharp, or if you must stamp through a multiple copy form, you can increase the print force easily. Gently insert a small screwdriver into Be sure the blade the hole in the circuit board mounting plate as shown in figure 8 of the screwdriver fits properly into the potentiometer slot. - Page 17 Open the cover and remove the ribbon. To increase the throat depth, slightly loosen the screw securing the trigger top and slide it back as needed (i.e. if you wish to move the print 1/8" further down from the top of the document, slide the trigger top 1/8" toward the rear of the machine).
- Page 18 01/04/2012...
-
Page 19: Installation Of Extended Trigger
Installation Of Extended Trigger: NOTE: UNPLUG THE MACHINE FROM THE WALL OUTLET. Remove ribbon frame assembly. Remove base plate/circuit board assembly. Loosen trigger top screw only slightly and push top toward rear of machine. Using your left index finger, hold the hex nut and lockwasher in place and remove the screw and trigger top. -
Page 20: Troubleshooting Guide
TROUBLESHOOTING GUIDE Machine Does Not Stamp: If the machine does not stamp when a document is inserted, the following checks should be made in the order listed. NOTE: UNPLUG THE MACHINE FROM THE WALL OUTLET. 1. Make sure the printing weight moves freely up and down. 2. - Page 21 -remove base plate/circuit board assembly-disconnect circuit board from terminal connector - visually check fuse (figure 12-two types) 01/04/2012...
- Page 22 a)If fuse is not blown, see step 6 . If coil continuity is good, circuit board replacement is necessary. b)If fuse is blown, see step 5 . If replacement fuse blows, circuit board replacement is necessary. 5. Fuse Replacement: Use standard soldering techniques when replacing fuse. Observe precautions necessary when working with printed circuit boards.
-
Page 23: Gains Time
Machine Gains Time: NOTE: UNPLUG THE MACHINE FROM THE WALL OUTLET. 1. Make sure the actuating pawl teeth are stepped properly (figure 13). Observe the wheels turning and be sure the correct wheels advance at the end of each cam rotation cycle. Replace actuating pawl if necessary. -
Page 24: Loses Time
Remove motor and use a screwdriver to turn the cam. Just as the cam follower roller is about to drop off the cam, take hold of the cam follower (a) and allow it to move forward slowly until it hits the bumper screw (b). When this screw is properly set, the unit wheel will stop just before the retaining pawl "clicks"... - Page 25 Be sure to check the cam follower for loose or broken parts and replace if necessary. If the wheels do not turn easily, or do not turn at all, remove them and wash in a cleaning solution to remove any residue on the inner hubs. Replace the wheel shaft. C) MISALIGNED OR WORN ACTUATING PAWL: A defective actuating pawl may also cause this problem.
-
Page 26: Combination Test
Combination Test: The following combination test checks all the type-wheels at one time for correct bumper screw adjustment, and checks the strength of the return spring. 1. Set wheels to "20## DEC 19 PM 11:59" 2. Turn cam follower through one rotation but do not hold the cam follower this time, as previously described. -
Page 27: Ar-E Wiring Diagram
AR-E WIRING DIAGRAM 01/04/2012... -
Page 28: Ar-E W/Visual Counter Wiring Diagram
AR-E w/VISUAL COUNTER WIRING DIAGRAM 01/04/2012... -
Page 29: An-E Wiring Diagram
AN-E WIRING DIAGRAM 01/04/2012... -
Page 30: An-E W/Repeat Switch Wiring Diagram
AN-E w/REPEAT SWITCH WIRING DIAGRAM 01/04/2012... -
Page 31: C724-E Wiring Diagram
C724-E WIRING DIAGRAM 01/04/2012... -
Page 32: Recommended Tools
RECOMMENDED TOOLS -1/4" Nut Driver -1/16" Allen wrench -Needle nose pliers -11/32" Box/open end wrench -Phillips screwdrivers(1 standard size, 1 small size) - Rubber hammer - Prick punch - Hammer - Jackknife - Multi-meter - Small bench vise (optional) - Locking pliers - Hooked tool (such as a crochet hook) - Floating shafts -1 inside dimension of swing... -
Page 33: Replacement Spacers
REPLACEMENT SPACERS FOR ACTUATING PAWL SHAFT p/n 2701 WIDTH O.D. HOLE DIA WIDTH O.D. HOLE DIA .310 .096 299-2 .002 .109 .080 " " 299-5 .005 " " .100 " " 299-10 .010 " " .109 " " 299-15 .015 "... -
Page 34: Maintenance
MAINTENANCE CHANGING RIBBON To Remove Ribbon (figure 17) NOTE: UNPLUG THE MACHINE FROM THE WALL OUTLET. Unlock the machine and raise the top cover until it is fully open. Turn the machine sideways so that the lock is facing the operator. Turn one of the ratchet wheels (A) one revolution to create slack in the ribbon. -
Page 35: Removing Typesection Assembly
Removal Of Typesection Assembly: NOTE: UNPLUG THE MACHINE FROM THE WALL OUTLET. -Remove ribbon frame assembly and base plate/circuit board assembly-pulling circuit board free of connector. -Disconnect motor leads from terminals 5 and 12 of connector. -Remove lower mounting screw and take hold of typesection as you remove upper mounting screw. -
Page 36: Removing Retaining Pawls/Springs/Shaft
Retaining Pawl Springs: -Use a hooked tool ( as shown in figure 19 ) to first remove end of spring attached to the threaded shaft, then remove the end attached to the retaining pawl. NOTE: SPRINGS ARE COLOR CODED. BE SURE TO REINSTALL EACH SPRING IN ITS CORRECT LOCATION (SEE TABLE l). - Page 37 01/04/2012...
- Page 38 TABLE I RETAINING PAWL SPRINGS Color Coded Breakdown Typewheel Retaining Pawl Spring Color Code Model AR-E Unit of Minutes Wheel 36 oz. Spring P/N 980-36 Green Tens Minute Wheel 21 oz. Spring P/N 980-21 Black Hour Wheel 21 oz. Spring P/N 980-21 Black AM-PM Wheel 21 oz.
-
Page 39: Removing Actuating Pawl Assembly
Actuating Pawl Assembly: -Note location of spacers on shaft for reinstallation. -Push protruding end of shaft through swing and pull out flared end, removing shaft completely from swing. -Pull actuating pawl assembly free of swing. Cam Follower: -Use needle nose pliers to remove return spring. -Remove 5/16 hex nut that secures cam follower shaft, and unscrew shaft. - Page 40 -When you have pushed it far enough, (before it reaches the unit wheel) pull the old shaft out slowly and the unit wheel should drop out. -Note the location of any spacers that may drop out. They should be reinstalled in the same position when installing a new wheel.
-
Page 41: Disconnecting Typesection Wires
Disconnecting Typesection Wires For changing motor or rotary solenoid, the cutting and splicing of wire leads is acceptable. (Solder-less splices are available from Rapidprint; P/N 5491-1 or you may purchase Scotchlok #558 from your local supply house). Simply, clip the wire leads, and remove type-section mounting screws and proceed with installation of new type-section. - Page 42 WE RECOMMEND PURCHASING AN EXTRACTION TOOL FOR EASE OF SERVICING. YOU MAY OBTAIN THE TOOL SHOWN IN figure 23 FROM: 01/04/2012...
- Page 43 AMP Incorporated Eisenhower Boulevard Harrisburg, Pennsylvania 17105 Order P/N 457241-1 (be sure to request full instructions) WHEN REINSTALLING LEADS INTO THE CONNECTOR, YOU MUST LIFT THE SMALL TAB APPROXIMATELY 30 DEGREES. THIS WILL ENSURE THAT IT WILL HOLD FIRMLY IN THE TERMINAL CONNECTOR WHEN REINSTALLED ( figure 24 ).
- Page 44 01/04/2012...
-
Page 45: Disassembling An-E Typesection
Disassembling Typesection: Numbering Machines (AN-E, ADN-E): The following instructions are to be used when it is necessary to remove or replace a worn part. Rotary Solenoid ( figure 25) NOT RECOMMENDED ON FIELD REPAIRS -Remove return spring. -With printing wheels face down, move actuating pawl swing forward. -Using a thin punch (an old actuating pawl shaft (a) will do), tap the roll pin out. -
Page 46: Removing Retaining Pawls/Shaft
Retaining Pawls And Retaining Pawl Shaft: -Remove one of the two "E" rings securing the shaft. -Tap the shaft so it protrudes from one side of the frame. Take hold and turn as you pull it out, allowing the pawls to fall out. Wheels And Swing Assembly: To allow the removal of the wheels and swing as one unit, it is best to use a "floating shaft". -
Page 47: Removing Actuating Pawl Assembly
-Use "floating shaft" to push out existing shaft, allowing swing to fall free of frame. Push from side of frame opposite retainer (figure 20). Actuating Pawl Assembly: -Remove the actuating pawl shaft from swing (one end of this shaft is flared out and it can only be removed from one end). -
Page 48: Disassembling Bottom Frame
Disassembling Bottom Frame: Removal Of Ribbon Frame Assembly: -Remove ribbon frame mounting screws. -Carefully lift assembly upward and out. Removal Of Solenoid Frame Assembly: -Remove stainless steel paper shelf. -Remove solenoid frame mounting screws. -Lift right side of frame to disengage bottom of printing weight from ribbon feed actuator (figure 26). -
Page 49: Installing Solenoid Frame Assembly
Installation Of Solenoid Frame Assembly: (Assumes trigger and switch are in place.) -Place frame in casting with right side of casting raised up. -Pivot ribbon feed actuator upward 3/4" to engage with printing weight (figure 27). -Lower solenoid frame to engage ribbon feed actuator. -To check engagement, move printing weight up and down. -
Page 50: Replacing Trigger And/Or Switch
Replacing Trigger And/Or Switch: -Remove solenoid frame mounting screws. -Lift right side of solenoid frame to disengage ribbon feed actuator assembly from printing weight, lift out solenoid frame. -Remove support plate mounting screws (figure 28). -Remove yellow leads from COM and NC terminals of the switch. -Remove switch mounting screws. -
Page 51: Replacing Print Coil
Print Coil: -Remove the brass plunger guide. Rapidprint tool #607T-1 is available for this purpose upon request (figure 30). Turn the frame upside down and insert the narrower end of the tool into the plunger guide. Tap with a hammer until the plunger guide protrudes from the top of the frame sufficiently to take hold and pull it out. -
Page 52: Replacing Base Plate/Circuit Board
Disassembling Bottom Frame (continued): When reinstalling the plunger guide, be sure it is exactly in line with the bottom of solenoid frame before forcing it into place. Otherwise, you may bend the end of the plunger guide. When plunger guide is in place, use the crimped end of the #607T-1 tool to crimp and secure guide into place. - Page 53 Installation Of Circuit Board And Base Plate: -Press and lock circuit board onto base plate standoffs. -Attach terminal connector to circuit board (figure 33). -To mount base plate, first be sure that the case locking lever is straight up in the locked position to avoid interference.
- Page 54 Ribbon Feed Actuator: -Disconnect the plunger return spring from the stud on the left side of the casting. -Remove "E" ring, and slide actuator to the right. 01/04/2012...
-
Page 55: Illustrated Parts List (A-E Models)
ILLUSTRATED PARTS LIST DATE/TIME STAMPS Model AR-E, AD-E, ARC-E, ARL-E Series NUMBERING MACHINES Model AN-E, ADN-E Series 01/04/2012... -
Page 56: General Assembly
GENERAL ASSEMBLY Item Name Quantity Bottom Front Plate(see note 1) 00-05614-000000 Paper Plate 00-05648-000000 Flat Hd Undercut Phillips #6-32 x 1/4 Thd-Forming Screw Ribbon, Purple 00-05650-000908 Hex Hd Thd-Forming Screw #8-32 x 3/4 Top Frame Assembly AN-E (see pg. 58) 01-07554-000172 AR-E (see pg. - Page 57 01/04/2012...
-
Page 58: Bottom Frame And Casting Assembly
BOTTOM FRAME & CASTING ASSEMBLY Item Name Quantity Hex Hd Thd-Forming Screw #8-32 x ½ Ribbon Frame Ass'y (see pg. 52) 01-00608-000151 Base Plate 00-01536-001130 Standoff 00-07313-001130 Connector 00-07325-001130 Circuit Board Assembly 01-07310-001129 (AN-E) 01-07310-001130 (AR-E) Filstr Hd Blk Phil Thd-Form Scr #6-32 x 1/4 Hex Hd Thd-Forming Screw #8-32 x 3/4... - Page 59 01/04/2012...
-
Page 60: Solenoid Frame Assembly
SOLENOID FRAME ASSEMBLY Item Name Quantity Solenoid Coil 00-03024-001130 Solenoid Coil Insulator 00-05225-000000 Flat Pt Socket Set Screw #8-32 x 1/2 Solenoid Frame Casting 00-06945-000000 Solenoid Plunger Guide 00-06946-000000 Printing Weight Assembly 01-00598-101130 Trigger Pivot Shaft 00-05432-000000 Trigger Spring 00-05379-001130 Hex Nut #4-40 Ext Star Washer... - Page 61 01/04/2012...
-
Page 62: Ribbon Frame Assembly
RIBBON FRAME ASSEMBLY Item Name Quantity Ribbon Feed Link & Stud Ass'y 01-05638-000000 Ribbon Feed Pawl Spring 00-02622-001130 Ribbon Feed Pawl 00-02468-000000 Ribbon Ratchet & Shaft Assembly 01-05636-000000 Hex Nut #10-32 Ext Star Washer Left Ribbon Plate Assembly 01-05641-000000 Ribbon Reverse Toggle Assembly 01-00591-000000 Toggle Snap Spring 00-02620-001130... - Page 63 01/04/2012...
-
Page 64: Ad-E Typesection Assembly
AD-E TYPESECTION ASSEMBLY PART NAME PART NAME Month Wheel Ass'y 01-00497-005243 Retaining Pawl 00-05747-000243 1-2-3 Wheel Ass'y 01-00496-005243 Retaining Pawl Shaft 00-02682-000000 1-0 Date Wheel Ass'y 01-00495-005243 "E" Retaining Ring 00-05142-000000 Spacer 00-00296-000020 Wheel Shaft Retainer 00-06849-000000 Year Wheel Assembly 01-00498-005101 Binding Hd Screw #4-40 x 1/8... -
Page 65: Ar-E Typesection Assembly
AR-E TYPESECTION ASSEMBLY Item Name Quantity Spacer 00-00296-000020 Year Wheel Assembly 01-00498-005101 Month Wheel Assembly 01-00497-005243 1-2-3 Wheel Assembly 01-00496-005243 1-0 Date Wheel Assembly 01-00495-005243 AM-PM Wheel Assembly 01-00494-005243 Hour Wheel Assembly 01-00493-005243 Tens Minute Wheel 01-00492-005243 Actuating Pawl Spacer 00-02306-000250 Actuating Pawl Spring 00-05275-000243... - Page 66 01/04/2012...
-
Page 67: An-E Typesection Assembly
AN-E TYPESECTION ASSEMBLY Item Name Quantity 1-0 Number Wheel Assembly 01-04043-005178 Spacer 00-02869-000000 Spacer 00-02695-000000 Spacer Washer 00-00297-000005, 00-00297-000010 Spacer Washer 00-00295-000005, 00-00295-000010 Spacer 00-02306-000100 Actuating Pawl Spring 00-05275-000243 Actuating Pawl Assembly 01-05268-000243 Actuating Pawl Spacer 00-02306-000000 Spacer 00-00299-000002, 00-00299-000005, 00-00299-000010 Actuating Pawl Shaft 00-02701-000000... - Page 68 01/04/2012...
-
Page 69: Adn-E Typesection Assembly
ADN-E TYPESECTION ASSEMBLY Item Name Quantity Spacer 00-00296-000005, 00-00296-000010 1-0 Number Wheel Assembly 01-04043-005178 Month Wheel Assembly 01-00497-005243 HM-1L 1-2-3 Wheel Assembly 01-00496-005236 HM-1L 1-0 Date Wheel Assembly 01-00495-005236 Abbr. Vertical Year Wheel Ass'y 01-06160-005191 Actuating Pawl Assembly 01-05269-000243 Actuating Pawl Spring 00-05275-000274 Actuating Pawl Spacer 00-02306-000000... - Page 70 01/04/2012...
-
Page 71: Armt-E Type-Section Assembly
ARMT TYPESECTION ASSEMBLY Item Name Quantity Spacer 00-00296-000010 1-0 Date Wheel Assembly 01-00495-005236 1-2-3 Date Wheel Assembly 01-00496-005236 Month Wheel Assembly 01-00497-005243 Year Wheel Assembly 01-00498-005101 (13-23) Hour Wheel Assembly 01-00494-005259 (00-12) Hour Wheel Assembly 01-00493-005259 0-5 Tens Minute Wheel Assembly 01-00492-005236 Actuating Pawl Spring 00-05275-000243... - Page 72 01/04/2012...
-
Page 73: Illustrated Parts List (C724-E Models)
ILLUSTRATED PARTS LIST TIME/DATE/NUMBERING STAMPS Model C724-E, C724L-E 01/04/2012... -
Page 74: General Assembly
GENERAL ASSEMBLY C724-E Item Name Quantity Filstr Hd Blk Phil Thd-Form Scr #6-32 x 1/4 Bottom Cover Plate 00-05649-000000 Front Plate Mtg Clip 00-05629-000000 Filstr Hd Blk Phil Thd-Form Scr #6-32 x 1/4 Top Front Plate 00-05786-000000 Typesection Assembly (AR,) 01-07554-000186 (AN,) 01-07554-000172... - Page 75 01/04/2012...
-
Page 76: Bottom Frame And Casting Assembly
BOTTOM FRAME & CASTING ASSEMBLY C724-E Item Name Quantity Rubber Feet 00-00210-000145 Ground Jumper Wire Assembly 01-07314-000000 Int Star Washer Filstr Hd Blk Phil Thd-Form Scr #6-32 x 1/4 Lock/Nut/Key 00-06784-000000 Locking Lever 00-05769-000000 Washer 00-06988-000000 Hex Nut 00-06645-000000 Locking Lever Spring 00-02666-000000 Grommet 00-02160-000000... - Page 77 01/04/2012...
-
Page 78: Ribbon Frame Assembly
RIBBON FRAME ASSEMBLY Item Name Quantity Deflector Spring (left) 00-05728-000243 Ribbon Ratchet & Shaft Ass'y (front) 01-05635-000000 "E" Ring 00-05211-000000 "E" Ring 00-05418-000000 Ribbon Feed Link & Stud Ass'y 01-05638-000000 Ribbon Feed Pawl Spring 00-02622-000000 Ribbon Feed Pawl 00-02468-000000 Ribbon Ratchet & Shaft Ass'y 01-05636-000000 Left Ribbon Plate Ass'y 01-05641-000000... - Page 79 01/04/2012...
-
Page 80: Solenoid Frame Assembly
SOLENOID FRAME ASSEMBLY C724-E Item Name Quantity Solenoid Coil 00-02927-000000 Solenoid Coil Insulator 00-05763-000000 Printing Weight Assembly 01-07598-000217 Solenoid Plunger Guide 00-02736-000000 Flat Point Socket Set Screw #8-32 x 1/2 Top Plate 00-05774-000000 Trigger Pivot Shaft 00-05432-000000 Int Star Washer Hex Hd Screw #8-32 x 1/2 Hex Nut... - Page 81 01/04/2012...
-
Page 82: Digital Clock Assembly C724-E
01/04/2012... -
Page 83: Illustrated Parts List (V-E Models)
ILLUSTRATED PARTS LIST VERTICAL TIME/DATE NUMBERING STAMPS Model VAR-E, VAD-E, VADN-E, VAN-E, VR-E, VARC-E, VARL-E 01/04/2012... -
Page 84: General Assembly
GENERAL ASSEMBLY V-E Item Name Quantity Pan Hd Screw #4-40 x 3/16 Int Star Washer Front Plate 00-05302-000000 Print Indicator 00-05193-000000 Cord & Plug Assembly 00-00209-001130 Signature Ornament 00-05174-000000 Drive Screw #0 x 3/16 Filstr Hd Phil Blk Thd-Form Scr #6-32 x 1/4 Flat Hd Thd-Forming Screw #6-32 x 3/8... - Page 85 01/04/2012...
-
Page 86: Bottom Frame Assembly
BOTTOM FRAME ASSEMBLY V-E Item Name Quantity Ribbon Frame Ass'y (see pg 79) Rd Hd Screw SEMS #8-32 x 3/8 Socket Screw (black) #8-32 x 1/2 Solenoid Frame Ass'y (see pg 80-81) Solenoid Frame Mtg Bracket 00-05716-000304 Solenoid Frame Support Plate 00-05178-000304 01/04/2012... -
Page 87: Ribbon Frame Assembly
RIBBON FRAME ASSEMBLY V-E Item Name Quantity "E" Ring 00-05418-000000 Ribbon Feed Pawl Spring 00-02622-001130 Ribbon Feed Pawl 00-02468-000000 Rear Ribbon Ratchet & Shaft Ass'y 01-00592-000000 Front Ribbon Ratchet & Shaft Ass'y 01-00594-000000 "E" Ring 00-05211-000000 Ribbon Feed Link & Stud Ass'y 01-00585-000000 Ribbon, Purple 00-05650-000908... -
Page 88: Solenoid Frame Assembly
SOLENOID FRAME ASSEMBLY V-E Item Name Quantity Solenoid Coil Insulator 00-05225-000000 Solenoid Coil 00-03024-001130 Solenoid Plunger Guide 00-06946-000000 Trigger Pivot Shaft 00-05432-000000 Solenoid Frame Casting 00-06945-000000 Flat Point Socket Set Screw #8-32 x 1/2 Printing Weight Ass'y 01-00598-101130 Hex Nut #4-40 Trigger Top 00-05660-000000... - Page 89 01/04/2012...
-
Page 90: Clock Assembly
Item Name Quantity ANALOG CLOCK Rd Hd Phil Screw #4-40 x 7/8 Bezel 00-05310-000000 Clock Crystal 00-05311-000000 Minute Hand 00-05644-000000 Hour Hand 00-05643-000000 Clock Dial 00-05314-000000 Gear Train Assembly 01-05327-000000 Ext Star Washer Hex Nut #4-40 Motor & 48T Gear Assy (110V/60Hz) 01-05326-000000 Binding Hd Screw SEMS #4-40 x 1/4... -
Page 91: Illustrated Parts List (C650 Model)
ILLUSTRATED PARTS LIST AUTOMATIC CHECKSIGNER Model C650 01/04/2012... -
Page 92: General Assembly
GENERAL ASSEMBLY C650 Item Name Quantity Paper Plate 00-05785-000136 Paper Plate Post 00-06066-000000 Adjustable Guide Nut 00-06074-000000 Front Plate Support Bracket 00-05780-003000 Filstr Hd Blk Phil Thd-Form Scr #6-32 x 1/4 Filstr Hd Blk Phil Thd-Form Scr #6-32 x ¼ Bottom Cover Plate 00-05649-000000 Bottom Front Plate... - Page 93 01/04/2012...
-
Page 94: Ribbon And Frame Assembly
RIBBON FRAME ASSEMBLY C650 Item Name Quantity Hex Nut #8-32 Ext Star Washer Ext Star Washer Square Nut #8-32 Mtg Plate & Roller Assembly 01-00801-000000 Printing Die Holder 00-02835-000136 Die Plate 00-05221-000000 "E" Ring 00-07331-000000 Counter Connecting Link 00-02852-000000 Shoulder Screw 00-05028-000000 "E"... - Page 95 RIBBON & FRAME ASSEMBLY C650 Item Name Quantity Condenser 00-01083-000000 Int Star washer Rd Hd Screw #8-32 x 5/16 Binding Hd Screw SEMS #4-40 x 1/4 Die Holder Lock Spring 00-02815-000000 Steel Ball 00-02901-000000 01/04/2012...
-
Page 96: Solenoid Frame Assembly
SOLENOID FRAME ASSEMBLY C650 Item Name Quantity Bottom Plate 00-05494-000000 Coil Insulator 00-05763-000000 Solenoid Coil 00-02927-000000 Top Plate 00-05492-000000 Plunger Guide 00-02736-000000 Printing Weight Assembly 01-00754-000000 Trigger Pivot Shaft 00-05432-000000 Back Plate 00-05424-000000 Int Star Washer Hex Hd Screw #8-32 x 1/2 Trigger Assembly 01-00603-000000 Washer... -
Page 97: Optional Features
OPTIONAL FEATURES 01/04/2012... - Page 98 The following pages contain instructions on how to add optional features. Caution should always be exercised when modifying electrical equipment. Always unplug machine from outlet prior to disassembling. The instructions do not mention disassembly procedures since they are usually straightforward. Simply remove necessary parts until area of interest is exposed.
-
Page 99: Visual Counter
VISUAL COUNTER RETROFITTING A STANDARD AN-E/AR-E MACHINE -Replace Bottom Front Plate with p/n 00-07240-000000 (or machine a 1.435 x .885 cutout in existing plate). -Remove Retaining Clip from Counter p/n 00-02855-000001. -Guide counter leads through opening of Bottom Front Plate from the front of machine. -Reinstall Retaining Clip. -
Page 100: Repeat Switch
REPEAT SWITCH RETROFITTING A STANDARD AN-E MACHINE -Drill 1/2"DIA. hole in bottom casting-location specified on diagram. -Apply Label p/n 00-05212-000000 onto casting using centerline to locate center of hole. -Using an X-ACTO knife, cut off label material that is covering mounting hole. -Attach 2 wire assemblies p/n 01-06930-001140 to Toggle Switch-one to the center terminal, the other to the uppermost terminal. -
Page 101: Pushbutton Number Advance
PUSHBUTTON NUMBER ADVANCE RETROFITTING A STANDARD AN-E MACHINE -Drill 1/2"DIA. hole in bottom casting-location specified on diagram. WIRING MACHINE Wire machine per wiring diagram 08-00218-000012 and/or perform the following steps: 1-P.C. Bd must be D revision or later. If not, it must be replaced with p/n 01-07310-001129. - Page 102 01/04/2012...
-
Page 103: Word Roll
WORD ROLL RETROFITTING A STANDARD MACHINE -Remove existing Typesection Assembly -Drill a .386 DIA. hole in top cover of casting as per diagram below. -Install one of the following Typesection Assemblies: MODEL AD WR 01-07554-000170 AR WR 01-07554-000201 ADN WR 01-07554-000330 ARMT WR 01-07554-000339... - Page 104 ______________________________________________________________________________ PARTS LIST ITEM DESCRIPTION AR RSB AR RST AR RSTB 01-05672-000000 Die Clip Guide Assembly 00-05061-000000 Remov. Die Plate (BLANK) see list (next pg) Typesection Assembly 00-01196-000000 Steel Ball 00-05385-000000 Compression Spring #4-40 x 3/4 Flat Hd Phil Screw 00-06174-000000 Guide Plate #4-40 x 3/16...
-
Page 105: Rst/Rsb Removable Die
RST/RSB REMOVABLE DIE RETROFITTING A STANDARD MACHINE -Remove existing Typesection Assembly -Drill and countersink two (or four) holes as per Diagram A. -Install one of the following Typesection Assemblies: MODEL AR RSB 1-7554-341 AR RST 1-7554-342 AR RSTB 1-7554-842 -Assemble Die Clip Guide Assembly (or assemblies) as per Diagram B. -Remove two #4-40 x 5/32 Pan Hd SEMS screws presently fastening Leaf Spring p/n 5639 (refer to pg 52-53). -
Page 106: Electric Security Lock
ELECTRIC SECURITY LOCK RETROFITTING A STANDARD AN-E /AR-E MACHINE -Prepare Switchlock p/n 2865-573 by soldering two Blue Wire Assemblies p/n 1-6930-11 to Switchlock terminals 1 & 3. -Drill 3/4"Dia. hole. Pre-drilling a 5/16" dia. pilot hole is recommended. -Insert Switchlock through hole and fasten it into place with the supplied hex nut. NOTE: key slot must be in OFF position when vertical (counterclockwise). -
Page 107: Footswitch Number Advance
FOOTSWITCH NUMBER ADVANCE RETROFITTING A STANDARD AN-E MACHINE -Drill 5/8"dia. hole in rear of bottom casting-location specified on diagram. WIRING MACHINE Wire machine per wiring diagram 08-218-43 and/or perform the following steps: 1-P.C. Bd must be D revision or later. If not, it must be replaced with p/n 1-7310- 1129. - Page 108 CASTING MODIFICATION FOR FOOTSWITCH FEATURE 01/04/2012...
-
Page 109: Notes
NOTES: ______________________________________________________________________________________ ______________________________________________________________________________________ ______________________________________________________________________________________ ______________________________________________________________________________________ ______________________________________________________________________________________ ______________________________________________________________________________________ ______________________________________________________________________________________ ______________________________________________________________________________________ ______________________________________________________________________________________ ______________________________________________________________________________________ ______________________________________________________________________________________ ______________________________________________________________________________________ ______________________________________________________________________________________ ______________________________________________________________________________________ ______________________________________________________________________________________ ______________________________________________________________________________________ ______________________________________________________________________________________ ______________________________________________________________________________________ ______________________________________________________________________________________ ______________________________________________________________________________________ ______________________________________________________________________________________ ______________________________________________________________________________________ ______________________________________________________________________________________ ______________________________________________________________________________________ 01/04/2012... -
Page 110: Ad-E "Euromegras Typesection Assy
TO PRINT: 31 MAI 2000 REF: 01-07554-900867 PART NAME PART NAME Month Wheel Ass'y (French) 01-00497-005099 Retaining Pawl 1 00-05747-000243 1-2-3 Wheel Ass'y 01-00496-005243 Retaining Pawl Shaft 00-02682-000000 1-0 Date Wheel Ass'y 01-00495-005243 "E" Retaining Ring 00-05142-000000 Spacer 00-00296-000020 Wheel Shaft Retainer 00-06849-000000 Year Wheel Assembly 01-00498-005101... -
Page 111: An-E "Euromegras Typesection Assy
AN-E “EUROMEGRAS” TYPESECTION ASSEMBLY Item Name Quantity 1-0 Number Wheel Assembly 01-04043-005178 Spacer 00-02869-000000 Spacer 00-02695-000000 Spacer Washer 00-00297-000005, 00-00297-000010 Spacer Washer 00-00295-000010 Spacer 00-02306-000100 Actuating Pawl Spring 00-05275-000243 Actuating Pawl Assembly 01-05268-000243 Actuating Pawl Spacer 00-02306-000000 Spacer 00-00299-000002, 00-00299-000005, 00-00299-000010 Actuating Pawl Shaft 00-02701-000000... - Page 112 TO PRINT: 654321 REF: 01-07554-000177 EM-3 01/04/2012...
-
Page 113: Adn-E "Euromegras Typesection Assy
ADN-E “EUROMEGRAS” TYPESECTION ASSEMBLY Item Name Quantity Spacer 00-00296-000010 1-0 Number Wheel Assembly 01-04043-005178 Month Wheel Assembly (French) 01-00497-005099 HM-1L 1-2-3 Wheel Assembly 01-00496-005236 HM-1L 1-0 Date Wheel Assembly 01-00495-005236 Abbr. Vertical Year Wheel Ass'y 01-06160-005191 Actuating Pawl Assembly 01-05269-000243 Actuating Pawl Spring 00-05275-000274 Actuating Pawl Spacer... - Page 114 TO PRINT: 654321 31 MAI REF: 01-07554-900208 EM-5 01/04/2012...
-
Page 115: Armt-E "Euromegras Typesection Assy (Version I)
ARMT “EUROMEGRAS” (VERSION I) TYPESECTION ASSEMBLY Item Name Quantity Spacer 00-00295-000010 1-0 Date Wheel Assembly 01-00495-005236 1-2-3 Date Wheel Assembly 01-00496-005236 Month Wheel Assembly (French) 1 01-00497-005099 Year Wheel Assembly 01-00498-005243 (13-23) Hour Wheel Assembly 01-00494-005259 (00-12) Hour Wheel Assembly 01-00493-005259 0-5 Tens Minute Wheel Assembly 1 01-00492-005236... - Page 116 TO PRINT: 31 MAI 25 23 59 REF: 01-07554-000099 EM-7 01/04/2012...
-
Page 117: Armt-E "Euromegras Typesection Assy (Version Ii)
ARMT “EUROMEGRAS” (VERSION II) TYPESECTION ASSEMBLY Item Name Quantity Spacer 00-00295-000010 1-0 Date Wheel Assembly 01-00495-005236 1-2-3 Date Wheel Assembly 01-00496-005236 Month Wheel Assembly (French) 1 01-00497-005099 Year Wheel Assembly 01-00498-005101 (13-23) Hour Wheel Assembly 01-00494-005259 (00-12) Hour Wheel Assembly 01-00493-005259 0-5 Tens Minute Wheel Assembly 1 01-00492-005236... - Page 118 TO PRINT: 31 MAI 2025 23 59 REF: 01-07554-000999 EM-9 01/04/2012...
-
Page 119: Armt-E "Euromegras Typesection Assy (Version Iii)
ARMT-RH “EUROMEGRAS” (VERSION III) TYPESECTION ASSEMBLY Item Name Quantity Spacer 00-00295-000010 1-0 Date Wheel Assembly 01-00495-005238 1-2-3 Date Wheel Assembly 01-00496-005238 Month Wheel Assembly (French) 1 01-00497-051055 Year Wheel Assembly 01-00498-005105 (13-23) Hour Wheel Assembly 01-00494-005261 (00-12) Hour Wheel Assembly 01-00493-005261 0-5 Tens Minute Wheel Assembly 1 01-00492-005238... - Page 120 TO PRINT: 31 MAI 2025 23 59 REF: 01-07554-901084 EM-11 01/04/2012...
-
Page 121: Armt-E "Euromegras Typesection Assy (Version Iv)
ARMT “EUROMEGRAS” (VERSION IV) TYPESECTION ASSEMBLY Item Name Quantity Spacer 00-00295-000010 1-0 Date Wheel Assembly 01-00495-005236 1-2-3 Date Wheel Assembly 01-00496-005236 Month Whl Assy (Vert.French) 01-05399-005099 Year Wheel Assembly 01-00498-005101 (13-23) Hour Wheel Assembly 01-00494-005259 (00-12) Hour Wheel Assembly 01-00493-005259 0-5 Tens Minute Wheel Assembly 1 01-00492-005236 Actuating Pawl Spring... - Page 122 TO PRINT: 31 2025 23 59 REF: 01-07554-990099 EM-13 01/04/2012...
Need help?
Do you have a question about the RAPIDPRINT A Series and is the answer not in the manual?
Questions and answers