Advertisement
Quick Links
Advertisement

Summary of Contents for Fantom Drives Venom8
- Page 2 For a digital version of the manual, please visit www.fantomdrives.com/venom8 or scan the QR code below.
- Page 3 Table of Contents Important Information PAGE 4 Installing VENOM8 on to your PlayStation 5 PAGE 5 System Requirements PAGE 6 Installing VENOM8 on your motherboard PAGE 7-9 Installing VENOM8 as a new primary drive PAGE 10 Installing VENOM8 as a secondary drive...
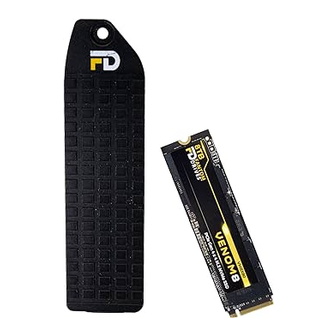
- Page 4 M.2 drive. A heatsink is required to keep the drive at its optimal temperature to increase the longevity of its life and performance. If your motherboard did not come with a heatsink, we recommend the Fantom Drives VENOM8 Heatsink to pair with your VENOM8 SSD.
- Page 5 PlayStation 5 Installation Please visit www.fantomdrives.com/venom8 or scan the QR code below to view a step by step video tutorial of installing SSD on to the PlayStation 5.
-
Page 6: System Requirements
System Requirements PCIe NVMe storage-capable hardware motherboard that supports M.2 form factor (M.2 2280 NVMe socket slot). System BIOS that supports UEFI 2.3.1 or later with NVMe support. Microsoft Windows 7, 8, 10, 11 or newer For Mac, compatibility varies per model. Consult with a Mac specialist or owners manual to see if a M.2 2280 NVMe SSD can be used to upgrade the internal drive. - Page 7 Installing VENOM8 on your motherboard Installation by a computer technician is highly recommended. Please check your manual and warranty information for your motherboard and computer before continuing. Always back up you data to another storage device before installing any new component.
- Page 8 Please view your motherboard manual to correctly identify and locate the slot. 4. Align the correct pins of VENOM8 to the pins of the M.2 slot. Insert SSD into slot (figure A). The SSD should now hold itself at around a 45-degree angle.
- Page 9 example of an M.2 slot on a motherboard...
- Page 10 OS boot media. Follow on screen instructions and select VENOM8 as your operating system destination. If you are using the VENOM8 to upgrade from an older drive, you can clone your old boot drive using FD cloning software provided free for VENOM8 customers.
- Page 11 Installing VENOM8 as your secondary drive After physical installation of VENOM8, power on the computer. Once Windows operating system has loaded, right click on your Windows icon and select “Disk Management” Select the correct disk, right click and select “Initialize Disk”...
- Page 12 Make sure your correct disk and GPT option is selected.
- Page 13 Go back to Disk Management and right click on your disk. Click on “New Simple Volume.” Continue through the Wizard and where it asks for File System Type, set it to NTFS. Finish the Wizard and your drive is ready for use.
-
Page 14: Warranty Disclaimer
Product with a degree of protection equivalent to that of the original packaging, to Fantom Drives. Items shipped with insufficient packaging will void the item’s warranty, and may be rejected for service. Fantom Drives is not responsible for any damage to, or loss of, any programs, data, or other information stored on any media or any part of any Product serviced hereunder This limited warranty does not cover: (1) any consumables (such as batteries) supplied with this product;... -
Page 15: Product Warranty
Product Warranty Model Number Capacity Warranty VM8X10 1 Year Warranty without product VM8X20 registration. VM8X40 5-Year Warranty if product is registered VM8X80 within 90 days of purchase. To register the product, visit https://www.fantomdrives.com/register...

Need help?
Do you have a question about the Venom8 and is the answer not in the manual?
Questions and answers