Table of Contents
Advertisement
Quick Links
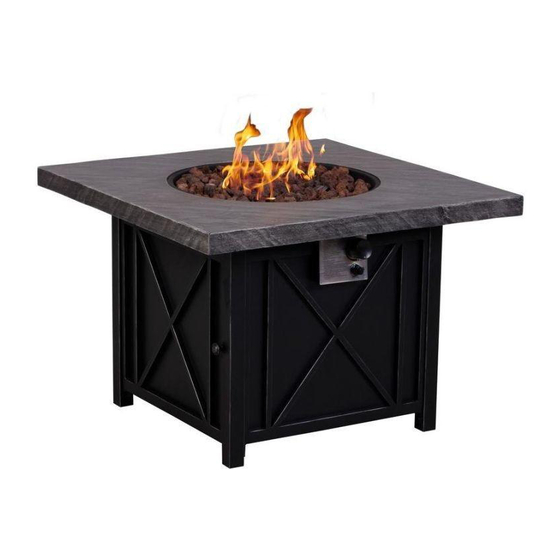
Cottage 34 in Square Gas Fire Pit
ITM./ART.#: 25XY92001
MODEL#: FW-CTGSQFP
ANSI Z21.97/CSA 2.41-2014
Outdoor Decorative Gas Appliances
Installer: Leave these instructions with consumer.
Consumer: Keep these instructions for further reference.
DANGER
If you smell gas:
Shut off gas to the appliance.
Extinguish any open flame.
If odor continues, keep away from the
appliance and immediately call your
gas supplier or fire department.
DANGER
WARNING:
Improper installation,
or maintenance can cause injury or property damage.
Read the installation, operating, and maintenance
instructions thoroughly before installing or servicing
this equipment.
R
CARBON MONOXIDE HAZARD
This appliance can produce carbon monoxide which has
no odor.
Using it in an enclosed space can kill you.
Never use this appliance in an enclosed space such as a
camper, tent, car or home.
adjustment, alteration, service
WARNING: For Outdoor Use Only.
WARNING
Do not store or use gasoline, or other
flammable vapors and liquids,in the
vicinity of this or any other appliance.
An LP-cylinder not connected for use
shall not be stored in the vicinity of
this or any other appliance.
Questions, Problems, Missing Parts?
Before returning to your retailer, email us at
tiramisubest1@outlook.com
01
Advertisement
Table of Contents

Subscribe to Our Youtube Channel
Related Manuals for Afterglow FW-CTGSQFP

Summary of Contents for Afterglow FW-CTGSQFP
- Page 1 Cottage 34 in Square Gas Fire Pit ITM./ART.#: 25XY92001 MODEL#: FW-CTGSQFP ANSI Z21.97/CSA 2.41-2014 Outdoor Decorative Gas Appliances Installer: Leave these instructions with consumer. WARNING: For Outdoor Use Only. Consumer: Keep these instructions for further reference. DANGER WARNING If you smell gas: Do not store or use gasoline, or other Shut off gas to the appliance.
- Page 2 DANGER FLAMMABLE GAS UNDER PRESSURE. LEAKING LP-GAS MAY CAUSE A FIRE OR EXPLOSION IF IGNITED CAUSING SERIOUS BODILY INJURY OR DEATH. CONTACT LP GAS SUPPLIER FOR REPAIRS, OR DISPOSAL OF THIS CYLINDER OR UNUSED LP-GAS. WARNING FOR OUTDOOR USE ONLY.* DO NOT USE OR STORE CYLINDER IN A BUILDING, GARAGE OR ENCLOSED AREA.
-
Page 3: Important Safety Information
IMPORTANT SAFETY INFORMATION The installation must conform with local codes or, in the absence of local codes, with the National Fuel Gas Code, ANSI Z223.1 NFPA 54; National Fuel Gas Code; Natural Gas and Propane Installation Code, CSA B149.1; ● or Propane Storage and Handling Code, CSA B149.2, as applicable. -
Page 4: Specifications
IMPORTANT SAFETY INFORMATION ABOUT PROPANE (LP) GAS The LP-gas supply cylinder to be used must be constructed and marked in accordance with the U.S. Deparment of Transportation (D.O.T.) Specifications for LP-Gas Cylinders, or the Standard for Cylinders, Spheres and Tubes for Transportation of Dangerous Goods and Commission, CAN/CSA-B339, as applicable. The LP-gas supply cylinder to be used must have a listed overfilling prevention device (See Figure 1). -
Page 5: Package Contents
PACKAGE CONTENTS PART DESCRIPTION QUANTITY PART DESCRIPTION QUANTITY Tabel top assembly Bottom beam Right panel Gas cylinder support Left panel Foot glider Door Weather cover Back panel Handle assembly Front-right leg Lava rock (13.2 lbs) 2 pkg Back-right leg Natural gas orifice Front-left leg Bolt (M6 x 15) Back-left leg... -
Page 6: Illustrated Parts List
ILLUSTRATED PARTS LIST Table top assembly Right panel Left panel Door Back panel Front-right leg Back-right leg Front-left leg Back-left leg Upper beam Bottom beam Gas cylinder support Foot glider Weather cover Handle assembly Lava rock Natural gas orifice Bolt (M6 x 15) Washer Hex screw driver... - Page 7 ASSEMBLY INSTRUCTIONS NOTE: Tool Required for Assembly: phillips screw driver ( NOT included) 1. Carefully unpack all parts from the box, compare parts with package content listed above, make sure all parts are present before beginning assembly of product. If any part is missing or damaged, do not attempt to assemble the product.
- Page 8 Hardware Used: AA Bolt (M6 x 15) BB Washer (M6) CC Hex screw driver Figure 4 5. Attach the Gas Cylinder Support (L) to the Right Panel (B) and the Left Panel (C) with Bolt (AA) and Washer (BB) using the Hex Screw Driver (CC), (see Figure 5). NOTE: DO NOT tighten the screws completely.
- Page 9 7. Un-screw the Handle Assembly (O), attach the Handle to the Door (D) using the phillips screw driver, then screw it tightly (see Figure 7). NOTE: DO NOT tighten the screws completely. Figure 7 8. Attach the assembled base to the Table Top Assembly (A) with Bolt (AA) and Washer (BB) using the Hex Screw Driver (CC).
- Page 10 10. Open the door, place the gas cylinder into the Gas Cylinder Support (L), connect the regulator, screw the black handle clockwise to tighten, turn the black handle counterclockwise to remove. The hose must point down. The knob on the control panel is turned all the way to the “OFF” position when the fire pit is NOT in use(see Figure 10).
-
Page 11: Natural Gas Conversion
STOP STOP NATURAL GAS CONVERSION Natural gas conversion must be performed only by natural gas provider or service company. Disconnect the propane hose from the gas valve (see Figure 12). gas valve propane hose Figure 12 Unscrew and disconnect the propane orifice from the bellows (see Figure 13). Propane orifice (2.21 mm diameter size) is painted with red mark. -
Page 12: Gas Valve
Figure 15 Figure 16 FW-CTGSQFP Stick and cover the conversion label onto the propane rating plate (see Figure 17). Serial Number: Model Number: FW-CTGSQFP CAUTION: This appliance has been converted to use natural gas. - Page 13 BATTERY Make sure the control knob is in the “OFF” position. Unscrew the push button cap on the ignitor module located on the control panel to access the battery compartment. The ignitor module requires one AAA size battery (See Figure 18), BATTERY IS NOT INCLUDED. WARNING: 1.
-
Page 14: Lighting Instructions
gas valve-hose connection (Figure 21) inlet tube-bellows connection (Figure 22) To perform a leak test: Make 2~3 oz. of leak solution by mixing one part liquid dishwashing detergent and three parts water. Noted: make sure control knob is “OFF”. Apply several drops of solution where the cylinder attaches to regulator (see Figure 19), inspect the solution at the connection looking for bubbles. -
Page 15: Care And Maintenance
Observe Flame Height When Lit: Flame should be a blue / yellow color between 1~2 in. height (see Figure 24). Good Yellow Yellow Light Blue Light Blue Blue Blue Figure 24 CARE AND MAINTENANCE To enjoy the outstanding performance from your fire pit, make sure you perform the following activities on a regular basis: 1. -
Page 16: Replacement Parts List
REPLACEMENT PARTS LIST PART# DESCRIPTION EFP-RDTTA Table top assembly EFP-RP Right panel EFP-LP Left panel EFP-DR Door EFP-BP Back panel EFP-FRLG Front-right leg EFP-BRLG Back-right leg EFP-FLLG Front-left leg EFP-BLLG Back-left leg EFP-UPBM Upper beam EFP-BTBM Bottom beam EFP-GCSPT Gas cylinder support EFP-FOOTGD Foot glider EFP-HDL...
Need help?
Do you have a question about the FW-CTGSQFP and is the answer not in the manual?
Questions and answers