Table of Contents

Summary of Contents for Interroll SH 1110
- Page 1 INSPIRED BY EFFICIENCY Installation and Operating Instructions Interroll Roller conveyor – straight SH 1110 Rated width 405 mm (S), 710 mm (M), 862 mm (L) Version 1.0 (06/2022) en Translation of original operating instructions...
- Page 2 All signs contained in this document (registered trademarks, such as logos and business designations) are the property of Interroll Trommelmotoren GmbH or third parties and may not be used, copied or distributed without prior written consent.
-
Page 3: Table Of Contents
Maintenance intervals..........................Interfaces to other devices ........................Operating modes............................. Normal mode ............................. Special mode............................Product identification ......................13 Roller conveyor - straight (SH 1110)....................Components............................Property ............................... Technical data ............................ Scope of supply............................Nameplate ..............................Transport and storage ......................17 Transport.............................. - Page 4 Interroll Roller Conveyor SH 1110 Table of contents Installation ..........................18 To be observed during installation ...................... Electrical installation ......................... Torque..............................Grounding............................Orientation............................Connection ............................Anchoring ............................Integration into complete system ....................Installing supports ............................ Integrating the module in a complete system...................
- Page 5 Interroll Roller Conveyor SH 1110 Table of contents Replacing the photo cell and reflector ....................Replacing the photo cell ........................Replacing the reflector........................Troubleshooting........................51 In case of a fault............................Troubleshooting ............................Spare and wear parts ......................53 Ordering information..........................
-
Page 6: Introduction
4 Keep the installation and operating instructions close to the module. 4 Pass the installation and operating instructions on to any subsequent operator or occupant. Interroll does not accept any liability for faults or defects due to non-observance of these installation and operating instructions. -
Page 7: Warning Notices In This Document
Interroll Roller Conveyor SH 1110 Introduction Warning notices in this document The warning notices refer to risks which may arise while using the module. They are available in four danger levels identified by the signal word: Signal word Meaning DANGER Identifies a danger with high risk that will result in death or serious injury if it is not avoided. -
Page 8: Safety
Interroll Roller Conveyor SH 1110 Safety State of the art The module has been built to comply with the state of the art. Nevertheless, users may encounter hazards during its use. Disregarding the notices in these installation and operating instructions may lead to life- threatening injuries! 4 Carefully read the installation and operating instructions and follow their content. -
Page 9: Unintended Use
Unintended use Any use beyond the intended use is considered inappropriate or, if required, must be authorized by Interroll Trommelmotoren GmbH. Setup and operation in explosive atmospheres is prohibited. The use in a medical-pharmaceutical area requires the approval from Interroll. -
Page 10: Personal Protective Equipment
Interroll Roller Conveyor SH 1110 Safety Personal protective equipment 4 For all work, such as assembly, maintenance and cleaning tasks, wear personal protective equipment that is suitable and appropriate for the hazard situation. Close-fitting work clothing Protective gloves Safety shoes... -
Page 11: Dangers
Interroll Roller Conveyor SH 1110 Safety Dangers The following list informs you about the various types of danger or damage that may occur while working with the module. 4 Perform any maintenance and repair work on the module only when it is powered down and Safety devices ensure that it cannot be started accidentally. -
Page 12: Interfaces To Other Devices
Interroll Roller Conveyor SH 1110 Safety Interfaces to other devices Hazard locations may occur while integrating the module into a complete system. These are not part of this manual and have to be analyzed during the installation and startup of the complete system. -
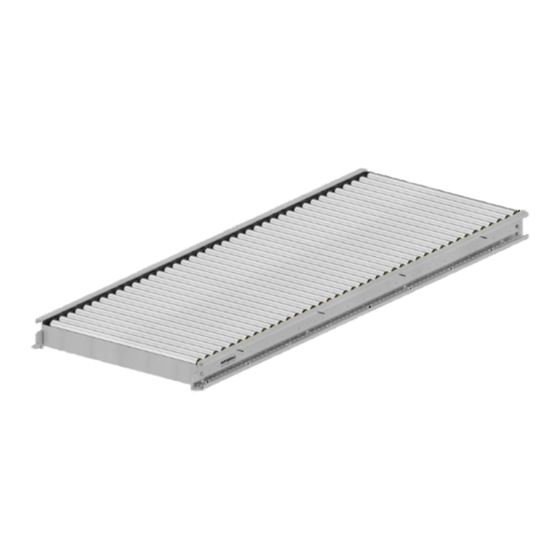
Page 13: Product Identification
The module's rollers are driven by several PolyVee belts running from roller to roller. The drive is provided by an Interroll RollerDrive EC5000. Using the Interroll RollerDrive allows for a compact design. Since the drive is located within the side profiles, the individual modules can be installed very close to each other. Together with MultiControl, it is very easy to implement a zero-pressure accumulation conveyor. -
Page 14: Technical Data
Interroll Roller Conveyor SH 1110 Product identification Technical data SH 1110 Rated width (BF) 405 mm (S) 710 mm (M) Conveying width (CW) 862 mm (L) Dimensions of conveying good Max.: 700 x 800 mm Max. load capacity per zone... -
Page 15: Scope Of Supply
Interroll Roller Conveyor SH 1110 Product identification Scope of supply The module is delivered completely assembled. The scope of delivery includes: • Rack, including side frames, bracing • Drive (RollerDrive) • Rollers (drive rollers, carrying idlers) • Finger guards • End plates Optional: •... -
Page 16: Nameplate
Interroll Roller Conveyor SH 1110 Product identification Nameplate Interroll Trommelmotoren GmbH Center of Excellence Hygienic Solutions TypePlate Opelstraße 3 41836 Hueckelhoven/Baal (Germany) www.interroll.com Conveyor Type Sales Order No. / Pos. Serial Number Level Build Year Layout Position .No. Weight [kg]... -
Page 17: Transport And Storage
Interroll Roller Conveyor SH 1110 Transport and storage Transport WARNING Risk of injury during transport 4 Fasten the module securely and slip-proof for transport. 4 Ensure that the lifting device (e.g. fork lift) is rated for the weight of the module. -
Page 18: Installation
Interroll Roller Conveyor SH 1110 Installation WARNING Risk of injury due to improper assembly 4 Mechanical assembly tasks should be performed only by service personnel. Observe the safety information. 4 Electrical assembly tasks should be performed only by authorized electricians. Observe the safety information. -
Page 19: Torque
Interroll Roller Conveyor SH 1110 Installation The module is provided with voltage either via CEE plug or direct installation in the control cabinet. 4 Check cables and components for damage before installation. 4 The connection values of the module are listed on the nameplate of the RollerDrive EC5000. -
Page 20: Installing Supports
Interroll Roller Conveyor SH 1110 Installation Installing supports Support with two height-adjustable feet Nuts Torx screws Washers Height-adjustable foot CAUTION Risk of injury when lifting heavy loads 4 During the installation and replacement of conveyor modules or heavy spare parts, always work in pairs or use suitable lifting devices. -
Page 21: Integrating The Module In A Complete System
Interroll Roller Conveyor SH 1110 Installation Integrating the module in a complete system CAUTION Risk of crushing and injuries from cuts 4 When integrating the module into a complete system, consider possible danger spots, particularly infeed locations and interfaces. The module is delivered pre-assembled, but integration into a complete system may still require individual installation tasks: •... -
Page 22: Installing The Universal Support
Interroll Roller Conveyor SH 1110 Installation Installing the universal support The universal supports are delivered pre-assembled, with Z or U mounting brackets depending on the selection. The universal supports are turned towards the conveyor center for transport and still must be positioned before startup depending on their use (for the installation of adjustable side guide, photo cell or reflector). - Page 23 Interroll Roller Conveyor SH 1110 Installation The universal support (7) is installed at the top on the profile of the side frame (1). Requirement: The module is shut down. 4 Loosen screw (6) in the universal support, but do not remove it.
-
Page 24: Installing The Side Guide
Interroll Roller Conveyor SH 1110 Installation Installing the side guide Universal support with U-bracket Torx screw Side guide Universal support with Z-bracket (Bottom part) Side guide bracket WARNING Risk of injury from crushing and electrocution Installation and maintenance tasks on a conveyor system while it is in operation can cause crushing and electric shock. -
Page 25: Installing The Photo Cell And Reflector
Interroll Roller Conveyor SH 1110 Installation Installing the photo cell and reflector The photo cell and reflector are each delivered as a complete unit: • The photo cell is in the photo cell housing. • The reflective tape is affixed to the reflector. -
Page 26: Installing The Photo Cell
Interroll Roller Conveyor SH 1110 Installation Installing the photo cell Installing the photo cell Photo cell Universal support Sensor holder Clamping plate Torx screw Side frame Mounting bracket (Z-bracket) Requirement: The module is shut down. 4 Loosen screw (3) in the universal support (5), but do not remove it. -
Page 27: Installing The Reflector
Interroll Roller Conveyor SH 1110 Installation Installing the reflector Installing the reflector Mounting bracket (U-bracket) Clamping plate Sensor holder Torx screw Reflector Universal support Side frame 4 Install the reflector (3) opposite the photo cell. 4 Loosen screw (6) in the universal support (7), but do not remove it. -
Page 28: Connecting The Modules
Interroll Roller Conveyor SH 1110 Installation Connecting the modules CAUTION Risk of crushing and injuries from cuts 4 When integrating the module into a complete system, consider possible danger spots, particularly infeed locations and interfaces. The profile connectors are also used for grounding between modules. -
Page 29: Straight Roller Conveyor - Straight Roller Conveyor
Interroll Roller Conveyor SH 1110 Installation Straight roller conveyor - straight roller conveyor Washer Washer (small) Module connector RC Torx screw Roller conveyor Roller conveyor This connection does not allow incline or decline. 4 If available, disassemble end plate at both modules (4, 7), see "Removing/installing the end plate", page 43. -
Page 30: Straight Roller Conveyor - Roller Curve
Interroll Roller Conveyor SH 1110 Installation Straight roller conveyor - The modules can be connected with each other in different ways: roller curve • Horizontal • Up to max. 4° ascending • Up to max. 4° descending Roller conveyor Roller curve... -
Page 31: Straight Roller Conveyor - Straight Module Belt Conveyor (80)
Interroll Roller Conveyor SH 1110 Installation Straight roller conveyor - The modules can be connected with each other in different ways: straight module belt • Horizontal conveyor (80) • Up to max. 4° ascending • Up to max. 4° descending... -
Page 32: Straight Module Belt Conveyor (50) - Straight Roller Conveyor
Interroll Roller Conveyor SH 1110 Installation Straight module belt The modules can be connected with each other in different ways: conveyor (50) - straight • Horizontal roller conveyor • Up to max. 4° ascending • Up to max. 4° descending... -
Page 33: Straight Roller Conveyor - Lateral Diverter
Interroll Roller Conveyor SH 1110 Installation Straight roller conveyor - lateral diverter Diverter Torx screw (M8x20) Washer Roller conveyor Torx screw (M8x16) Module connector Roller conveyor contact guard This connection does not allow incline or decline. 4 Position the modules to be connected (1, 6) in such a way that the side profiles are aligned. -
Page 34: Straight Roller Conveyor - Front Diverter
Interroll Roller Conveyor SH 1110 Installation Straight roller conveyor - front diverter Diverter Torx screw Roller conveyor contact guard Roller conveyor This connection does not allow incline or decline. 4 Position the modules to be connected (1, 4) in such a way that the side profiles are aligned. -
Page 35: Initial Startup And Operation
Interroll Roller Conveyor SH 1110 Initial startup and operation Initial startup WARNING Risk of injuries due to incorrect handling 4 Check electrical connections and protective devices. 4 Remove the materials from the module. 4 Remove unauthorized persons from the danger zone. -
Page 36: Operation
Interroll Roller Conveyor SH 1110 Initial startup and operation Operation 4 Check the module for visible damage. Before every operation start 4 Ensure that all safety devices operate flawlessly. 4 Ensure that only authorized persons are in the operating area of the module. -
Page 37: Cleaning
Interroll Roller Conveyor SH 1110 Cleaning CAUTION Risk of injury due to improper handling or accidental motor starts 4 Maintenance work and cleaning must only be performed by qualified and authorized persons. 4 Perform maintenance work only after switching off the power. Ensure that the conveyor cannot be switched on accidentally. -
Page 38: Preparation For Cleaning By Hand
Interroll Roller Conveyor SH 1110 Cleaning Preparation for cleaning by hand 4 Switch off the power supply to the conveyor. 4 Switch off the main switch to de-energize all the drives. 4 Open terminal box or distribution box and disconnect cables if there is no switch. Ensure that live components or cables are electrically insulated to prevent electrocution. - Page 39 Cleaning 4 Spray off with water (8 bar, 35 °C). 4 After cleaning, check surfaces, grooves and other recesses for residues. 4 Wipe the floor dry. 4 Observe the corresponding certificates at www.interroll.com. Version 1.0 (06/2022) en Translation of original operating instructions...
-
Page 40: Resistance
Interroll Roller Conveyor SH 1110 Cleaning Resistance The conveyor platform consists of various parts. Some parts are more resistant to cleaning agents than others. The rollers can be cleaned, e.g., with certain cleaning agents. Chemical resistance of the plastic modular belts Polyoxymethylene (POM), polypropylene (PP) and polyamide (PA): •... -
Page 41: Maintenance And Repair
Interroll Roller Conveyor SH 1110 Maintenance and repair Observe the following for maintenance and repair DANGER Danger to life from electrical voltage! 4 Switch off the power supply system, ensure that it cannot be switched on accidentally and check that there is no voltage. -
Page 42: Maintenance Intervals
Interroll Roller Conveyor SH 1110 Maintenance and repair Maintenance intervals If maintenance is not performed according to schedule, it may lead to damages and failures. If maintenance intervals are not followed, the warranty will be void. All bearings of the module feature a life-time lubrication and are maintenance-free within the operating parameters. -
Page 43: Preparatory And Follow-Up Maintenance Work
Interroll Roller Conveyor SH 1110 Maintenance and repair Preparatory and follow-up maintenance work WARNING Risk of injury from crushing and electrocution Installation and maintenance tasks on a conveyor system while it is in operation can cause crushing and electric shock. -
Page 44: Replacing The Roller
Interroll Roller Conveyor SH 1110 Maintenance and repair Replacing the roller Taper screw Roller Replacing the roller is only necessary if the PolyVee heads show signs of wear or the roller is damaged. WARNING Risk of injury from crushing and electrocution Installation and maintenance tasks on a conveyor system while it is in operation can cause crushing and electric shock. -
Page 45: Replacing The Conveyor Bracing
Interroll Roller Conveyor SH 1110 Maintenance and repair 4 Place a new roller in the open elongated hole. Pull the drive belt onto the roller in the process and observe the centering of the roller: Screw roller in the side frame with taper screws on the right and left. -
Page 46: Replacing The Rollerdrive
Interroll Roller Conveyor SH 1110 Maintenance and repair Replacing the RollerDrive Taper screw Drive roller (RollerDrive) Replacing the RollerDrive is required only if the roller is damaged, or the drive is defective. WARNING Risk of injury from crushing and electrocution Installation and maintenance tasks on a conveyor system while it is in operation can cause crushing and electric shock. -
Page 47: Replacing Multicontrol
Interroll Roller Conveyor SH 1110 Maintenance and repair Replacing MultiControl Disassembling MultiControl MultiControl Requirement: The module is shut down. 4 Detach cable from the MultiControl. 4 Loosen screws with which the MultiControl (1) is attached to the side frame and pull off MultiControl. -
Page 48: Replacing The Finger Guard And Polyvee Belt
Interroll Roller Conveyor SH 1110 Maintenance and repair Replacing the finger guard and PolyVee belt Drive belt (PolyVee) Top part of finger guard Torx screw Bottom part of finger guard The finger guard protects against injuries as well as damage to the belt. -
Page 49: Replacing The Photo Cell And Reflector
Interroll Roller Conveyor SH 1110 Maintenance and repair Fasten screws with a tightening torque of 3.5 Nm. 4 Then place the top part (3) on the belt side between the rollers in the centering hole on the bottom part (4) and fasten it with the screw (2) from the outside at the C-profile of the side frame. -
Page 50: Replacing The Reflector
Interroll Roller Conveyor SH 1110 Maintenance and repair 4 Insert the new photo cell in the housing at the same location. The studs of the housing (2) are guided through the holes in the sensor holder (3) and secured with the fastening clip (4) from the opposite side. -
Page 51: Troubleshooting
Interroll Roller Conveyor SH 1110 Troubleshooting In case of a fault DANGER Danger to life from electrocution 4 Only perform maintenance and repair work after you have switched off power. 4 Faults on electrical equipment may be rectified only by a trained electrician! 4 Immediately power down the module and ensure that it cannot be started accidentally. - Page 52 Interroll Roller Conveyor SH 1110 Troubleshooting Fault Cause Remedy Motor circuit breaker is Short circuit Check electrical connections and triggered due to excessive replace defective parts current consumption Transport weight too high Observe maximum weight Noise development/ Roller bearing defective...
-
Page 53: Spare And Wear Parts
Interroll offers training sessions about required maintenance and repair tasks upon request. The spare parts for the connector sets can be ordered from Interroll upon request. The different connector sets are matched to all available conveyor modules and include static connectors as well as safety-relevant protective devices. -
Page 54: Spare Part Designation
Interroll Roller Conveyor SH 1110 Spare and wear parts Spare part designation 14 13 Roller Conveyor SH 1110 Version 1.0 (06/2022) en Translation of original operating instructions... -
Page 55: Spare Parts List
Interroll Roller Conveyor SH 1110 Spare and wear parts Spare parts list S = spare part, W = wear part, T = tool Type: 1110 (S, M, L) Item Designation Material number S/W/T No.: PolyVee drive belt 1001108 (Pitch distance 60 mm) Photo cell incl. -
Page 56: Decommissioning And Disposal
Interroll Roller Conveyor SH 1110 Decommissioning and disposal 4 When disposing the motor oil, observe the disposal documents of the motor manufacturer. 4 The packaging must be recycled to provide environmental relief. Environmental protection regulations For all work on and with the module, the legal regulations concerning waste avoidance and proper disposal and recycling must be followed. -
Page 57: Declaration Of Incorporation
EC Machinery Directive: • Interroll roller conveyor - straight SH 1110 The incomplete machine may only be started up if it has been determined that the complete machine/system into which the incomplete machine is to be installed meets the requirements of this directive. - Page 58 Interroll Roller Conveyor SH 1110 Declaration of incorporation Hueckelhoven/Baal, dated 16 May 2022 Dr. Hauke Tiedemann Managing Director Version 1.0 (06/2022) en Translation of original operating instructions...
-
Page 59: Declaration Of Incorporation
Interroll Roller Conveyor SH 1110 Declaration of incorporation UK Supply of Machinery (Safety) Regulations 2008 The manufacturer Interroll Trommelmotoren GmbH Opelstr. 3 D - 41836 Hueckelhoven/Baal Germany represented in the UK by Interroll Limited Unit 1a, Orion Way Kettering, Northants... - Page 60 Authorised for compiling technical documentation: Interroll Trommelmotoren GmbH, Opelstr. 3, Germany - 41836 Hueckelhoven Hueckelhoven, 16th May 2022 Dr. Hauke Tiedemann (Managing Director) Version 1.0 (06/2022) en...
-
Page 61: Appendix
Restrictions Interroll and its dealers do not assume any liability for shutdowns or damage to the product that is due to the following causes: • Non-observance of the installation or maintenance notes from Interroll •... - Page 62 Interroll Roller Conveyor SH 1110 Version 1.0 (06/2022) en Translation of original operating instructions...
- Page 63 Interroll Roller Conveyor SH 1110 Version 1.0 (06/2022) en Translation of original operating instructions...
- Page 64 © copyright For your local contacts please visit Version 1.0 (06/2022) en interroll.com/contact Translation of original operating instructions...
Need help?
Do you have a question about the SH 1110 and is the answer not in the manual?
Questions and answers