Table of Contents
Advertisement
Quick Links
Advertisement
Table of Contents

Related Manuals for SP Scientific VIRTIS 2K


Summary of Contents for SP Scientific VIRTIS 2K
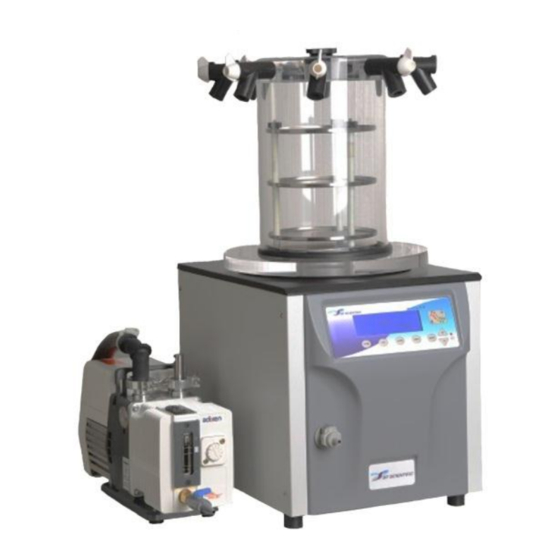
- Page 1 FREEZE DRYER OPERATOR’S MANUAL VIRTIS BENCHTOP 2K, 4K AND 6K FREEZE DRYERS...
- Page 3 The information in this document is subject to change without prior notice. Always confirm with SP Scientific that you are using the most current version of this document. SP Scientific is free to modify any of its products and services, in any manner and at any time, notwithstanding the information contained in this document.
-
Page 4: Important Symbols
Never use acrylic closures if they are cracked or crazed. Never use with toxic, corrosive, flammable or organic materials unless special precautions are in place to prevent injury to personnel or damage to equipment. Rev 007, 10/11 © SP Scientific 2011... -
Page 5: Warranty Information (Virtis Lyophilizers)
Warranty Information (VirTis Lyophilizers) VirTis BenchTop 2K, 4K and 6K Lyophilizers are warranted by SP Scientific to be free of defects in material and workmanship when operated under normal conditions as specified in the instructions provided in this manual. Please take this opportunity to locate the serial tag on your new VirTis BenchTop 2K, 4K and 6K and record the information below for future reference. - Page 6 Rev 007, 10/11 © SP Scientific 2011...
-
Page 7: Table Of Contents
Main Menu ................................. 11 Vacuum Control ............................. 12 Purge ................................12 Bath ................................12 Heat (Optional) .............................. 12 User Options Menu ............................12 Vacuum Control ............................. 12 Rev 007, 10/11 © SP Scientific 2011... - Page 8 Quickseal Valves ............................36 Refrigeration System ............................36 The Air-Cooled Condenser ..........................36 Condenser Chamber ............................. 36 Acrylic Parts ............................... 37 Appendix A: Troubleshooting ..................39 Rev 007, 10/11 © SP Scientific 2011...
- Page 9 VirTis BenchTop 2K, 4K and 6K Contents Vacuum Problems .............................. 39 Product Melting ..............................40 Appendix B: Serum Vial Capacities ................41 Appendix C: Stainless Steel Cleaners ............... 43 Rev 007, 10/11 © SP Scientific 2011...
- Page 10 Contents VirTis BenchTop 2K, 4K and 6K viii Rev 007, 10/11 © SP Scientific 2011...
-
Page 11: Introduction
¾-inch stainless steel port. For more information, refer to Chapter 6: Cold Trap Condenser. Note: A low temperature condenser is required when trying to trap organic solvents. Requires optional manifold. Rev 007, 10/11 © SP Scientific 2011... -
Page 12: Available Configurations
VirTis BenchTop 2K, 4K and 6K Available Configurations Shelf unit in Vertical manifold Freeze-drying in drum manifold the condenser Flask drying on Flask drying on drum Fitted for cold drum manifold manifold with stoppered trap application shelves Rev 007, 10/11 © SP Scientific 2011... -
Page 13: Installation And Startup
Note: SP Scientific will cooperate in the matter of collecting your claim, but is not responsible for the collection or free replacement of the material. When possible, replacement parts will be shipped and invoiced to you, making them a part of your claim. -
Page 14: Vacuum Pump Installation
A vacuum pump inlet port adapter and sufficient tubing are required for connection to the vacuum pump. If you need assistance, please contact SP Scientific. Position the vacuum pump in a convenient location near the freeze dryer. Ensure that the pump will be easily accessible during routine maintenance. -
Page 15: Oil Mist Eliminators
Oil Mist Eliminators To reduce fumes from the vacuum pump and/or vent the vacuum exhaust externally, SP Scientific recommends the installation of an Oil Mist Eliminator (OME). BenchTop Setup To set up your BenchTop unit: Note: Refer to Chapter 5: Basic Operation for complete equipment operation instructions. -
Page 16: Vacuum Baffle Plate
Lower the baffle plate handle to raise the baffle plate when freeze-drying products directly on the baffle. This allows ice to build up on the condenser below and provides more room for the materials to be dried. Rev 007, 10/11 © SP Scientific 2011... -
Page 17: Freeze-Drying Concepts
Adding vacuum assists in removing air and other non-condensable vapors from the chamber to facilitate vapor migration. The vacuum system creates a nearly pressure- free environment to allow the vapor from the frozen product to flow toward the cold condenser surface easily. Rev 007, 10/11 © SP Scientific 2011... -
Page 18: Heat
If the condenser is not cold enough, excess vapors may be pulled into the vacuum pump inadvertently. To compensate for this issue, SP Scientific offers optional filter and liquid nitrogen ) traps. -
Page 19: Sentry 2.0 Controls
LED Wave Display (Qualitative Reference) Condenser Temperature The LEDs on the bottom wave represent the following temperatures: Temperature (°C) Color Amber Amber Green ≤ -50 Green Rev 007, 10/11 © SP Scientific 2011... -
Page 20: Button Functions
DEFR Button The DEFR button activates the condenser defrost function. Hot gas defrost is directed toward the condenser walls to quickly loosen ice. Note: Defrost mode is disabled while any other function is on. Rev 007, 10/11 © SP Scientific 2011... -
Page 21: Lcd Display Functions
The ^ symbol, located in the upper left corner of the screen, returns you to the previous screen. The > symbol allows you to go to the next screen within a selected option. Rev 007, 10/11 © SP Scientific 2011... -
Page 22: Vacuum Control
Power Save Deadband should be set to 20 or more. Temperature Units The Temperature Units field displays the current setting for indicating temperature values. Temperature may be displayed in either Fahrenheit (°F) or Celsius (°C). Rev 007, 10/11 © SP Scientific 2011... -
Page 23: Vacuum Units
MENU button while Alarm Setpoint is highlighted. Once prompted, use the Up/Down (+/-) buttons to change this value. The Current Hours field can be reset at any time by pressing and holding the MENU button while Current Hours is highlighted. Rev 007, 10/11 © SP Scientific 2011... -
Page 24: Alarms Menu
The Power Save Deadband is the acceptable amount of pressure rise within the system before the vacuum pump is re-energized. This value is used when Vacuum Control is set to Power Save in the User Options screen. Rev 007, 10/11 © SP Scientific 2011... -
Page 25: Maintenance Menu And Factory Options
Note: The Heat option requires additional factory-installed components to function. If this option is purchased, the function will be enabled at the factory. If you are unsure whether you purchased the Heat option, contact SP Scientific. Rev 007, 10/11 © SP Scientific 2011... -
Page 26: Interstage Control
Set the simulator temperature to 25 °C. The current temperature is displayed on the Calibration screen. Adjust the numerical value of the Temperature Zero as appropriate and press MENU to enter the value. Rev 007, 10/11 © SP Scientific 2011... - Page 27 LCD screen up to increase the Vacuum reading. Adjust the Vacuum value down to decrease the Vacuum reading. Note: SP Scientific recommends the use of a Varian Vacuum Reference Tube for vacuum calibration. PRACTICAL OPERATING TIP. ENSURE THAT THE GROUND WIRE IS FIRMLY CONNECTED BEFORE CALIBRATING ANY VALUES.
- Page 28 Sentry 2.0 Controls VirTis BenchTop 2K, 4K and 6K Rev 007, 10/11 © SP Scientific 2011...
-
Page 29: Basic Operation
Wide Mouth Flasks are the most popular glassware type, but other types of flasks, vials and ampoules are available. If you are not certain how to use glassware accessories, contact SP Scientific. Dry ice methods can freeze a product to approximately -78 °C, while liquid nitrogen (N... -
Page 30: Product Preparation: Chamber Drying
General Maintenance section of this manual. Refer to Appendix B for a list of standard serum vial capacities. For precise positioning of probes in vials, contact SP Scientific about optional MVP Probe Holders. Rev 007, 10/11 © SP Scientific 2011... -
Page 31: Operation Instructions
For heated shelf and chamber drying, the process is complete when one or more of the following are true: The condenser approaches its maximum low temperature. Rev 007, 10/11 © SP Scientific 2011... -
Page 32: Meltback
Consider diluting the product with water. For products that dry readily, alternative heat sources such as a heat lamp may be used to expidite the freeze-drying process. Rev 007, 10/11 © SP Scientific 2011... -
Page 33: Preventing Glassware Breakage
The shelf heat control is disabled. Note: SP Scientific recommends performing a test run to ensure that you are familiar with the stoppering process before adding your product. The optional stoppering system includes a manual stoppering mechanism, and comes with either heated or unheated shelves. - Page 34 Basic Operation VirTis BenchTop 2K, 4K and 6K Rev 007, 10/11 © SP Scientific 2011...
-
Page 35: Cold Trap Condenser
Freezing and condensing points of solvents. Overall volume. Solvent properties, such as toxicity. Note: This process is completely product dependent, so each application will vary in terms of temperature requirements and process time. Rev 007, 10/11 © SP Scientific 2011... -
Page 36: Cold Trap Setup
Connect the vacuum pump to your BenchTop unit as described in Chapter 2: Installation and Setup. Rubber Elbow Connector Quick Release Drain Valve (Body & Coupling) Hose Clamp Vacuum Tubing PVC Tubing Hose Clamp Vacuum Pump Rev 007, 10/11 © SP Scientific 2011... -
Page 37: Optional Components
Stainless steel vertical manifolds with 4, 8, 12 or 24 ports. Stainless steel drum manifolds with 12 or 18 ports. Acrylic drum manifolds with 0, 8 or 12 ports. For more information about manifolds and current availability, contact SP Scientific. Rev 007, 10/11 © SP Scientific 2011... -
Page 38: Shelf Racks
Stoppering shelf rack with 1, 2, 3 shelves available with heated or non-heated shelves (for use with acrylic drum manifolds only). For more information about shelf racks and current availability, contact SP Scientific. Rev 007, 10/11 © SP Scientific 2011... -
Page 39: Liquid Nitrogen Trap
Open center well and slowly fill with liquid nitrogen (2.8 or 5 liters, depending on capacity). Open valves 1 and 2, and close valve 3 (see diagram). Enable the vacuum and wait until vacuum pressure reaches 100 mT. Rev 007, 10/11 © SP Scientific 2011... -
Page 40: Filter Trap
Depending on the usage and concentration, changing the charcoal cartridge every three to six months may suffice. WARNING! BE SURE TO PROPERLY HANDLE AND DISPOSE OF USED CARTRIDGES. Rev 007, 10/11 © SP Scientific 2011... -
Page 41: Benchtop Cold Plate
The optional BenchTop cold plate can be cooled to -40 °C within 30 minutes when fully insulated and covered. The cold plate will remain lower than -40 °C after the cover is removed. These specifications are based on SP Scientific test data from similar units operating with no load. - Page 42 Optional Components VirTis BenchTop 2K, 4K and 6K Rev 007, 10/11 © SP Scientific 2011...
-
Page 43: General Maintenance
Repeat steps 3 and 4 to complete the process. PROPERTY CAUTION! OIL MUST BE CHECKED AND CHANGED FREQUENTLY IF YOUR PRODUCT CONTAINS CORROSIVE MATERIALS OR ORGANIC SOLVENTS. IN ADDITION, A FILTER TRAP MAY BE INSTALLED TO PROTECT THE VACUUM PUMP. Rev 007, 10/11 © SP Scientific 2011... -
Page 44: Vacuum Tubing And Gaskets
Inspect the inside of the gasket. This is where you are most likely to find a potential problem. If you find the slightest inconsistency in the surface of the material (e.g., cuts, cracks, dry rot, rippling), replace the gasket as soon as possible. Rev 007, 10/11 © SP Scientific 2011... -
Page 45: Vacuum Pump Gas Ballast Valve
When the ballast is open, it allows a controlled amount of air into the second stage pump cylinder. This reduces the partial pressure, increases the pump’s operating temperature and releases the vapors. Note: Refer to the vacuum pump manual for the location of the gas ballast valve. Rev 007, 10/11 © SP Scientific 2011... -
Page 46: Quickseal Valves
Maintain the room temperature at approximately 20 °C. Higher temperatures may result in reduced performance and shortened compressor life. Clean the fins on the bottom of the unit. Dust buildup may cause the unit to malfunction. Keep these fins clean. Rev 007, 10/11 © SP Scientific 2011... -
Page 47: Condenser Chamber
R = Resistant (withstands long periods of exposure at temperatures up to 50 °C). LR = Limited Resistance (withstands short periods of exposure at room temperature). N = Not Resistant (immediate damage may occur upon exposure). PROPERTY CAUTION! DO NOT USE ORGANIC SOLVENTS OR ABRASIVE CLEANERS. Rev 007, 10/11 © SP Scientific 2011... - Page 48 General Maintenance VirTis BenchTop 2K, 4K and 6K Rev 007, 10/11 © SP Scientific 2011...
-
Page 49: Appendix A: Troubleshooting
If you do not get a normal vacuum reading on the front panel display or vacuum gauge within one (1) minute, start checking components individually. Rev 007, 10/11 © SP Scientific 2011... -
Page 50: Product Melting
Replace the vacuum probe and retest. Note: If this does not resolve your vacuum problem, contact SP Scientific for assistance. Product Melting The most common reason for product melting is poor vacuum. Adequate vacuum is required to keep products in a frozen state. -
Page 51: Appendix B: Serum Vial Capacities
Body OD (mm) Capacity (mL) 179077 179275 179101 179085 179143 179135 178855 178830 178897 178921 178954 178988 Add 8mm for partially inserted stopper. Thin Wall. Special Stoppering Ampoule (add 10mm for partially inserted stopper). Rev 007, 10/11 © SP Scientific 2011... - Page 52 Appendix B: Serum Vial Capacities VirTis BenchTop 2K, 4K and 6K Rev 007, 10/11 © SP Scientific 2011...
-
Page 53: Appendix C: Stainless Steel Cleaners
Appendix Appendix C: Stainless Steel Cleaners The following table lists possible problem situations and suggests corrective actions. For additional information, contact SP Scientific. Cleaning Required Cleaning Agent Application Method Effect on Finish Use in direction of polish lines May scratch No. 2 (mil) and Penny-Brite or Copper-Brite on No. - Page 54 Appendix C: Stainless Steel Cleaners VirTis BenchTop 2K, 4K and 6K Rev 007, 10/11 © SP Scientific 2011...
- Page 56 SP Scientific 815 State Route 208 Gardiner, NY 12525 USA 3538 Main Street Stone Ridge, NY 12484 USA www.SPScientific.com (800) 431-8232 (845) 255-5000...
Need help?
Do you have a question about the VIRTIS 2K and is the answer not in the manual?
Questions and answers