
Related Manuals for Sunwave Crossfire M2RU


Summary of Contents for Sunwave Crossfire M2RU
- Page 1 INSTALLATION MANUAL MID POWER 4T4R Digital Radios 37dBm per Band 5G NR Compliant Passive Cooling Outdoor Rated...
- Page 2 Sunwave. The information furnished herein is believed to be accurate and reliable. However, no responsibility is assumed by Sunwave for its use or any infringements of patents or other rights of third parties resulting from its use.
-
Page 3: Table Of Contents
Attach Sliding Rails and E2-O to Rack ........................... 25 Connect Power and Ground Cable to E2-O ........................26 Mount the E2-O on the Wall ............................. 27 Attach Handle to E2-O ..............................27 Contact us today: www.sunwave.com © Sunwave IM_CF_M2 v2.0.1 | 3 of 51 cf_support@sunwave.com... - Page 4 Dual Port SFP Transceiver ............................. 45 Optical Indicator ................................46 A2 Optical Port Description ............................47 E2-O Optical Port Description ............................47 RU Optical Port Description ............................49 Contact us today: www.sunwave.com © Sunwave IM_CF_M2 v2.0.1 | 4 of 51 cf_support@sunwave.com...
-
Page 5: Preface
15. This is NOT a CONSUMER device. It is designed for installation by an installer approved by an ISED licensee. You MUST have an ISED LICENCE or the express consent of an ISED licensee to operate this device. Contact us today: www.sunwave.com © Sunwave IM_CF_M2 v2.0.1 | 5 of 51 cf_support@sunwave.com... - Page 6 Cet équipement est conforme aux limites d'exposition aux radiations IC CNR-102 établies pour un environnement non contrôlé. Cet équipement doit être installé et utilisé avec une distance minimale de 100cm entre le radiateur et votre corps. Contact us today: www.sunwave.com © Sunwave IM_CF_M2 v2.0.1 | 6 of 51 cf_support@sunwave.com...
-
Page 7: Site Considerations
Maximum humidity (M2RU): 100% (Non-Condensing) Operating Temperature range (A2/E2-O): -10°C to +50°C Operating Temperature range (M2RU): -40°C to +55°C Storage Temperature range: -25°C to +70°C Contact us today: www.sunwave.com © Sunwave IM_CF_M2 v2.0.1 | 7 of 51 cf_support@sunwave.com... -
Page 8: Dc Power Connections
Connect “-” to a low potential (0VDC from a +48VDC power supply; -48VDC from a -48VDC power supply) Cable Core Cable Length Maximum Expandable Length 14AWG Contact us today: www.sunwave.com © Sunwave IM_CF_M2 v2.0.1 | 8 of 51 cf_support@sunwave.com... -
Page 9: Warning Marks
ALWAYS disconnect all lines and power connections before servicing or disassembling this equipment. NEVER touch the surface after the device's power on. For performance and safety reasons, NEVER disassemble and remodel the devices. Contact us today: www.sunwave.com © Sunwave IM_CF_M2 v2.0.1 | 9 of 51 cf_support@sunwave.com... -
Page 10: Unpacking And Inspecting
Verify that the contents and quantities agree with the Delivery Packing List. Check the device model against the Delivery Packing List. Notify SUNWAVE immediately if any discrepancies are discovered, to verify whether the complete and correct shipment has been received. -
Page 11: Inspecting The Device
You can mount the fan between the bottom of the device and any other. Maintain 2U clearance between the bottom of the device and any other. You must ensure the following mounting clearances for wall mounting: Contact us today: www.sunwave.com © Sunwave IM_CF_M2 v2.0.1 | 11 of 51 cf_support@sunwave.com... -
Page 12: Tools
Electric drill, cross head screwdriver, side cutters, ladder, and other tools are needed for M2RU installation which is not offered from Mavenir for now. Customers to provide these tools themselves. Drilling Machine Allen Wrench T5 Combination Nut M10 and M12 Spanner 17mm Contact us today: www.sunwave.com © Sunwave IM_CF_M2 v2.0.1 | 12 of 51 cf_support@sunwave.com... -
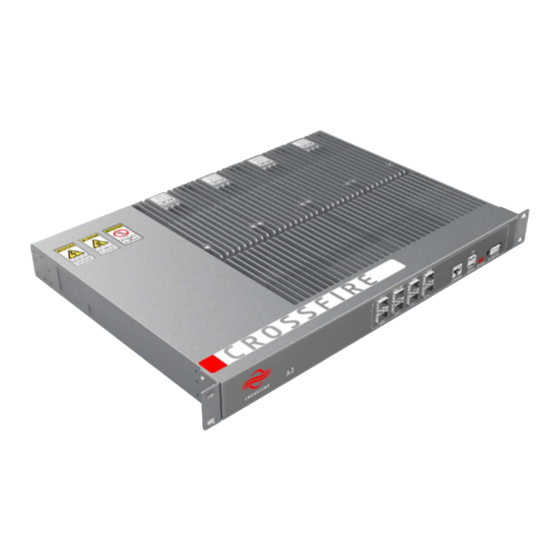
Page 13: Installing The Access Unit (A2)
MID POWER 4 x 37dBm Output 5G NR Compli Installing the Access Unit (A2) Accessories List Contact us today: www.sunwave.com © Sunwave IM_CF_M2 v2.0.1 | 13 of 51 cf_support@sunwave.com... -
Page 14: Rack Installation
Attach the 19" mounting brackets at the front of the A2, using 4 screws M3×6 per bracket and the Phillips screwdriver. Observe the orientation of the brackets. Recommended attaching the sliding rails to rack. (Not included in delivery). Contact us today: www.sunwave.com © Sunwave IM_CF_M2 v2.0.1 | 14 of 51 cf_support@sunwave.com... - Page 15 (44mm) of free space below each unit with fan occupied in the middle. Otherwise, the device temperature may rise and affect the service life of the device. Connect and lock the power cable at the A2 rear side. Contact us today: www.sunwave.com © Sunwave IM_CF_M2 v2.0.1 | 15 of 51 cf_support@sunwave.com...
- Page 16 MID POWER 4 x 37dBm Output 5G NR Compli Connect and screw the ground wire at the A2 rear side. Contact us today: www.sunwave.com © Sunwave IM_CF_M2 v2.0.1 | 16 of 51 cf_support@sunwave.com...
-
Page 17: Fan Installation
4 x 37dBm Output 5G NR Compli Fan Installation 1. Secure the Fan using 2 screws M6×16 on both sides and the Phillips screwdriver Plug AC power lead. Contact us today: www.sunwave.com © Sunwave IM_CF_M2 v2.0.1 | 17 of 51 cf_support@sunwave.com... - Page 18 Connect “-” to a low potential (0VDC from a +48VDC power supply; -48VDC from a -48VDC power supply) Warning: The fan has no reverse polarity protection. Reverse connection will cause power supply damage. Contact us today: www.sunwave.com © Sunwave IM_CF_M2 v2.0.1 | 18 of 51 cf_support@sunwave.com...
-
Page 19: Wall Installation
Rotate the handles 90°and attach them at the rear of the A2, using 4 screws M3×6 per bracket and the Phillips screwdriver. Observe the orientation of the brackets. Contact us today: www.sunwave.com © Sunwave IM_CF_M2 v2.0.1 | 19 of 51 cf_support@sunwave.com... - Page 20 Drill 4 holes at the marked sites using percussion drill and embed 4× ∅ 10 plastic expansion pipes. Note: H=70mm. Fasten the case with 4×M6 expansion bolt. Contact us today: www.sunwave.com © Sunwave IM_CF_M2 v2.0.1 | 20 of 51 cf_support@sunwave.com...
- Page 21 4 x 37dBm Output 5G NR Compli Connect and lock the power cable at the A2 rear side Connect and screw the ground wire at the A2 rear side Contact us today: www.sunwave.com © Sunwave IM_CF_M2 v2.0.1 | 21 of 51 cf_support@sunwave.com...
-
Page 22: A2 Mounting Dimension Spacing
MID POWER 4 x 37dBm Output 5G NR Compli A2 Mounting Dimension Spacing Contact us today: www.sunwave.com © Sunwave IM_CF_M2 v2.0.1 | 22 of 51 cf_support@sunwave.com... -
Page 23: Rf Connection
Installation of the E2-O Installing the E2-O is virtually the same as installing the A2. Please refer to the steps described in the A2 installation for the E2-O. Contact us today: www.sunwave.com © Sunwave IM_CF_M2 v2.0.1 | 23 of 51 cf_support@sunwave.com... -
Page 24: Mount The E2-O In The Rack
5G NR Compli Mount the E2-O in the Rack E2-O Accessories E2-O Accessories Note: the ground wire of E2-O is 12AWG and 2 meter in Accessories package. Contact us today: www.sunwave.com © Sunwave IM_CF_M2 v2.0.1 | 24 of 51 cf_support@sunwave.com... -
Page 25: Attach E2-O Handle
Place the E2-O in the rack Place E2-O in Rack Secure the E2-O using 2 screws M6×16 on both sides and the Phillips screwdriver. Fix E2-O with Screws Contact us today: www.sunwave.com © Sunwave IM_CF_M2 v2.0.1 | 25 of 51 cf_support@sunwave.com... -
Page 26: Connect Power And Ground Cable To E2-O
E2-O. Connect Power Cable at Rear Side Connect and screw the ground wire at the rear of the E2-O. Connect Ground Cable at Rear Side Contact us today: www.sunwave.com © Sunwave IM_CF_M2 v2.0.1 | 26 of 51 cf_support@sunwave.com... -
Page 27: Mount The E2-O On The Wall
Drill the mounting holes according to the chosen mounting accessories. Marking the Position of Mounting Holes Attach the dowels, expansion screws, or the similar and fasten the E2-O to the wall. Mounting Completed Contact us today: www.sunwave.com © Sunwave IM_CF_M2 v2.0.1 | 27 of 51 cf_support@sunwave.com... -
Page 28: Connect Power And Ground Cable To E2-O
Connect power cable at the rear of the unit Connect and screw the ground wire at the rear of the E2-O Connect ground cable at the rear of the unit Contact us today: www.sunwave.com © Sunwave IM_CF_M2 v2.0.1 | 28 of 51 cf_support@sunwave.com... -
Page 29: E2-O Mounting Dimension Spacing
MID POWER 4 x 37dBm Output 5G NR Compli E2-O Mounting Dimension Spacing Contact us today: www.sunwave.com © Sunwave IM_CF_M2 v2.0.1 | 29 of 51 cf_support@sunwave.com... -
Page 30: Installing The Mid Power Remote Unit (M2Ru)
MID POWER 4 x 37dBm Output 5G NR Compli Installing the Mid Power Remote Unit (M2RU) Accessories List Contact us today: www.sunwave.com © Sunwave IM_CF_M2 v2.0.1 | 30 of 51 cf_support@sunwave.com... -
Page 31: Wall Installation (Back On The Wall)
Attach and fasten the handle to the side of M2RU with screws M6×14 using T5 Wrench. Attach and fasten the Bracket I to the back of M2RU with screws M6×14 using T5 Wrench. Contact us today: www.sunwave.com © Sunwave IM_CF_M2 v2.0.1 | 31 of 51 cf_support@sunwave.com... - Page 32 4 x 37dBm Output 5G NR Compli Mark the position of the drilling holes in the mounting Bracket II. Note: R=13mm. Drill 4 holes at the marked positions. Note: H=70mm Contact us today: www.sunwave.com © Sunwave IM_CF_M2 v2.0.1 | 32 of 51 cf_support@sunwave.com...
- Page 33 Tips: use Bracket II as a reference to control each devices’ separation distance before hanging and locking M2RU up. Hang the M2RU on the mounting bracket II and fasten with nuts M10. Contact us today: www.sunwave.com © Sunwave IM_CF_M2 v2.0.1 | 33 of 51 cf_support@sunwave.com...
- Page 34 4 x 37dBm Output 5G NR Compli Fasten the Bracket I and II with screws M6×14. Connect and lock the power cable at the M2RU rear side Contact us today: www.sunwave.com © Sunwave IM_CF_M2 v2.0.1 | 34 of 51 cf_support@sunwave.com...
- Page 35 MID POWER 4 x 37dBm Output 5G NR Compli Connect and screw the ground cable at the M2RU’s left side Contact us today: www.sunwave.com © Sunwave IM_CF_M2 v2.0.1 | 35 of 51 cf_support@sunwave.com...
-
Page 36: Wall Installation (Side On The Wall)
5G NR Compli Wall Installation (Side on the Wall) Attach and fasten the handle to the side of M2RU with screws M6×14 using T5 Wrench. Figure 1. Contact us today: www.sunwave.com © Sunwave IM_CF_M2 v2.0.1 | 36 of 51 cf_support@sunwave.com... - Page 37 Attach and fasten the Bracket I to the left side of M2RU with screws M6×14 using T5 Wrench. Mark the position of the drilling holes in the mounting Bracket II. Note: R=13mm. Drill 4 holes at the marked positions. Note: H=70mm. Contact us today: www.sunwave.com © Sunwave IM_CF_M2 v2.0.1 | 37 of 51 cf_support@sunwave.com...
- Page 38 Attach the dowels, expansion screws or the like and fasten the Bracket II to the wall. Tips: use Bracket II as a reference to control each devices’ separation distance before hanging and locking M2RU up. Contact us today: www.sunwave.com © Sunwave IM_CF_M2 v2.0.1 | 38 of 51 cf_support@sunwave.com...
- Page 39 4 x 37dBm Output 5G NR Compli Hang the M2RU on the mounting bracket II and fasten with nuts M10. Fasten the Bracket I and II with screws M6×14. Contact us today: www.sunwave.com © Sunwave IM_CF_M2 v2.0.1 | 39 of 51 cf_support@sunwave.com...
-
Page 40: Pole Installation
Hang the M2RU on the mounting bracket and fasten with nuts M10. Connect the ground cable and power cable. Note: The diameter of Pole shall not be over 110mm or less than 55mm. Contact us today: www.sunwave.com © Sunwave IM_CF_M2 v2.0.1 | 40 of 51 cf_support@sunwave.com... -
Page 41: M2Ru-Psu48S Installation
Note: the M2RU-PSU48S is not included in M2RU package. It needs to be purchased separately. Installation Procedure Attach and fasten the Bracket to the right side of M2RU with screws M6×12 using T5 wrench. Contact us today: www.sunwave.com © Sunwave IM_CF_M2 v2.0.1 | 41 of 51 cf_support@sunwave.com... - Page 42 Fasten the to the Bracket II with screws M6x12 using T5 wrench. Connect and screw power cable to DC OUT port of M2RU-PSU48S and input port of M2RU. Contact us today: www.sunwave.com © Sunwave IM_CF_M2 v2.0.1 | 42 of 51 cf_support@sunwave.com...
- Page 43 MID POWER 4 x 37dBm Output 5G NR Compli Connect and screw power cable to AC PWR of M2RU-PSU48S. Installation is completed as the following figure. Contact us today: www.sunwave.com © Sunwave IM_CF_M2 v2.0.1 | 43 of 51 cf_support@sunwave.com...
-
Page 44: M2Ru Mounting Dimension Spacing
MID POWER 4 x 37dBm Output 5G NR Compli M2RU Mounting Dimension Spacing Contact us today: www.sunwave.com © Sunwave IM_CF_M2 v2.0.1 | 44 of 51 cf_support@sunwave.com... -
Page 45: Optical Connection
B. The optical receiver and transmitter terminals of the optical module can be determined by the triangular mark on the optical module. The triangular mark in the yellow box and the red and blue lines indicate the optical fibre connections. Contact us today: www.sunwave.com © Sunwave IM_CF_M2 v2.0.1 | 45 of 51 cf_support@sunwave.com... -
Page 46: Optical Indicator
Figure below. When the optical module is unplugged or not synchronized, the indicators are red, as shown in the left pair of indicators. Check whether both indicators turn green after connecting one pair of optical modules. If the indicators are red, the terminal has not synchronized. Contact us today: www.sunwave.com © Sunwave IM_CF_M2 v2.0.1 | 46 of 51 cf_support@sunwave.com... -
Page 47: A2 Optical Port Description
Obtain the required lengths of optical fibers for all the optical connections and connect the fibers on the front panel of the Expansion Unit. The interface type of SFP transceivers is an LC connector. Contact us today: www.sunwave.com © Sunwave IM_CF_M2 v2.0.1 | 47 of 51 cf_support@sunwave.com... - Page 48 Connection for RU OP14 Connection for RU Alarm Alarm IN Alarm Alarm OUT CONSOLE Connection for local PC through CAT-5 for local monitoring STATUS Indicates device operating status Contact us today: www.sunwave.com © Sunwave IM_CF_M2 v2.0.1 | 48 of 51 cf_support@sunwave.com...
-
Page 49: Ru Optical Port Description
MASTER OP Connection for RU at the next lower level Master Indicates Master OP port operating status Slave Indicates Slave OP port operating status Indicates device operating status Contact us today: www.sunwave.com © Sunwave IM_CF_M2 v2.0.1 | 49 of 51 cf_support@sunwave.com... - Page 50 Contact us today: www.sunwave.com © Sunwave IM_CF_M2 v2.0.1 | 50 of 51 cf_support@sunwave.com...
- Page 51 —Connect the equipment into an outlet on a circuit different from that to which the receiver is connected. —Consult the dealer or an experienced radio/TV technician for help. Contact us today: www.sunwave.com © Sunwave IM_CF_M2 v2.0.1 | 51 of 51 cf_support@sunwave.com...
Need help?
Do you have a question about the Crossfire M2RU and is the answer not in the manual?
Questions and answers