Advertisement
Available languages
Available languages
Quick Links
2018 Graco Children's Products Inc.
VEUILLEZ GARDER CES INSTRUCTIONS POUR L'USAGE ULTERIEUR
GUARDE LAS INSTRUCCIONES PARA FUTURAS REFERENCIAS.
!
ADULT ASSEMBLY REQUIRED/ASSEMBLAGE REQUIS PAS UN ADULTE/
EL ENSAMBLE REQUIERE DE UN ADULTO
DUE TO THE PRESENCE OF SMALL PARTS DURING ASSEMBLY, KEEP OUT OF REACH OF
DUE A LA PRESENCE DE PETITE PIECES DURANT L'ASSEMBLAGE, VEUILLEZ GARDER
HORS DE PORTER DES ENFANTS JUSQU'A CE QUE L'ASSEMBLAGE SOIT COMPLETER.
DEBIDO A QUE HAY PIEZAS PEQUEÑAS, MANTENGA FUERA DEL ALCANCE A LOS
NIÑOS DURANTE EL ENSAMBLE, HASTA QUE HAYA TERMINADO.
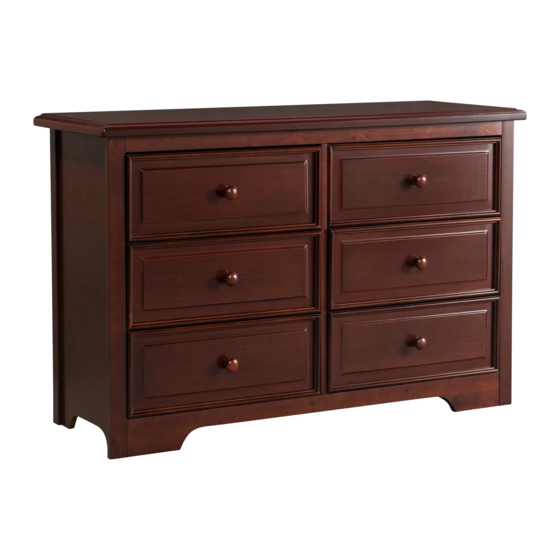
Brooklyn 6 Drawer Dresser
Brooklyn Chiffonnier A 6 Tiroirs
KEEP INSTRUCTIONS FOR FUTURE USE .
CHILDREN UNTIL ASSEMBLY IS COMPLETE.
Made in Malaysia / Fait au Malaysia / Hecho en Malaysia
Model / Modele No/ Número de modelo
TO ENSURE EASE OF ASSEMBLY
READ ALL INSTRUCTIONS BEFORE
ASSEMBLY AND FOLLOW STEP BY
STEP ILLUSTRATIONS
1
6 3
-CT
color code
Código de color
ID 7137A
Jan 2018
Advertisement

Related Manuals for Graco Brooklyn 03546-31 CT Series


Summary of Contents for Graco Brooklyn 03546-31 CT Series
- Page 1 Brooklyn 6 Drawer Dresser Brooklyn Chiffonnier A 6 Tiroirs 2018 Graco Children’s Products Inc. Model / Modele No/ Número de modelo color code Código de color TO ENSURE EASE OF ASSEMBLY READ ALL INSTRUCTIONS BEFORE ASSEMBLY AND FOLLOW STEP BY STEP ILLUSTRATIONS KEEP INSTRUCTIONS FOR FUTURE USE .
- Page 2 n on Customers living in the United States and Canada If you are missing parts, hardware, or if your product has been damaged during shipping, DO NOT RETURN YOUR PRODUCT The store does not stock parts and may not be able to help you. Contact Stork Cra directly and we will ship you the parts you need to your shipping address at no cost to you.We have three convenient ways for you to reach us: Visit us at...
-
Page 3: Notes On Assembly
WARNING: Serious or fatal crushing injuries can occur from furniture tip-over. To help prevent tip-over: . Install tipover restraint provided. . Place heaviest items in the lowest drawers. . Do not set TV's or other heavy objects on the top of this product, unless the product is specifically designed to accomodate them. - Page 4 MISE EN GARDE: Les lésions par écrasement graves ou mortelles peuvent survenir en raison d'un renversement de meubles. Pour aider à prévenir les : . Un renversement d'installation fourni. modération . Place des éléments dans la plus lourde des tiroirs plus bas. .Ne pas mettre la TV ou autres objets lourds sur le dessus de ce produit, à...
- Page 5 ADVERTENCIA: La posibilidad de sufrir lesiones graves o mortales pueden ocurrir desde muebles volcar. Para evitar vuelcos: . Instale el vuelco con moderación. . Colocar elementos más pesados en los cajones más bajos. .No configura el televisor u otros objetos pesados sobre la parte superior de este producto, a menos que el producto está...
- Page 6 ASSEMBLY INSTRUCTIONS/INSTRUCTION D’ASSEMBLAGE/ INSTRUCCIONES DE ENSAMBLAJE DRESSER PARTS/ PIECES DU CHIFFONNIER/ PIEZAS DE LA CAJONERA TOP / DESSUS / TAPA SUPERIOR x1 RIGHT SIDE / COTE DROIT / LATERALDERECHO X1 TOP RAIL / Traverse supérieur du devant / RIEL SUPERIOR x 2 CENTER PANEL / Panneau du centre x1 LEFT SIDE/ COTE GAUCHE/...
- Page 7 ASSEMBLY INSTRUCTIONS/INSTRUCTION D’ASSEMBLAGE/ INSTRUCCIONES DE ENSAMBLAJE HARDWARE/ Quincailleries/ HERRAJE 1 x 20 2 x 18 3 x 2 M8 x 30mm Wood Dowel M6 x 30mm Bolt M6 x 15mm Bolt M8 x 30mm de la cheville en bois M6 x 30mm Boulon M6 x 15mm Boulon M8 x 30mm la espiga de madera M6 x 30mm Tornillo...
- Page 8 ASSEMBLY INSTRUCTIONS/INSTRUCTION D’ASSEMBLAGE/ INSTRUCCIONES DE ENSAMBLAJE Required/Requis/Requerido...
- Page 9 ASSEMBLY INSTRUCTIONS/INSTRUCTION D’ASSEMBLAGE/ INSTRUCCIONES DE ENSAMBLAJE Required/Requis/Requerido...
- Page 10 ASSEMBLY INSTRUCTIONS/INSTRUCTION D’ASSEMBLAGE/ INSTRUCCIONES DE ENSAMBLAJE Required/Requis/Requerido...
- Page 11 ASSEMBLY INSTRUCTIONS/INSTRUCTION D’ASSEMBLAGE/ INSTRUCCIONES DE ENSAMBLAJE Required/Requis/Requerido...
- Page 12 ASSEMBLY INSTRUCTIONS/INSTRUCTION D’ASSEMBLAGE/ INSTRUCCIONES DE ENSAMBLAJE Required/Requis/Requerido Back side assemble.
- Page 13 ASSEMBLY INSTRUCTIONS/INSTRUCTION D’ASSEMBLAGE/ INSTRUCCIONES DE ENSAMBLAJE Required/Requis/Requerido Front side assemble. Required/Requis/Requerido...
- Page 14 ASSEMBLY INSTRUCTIONS/INSTRUCTION D’ASSEMBLAGE/ INSTRUCCIONES DE ENSAMBLAJE Required/Requis/Requerido Required/Requis/Requerido...
- Page 15 ASSEMBLY INSTRUCTIONS/INSTRUCTION D’ASSEMBLAGE/ INSTRUCCIONES DE ENSAMBLAJE Required/Requis/Requerido ASSEMBLE DRAWERS BY ALIGNING LEFT AND RIGHT ROLLERS WITH OPENING ABOVE LEFT AND RIGHT ROLLERS OF DRESSER Assemble le tiroir en alignant les roues droite et gauche avec l’ouverture au dessus des roues du chiffonnier INSTALE LOS CAJONES ALINEANDO LOS RIELES POR LA IZQUIERDA Y DERECHA...
- Page 16 ASSEMBLY INSTRUCTIONS/INSTRUCTION D’ASSEMBLAGE/ INSTRUCCIONES DE ENSAMBLAJE Required/Requis/Requerido...
- Page 17 WALL STUD SAFETY BRACKET INSTRUCTIONS Bracket Safety Strap 2" Wood Screw " Wood Screw Tipping can injure young children. Use of this safety hardware is highly recommended. This safety improper use..Frame below to top with the short the 2"screw provided: .
- Page 18 Montant du mur Crochet Sangle de sécurité Vis à bois 2’’ Vis à bois ’’ Étape 3 ..à l’aide de la vis a bois 2’’ inclus: ..Il est recommandé...
- Page 19 MONTAJE PARA PARED INSTRUCCIONES DEL SOPORTE DE SEGURIDAD Soporte Tornillo para madera Tornillo para Correa de seguridad de 2" madera de " IMPORTANTE: Una caída puede lesionar a los niños pequeños. Se recomienda el uso de esta herramienta de seguridad. Esta herramienta de seguridad, cuando se instala correctamente, puede proporcionar protección en los muebles contra una inesperada caída accidental de los muebles debido al uso incorrecto.
- Page 20 STORAGE AND CARE / ENTREPOSAGE ET ENTRETIENT / ALMACENAMIENTO Y CUIDADO DO NOT remove any part that is attached with wood screw. To disassemble, simply review the assembly instructions and reverse the order. Wipe all parts with a dampened cloth. Do not use abrasives. NE PAS démonter les pièces attaché...
Need help?
Do you have a question about the Brooklyn 03546-31 CT Series and is the answer not in the manual?
Questions and answers