Table of Contents

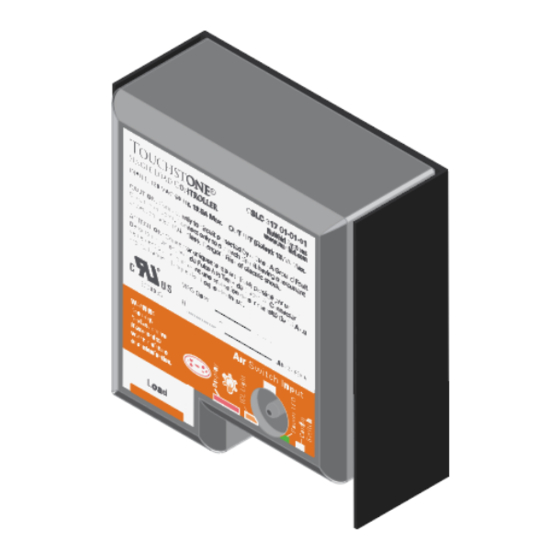
Summary of Contents for NuWhirl TOUCHSTONE CSLC-317-02-01-01
- Page 1 ® CSLC-317-02-01-01 Single Load Controller Multi-Speed Triac Load Installation & Operating Manual with Troubleshooting and Configuration Guide NuWhirl Systems Corp | www.nuwhirl.com | 951-817-5600 MANCSLC31702 REV A 9/27/2021 Page 1...
-
Page 2: Important Safety Instructions
Definitions WARNING May cause serious injuries or death May cause property damage CAUTION For information on NuWhirl Instructions, see: www.nuwhirl.com/doc/product-instructions.html When installing and using this electrical equipment, basic safety precautions should always be followed, including: WARNING Keep dry. Replace control if Do not use an extension cord to connect the exposed to water, moisture or contamination. - Page 3 ® Installation & Operating Instruction Manual Table of Contents Software Configuration….……………...………………...…………. P.4 Important Installation Notes & Mounting..……………...…………. P.6 CSLC-317-02-01-01: Multi-Speed Air Blower (Triac Model) Installation & Feature Operations……….………..….………….……… P.8 Operations.…………………...…...………………………...…….……… P.10 System Troubleshooting………….….…………………...…………. P.14 All Installation Procedures are for use by Tub Manufacturers or Qualified Service Personnel ONLY.
- Page 4 Control Configuration Selection and Setting Guide This only needs to be performed on a newly installed system or when the Controller is replaced. The TOUCHSTONE Single Load Controller box contains multiple software configurations to offer different sets of features on a bathtub. The control box must be placed in the proper configuration for the set of features on the bathtub in order to function properly.
- Page 5 ® Installation & Operating Instruction Manual Setting a Configuration Configuration Selection Button Locate the Configuration Selection Button, as shown above. It is to the right of the green Power Indicator light located on the lower-right corner of the Control box. This button can be used only for 20 seconds after the power is first applied to the control box.
- Page 6 Important Installation Notes & Mounting Installation Receptacle Location: A conventional, wall-mounted, vertically-oriented, GFCI-Protected 15 Amp or 20 Amp duplex receptacle under the skirt of the tub must be prepared, located in a sheltered area away from any possible contact with water (e.g. away from the tub deck, plumbing, and water pump).
- Page 7 ® Installation & Operating Instruction Manual Mounting Installation: Turn the power off at the breaker panel, and confirm that it is de- energized before installing. 1. Position the cover in place. 2. Plug the Controller into the lower receptacle, lining up the Screw with the Receptacle.
- Page 8 CSLC-317-02-01-01 Triac Model Installation Configurations 1 through 12 System Identification CSLC-317-02-01-01 Note For instructions on setting the Configuration Number, see Page 4. Controller Installation Diagram To 120V GFCI Protected Receptacle 15A or 20A Duplex CCBL-372 CCBL-366 x2 daisy chained or CCBL-376 “Y”...
-
Page 9: Operation
® Installation & Operating Instruction Manual Operation These operating instructions should be used in conjunction with other instructions and warnings provided with the whirlpool bathtub in order to fully understand and safely utilize the tub. System Features Air Buttons, Function Timers, Variable-Speed Pump or Variable-Speed Blower, Multi-Color LED Tub Lights Activation Air Switch Buttons which may be labeled... - Page 10 Triac Model Operating Instructions Note: The run timers for each component are independent of each other. At the end of the cycle, the component will automatically turn off. Configuration #1—Light Only The LED Multi-Color Tub Light is activated by pressing the “Light”...
- Page 11 ® Installation & Operating Instruction Manual Configuration #4—Dual Speed Blower & Light The Air System is activated by pressing the Power button on the Keypad. The Air System runs independently of the Tub Water Level. This will turn the Blower on at high speed and activate its 30-minute timer.
- Page 12 Triac Model Operating Instructions (continued) Note: The run timers for each component are independent of each other. At the end of the cycle, the component will automatically turn off. Configuration #6 (Continued) The LED Multi-Color Tub Light is activated by pressing the Light button. The first press will start its 30-minute timer, and activate the Tub Light in a “Rainbow”...
- Page 13 ® Installation & Operating Instruction Manual Configuration #10—Variable Speed Blower w/ Oscillation Option (No Light) The Air System is activated by pressing the “Air” Air Button. The Air System runs independently of the Tub Water Level. This will turn on the Blower at high speed and activate its 30-minute timer. Press again to turn off.
-
Page 14: System Troubleshooting
System Troubleshooting For the general troubleshooting issues related to TOUCHSTONE product, please refer to the TOUCHSTONE General Troubleshooting Guide. System Identification and Verification: The first step in troubleshooting is to verify that the hardware required for the system is complete and installed correctly. - Page 15 ® Installation & Operating Instruction Manual Load Verification (Pump, Blower, etc.): If a Load will not turn off: Unplug the Keypad. If the load is still on, there is a fault in the Control Box. Replace the Control Box. If a Load will not turn on: Referring to the Operating Instructions section, confirm that the Load is plugged into the correct Receptacle of the correct Control Box.
-
Page 16: Retain This Manual For Future Reference
Retain this manual for future reference For your records and future reference please fill in data below: Manufacturer: Model: Serial: Date of Installation: NuWhirl Systems Corp | www.nuwhirl.com | 951-817-5600 MANCSLC31702 REV A 9/27/2021 Page 16...


Need help?
Do you have a question about the TOUCHSTONE CSLC-317-02-01-01 and is the answer not in the manual?
Questions and answers