Table of Contents
Advertisement
Quick Links
Advertisement
Table of Contents
Troubleshooting

Subscribe to Our Youtube Channel
Related Manuals for Supreme Heating HEATSEEKER


Summary of Contents for Supreme Heating HEATSEEKER
- Page 1 INSTALLATION & USER MANUAL INSTALLATION & USER MANUAL...
- Page 2 Heating Australian Pools For Over 30 Years. jhowell@supremeheating.com.au...
-
Page 3: Table Of Contents
INSTALLATION & USER MANUAL GENERAL INFORMATION SOLAR PUMP OPERATION Introduction to Heatseeker solar pool BX Series solar pump operating instructions heating Starting the pump INSTALLATION AND CONNECTION Pump operation Safety Water quality Solar location Maintenance CONTROLLER OPERATION SOLAR PUMP TROUBLESHOOTING... -
Page 4: General Information
GENERAL INFORMATION INTRODUCTION TO HEATSEEKER SOLAR POOL HEATING Solar heating installed on a pool will give you a swimming season of 6 - 9 months depending on where you are situated in Australia. This is approximately double an unheated pool swimming season. The pool is heated by circulating water through the solar collector where it absorbs the suns energy. -
Page 5: Installation And Connection
Will the solar system fit on the roof? This has to be established from the ground or a ladder with OH & S Regulations preventing access to the roof without a harness or rail system. A quick measurement in most cases can be taken at ground level. Heatseeker Solar Pool Heating Installation & User Manual... -
Page 6: Controller Operation
CONTROLLER OPERATION Controlling your solar system may no longer be a daily chore. Supreme Heating has combined the latest technology, together with user friendly concepts in the development of our extensive range of automatic controllers. AQUAGEN 5 OPERATING INSTRUCTIONS The AquaGen 5 is a premium range of automatic solar controllers with temperature adjustment, heating, manual and standby mode features. -
Page 7: Mode Button
½°C below the temperature limit setting. Due to rounding the actual heat may vary by up to ±½°C. The ability to solar heat the pool will depend on weather conditions. The factory default for SOL. LIMIT is 30°C ATTENTION Heatseeker Solar Pool Heating Installation & User Manual... -
Page 8: Enter Button
For hours of solar operation (24hr Clock). First selecting the start time in hour intervals (6:00 – 12:00). Then the end time (12:00 – 21:00) HOURS Factory default for installer setup is run from 12:00-12:00 (24hrs). Heatseeker Solar Pool Heating Installation & User Manual... -
Page 9: Controller Troubleshooting
If the controller reports a short circuit while the cable is unplugged, then the controller requires repair. Heatseeker Solar Pool Heating Installation & User Manual... -
Page 10: Pump Faults
This can occur if the unit has been turned off for a prolonged period of time. Leave RTC-FAIL the unit on for 30 seconds and this will allow charging of the supercapacitor. Next, turn it off for 30 seconds before turning it back on. Heatseeker Solar Pool Heating Installation & User Manual... -
Page 11: Installer Setup
Switched to OFF and USE PIPE PROTECTION option will be offered. For use when Heatseeker UniPanels® cannot drain down and will require a wetted PIPE PROTECTION roof sensor for this mode. -
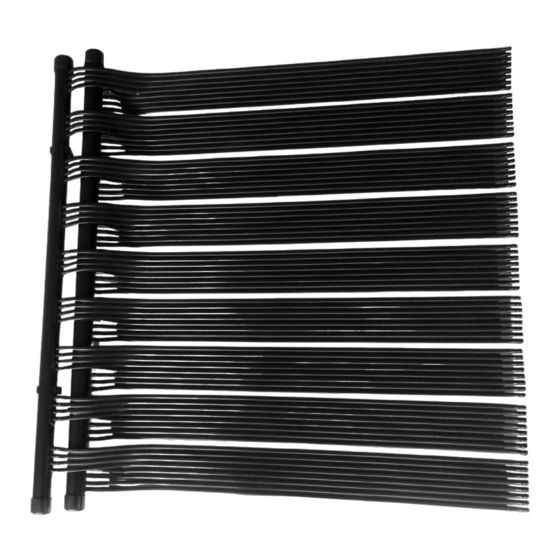
Page 12: Solar Pump Operation
SOLAR PUMP OPERATION At Supreme Heating we only use quality pumps for our solar installations. The pool plumbing configuration will determine what type of pump is used. Warning! Hazardous Suction Do not block water entry into filtration system with any part of your body as the pressure can trap hair or body parts, causing severe injury or death. -
Page 13: Starting The Pump
This should be carried out as described above. WATER QUALITY Maintaining balanced water chemistry is important to the life of your pump. Please consult your local pool shop regularly to have your water tested. Heatseeker Solar Pool Heating Installation & User Manual... -
Page 14: Maintenance
• Water leaking from seals – Check that O-rings on both union connections and pump lid are greased and are not pinched or damaged. PUMP LEAKING • Water leaking from pump body – Contact manufacturer for repair options. Heatseeker Solar Pool Heating Installation & User Manual... -
Page 15: Maintenance
Check for leaks Failure to abide by your maintenance schedule will void your warranty. ATTENTION Heatseeker Solar Pool Heating Installation & User Manual... -
Page 16: Vacuum Relief Valve
Vacuum relief valve maintenance Failure to correctly install a vacuum relief valve in your system or inspect and maintain its operation will void all warranties ATTENTION related to collectors, pipe work and fittings. Heatseeker Solar Pool Heating Installation & User Manual... -
Page 17: Solar Pump
8. Do not add pool salt, chlorine, acid or other chemicals directly to your skimmer. Do not add chemicals directly to skimmer This may result in damage to your pump and may void your warranty. ATTENTION Heatseeker Solar Pool Heating Installation & User Manual... -
Page 18: Repairing A Broken Barb
STEP 2: Drill out the hole using a 8.5 - 8.7mm drill bit. Be careful if the drill bit is new. STEP 3: Clean the hole to remove any excess materials. STEP 4: Place a grommet into the cleaned hole. Heatseeker Solar Pool Heating Installation & User Manual... - Page 19 STEP 7: Place a pressure sleeve over the strip. Apply a lubricant onto the barb and push the strip onto the barb. STEP 8: Push the pressure sleeve down over the strip to secure. Heatseeker Solar Pool Heating Installation & User Manual...
-
Page 20: Repairing A Hole In The Collector
STEP 2: Cut the webbing between the tubes on either side of the hole. STEP 3: Expose approximately 5cm of collector around the hole. STEP 4: Cut the collector on either side of the hole to remove it. Heatseeker Solar Pool Heating Installation & User Manual... - Page 21 STEP 6: Push a joining barb onto one of the sides. Using a lubricant will make this easier. STEP 7: Push the other side of the collector over the joining barb to connect the two sides. Heatseeker Solar Pool Heating Installation & User Manual...
-
Page 22: Warranty Agreement
Controller, a one (1) year limited warranty (b) negligent, careless or improper use or from Space Age Electronics Pty Ltd, PO Box handling; 4382, Homebush South, New South Wales, (c) non-adherence to operating, cleaning or 2140 Heatseeker Solar Pool Heating Installation & User Manual... - Page 23 Product; if the terms and conditions of this warranty are satisfied. Supreme Solar Pty Ltd will not be liable for any other loss or damage (including consequential or indirect damages). Heatseeker Solar Pool Heating Installation & User Manual...
- Page 24 NOTES Heatseeker Solar Pool Heating Installation & User Manual...
- Page 25 Heatseeker Solar Pool Heating Installation & User Manual...
- Page 26 Heatseeker Solar Pool Heating Installation & User Manual...
- Page 27 Heatseeker Solar Pool Heating Installation & User Manual...
- Page 28 1300 787 978 supremeheating.com.au...
Need help?
Do you have a question about the HEATSEEKER and is the answer not in the manual?
Questions and answers