Advertisement
Available languages
Available languages
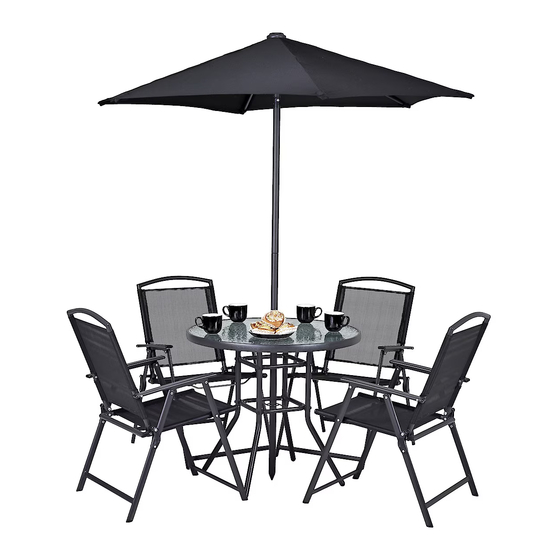
6-Piece Outdoor
Furniture Set
Art.no 31-5307
Please read the entire instruction manual before use and save
it for future reference. We reserve the right for any errors in text
or images and for making any necessary technical changes to
this document. If you should have any questions concerning
technical problems please contact our Customer Services.
Safety
• Read these instructions carefully before assembling
the product.
• Do not use a screwdriver or other sharp tool for assembly.
• Always place the table on a flat, level surface.
• Always use protective gloves when handling the tabletop.
• Do not sit or stand on the table.
• Never place hot objects on the tabletop.
• Never drag the table. Always have at least two people to lift
it when moving.
• Remove the parasol during windy weather.
• Always use the parasol stand when using the parasol.
Disposal
This product should be disposed of in accordance with local
regulations. If you are unsure how to proceed, contact your
local authority.
Specifications
Chairs
54 × 65 × 85 cm
Table diam
80 cm, height 70 cm
Parasol diam
180 cm, height 203 cm
GREAT BRITAIN • customer service tel: 08545 300 9799 e-mail: customerservice@clasohlson.co.uk internet: www.clasohlson.com/uk
Product description
1
2
4
5
7
8
10
11
1. Tabletop
2. Leg
3. Frame
4. Frame
5. Bolt cap
6. Nut
7. Washer
8. Plastic nut
9. Centre plug
10. 4 mm allen key
11. 13 mm fixed ring spanner
Table assembly
1. Place the tabletop (1) upside down on a level surface.
2. Insert the 4 legs (2) into the plastic leg sockets along
3
the inside of the tabletop rim.
3. Align the empty centre support frame's (4) bolt holes with
the legs' bolt holes and secure it with the washers (7),
nuts (6) and plastic nuts (8). Make sure that all parts
are securely fastened. Cover the bolt heads with
6
the bolt caps (5).
4. Repeat step 3 to mount the second centre frame with
centre wire (3).
5. After all pieces are correctly assembled and secured,
9
turn the table upright and insert the plastic centre plug (9).
Care and maintenance
• Clean using a lightly moistened cloth and a mild detergent.
Never clean the product using solvents or abrasive
cleaning agents.
• If you will not be using the furniture for a longer period,
store it in a dry sheltered area or cover it with a tarpaulin to
protect if from the elements.
Advertisement
Table of Contents

Related Manuals for Clas Ohlson 31-5307


Summary of Contents for Clas Ohlson 31-5307
- Page 1 Furniture Set 2. Insert the 4 legs (2) into the plastic leg sockets along the inside of the tabletop rim. Art.no 31-5307 3. Align the empty centre support frame’s (4) bolt holes with the legs’ bolt holes and secure it with the washers (7), Please read the entire instruction manual before use and save nuts (6) and plastic nuts (8).
- Page 2 Möbelset 6 delar Produktbeskrivning Montering av bord 1. Lägg bordsskivan (1) med undersidan uppåt på Art.nr 31-5307 ett plant underlag. 2. Passa in de 4 benen (2) i plasthållarna. Läs igenom hela bruksanvisningen före användning och spara 3. Montera den ena ramen (4) i mitten och sätt fast med den sedan för framtida bruk.
- Page 3 Møbelsett 6 deler Produktbeskrivelse Montering av bord 1. Legg bordplaten (1) på et flatt underlag og med undersiden Art. nr. 31-5307 vendt oppover. 2. Plasser de 4 beina i plastholderne. Les nøye igjennom hele bruksanvisningen og ta vare på den 3.
- Page 4 Kalustesarja, 6 osaa Tuotekuvaus Pöydän kokoaminen 1. Aseta pöytälevy (1) tasaiselle alustalle alapuoli ylöspäin. Tuotenumero 31-5307 2. Aseta pöydän neljä jalkaa (2) muovipidikkeisiin. 3. Aseta ensimmäinen kehys (4) pöydän keskelle ja kiinnitä Lue käyttöohjeet ennen tuotteen käyttöönottoa ja säilytä ne se aluslaatoilla (7), muttereilla (6) ja muovimuttereilla (8).
- Page 5 Möbelset 6 Teile Produktbeschreibung Montage des Tisches 1. Die Tischplatte (1) mit der Unterseite nach oben auf Art.Nr. 31-5307 eine ebene Fläche legen. 2. Die 4 Beine (2) in die Kunststoffhalterungen setzen. Vor Inbetriebnahme die komplette Bedienungsanleitung 3. Einen Rahmen (4) in der Mitte mit Unterlegscheiben (7), durchlesen und aufbewahren.
Need help?
Do you have a question about the 31-5307 and is the answer not in the manual?
Questions and answers