Advertisement
Quick Links
Advertisement

Summary of Contents for Inelco Grinders Truncator
- Page 2 IMPORTANT SAFETY INSTRUCTION On installation and operation of this machine, the safety instructions stipulated in this USER MANUAL must be read and complied with. This MANUAL must always be easily accessible to those who are responsible for the installation, operation and maintenance of the machine.
-
Page 3: Table Of Contents
AutoGrind module. Provided the truncator module is installed correctly, no changes are required with respect to the original CE marking or the use of the grinder with respect to safety. The module does not require a separate CE marking and neither does it need a separate EU Declaration of Conformity. -
Page 4: What Is Included
44520048 Locknut Tightening screw - see page 5 for part numbers 44510290 Inspection cover NX 44523015 Housing for stick-out adjustment 44523020 Bolt for stick-out 40110406 Screw M4x6 mm Inelco Grinders A/S, Industrivej 3, DK-9690 Fjerritslev, Denmark Web: www.inelco-grinders.com E-mail: info@inelco-grinders.com... -
Page 5: Installation
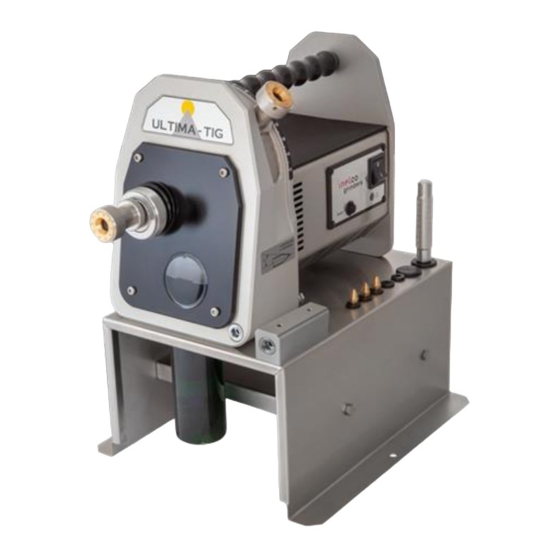
Installation Preparation of installation On reception of the Truncator, part nos. 7, 8, 9, 10, and 11 are found separately in the box. Prior to using the product, these parts must be installed on the Truncator frame (5): 1. Insert part no. 7 (O-ring) into the hole on the front plate such that it is flush against the flange, fig. 1 2. - Page 6 On older Ultima-TIG grinders (serial nos. below 2037-…) two new holes must be drilled to enable the Truncator to be fitted. See enclosed instructions. A set with drill bits and a threaded tap can be ordered by quoting part no. 75523030. Alternatively, a new grinding chamber with four holes (part no. 49520000) or a complete grinding chamber kit with four holes and a new angle setting (part no.
-
Page 7: Configuring The Truncator
Pull the electrode a little way out of the electrode holder such that at least 20 mm is sticking out of the clamp. Insert the electrode into the stick-out adjuster for the truncator and secure it in the electrode holder by rotating the electrode holder clockwise. - Page 8 Grind the electrode to a point once more and begin grinding to truncate the electrode again. Continue the above until the desired truncated diameter has been achieved and the Truncator is thereby configured.
-
Page 9: Adjustment Of Grinding Tracks On The Diamond Disc
The position on the grinding wheel is set on the eccentric guide (8). This has a locking ring (9) to lock the position. Inelco Grinders A/S, Industrivej 3, DK-9690 Fjerritslev, Denmark Web: www.inelco-grinders.com E-mail: info@inelco-grinders.com... -
Page 10: Use Of The Truncator
After a large number of grinding operations, the geometry of the tip can change, and it is recommended, that random checks of the diameter of the tip be made and the Truncator reconfigured as and when needed. -
Page 11: Replacing The Grinding Disc For Truncating
Ultima-TIG grinder or when the grinding disc for truncating needs to be replaced. Cleaning is carried out by dismantling the Truncator module as described in section 7, cleaning it in hot water and drying it with a dry cloth or paper. - Page 12 Also available for Ultima-TIG-S for truncating of larger electrodes up to 8 mm Item No. 75523011...
Need help?
Do you have a question about the Truncator and is the answer not in the manual?
Questions and answers