
Summary of Contents for Ensitech TIG Brush
- Page 1 Stainless Steel Weld Cleaning System TIG Brush Instruction Manual Ensitech Pty Ltd TIG Brush™ Instruction Manual www.tigbrush.com 2022...
- Page 2 To achieve this goal, we adhere to the process of a QUALITY MANAGEMENT SYSTEM which complies with the requirements of ISO 9001:2015 for the following scope: the design, manufacture, supply and repair of TIG Brush weld cleaning systems.
- Page 3 Online and Extend your 2-Year Warranty at no extra Cost! Ensitech offers an extended 6-month warranty* on any new TIG Brush Control Unit that has its warranty information registered on the TIG Brush website www.tigbrush.com/warranty. Registering your TIG Brush online and activating your warranty is easy and links your product with proof of ownership and warranty service.
- Page 4 FOREWORD This instruction manual is an important tool and designed to help you get the most out of your Ensitech products. We recommend you keep it with your TIG Brush at all times. Please take the time to read this manual as it provides users with the necessary operating procedures and safety precautions, essential for the safe and proper operation of the TIG Brush.
- Page 5 THIS SYMBOL INDICATES A HAZARDOUS SUBSTANCE WHICH MAY CAUSE MINOR OR MODERATE INJURY. SOME TIGBRUSH KITS MAY SHIP WITH HAZARDOUS FLUIDS. CHECK SAFETY DATA SHEETS CAREFULLY. SYMBOL FOR “VOID WARRANTY” OR “DAMAGED WORK” Ensitech Pty Ltd TIG Brush™ Instruction Manual www.tigbrush.com 2022...
- Page 6 Questions regarding special product applications • Questions regarding product modifications • Accident reporting CONTACT Your local TIG Brush distributor/dealer or Ensitech direct: Ensitech Pty Ltd Ensitech Inc Unit 1/144 Old Bathurst Road 340 Marshall Ave, Bldg#104 Emu Plains NSW 2750...
- Page 7 REVISIONS LOG REVISIONS LOG Original issue of Manual: August 2016 Revision 1: April 2018 Revision 2: February 2020 Revision 3: July 2022 Ensitech Pty Ltd TIG Brush™ Instruction Manual www.tigbrush.com 2022...
-
Page 8: Table Of Contents
The front panel LEDs are not illuminating. The Control Unit is making a humming/buzzing noise. The front Control Unit lights are illuminated but it will not clean or it’s not performing as well as normal. WARRANTY TIG Brush™ Instruction Manual 2022... -
Page 9: S1 Introduction
For more details on the Branding Kit visit www.tigbrush.com/products/branding-kit. As well as Stainless Steel, the TIG Brush can also be used with other metals such as brass, copper and aluminium (aluminum). Contact your local TIG Brush distributor/dealer team for more information, or visit our website www.tigbrush.com... -
Page 10: S2 Safety Precautions And Information
SAFETY INFORMATION The TIG Brush is one of the safest appliances in its class. However some precautions must be taken with the use of the TIG Brush, as with any electrolytic/electrochemical weld cleaner. - Page 11 Do not place the brush near any flammable materials. DO NOT connect the TIG Brush to any metal work, which has a welding •...
-
Page 12: Description Of Basic Equipment
DESCRIPTION OF BASIC EQUIPMENT CLASSIC KIT TIG Brush Control Unit Black Ground Cable Red Handle Cable Handle Classic Wand * When the brush is new, use the long Insulating Shrouds* shroud and change to the short shroud (short and long) as brush wears down. -
Page 13: Flexi Handle Kit
DESCRIPTION OF BASIC EQUIPMENT FLEXI HANDLE KIT TIG Brush Control Unit Black Ground Cable Flexi Handle Insulating Shrouds* (short and long) Standard Brush *When the brush is new use the long shroud and change to the short shroud Power Cord as brush wears down. -
Page 14: Propel Kit
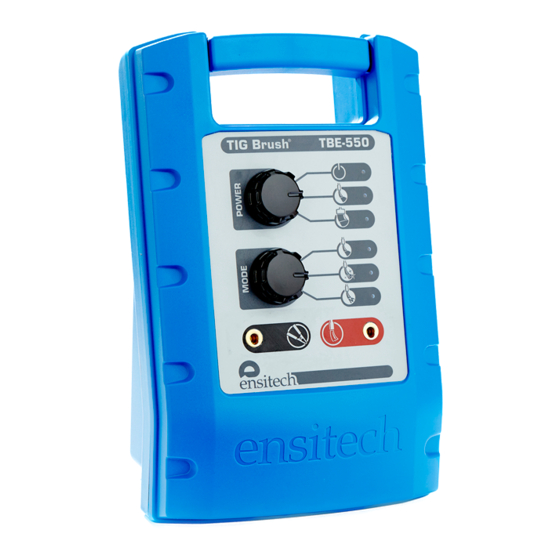
DESCRIPTION OF BASIC EQUIPMENT PROPEL KIT TIG Brush Control Unit Black Ground Cable PROPEL Torch PROPEL Torch Insulating Shroud PROPEL Torch Brush Power Cord TIG Brush™ Instruction Manual 2022... - Page 15 DESCRIPTION OF BASIC EQUIPMENT Power Control Mode Control Handle Cable, Flexi Handle or PROPEL Torch Socket Ground Cable Socket Power Socket On/Off Switch Ensitech Pty Ltd TIG Brush™ Instruction Manual www.tigbrush.com 2022...
-
Page 16: Preparation
S4 OPERATION PREPARATION Inspect the TIG Brush Control Unit for any damage, and cables for exposed wire. Ensure the Control Unit is dry. Ensure the work environment is well ventilated and away from any combustible substances. Ensure the cables do not present a trip hazard. -
Page 17: Flexi Handle Kit
S4 OPERATION Refer to illustration on page 16. Attach Handle Cable plug to the red socket of the TIG Brush Control Unit Screw Classic Wand into handle of the Handle Cable Place long Shroud on Standard brush and screw into the Classic Wand... -
Page 18: Propel Torch
S4 OPERATION Set POWER switch on the back of the machine to OFF Attach Power Cord to the Power Socket on the back of the TIG Brush Control Unit and plug into mains power Attach the Ground Clamp to workpiece 4.2.3... -
Page 19: 4.3 Cleaning Fluid
TIG Brush Control Unit Set POWER switch on the back of the machine to OFF Attach Power Cord to the Power Socket on the back of the TIG Brush Control Unit and plug into mains power Attach the Ground Clamp to workpiece 4.3 CLEANING FLUID... - Page 20 S4 OPERATION Workpiece Wand Shroud Brush For best performance Insulating shroud use tip of brush only must be used TIG Brush™ Instruction Manual 2022...
-
Page 21: Operation
Ensure the Power Cord is connected to a suitable 110V or 240V AC power outlet and connected to the TIG Brush Power Socket. Push the Power Button on the back of the Control Unit to turn ON. -
Page 22: S5 Power And Mode Setting
POLISH / ENGRAVE - This mode provides metal polishing as well as engraving. For metal polishing use TB-21 or TB-25. For engraving use TB-95 with the Branding Kit accessories. PRINT - This mode provides surface printing when used with TB-90 and the Branding Kit accessories. TIG Brush™ Instruction Manual 2020... -
Page 23: S6 Maintenance
• Rinse clamp with water to remove solution and prevent corrosion. • Use a wet cloth to wipe fluid splashes off the TIG Brush Control Unit. After some time splashes and marks may accumulate and become difficult to remove. Remove brush from Wand... -
Page 24: S7 Consumables
FLUIDS For optimum results, we recommend the use genuine Ensitech proprietary fluids. Ensitech fluids are NSF certified and conform to the requirements of the NSF Non-Food Compounds Registration Programme. The NSF mark is your assurance that Ensitech pre, post and weld cleaning fluids have been tested and certified by one of the most respected independent certification organisations. -
Page 25: Propel Torch Collets
PROPEL TORCH COLLETS The PROPEL Collet is a consumable item which may last for approximately 20 Brushes. Replacement Collets are supplied with a Spring which should be replaced with the Collet. Ensitech Pty Ltd TIG Brush™ Instruction Manual www.tigbrush.com 2022... -
Page 26: Troubleshooting
S8 TROUBLESHOOTING If the TIG Brush is not operating correctly, please refer to the following trouble shooting guide before contacting your TIG Brush distributor. THE MAINS POWER BUTTON ON THE BACK OF THE CONTROL UNIT DOESN’T OPERATE PROPERLY OR ILLUMINATE Check the power cord is firmly pushed into the Mains Power Socket on the back of the Control Unit and the Power Point is turned on. -
Page 27: The Front Control Unit Lights Are Illuminated But It Will Not Clean Or
To overcome these common problems and prevent downtime, it is recommended to perform regular cleaning, maintenance and replace worn or damaged parts. Do not continue to operate the TIG Brush with worn or damaged parts as this can result in further damage and possible injury. -
Page 28: S9 Warranty
Ensitech to find if there is an EARC in your region. 2. WARRANTY AGAINST DEFECTS 4.2 All goods to be returned to Ensitech or an EARC must be appropriately packaged to ensure no damage during transit 2.1 Without limiting statutory rights and subject to clause 7, to Ensitech or the EARC. - Page 29 - to cancel your service contract with us; and 6.3 If Ensitech fault analysis and testing supports a claim for breach of the warranty against defects in clause 2.1. Ensitech - to a refund for the unused portion, or to compensation for will either (subject to statutory rights): its reduced value.
- Page 30 NOTES...
- Page 31 NOTES...
- Page 32 Model: Serial No. Date of Purchase: Purchased from: TIG Brush™ Instruction Manual July 2022 Ensitech Pty Ltd Unit 1/144 Old Bathurst Road, Emu Plains NSW 2750, Australia Phone: +61 2 4735 7700 Email: info@ensitech.com.au...
Need help?
Do you have a question about the TIG Brush and is the answer not in the manual?
Questions and answers