Table of Contents
Advertisement
Available languages
Available languages
SPLIT-TYPE AIR CONDITIONERS
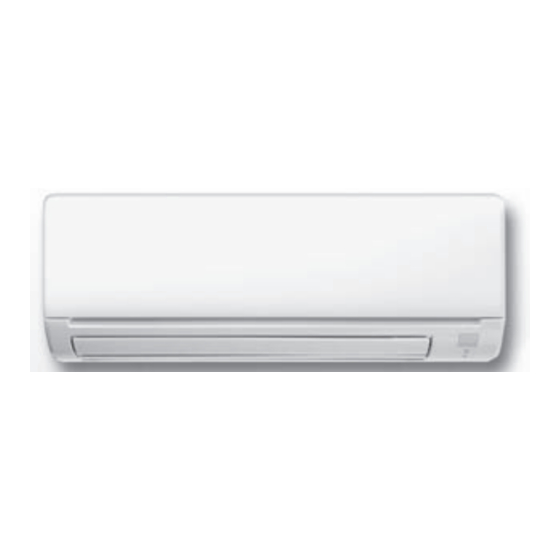
INDOOR UNIT
NTYWST09A112A
NTYWST12A112A
OPERATING INSTRUCTIONS
• To use this unit correctly and safely, be sure to read these operating in-
structions before use.
MANUAL DE INSTRUCCIONES
• Para utilizar esta unidad de forma correcta y segura, lea previamente es-
tas instrucciones de funcionamiento.
NOTICE D'UTILISATION
• Pour avoir la certitude d'utiliser cet appareil correctement et en toute
sécurité, veuillez lire cette notice d'instructions avant de mettre le climati-
seur sous tension.
NTYWST15A112A
For user
Para los clientes
A l'attention des clients
English
Español
Français
Advertisement
Table of Contents

Related Manuals for Mitsubishi Electric Trane NTYWST09A112A Series


Summary of Contents for Mitsubishi Electric Trane NTYWST09A112A Series
- Page 1 SPLIT-TYPE AIR CONDITIONERS INDOOR UNIT NTYWST09A112A NTYWST12A112A NTYWST15A112A OPERATING INSTRUCTIONS For user • To use this unit correctly and safely, be sure to read these operating in- English structions before use. Para los clientes MANUAL DE INSTRUCCIONES • Para utilizar esta unidad de forma correcta y segura, lea previamente es- Español tas instrucciones de funcionamiento.
- Page 2 ● OPERATING INSTRUCTIONS ● ONTENTS I SAFETY PRECAUTIONS I NAME OF EACH PART I PREPARATION BEFORE OPERATION I SELECTING OPERATION MODES I FAN SPEED AND AIRFLOW DIRECTION ADJUSTMENT I SMART SET OPERATION I ECONO COOL OPERATION I TIMER OPERATION (ON/OFF TIMER) I CLEANING I WHEN YOU THINK THAT TROUBLE HAS OCCURRED I WHEN THE AIR CONDITIONER IS NOT GOING TO BE USED FOR A LONG TIME...
-
Page 3: Safety Precautions
AFETY PRECAUTIONS Do not operate switches with wet hands. CAUTION • This may cause electric shock. Do not clean the air conditioner with water or place an object that Do not touch the air inlet or the aluminum fi ns of the indoor/ contains water, such as a fl... -
Page 4: Indoor Unit
● OPERATING INSTRUCTIONS ● AME OF EACH PART Indoor unit Remote controller Signal transmitting section Distance of signal : About 20 ft. (6 m) Front panel Beep(s) is (are) heard Air fi lter from the indoor unit when (Nano platinum fi lter) the signal is received. -
Page 5: Preparation Before Operation
REPARATION BEFORE OPERATION Before operation: Insert the power supply plug into the power outlet and/or turn the breaker on. Installing the remote controller batteries Press RESET. Remove the front lid. Insert the negative pole of AAA alkaline batteries fi rst. Install the front lid. -
Page 6: Selecting Operation Modes
● OPERATING INSTRUCTIONS ● ELECTING OPERATION MODES I FEEL mode The unit selects the operation mode according to the room temperature when I FEEL is selected. When the room temperature is higher than 77°F (25°C), COOL is selected (set temperature: 75°F [24°C]). When the room temperature is lower than 77°F (25°C), DRY is selected. -
Page 7: Airflow Direction
AN SPEED AND MART SET OPERATION AIRFLOW DIRECTION ADJUSTMENT Press to select fan speed. Each press changes Press during COOL or ECONO COOL mode to fan speed in the following order: select SMART SET mode. (AUTO) (Quiet) (Low) (Med.) (High) (Super High) Set the temperature, fan speed, and airfl... -
Page 8: Econo Cool Operation
● OPERATING INSTRUCTIONS ● CONO COOL OPERATION Press during COOL mode page 5 to start ECO- NO COOL operation. The unit performs swing operation vertically in various cycles according to the temperature of airflow. Set temperature is set 4°F (2°C) higher automatically. Press again to cancel ECONO COOL operation. -
Page 9: Front Panel
LEANING Instructions: • Switch off the power supply or turn off the breaker before cleaning. • Use only diluted mild detergents. • Be careful not to touch the metal parts with your hands. • Do not expose parts to direct sunlight, heat, or fi re to dry. •... -
Page 10: When You Think That Trouble Has Occurred
● OPERATING INSTRUCTIONS ● HEN YOU THINK THAT TROUBLE HAS OCCURRED Even if these items are checked, when the unit does not recover from the trouble, Symptom Explanation & Check points stop using the air conditioner and consult your dealer. Does not cool The room cannot be cooled •... -
Page 11: Electrical Work
HEN THE AIR CONDITIONER IS NOT NSTALLATION PLACE AND GOING TO BE USED FOR A LONG TIME ELECTRICAL WORK Installation place Set to the highest temperature in manual COOL mode, Avoid installing the air conditioner in the following places. and operate for 3 to 4 hours. Page 5 •... - Page 12 ● MANUAL DE INSTRUCCIONES ● Í NDICE I MEDIDAS DE SEGURIDAD I NOMBRE DE LAS PARTES I PREPARACIÓN ANTES DE LA PUESTA EN MARCHA I SELECCIÓN DE MODOS DE FUNCIONAMIENTO I VELOCIDAD DEL VENTILADOR Y AJUSTE DE LA DIRECCIÓN DEL AIRE I FUNCIONAMIENTO SMART SET (SELECCIÓN INTELIGENTE) I FUNCIONAMIENTO DE LA DESCONEXIÓN AUTOMÁTICA (ECONO COOL) I FUNCIONAMIENTO DEL TEMPORIZADOR (ACTIVACIÓN/DESACTIVACIÓN DEL TEMPORIZADOR)
- Page 13 EDIDAS DE SEGURIDAD No utilice los mandos con las manos mojadas. CUIDADO • Podría producirse una descarga eléctrica. No limpie el acondicionador de aire con agua ni coloque sobre él No toque la entrada de aire ni la aleta de aluminio de la unidad un objeto que contenga agua, como un fl...
-
Page 14: Unidad Interior
● MANUAL DE INSTRUCCIONES ● OMBRE DE LAS PARTES Unidad interior Controlador remoto Sección de transmisión de señales Distancia de la señal: Aprox. 20 pies (6 m) Panel frontal Cuando se recibe la Filtro de aire señal, la unidad interior Sección de pantalla (fi... -
Page 15: Preparación Antes De La Puesta En Marcha
REPARACIÓN ANTES DE LA PUESTA EN MARCHA Antes de la puesta en marcha: inserte el enchufe de alimentación en la toma de corriente y/o encienda el disyuntor. Instalación de las pilas del controlador remoto Pulse RESET. Retire la tapa frontal. Inserte primero el polo negativo de las pilas alcalinas tipo AAA. - Page 16 ● MANUAL DE INSTRUCCIONES ● ELECCIÓN DE MODOS DE FUNCIONAMIENTO Modo I FEEL La unidad selecciona el modo de funcionamiento en función de la temperatura ambiente cuando I FEEL está seleccionado. Cuando la temperatura ambiente es superior a 77°F (25°C), se selecciona REFRIGERACIÓN (temperatura estable- cida: 75°F [24°C]).
- Page 17 UNCIONAMIENTO SMART SET ELOCIDAD DEL VENTILADOR Y (SELECCIÓN INTELIGENTE) AJUSTE DE LA DIRECCIÓN DEL AIRE Pulse para seleccionar la velocidad del ventilador. Pulse durante el modo de REFRIGERACIÓN o La velocidad del ventilador cambia con cada pulsación DESCONEXIÓN AUTOMÁTICA (ECONO COOL) para en el orden siguiente: seleccionar el modo de SMART SET (SELECCIÓN INTELIGENTE).
- Page 18 ● MANUAL DE INSTRUCCIONES ● UNCIONAMIENTO DEL TEMPORIZADOR (ACTI- UNCIONAMIENTO DE LA DESCO- SACTIVACIÓN DEL TEMPORIZADOR) VACIÓN/DE NEXIÓN AUTOMÁTICA (ECONO COOL) Pulse durante el funcionamiento para ajustar el temporizador. (ACTIVACIÓN del temporizador) : La unidad se encenderá a la hora establecida. (DESACTIVACIÓN del temporizador) : La unidad se apagará...
-
Page 19: Panel Frontal
IMPIEZA Instrucciones: • Durante la limpieza, apague el disyuntor o desenchúfelo de la toma de corriente. • Use sólo detergentes suaves diluidos. • Tenga cuidado de no tocar las partes metálicas con las manos. • No exponga directamente al sol, al calor o a las llamas ninguna pieza con el fi n de secarla. •... -
Page 20: S I Cree Que Ha Ocurrido Algún Problema
● MANUAL DE INSTRUCCIONES ● I CREE QUE HA OCURRIDO ALGÚN PROBLEMA Si después de comprobar estas cuestiones el acondicionador de aire sigue sin Síntoma Explicación y puntos de comprobación funcionar bien, póngase en contacto con su distribuidor. No refrigera La habitación no se refrigera lo •... -
Page 21: Especificaciones
UANDO EL ACONDICIONADOR DE AIRE NO UGAR DE INSTALACIÓN Y SE VAYA A UTILIZAR DURANTE MUCHO TIEMPO TRABAJO ELÉCTRICO Lugar de instalación Ajuste a la máxima temperatura en el modo manual de Procure no instalar el acondicionador de aire en los siguientes lugares. REFRIGERACIÓN, y déjelo en funcionamiento durante •... - Page 22 ● NOTICE D’UTILISATION ● ABLE DES MATIERES I CONSIGNES DE SECURITE I NOMENCLATURE I PREPARATIF D’UTILISATION I SELECTION DES MODES DE FONCTIONNEMENT I REGLAGE DE LA VITESSE DU VENTILATEUR ET DE LA DIRECTION DU FLUX D’AIR I MODE SMART SET (REGLAGE INTELLIGENT) I FONCTIONNEMENT EN MODE ECONO COOL I FONCTIONNEMENT DE LA MINUTERIE (MARCHE/ARRET) I NETTOYAGE...
-
Page 23: Consignes De Securite
ONSIGNES DE SECURITE Ne pas actionner les commandes du climatiseur avec les mains AVERTISSEMENT mouillées. • Risque d’électrocution ! L’utilisateur ne doit jamais procéder au nettoyage intérieur de Ne pas nettoyer le climatiseur avec de l‘eau et ne placer ni vase l’unité... -
Page 24: Unité Externe
● NOTICE D’UTILISATION ● OMENCLATURE Unité interne Télécommande Transmission des signaux Distance de réception du signal : Panneau frontal Environ 20 ft. (6 m) Filtre à air Affi chage du L’émission de bip(s) en (fi ltre nano-platinum) mode de fonction- provenance de l’unité... -
Page 25: Insertion Des Piles Dans La Télécommande
REPARATIF D’UTILISATION Avant la mise en marche : Insérez la fi che d’alimentation électrique dans la prise secteur et/ou enclenchez le disjoncteur. Insertion des piles dans la télécommande Appuyez sur la touche RESET. Retirez le couvercle avant. Insérez les piles alca- lines AAA en plaçant d’abord le pôle négatif. - Page 26 ● NOTICE D’UTILISATION ● ELECTION DES MODES DE FONCTIONNEMENT Mode de SENSATION (I FEEL) Le climatiseur sélectionne le mode de fonctionnement selon la température de la pièce si le mode de SENSATION est activé. Si la température de la pièce est supérieure à...
- Page 27 EGLAGE DE LA VITESSE DU VENTILATEUR ODE SMART SET ET DE LA DIRECTION DU FLUX D’AIR (REGLAGE INTELLIGENT) Appuyez sur la touche pour sélectionner la vi- Appuyez sur en mode REFROIDISSEMENT ou tesse du ventilateur. Chaque nouvelle pression sur cette ECONO COOL pour sélectionner le mode SMART SET touche vous permet de modifi...
- Page 28 ● NOTICE D’UTILISATION ● ONCTIONNEMENT DE LA MINUTE- ONCTIONNEMENT EN MODE RIE (MARCHE/ARRET) ECONO COOL Appuyez sur les touches pendant le fonctionnement du climatiseur pour régler la minuterie. (Démarrage de la minuterie [ON]) : Le climatiseur démarrera (ON) à l’heure programmée. (Arrêt de la minuterie [OFF]) : Le climatiseur s’arrêtera (OFF) à...
-
Page 29: Panneau Frontal
ETTOYAGE Instructions : • Coupez l’alimentation ou le disjoncteur avant de procéder au nettoyage du climati- • Utilisez uniquement un détergent doux dilué avec de l’eau. seur. • N’exposez pas les pièces aux rayons directs du soleil, à la chaleur ou à une •... -
Page 30: E N Presence D'une Panne Potentielle
● NOTICE D’UTILISATION ● N PRESENCE D’UNE PANNE POTENTIELLE Suite à la vérifi cation de ces points, si le climatiseur ne fonctionne toujours pas Symptôme Explication & points à vérifi er correctement, ne vous en servez plus et consultez votre revendeur. Le climatiseur ne refroidit pas correctement Impossible de refroidir suffi... -
Page 31: S I Le Climatiseur Doit Res- Ter Longtemps Inutilise
I LE CLIMATISEUR DOIT RES- IEU D’INSTALLATION ET TER LONGTEMPS INUTILISE TRAVAUX ELECTRIQUES Lieu d’installation Sélectionnez manuellement le mode de REFROIDIS- Evitez d’installer le climatiseur dans les endroits suivants. SEMENT et réglez la température la plus élevée ; faites • En présence d’une grande quantité d’huile de machine. •... - Page 32 U.S. Product Warranty and Registration Information Congratulations on the purchase of your new Mitsubishi Electric Trane HVAC US Cooling & Heating system and thank you for trusting us with your personal comfort. Your installing contractor may have registered your products on your behalf. To check the registration status or to complete your product registration, please visit us at http://www.metahvac.com/.
Need help?
Do you have a question about the Trane NTYWST09A112A Series and is the answer not in the manual?
Questions and answers