Table of Contents
Advertisement
Available languages
Available languages
Quick Links
Advertisement
Table of Contents

Related Manuals for Nevir NVR-6231 MDG25


Summary of Contents for Nevir NVR-6231 MDG25
- Page 1 MANUAL DE INSTRUCCIONES MICROONDAS CON GRILL 25L NVR-6231 MDG25 Lea estas instrucciones cuidadosamente antes de usar su microondas y guárdelas. Si sigue las instrucciones, su microondas le ofrecerá muchos años de buen funcionamiento. GUARDE CUIDADOSAMENTE ESTAS INSTRUCCIONES.
- Page 2 Si el aparato no se mantiene en un buen estado de limpieza, su superficie podría degradarse y afectar a la vida útil del aparato y dar lugar a una situación peligrosa. Especificaciones Modelo NVR-6231 MDG25 Alimentación eléctrica 230V~ 50Hz Consumo Nominal...
-
Page 3: Instrucciones De Seguridad Importantes
INSTRUCCIONES DE SEGURIDAD IMPORTANTES ADVERTENCIA Para reducir el riesgo de incendio, choque eléctrico, lesiones a personas o exposición excesiva a la energía de microondas al usar su electrodoméstico, siga las precauciones básicas, incluyendo las siguientes: 1. Advertencia: Los líquidos y otros alimentos no deben ser calentados en recipientes cerrados ya que pueden explotar. - Page 4 16. Si el cable de alimentación está dañado, debe ser sustituido por el fabricante, su agente de servicio o personal cualificado similar a fin de evitar situaciones de peligro. 17. No almacene o utilice este aparato al aire libre. 18. No utilice este horno cerca del agua, en un sótano húmedo o cerca de una piscina 19.
- Page 5 PARA REDUCIR EL RIESGO DE DAÑOS A LAS PERSONAS USE TOMA DE TIERRA PELIGRO Peligro de descarga eléctrica. Tocar algunos de los componentes internos puede causar lesiones graves o la muerte. No desmonte el aparato. ADVERTENCIA Peligro de descarga eléctrica. El uso inadecuado de la toma de tierra puede resultar en descarga eléctrica.
- Page 6 UTENSILIOS PRECAUCIÓN Peligro de lesiones personales Es peligroso para cualquiera que no esté cualificado realizar reparaciones o mantenimiento que supongan retirar la tapa de mica que protege de la exposición a las microondas. Véanse las instrucciones sobre “Materiales que pueden usarse o deben evitarse en el horno microondas.”...
- Page 7 Materiales que NO pueden usarse en el horno microondas Utensilios Observaciones Bandejas de aluminio Pueden formar arco eléctrico. Pase los alimentos a un plato apto para horno microondas. Envase de cartón para Pueden formar arco eléctrico. Pase los alimentos a un plato apto para horno alimentos con mango de microondas.
-
Page 8: Instalación Del Plato Giratorio
INSTALACIÓN DEL PLATO GIRATORIO Cubo central (cara de abajo) a. No ponga nunca la bandeja de vidrio boca abajo. La bandeja de vidrio debe poder moverse siempre. b. Para la cocción deben usarse siempre la bandeja de vidrio y el conjunto del aro giratorio Bandeja de vidrio c. -
Page 9: Instrucciones De Uso
La superficie accesible puede estar caliente durante el funcionamiento INSTRUCCIONES DE USO Este horno microondas utiliza el control electrónico moderno para ajustar los parámetros de cocción para satisfacer mejor sus necesidades para cocinar. 1. Ajuste del reloj Cuando el horno de microondas está electrificado, el horno mostrará “0:00”, el timbre sonará una vez. - Page 10 1) Presionar el botón “Micro / Grill / Combi” una vez la tecla y en la pantalla se visualizará “G”. 2) Pulse “Micro. / Grill / Combi” varias veces o gire “ ” para seleccionar la potencia del Grill y la pantalla visualizará...
- Page 11 6. Descongelación por Tiempo 1) Presione “Weight / Time Defrost” dos veces, la pantalla mostrará “dEF2”. 2) Gire “ ” para seleccionar el tiempo de cocción. (El ajuste del tiempo será 0:05 - 95:00.) 3) Pulse el botón “Start / +30 SEC. / Confirm” para empezar a descongelar. Nota: La potencia de descongelación fijada es P30.
- Page 12 8. Auto Menú 1) En el estado de espera, gire “ ” a la derecha para elegir el menú de la A-1 a A-8. 2) Presione “Start / +30 SEC. / Confirm” para confirmar el menú que elija; 3) Gire “ ”...
- Page 13 4) Gire “ ” para elegir el 80% de potencia de microondas hasta que se muestre “P80” en el display; 5) Presione “Start / +30 SEC. / Confirm” para confirmar; 6) Gire “ ” para ajustar el tiempo de cocción de 7 minutos; 7) Pulse el botón “Start / +30 SEC.
- Page 14 (distribuidores y/o instalaciones de las Entidades Locales) Para dar cumplimiento a la Norma UNE EN-60335, indicamos que, si el cable flexible se daña, únicamente puede ser sustituido por un taller de reparación reconocido por el fabricante NEVIR, S.A., ya que se necesitan herramientas especiales.
-
Page 15: Microwave Oven
INSTRUCTION MANUAL Microwave Oven NVR-6231 MDG25 Read these instructions carefully before using your microwave oven and keep it carefully. If you follow the instructions, your oven will provide you with many years of good service. -
Page 16: Precautions To Avoid Possible Exposure To Excessive Microwave Energy
Sp ec i fi c at io n s Model: NVR-6231 MDG25 Rated Voltage: 230V~ 50Hz Rated Input Power(Microwave): 1450 W... -
Page 17: Important Safety Instructions Warning
IMPORTANT SAFETY INSTRUCTIONS WARNING To reduce the risk of fire, electric shock, injury to persons or exposure to excessive microwave oven energy when using your appliance, follow basic precautions, including the following: 1. Read and follow the specific:” PRECAUTIONS TO AVOID POSSIBLE EXPOSURE TO EXCESSIVE MICROWAVE ENERGY". - Page 18 7. WARNING: Liquids and other foods must not be heated in sealed containers since they are liable to explode. 8. When heating food in plastic or paper containers, keep an eye on the oven due to the possibility of ignition. 9.
-
Page 19: Read Carefully And Keep For Future Reference
19.The microwave oven must be operated with the decorative door open. (for ovens with a decorative door.) 20.This appliance is intended to be used in household and similar applications such as: -staff kitchen areas in shops, offices and other working environments. -
Page 20: To Reduce The Risk Of Injury To Persons Grounding Installation
To Reduce the Risk of Injury to Persons Grounding Installation DANGER Electric Shock Hazard Touching some of the internal components can cause serious personal injury or death. Do not disassemble this appliance. WARNING Electric Shock Hazard Improper use of the grounding can result in electric shock. Do not plug into an outlet until appliance is properly installed and grounded. -
Page 21: Utensils Caution
2)The extension cord must be a grounding-type 3-wire cord. 3)The long cord should be arranged so that it will not drape over the countertop or tabletop where it can be pulled on by children or tripped over unintentionally. CLEANING Be sure to unplug the appliance from the power supply. 1. - Page 22 Materials you c an u s e in microwave oven Utensils Rem arks Browning dish Follow manufacturer’s instructions. The bottom of browning dish must be at least 3/16 inch (5mm) above the turntable. Incorrect usage may cause the turntable to break. Dinnerware Microwave-safe only.
-
Page 23: Setting Up Your Oven
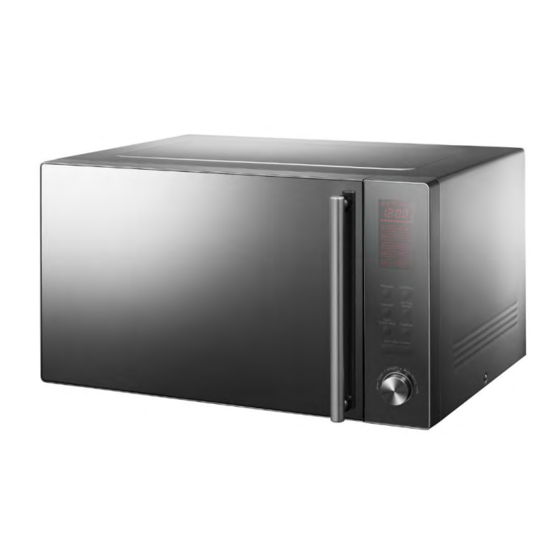
SETTING UP YOUR OVEN Names of Oven Parts and Accessories Remove the oven and all materials from the carton and oven cavity. Your oven comes with the following accessories: Glass tray Turntable ring assembly Instruction Manual A) Control panel B) Turntable shaft C) Turntable ring assembly D) Glass tray E) Observation window... -
Page 24: Countertop Installation
Countertop Installation Remove all packing material and accessories. Cabinet: Remove any protective film found Examine the oven for any damage such as on the microwave oven cabinet surface. dents or broken door. Do not install if oven is Do not remove the light brown Mica cover damaged. - Page 25 Operation Instructions 1. Clock Setting When the microwave oven is electrified, the screen will display "0:00", buzzer will ring once. 1) Press " Clock/ Kitchen Timer " once to select clock function, the hour figures will flash. 2) Turn " "...
- Page 26 "Microwave" Pad instructions Microwave Display Order Power P100 100% 3. Grill or Combi. Cooking Press " Grill/Combi. " screen will display "G", and press " Grill/Combi. " repeatedly or turn the " " to choose the power you want, and "G","C-1" or "C-2" will display for each added press.
- Page 27 4. Quick Start 1) In waiting state, press " Start/+30Sec./Confirm " to start cooking with 100% power, each added press will increase 30 seconds cooking time up to 95 minutes. 2) In microwave,grill,combination cooking or time defrost state, each press of "...
- Page 28 8. Auto Menu 1) Turn " " right to choose the menu, and "A-1" to "A-8" will display, which means pizza, meat, vegetable, pasta, potato, fish, beverage and popcorn. 2) Press " Start/+30Sec./Confirm " to confirm. 3) Turn " " to choose the default weight as the menu chart. 4) Press "...
- Page 29 9. Multi-section cooking At most 2 sections can be set for cooking. In multi-section cooking, if one section is defrosting, then defrosting shall be placed in the first section automatically. Example: If you want to defrost food for 5 minutes and then cook with 80% microwave power for 7 minutes, operate it as the following: Time Defrost 1) Press "...
-
Page 30: Troubleshooting
Trouble shooting It is forbidden to run the unit without any food inside. It is very dangerous. -
Page 31: Declaración De Conformidad
DECLARACIÓN DE CONFORMIDAD NEVIR, S.A. declara bajo su responsabilidad que el aparato indicado cumple los requisitos de las siguientes directivas: DIRECTIVA EMC EN 55014-1:2017 EN 55014-2:2015 EN 61000-3-2:2014 EN 61000-3-3:2013 EN 55011:2016+A1:2017 LOW VOLTAGE DIRECTIVA EEC EN 60335-2-25:2012+A1:2015+A2:2016 EN 60335-2-9:2003+A1:2004+...
Need help?
Do you have a question about the NVR-6231 MDG25 and is the answer not in the manual?
Questions and answers