Advertisement
Quick Links
Manual Contents
Safety Instructions
Assembly
Operation
Maintenance
Parts
Warranty
Caution: Carefully read all rules and instructions for safe operation.
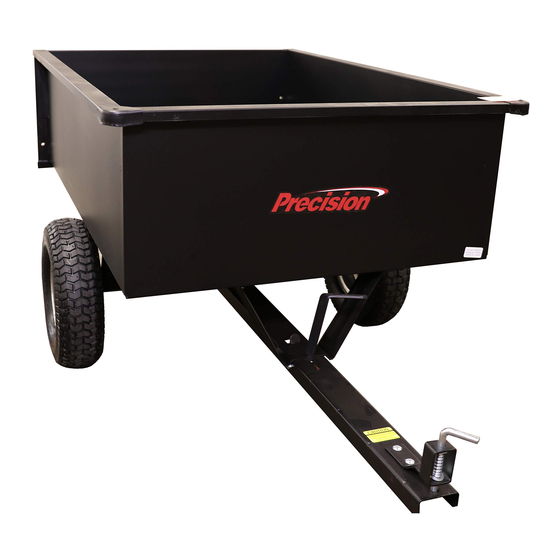
Owner's Manual | LC1700GY| 17 cu. ft. Dump Cart
Your New Trailer Dump Cart
2
Congratulations on your purchase of a new
4-6
Precision Products, Inc. Trailer Dump Cart. Your
6
Trailer Dump Cart has been engineered and built to
6
give you the most dependable and best performing
3&7
product possible.
8
If you experience any problem you can not easily
resolve,
knowledgeable
department toll-free at 1 (800) 225-5891.
Tire tread pattern may vary.
please
feel
and
Form No.
free
to
contact
helpful
customer
(Rev. 10/09)
our
service
Advertisement

Related Manuals for Precision LC1700GY

Summary of Contents for Precision LC1700GY
- Page 1 Owner’s Manual | LC1700GY| 17 cu. ft. Dump Cart Tire tread pattern may vary. Manual Contents Your New Trailer Dump Cart Safety Instructions Congratulations on your purchase of a new Assembly Precision Products, Inc. Trailer Dump Cart. Your Operation Trailer Dump Cart has been engineered and built to...
-
Page 2: Carton Contents
Rules for Safe Operation The following safety precautions are suggested. This Trailer Dump Cart is designed, engineered and tested to offer reasonably safe and effective service, provided that it is operated in strict accordance with these instructions. Failure to do so may result in personal injury. Always observe the rules of safe operation. Please read and retain this manual. - Page 3 Shown Full Size Ref. Qty. Description 5/16” x 3/4” Hex Head Bolt 5/16” x 3/4” Truss Head Bolt 3/8 x 3/4” Truss Head Bolt 1/4” x 3-1/2” Hex Head Bolt 1/2” x 1-3/4” Clevis Pin 3/8” Lock Washer 5/16” Lock Washer 1/4”...
- Page 4 Assembly Instructions 3. Slide the Latch, Spring and Spacer through the Tow Bar. This will cause the Spring to open. See Figure 3. Tools Needed For Cart Assembly (2) 7/16” Wrenches (2) 1/2” Wrenches (1) 9/16” Wrench (1) Pair Pliers Spring (1) Large Standard or Flat Screwdriver Remove from Carton...
- Page 5 5. If assembled correctly the Latch should be forced 7. Attach Pedestal to bottom front of Body. Use toward the back of the Tow Bar by the spring. See 5/16” x 3/4” Truss Head Bolts from inside. On the Figure 5. bottom side, use 5/16”...
-
Page 6: Operation
Clevis Plate Hole and securing with Hitch Pin Clip. STOP the store prior to contacting Precision. At Precision Products, Inc. our goal is to deliver quality, value and outstanding service. If for any reason our product does not meet your expecta- tions, please contact us and we will take care of any problem you may have with this unit. - Page 7 Part No. Qty. Description Part No. Qty. Description 5515GY Body 4552 3/8” x 3/4” Truss Head Bolt 5502GY Tow Bar 1273 3/8” Hex Head Nut 5629 Axle 1248 5/16” x 3/4” Hex Head Bolt 5547 Wheel (Knobby) 1275 5/16” Hex Head Nut 1262 Cotter Pin 1274...
- Page 8 Manufacture’s Limited Warranty for Pull Behind Accessories The limited warranty set forth below is given by Precision Precision Products, Inc. will not be liable for incidental or Products, Incorporated with respect to new merchandise consequential loss damage including, without purchased and used in the United States, its possessions...