Table of Contents
Advertisement
Advertisement
Table of Contents

Summary of Contents for ACEGER Cruiser Bike
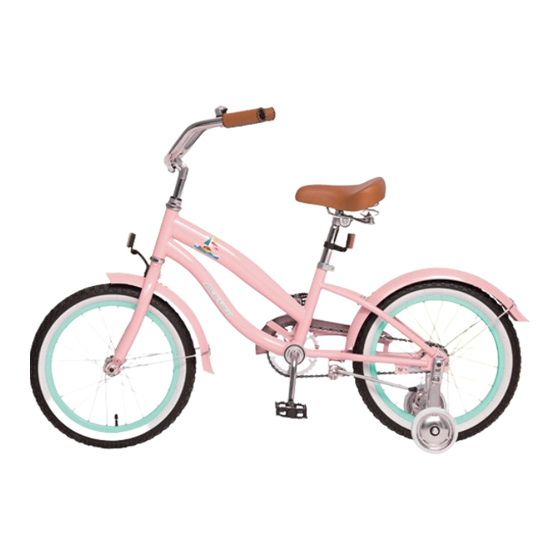
- Page 1 n e ' s M nu a l CRUISER...
- Page 3 Thank you for choosing Aceger bike! Our ACEGER kids bikes are designed for maximum enjoyment. We adhere to the simple,stylish design concept and high quality production requirements. The following pages will help you fully understand your bike and how to look after it. They will provide you with the information you need to properly assembly, adjust,use and maintain your new bike, so you can get the most out of every ride.
-
Page 4: Table Of Contents
Contents A SPECIAL NOTE FOR PARENTS ........................................1 FITTING THE RIDER TO THE BICYCLE ....................................2 RIDING ON WET WEATHER ........................................3 NIGHT RIDING ............................................3 ON ROAD SAFETY ............................................4 OFF ROAD SAFETY ...........................................4 TOOLS REQUIRED ............................................4 Install Training Wheels ..........................................5 Install Front Tire ............................................6 Install Front Fender and Front Reflector ....................................6 Install Handlebar ............................................ -
Page 5: A Special Note For Parents
A SPECIAL NOTE FOR PARENTS feet off the pedals when riding downhill. It is a tragic fact that most bicycle accidents involve children. As a 11. Always wear shoes when riding a bicycle and avoid loose fiting parent or guardian, you bear the responsibility for the activities and clothes. -
Page 6: Fitting The Rider To The Bicycle
●There must be at least 1 inch (2.5 cm) of clearance between the highest part of the top tube and the crotch of the rider with tires properly inflated. Item Cruiser Bike ●The minimum leg-length for the rider is the highest part of the Size 16 inch... -
Page 7: Riding On Wet Weather
RIDING ON WET WEATHER Under wet conditions, the stopping power of your brakes (as well as Ensure bicycle is equipped with a full set of correctly positioned the brakes of other vehicles sharing the road) is dramatically and clean reflectors.Use a white light on the front and a red light on reduced and your tires don’t grip nearly as well. -
Page 8: On Road Safety
Leaves, loose gravel, and other increased risk of injury or death. Aceger bicycles are not designed debris can also effect stopping. for these types of extreme riding. -
Page 9: Install Training Wheels
GETTING STARTED Open the carton from the top and take out the bicycle. NOTE Remove the straps and protective packaging from the bicycle. The 16 inch bike of this model has both training wheels and Important kickstand. Do not discard packing materials until assembly is complete and the The 20 inch bike of this model has only kickstand,no training bicycle can work properly. -
Page 10: Install Front Tire
2.Install Front Tire 3.Install Front Fender and Front Reflector Loosen the retaining washer and nut on both sides of the axle,place the wheel into fork drop outs. Remove the nut and bolt on the fork first,then attach the front reflector to the front fork and match front fender bracket to the bolt. Set the retaining washer into the hole on the fork drop out and tighten the nuts on both sides. - Page 11 Note: Note The 26 inch bike of this model has the V-brake on the front If the fender is warped and rubbing against the fork,please match the front fender bracket to the bolt in a similar tire,please scan the QR code or browse the link below way.
-
Page 12: Install Handlebar
4.Install Handlebar Loosen the bolt on the handlebar. Insert the handlebar into the head tube and tighten the expansion bolt with the allen wrench.The stem height should be set correctly in relation to the rider’s height. Rotate the handlebar towards the upright position and retighten the bolt. -
Page 13: Adjust V Style Brake
5.Adjust V Style Brake The picture on the right side is the diagram of each part of the V-brake, please refer to it before adjusting. WARNING Failure to properly set the brakes may result in the inability to stop the bicycle movement and cause serious injury or death.Be sure the brakes are functioning properly before using the bicycle. - Page 14 Put the brake cable through the cable slot on the end of the left Adjusting the brake arms brake arm.Always make sure that the cable is properly seated in the The two brake arms must be nearly parallel to each other. To make cable slot.Then slip the brake cable boot over the cable and position this adjustment, adjust the spring tension in each brake arm so that it between both brake arms.
-
Page 15: Install Pedals
6.Install Pedals 7.Install Seat and Rear Reflector The left pedal(marked L)should be tightened to the Loosen the nuts on both sides of seat with 14mm wrench. counter-clockwise direction. Then .pull the seat post into a vertical position and retighten the The right pedal(marked R) should be tightened to the clockwise nuts. - Page 16 Loosen the screw on the rear reflector ,attach the reflector to the Insert the seat into the seat tube and tighten seat clamp bolt. Be seat post,then retighten the screw. sure the minimum insertion marks do not go past the top of the seat clamp and are not visible.
-
Page 17: Install Bell
Note: In order to obtain the most comfortable riding position and offer the best possible pedaling efficiency, the seat height should be set correctly in relation to the rider’s leg length. The correct saddle height should not allow leg strain from over-extension, and the hips should not rock from side to side when pedaling. -
Page 18: Before Every Ride
BEFORE EVERY RIDE Just a minute each time before you ride, make a habit of performing the following safety checks. and will not contact any moving parts. Make sure all reflectors are in ●Stand in front of the bicycle facing rearward and hold the front position and not broken. -
Page 19: Basic Maintenance
BASIC MAINTENANCE used as a preventative measure. Here are some general factors to help you and your stockist The following procedures will help you maintain your bicycle for determine how often your bike should be inspected. The more you years of enjoyable riding. fit the “shorten product life”... -
Page 20: Attach The Front Brake Cable
WARNING Do not ride a bicycle or component with any crack, bulge or dent, even a small one. Riding a cracked frame, fork or component could lead to complete failure, with risk of serious injury or death. ATTACH THE FRONT BRAKE CABLE If the brake cable are not attached follow these steps: Rotate the cable adjustment barrel and cable nut until the slots are aligned with the slot on the brake lever body. -
Page 21: How To Fix A Flat Tire
HOW TO FIX A FLAT TIRE If you need to repair a tire, follow these steps: 11.Using your hands only, remount the other side of the tire by 1. Remove the wheel from the bicycle. pushing the edge toward the center of the rim. Start on ether side 2. -
Page 22: Chain Adjustment
CHAIN ADJUSTMENT The chain must be kept clean, rust free and lubricated with light oil Adjust the tightness of the chain as follows: after used in wet, muddy, or dusty conditions.Take care to wipe off ●Loosen the axle nuts of the rear wheel. excess oil, and not to get oil on the tires or rim braking surfaces. -
Page 23: How The Coaster Brake Works
LUBRICATION SCHEDULE the bead of the tire into the rim where necessary. Add air slowly and stop frequently to check the tire seating and the pressure, until you reach the correct inflation pressure. WHAT WHEN Put one drop of oil on the pivot point of Brake Levers Every six months each brake lever.( Lubricant: Oil) -
Page 24: Watch The Assembly Video
WATCH THE ASSEMBLY VIDEO If you want more information of assembly and adjustment ,please scan the QR code or browse the link below to check our Youtube channel. https://www.youtube.com/channel/UClEWwGhf8z_7u6mjWiONom Q/videos You can also follow us on Instagram to check the news of Aceger. -
Page 25: Troubles Shooting Guide
TROUBLES SHOOTING GUIDE Constant clicking - Stiff chain link. - Lubricate chain or noises when - Loose pedal axle or adjust chain link. PROBLEM POSSIBLE CAUSE REMEDY pedaling. bearing. - Adjust bearings or Slipping Chain -Excessively -Replace chaining, - Loose bottom axle nut. - Page 26 Brakes not working - Brake blocks worn - Replace brake Knocking or - Bulge in the rim or - True wheel or take effectively. down. blocks. shuddering when rim out of true. to a bike shop. -Brake blocks/rim - Clean blocks and applying brakes.
- Page 27 Steering not - Wheels not aligned - Align wheels accurate. in frame. correctly. - Headset loose or - Adjust/tighten binding. handset. - Front forks or frame - Take bike to a bike bent. shop for possible - Stem wedge bolt not frame realignment.
- Page 28 Follow us Quick Assembly Guide Acegerbike Aceger kid’s bike...
Need help?
Do you have a question about the Cruiser Bike and is the answer not in the manual?
Questions and answers