Table of Contents
Advertisement
Available languages
Available languages
Advertisement
Table of Contents

Subscribe to Our Youtube Channel
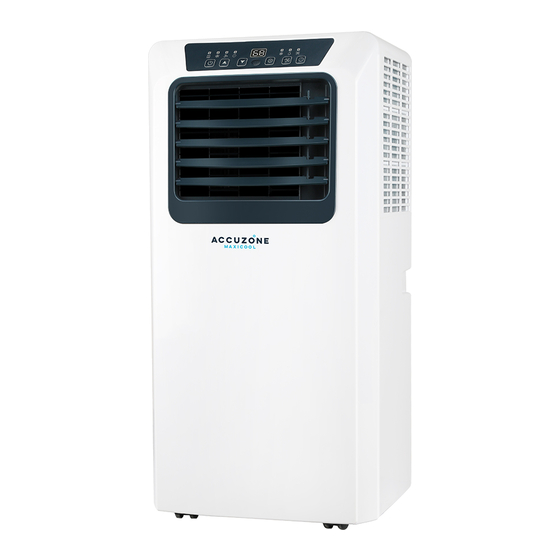
Summary of Contents for ACCUZONE MAXICOOL AZ08EWB
- Page 1 AZ08EWB 8000 BTU AZ11EWB 11000 BTU USER G UIDE PORTABLE AIR CONDITIONER...
-
Page 3: Table Of Contents
MODEL AZ08EWB | AZ11EWB BEFORE YOU START Take a few moments register your product at accuzonemc.com/register and keep up on the latest updates, coupons, and other relevant information. Although greatly appreciated, product registration is not required to activate any warranty. -
Page 4: Important Safety Instructions
Important Safety Instructions When using your Accuzone Maxicool portable air conditioner, basic safety precautions should always be followed to reduce the risk of fire, electrical shock, and/or injury to persons. Please read all assem- bly and operation Instructions. Failing to do so may result in incorrect operation, damage or even personal injury! THIS SYMBOL INDICATES INSTRUCTIONS THAT MUST BE OBSERVED. -
Page 5: Parts Description
Housing & Parts Description Housing Control Functions Panel Air Filter Power Plug Front Louvers Air Intake Connections Main Air Resessed Outlet Connect Handles to Vent Tube Bottom Tray Wheels Drain Outlet Installation QUANTITY Connectors Unit Adapter ..............1 Vent Tube ................ 1 Window Slider Adapter ........ -
Page 6: Assembly Preparation
Assembly Preparation Before Make sure that you install your unit on an even surface for minimal noise and vibration. The unit must be installed near a grounded plug and the Bottom Tray Drain Outlet (on the back of the unit) must be accessible. Begin Minimum unit to wall surface distance Tools... - Page 7 Orient the ring adapters to the tube end as shown in the diagram below. With the ring flush to the tube STEP TWO: end, twist the ring so the leading point of the tube coil slides into the inner ring grooves. Twist enough rotations for a solid connection and repeat for other tube end.
-
Page 8: Installation 1
Window Installation 1 NOTE: Once the Vent Tube assembly and Adjustable Window Slider are prepared, choose from one of the following two installation methods. 1. Cut Foam Seal A and B strips to the proper lengths and remove the adhesive backing. Attach them to Method 1: the window sash and frame as shown. - Page 9 Window Installation 2 Method 2: 1. Cut Foam Seal A and B strips to the proper lengths and remove the adhesive backing. Attach them to the window sash and frame as shown. Hung Window 2. Insert the Window Slider assembly into the window opening. 3.
-
Page 10: Control Panel Functions And Indicators
Control Panel & Remote Functions Buttons INDICATORS Indicators BUTTONS POWER Water full Press to turn ON/OFF the unit. High fan Low fan Set the indoor temperature (or time), the temperature (or time) will rise by 1°C/1°F Timer mode (or 1 hour) with each press. DOWN Set the temperature (or time), the Cool mode... -
Page 11: Operation
Operation CAUTIONS Confirm that the vent tube has been mounted properly. • When using functions on cooling and dehumidifying, keep an interval of at least 3 minutes between each ON/OFF. • Be sure wall socket provides standard 110-115V AC, 60Hz use. •... -
Page 12: Water Drainage
Water Drainage Under normal running conditions the unit can evaporate the condensated water and automati- cally exhaust it. If there is excess water condensa- tion inside the unit during normal cooling operation, the air conditioner stops running (the fan will contin- ue running) and the WATER FULL indicator illumi- nates on the top control panel. -
Page 13: Maintenance
Maintenance 1) Before cleaning, be sure to disconnect the unit from any electric supply outlet; 2) Do not use gasoline or other chemicals to clean the unit; 3) Do not wash the unit directly; 4) If the conditioner is damaged, please contact the dealer or repair shop. Cleaning the air filter every two weeks will keep in unit running in top condition with optimum Cleaning cooling e ciency. -
Page 14: Troubleshooting
Troubleshooting P RO BL E M P O S S I BL E CAUS E S SUGGESTED REMEDIES 1. Unit does not start when Water full indicator lamp blinks Dump the water out of the water tank. pressing on/o button Room temperature is lower than the Reset the temperature. -
Page 15: Warranty
Section 2 Accuzone Maxicool™ warrants the Covered Equipment to be free from defects in materials and work- manship, and will repair or replace, at its option, ANY PART of Covered Equipment installed in residential... -
Page 16: Reaching Accuzone
Reaching Accuzone Maxicool With our thanks to you, we sincerely hope you will enjoy your Accuzone Maxicool™ portable air conditioner trouble-free in the years ahead. If you do have any questions however, regarding this manual, installation or operation, please know that we are always here to assist you with any concern! 1 (800) 379-9189 accuzonemc.com/contact... - Page 17 MODELOS AZ08EWB 8000 BTU AZ11EWB 11000 BTU GUÍA DEL USUARIO AIRE ACONDICIONADO PORTÁTIL...
- Page 19 ANTES DEL PRIMER USO Para evitar posibles daños internos, es muy importante que mantenga su aire acondicionado Accuzone Maxicool™ en posición vertical y fuera de la caja durante 24 HORAS antes de enchufarlo. CONSERVE ESTE MANUAL PARA PODER CONSULTARLO EN EL FUTURO ÍNDICE...
- Page 20 Instrucciones de Seguridad Importantes Al usar el aire acondicionado portátil Accuzone Maxicool, siempre deben tomarse unas precauciones de seguridad básicas para reducir el riesgo de incendio, de descarga eléctrica y/o de daños personales. Por favor, lea todas las instrucciones relacionadas con el montaje y el funcionamiento.En caso contrario, ¡puede que provoque un funcionamiento incorrecto, daños o incluso daños personales!
- Page 21 Chasis y Descripción de los Componentes Descripción Panel de la Carcasa de control Filtro de Aire Rejilla Enchufe Frontal Entrada de Aire Aire Principal Conexión de Salida (en ambos al Tubo de Ventilación lados) Salida de Drenaje Ruedas de la Bandeja Inferior Conectores QUANTITY de Instalación...
- Page 22 Montaje y Preparacion Antes de Asegúrese de que instala la unidad en una superficie plana, para reducir al mínimo los ruidos y las vibraciones. Comenzar Se debe instalar la unidad cerca de un enchufe con toma de tierra, dejando accesible la salida de drenaje de la bandeja inferior (en la parte posterior de la unidad).
- Page 23 Oriente los adaptadores cilíndricos hacia el extremo del tubo tal y como se indica en el siguiente PASO 2: diagrama. Con el aro alineado con el extremo del tubo, gire el primero para que el punto de entrada de la bobina del tubo se deslice dentro de las ranuras interiores del aro. Gírelo varias veces para que quede Instalación del bien conectado y repita la operación con el otro extremo del tubo.
- Page 24 Instalacion de Ventana 1 NOTA: Cuando el conjunto del tubo de ventilación y la corredera ajustable de la ventana estén preparados, elija uno de los siguientes métodos de instalación. 1. Recorte las tiras de espuma aislante A y B con la longitud necesaria y retire el protector del adhesivo. TIPO 1: Fíjelas a la banda y al marco de la ventana tal y como se indica.
- Page 25 Instalacion de Ventana 2 TIPO 2: 1. Recorte las tiras de espuma aislante A y B con la longitud necesaria y retire el protector del adhesivo. Fíjelas a la banda y al marco de la ventana tal y como se indica. Instalación en 2.
- Page 26 Panel de Control y Funciones Remotas Botones e INDICADORES indicadores BOTONES ENCENDIDO/APAGADO Lleno de agua Púlselo para encender/apagar la unidad. Ventilador (alta) MÁS Ventilador (baja) Establecer la temperatura de la habitación (o la hora): la temperatura (o la hora) subirá 1°C/°F (o 1 hora) cada vez Modo temporizador que lo pulse.
- Page 27 Operación PRECAUCIONES Confirme que el tubo de ventilación se haya montado correctamente. • Al utilizar las funciones de refrigeración y deshumidificación, mantenga un intervalo de al menos 3 minutos entre cada encendido/apagado. • Asegúrese de que el enchufe de pared ofrece un uso estándar de 110-115 V CA, 60 Hz. •...
- Page 28 Agua Drenaje En condiciones de funcionamiento normales, la unidad puede evaporar el agua condensada y evacuarla automáti- camente. Si hay un exceso de condensación de agua dentro de la unidad durante el funcionamiento de refrig- eración normal, el aire acondicionado deja de funcionar (el ventilador seguirá...
- Page 29 Mantenimiento 1) Antes de limpiar, asegúrese de desenchufar la unidad. 2) No utilice gasolina ni otros productos químicos para limpiar la unidad. 3) No lave la unidad directamente. 4) Si el aire acondicionado está dañado, contacte con el distribuidor o con un taller de reparación. La limpieza del filtro de aire cada dos semanas mantendrá...
- Page 30 Resolución de Incidencias P RO BL E M P O S S I BL E CAUS E S SUGGESTED REMEDIES El indicador “Water full” (Lleno de agua) 1. La unidad no se enciende Vacíe el agua del depósito. parpadea y el depósito de agua está lleno. al pulsar el botón de encendido/apagado La temperatura de la habitación está...
- Page 31 SECCIÓN 2 Accuzone Maxicool™ garantiza que el Equipo cubierto carece de defectos en los materiales y la mano de obra, y reparará o sustituirá, a la discreción de airo, CUALQUIER PIEZA del Equipo cubierto instalado en domicilios Cobertura de la (no en establecimientos comerciales) que falle durante el uso normal en un periodo de garantía de 1 años.
- Page 32 Accuzone Maxicool ¡Muchas gracias! Esperamos sinceramente que disfrute de su aire acondicio- nado portátil Accuzone Maxicool™ sin problemas durante muchos años. Sin embargo, si tiene cualquier pregunta en relación con este manual, la instalación o el funcionamiento, no dude que estaremos siempre aquí para ayudarle.
Need help?
Do you have a question about the AZ08EWB and is the answer not in the manual?
Questions and answers