Table of Contents
Advertisement
Quick Links
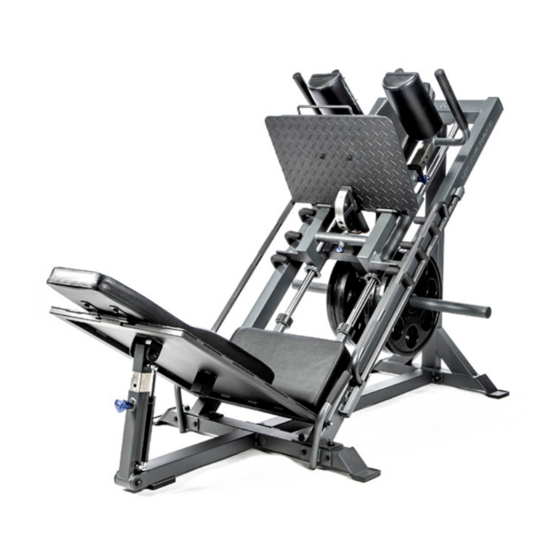
Linear Leg Press / Hack Squat
F760 PRO
To see in
FULL COLOR
& additional information,
scan this QR code.
Open your Camera
App and point it at
the QR Code
Base Serial Number: _ _ _ _ _ _ _ _ _ _ _ _ _
Purchased Date: ___ / ___ / ______
Dealer's Name:__________________________
Please register your products at:
https://www.bodycraft.com/product-registration/
Owner's Manual
F760 v1.3
1
Advertisement
Table of Contents

Summary of Contents for BodyCraft F760 PRO
- Page 1 Linear Leg Press / Hack Squat F760 PRO To see in FULL COLOR & additional information, scan this QR code. Open your Camera App and point it at the QR Code Base Serial Number: _ _ _ _ _ _ _ _ _ _ _ _ _ Purchased Date: ___ / ___ / ______ Dealer’s Name:__________________________...
- Page 2 Your BODYCRAFT machine has all the quality and design elements to make your workout extremely efficient and comfortable. Your new unit is a serious strength training machine that will keep you motivated, challenged and within reach of your fitness goals.
-
Page 3: Table Of Contents
Table of Contents NOTE: When you have downloaded the Owner’s Manual into a PDF reader, go directly to the desired page by touching any words in this Table of Contents. Product Safety Information Page Product Safety ……………………………………………………………... Important Notes, Recommended Tools & Cleaners …………………….. -
Page 4: Product Safety
It is imperative that you retain these Assembly Instructions and be sure all warning labels are legible and intact. Replacement Assembly Instructions and labels are available from BODYCRAFT. If you are unsure about the proper use of the BODYCRAFT strength machine call your local BODYCRAFT dealer or our Customer Service Department. Contact BODYCRAFT at 800-990-5556 or support@bodycraft.com... -
Page 5: Important Notes, Recommended Tools & Cleaners
Important Notes, Recommended Tools & Cleaners Important Notes and Tips: Before assembly, read all instructions thoroughly and preview diagrams to help make the installation easier. 2. Make sure all parts are accounted for and in proper condition before beginning assembly. See the parts list. -
Page 6: Warning Labels, Maintenance Schedule - Details
Warning Labels, Maintenance Schedule & Serial Number - F760 PRO Carefully read ALL warning, caution & maintenance schedule labels... - Page 7 Warning Labels, Maintenance Schedule & Serial Number Placement - F760 PRO Carefully read ALL Warning, Caution & Maintenance Schedule labels Both Rt & Lt Sides...
-
Page 8: Machine & Shipping Dimensions W/ Weight Capacities
Machine & Shipping Dimensions - F760 PRO Side View F760 Front View Overall Dimensions 40.9” W x 82.5” D x 50.2” H Weight Capacity: 1,000 lbs. Starting Weight: 80 lbs. Top View Starting Weight: 80 lbs (36 kg) Weight Capacity:... -
Page 9: Assembly Parts List
Assembly Parts - F760 PRO 1 of 2 Part # Assembly Parts List F760-001-ASM Frame, Main - Assembly F760-002-ASM Frame, Front, Stabilizer - Assembly F760-003-ASM Frame, Rear, Upright - Assembly F760-004 Frame, Bottom, Connector F760-005-ASM Frame, Right Shoulder, Adjusting - Assembly... -
Page 10: Assembly Parts Hardware
Assembly Parts - Hardware - F760 PRO 2 of 2 Part # Assembly Hardware F760-058 Bolt, Hex 1/2″ x 3-1/4″ L - BLACK F760-059 Bolt, Hex 1/2″ x 4″ L - BLACK F760-060 Bolt, Hex 3/8″ x 1″ L - BLACK F760-061 Bolt, Hex 3/8″... -
Page 11: Preassembly Tips
Product Assembly - Preassembly Tips - F760 PRO PREASSEMBLY TIP #1 – “Stage Right”. During the assembly process we will be stating Right, Left, Front, Back, Top, or Bottom. These all are in the perspective of the user in the machine facing outward with feet facing the ground. -
Page 12: Step 1A Thru Step 5D - Main Assembly Procedures
Product Assembly - F760 PRO - STEP 1a, 1b Please Hand Tighten All Bolts Until STEP 1d TEP 1a: Installation of the Base Frames Attach the Frame, Bottom, Connector (4) to the Frame, Front Stabilizer -Assembly (2-ASM) and the Frame, Rear, Upright - Assembly (3-ASM) using: ●... - Page 13 Product Assembly - F760 PRO - STEP 1c, 1d Please Hand Tighten All Bolts Until STEP 1d TEP 1c: Installation of the Handle Assemblies Attach the Handle, Right - Assembly (15-ASM) & the Handle, Left Assembly (16-ASM) to the Frame, Front, Stabilizer - Assembly (2-ASM) using: ●...
- Page 14 Product Assembly - F760 PRO - STEP 2a, 2b Please Hand Tighten All Bolts Until STEP 3c TEP 2a: Installation of the Weight Horn Support Attach the Weight Holder Support (12) to the Frame, Main Assembly (1-ASM) on the bottom side, upper cross frame, Moving Carriage (23) using: ●...
- Page 15 Product Assembly - F760 PRO - STEP 3a, 3c Please Hand Tighten All Bolts Until STEP 3c TEP 3a: Installation of the Shoulder Assemblies Attach the Pad, Shoulder, Right & Left (21, 22) to the Frame, Right Shoulder, Adjusting - Assembly (5-ASM) and...
- Page 16 Product Assembly - F760 PRO - STEP 4a, 4b NOTE: The Long Axle (27) & Short Axle (31) are pre-assembled in the Main Frame Assembly (1-ASM). Take both out to start STEP 4a and STEP 4c by using a 9/16 wrench or socket on the Nuts (76).
- Page 17 Product Assembly - F760 PRO - STEP 4c, 4d NOTE: The Long Axle (27) & Short Axle (31) are pre-assembled in the Main Frame Assembly (1-ASM). Take both out to start STEP 4a and STEP 4c by using a 9/16 wrench or socket on the Nuts (76).
- Page 18 Product Assembly - F760 PRO - STEP 5a, 5b TEP 5a: Installation of the Back Pads Attach the Pad, Back, Upper (20) to the Frame, Main - Assembly (1-ASM). Continue with installation of the Pads, Back (18) to the Plate, Back Pad - Assembly (9-ASM), then insert into the Plate, Leg Press - Assembly (7-ASM), see image below..
- Page 19 Product Assembly - F760 PRO - STEP 5c, 5d TEP 5c: Installation of the Seat & Lower Back Pads Attach the Pad, Seat (17) to the Frame, Main - Assembly (1-ASM). Continue with installation with the Pad, Back, Lower (19) to the Foot Platform (8). Finish with the Foot Tube - Assembly (11-ASM) on the Foot Platform.
-
Page 20: Step 6 - Final Assembly Clean Up, Polish & Double Checks
Product Assembly - F760 PRO - STEP 6 STEP 6a - 6c: Final Assembly Clean Up, Polish and Double Checks STEP 6a: Remove all assembly stickers, i.e. part numbers & right left circles. ● Easy to remove with fingernail or plastic scraper ●... - Page 21 Detailed Parts List - F760 PRO 1 of 2 Part # Detailed Parts list F760-001 Frame, Main F760-002 Frame, Front, Stabilizer F760-003 Frame, Rear, Upright F760-004 Frame, Bottom, Connector F760-005 Frame, Right Shoulder, Adjusting F760-006 Frame, Left Shoulder, Adjusting F760-007...
-
Page 22: Detailed Parts List
Detailed Parts List - F760 PRO 2 of 2 Part # Detailed Parts list F760-040 Plug, Rectangular 75mm x 50mm F760-041 Plug, Square 50mm x 50mm F760-042 Plug, Square 45mm x 45mm F760-043 Rubber Cushion F760-044 Locking Pin F760-045 Plastic Cap... -
Page 23: Parts Exploded View
Detailed Parts - Exploded View - Main Frame Assembly (001-ASM) - F760 PRO 1 of 2 Locking Pin Inner Hex Screw 5/16” x 1/4” Locking Pin Assembled View Main Frame Assembly (001-ASM) NOTE: Parts are not to scale View Keys Red dotted (large): Structural parts assembled direction. - Page 24 Detailed Parts - Exploded View - F760 PRO 2 of 2 71 66 1-ASM 69 76 69 76 View Keys Red dotted (large): Structural parts assembled direction. Red dotted (med): Sub-parts assembled direction. NOTE: Parts are not to scale Blue dotted lines (small):...
-
Page 25: Strength Maintenance & Routine Schedule
Strength Maintenance & Routine Schedule LIGHT HOME ROUTINE SCHEDULE COMMERCIAL Clean: 1 - 2 WEEKS DAILY Upholstery. Inspect: DAILY 1 - 2 WEEKS Cables or Belts and their tension. Inspect: 1 - 2 WEEKS DAILY Links, Pull Pins, Snap Locks, Swivels, and Weight Stack Pins. -
Page 26: Strength Maintenance - Lubrication
Bearing and linear bearing systems have advanced over the years, but they must be maintained on a regular basis if you expect them to last and perform efficiently. BODYCRAFT uses only the highest quality bearings and linear motion components that are... -
Page 27: Required Info Before Initiating A Service Case
Service Request Required Information BEFORE Initiating a Service Case The following information is needed to help expedite troubleshooting and to ensure the correct part(s) are sent if needed for a repair: What product / model # do you have? Unit serial number? Installed by a dealer or direct sale? Date of installation? Date of service issue? -
Page 28: Product Warranty
If the item exhibits such a defect, BODYCRAFT will, at its option, repair or replace it without cost for parts. Shipping and handling charges may apply. (BODYCRAFT may require return of the part(s) or photographic evidence of the damaged part(s) prior to replacement.) Serial number is required. -
Page 29: Product Warranty Registration
The information you provide will never be distributed to any other individuals or agencies for any purpose. If you prefer to mail your warranty card, have the owner of the product complete the information below and return it to BODYCRAFT within 30 days from the date of equipment installation.
Need help?
Do you have a question about the F760 PRO and is the answer not in the manual?
Questions and answers