Table of Contents
Advertisement
Quick Links
RETAILER/INSTALLER NOTICE
This system includes a Quick Start Guide (QSG). Please ensure that the QSG is provided to the Consumer of this
system. The QSG references the URL link or QR code where a Consumer may access and download the full
Operation Manual.
Owner's Manual: www.voxxintl.com/seatback0M2
The Installation Manual for this system is also available for download at the below URL link or QR code.
Installation Manual: www.voxxintl.com/seatbacklM
PRE-INSTALLATION NOTE
The Audio/Video Output of this system will only output A/V content from the monitor that is connected to the
M2 Monitor side of the T-Harness.
When connecting to an external A/V receiving device, it is important to review with the Consumer which monitor
they would like to have as the source monitor (SB10MD2 or SB10M2) that will feed this external A/V device.
111111111111111111111111 I
Ill
710039
Advertisement
Table of Contents

Related Manuals for Voxx Electronics SB10MD1

Summary of Contents for Voxx Electronics SB10MD1
- Page 2 Universal Seatback In-Vehicle Entertainment System Owner's Manual...
- Page 3 © 2019 Voxx Electronics. All rights reserved. This manual, or any portion thereof, may not be reproduced without the express written permission of Voxx Electronics. Design and specifications subject to change without notice. The images shown in the examples may differ from actual operation.
-
Page 4: Table Of Contents
TABLE OF CONTENTS System Features ........................................... 5 Accessories ............................................6 Monitor Features (SB10MD1) ......................................7 Monitor Features (SB10M1) ......................................8 Getting Started ............................................. 9 Home Main Menu ..........................................10 System Applications ......................................... 11 SmartStream Android ........................................12 SmartStream iOS ..........................................13 HDMI Port Information ........................................14... -
Page 5: System Features
SB10M1 FEATURES SB10MD1 FEATURES • Android Operating System • Android Operating System • Quad-core Processor • Quad-core Processor • RAM (8GB) • RAM (8GB) • Internal Memory (8GB) • Internal Memory (8GB) • 10.1" TFT LCD Display (1024x600) • 10.1" TFT LCD Display (1024x600) •... -
Page 6: Accessories
ACCESSORIES Wireless Headphones Each monitor includes a built-in dual channel infrared transmitter for use with the included wireless headphones. The wireless headphones must be used within a direct line of sight from the screen. Infrared transmission, like visible light, travels only in a straight line. How to Use the Wireless Headphones When wearing the headphones, make sure to observe the “Left”... -
Page 7: Monitor Features (Sb10Md1)
MONITOR FEATURES (SB10MD1) 6. Wired Headphone Jack 1. DVD Disc Eject Button For use with wired headphones equipped with a 3.5mm cable. This button is used for ejecting a disc from the built-in DVD player. 7. Micro SD Card Slot 2. -
Page 8: Monitor Features (Sb10M1)
MONITOR FEATURES (SB10M1) 6. Wired Headphone Jack 1. Power Button For use with wired headphones equipped with a 3.5mm cable. This button is used to turn the system ON/OFF. 7. USB Port 2. Home Button This input supports media playback from a USB thumb drive (up to This button is used to display the Home Menu Screen. -
Page 9: Getting Started
GETTING STARTED Power Button Home Button 1. To start the system, the vehicle ignition key switch must be in ACC or engine ON position. 2. The Power Button and Home Buttons will flash RED and BLUE while the system is booting up. Once the boot up process is completed, the Power Button and Home Buttons will turn RED, and stay in the Standby position. -
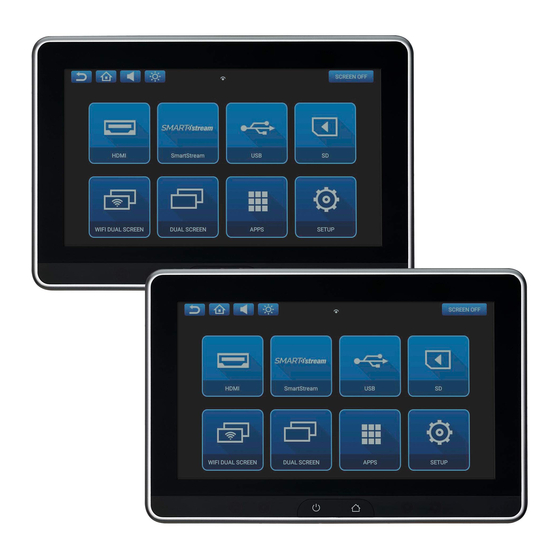
Page 10: Home Main Menu
HOME MAIN MENU SB10MD1 SB10M1... -
Page 11: System Applications
Store with your Google account and download your favorite apps directly. If you do not have Google account, creating one is easy and free. 1. Connect the SB10MD1 and SB10M1 monitors to a Wi-Fi hotpsot. Refer to page 19 for details. 2. Select "APPS" from the main menu screen. -
Page 12: Smartstream Android
SMARTSTREAM ANDROID 1. Select the SmartStream icon on the Main Menu. 4. Select the Mirroring function on your Smartphone. Your Smartphone will start searching for devices. *See your Smartphone's Operation Manual for details on how to operate screen mirroring. 5. After searching is completed, the monitor name will appear on your Smartphone screen. -
Page 13: Smartstream Ios
Each system monitor will display a message describing this limitation. Due to this limitation, please connect your iOS device using the HDMI input on the SB10M1 monitor. SB10MD1 Screen Message 2. Select the iOS icon on the screen. SB10M1 Screen Message NOTE: Smartphone/Tablet manufacturers in addition to App providers may place restrictions on the type of content that can be transmitted wirelessly. -
Page 14: Hdmi Port Information
SMARTSTREAM iOS (CONTINUED) 4. Please use a genuine Apple HDMI Adaptor & HDMI Cable to connect your iOS device to the SB10M1 monitor's HDMI Input and select HDMI as the video source to play content from your iOS device. Aftermarket Apple HDMI adapters may not function properly with the system. <Apple HDMI Adapter>HDMI Cable<SB10M1<... -
Page 15: Usb & Sd Card Playback
USB & SD CARD PLAYBACK USB PLAYBACK SD CARD PLAYBACK 1. Insert a USB storage device into either monitor's USB port. 1. Insert a Micro SD Card into either monitor's SD card slot. 2. Select USB source in the Main Menu. 2. -
Page 16: Wifi Dual Screen
WIFI DUAL SCREEN Wi-Fi Dual Screen allows you to wirelessly share content between monitors in high-resolution. Either monitor can be setup as the Transmitting or Receiving monitor. 1. To setup each monitor as a Transmitting or Receiving monitor, select WIFI 3. - Page 17 WIFI DUAL SCREEN(CONTINUED) 5. Select the Receiving Monitor by pressing the Device Name. The Transmitting monitor will then establish a connection to the Receiving Monitor. Once a connection is established, "Connected" will appear under the Device Name. Transmitting Monitor 6. Once connected, the Receiving Monitor will mirror the Transmitting Monitor in high resolution. Transmitting Monitor Receiving Monitor 7.
-
Page 18: Dual Screen
DUAL SCREEN Dual Screen allows you to share content between monitors in standard resolution. 1. To mirror content from one monitor to the other, select Dual Screen on the receiving monitor. 2. To stop mirroring content on the receiving monitor, press the Home button on the receiving monitor. NOTE: Dual Screen mode can only be selected on one monitor at a time. -
Page 19: Wifi Setup
WIFI SETUP 1. Select SETUP in the Main Menu. 3. Select a Wi-Fi network from the available list. Vehicle Wi-Fi Mom's Phone Dad's Phone 4. Touch the line to enter the password, and the on-screen keyboard will 2. Select WIFI from the setup menu. Turn ON the WIFI and then touch the WIFI bar to see a listing of available Wi-Fi networks. -
Page 20: Voxx Link
VOXX LINK Voxx Link is an APP developed for Android and Apple smartphones and tablets that allows full system remote control and visual monitoring of the system without having to directly see or directly touch the monitors. This is a great tool to allow content selection and control of the system for actual users who may be infants and toddlers, too young to control the system themselves. - Page 21 INSTALL WFMM HDMI SmartStream IR TRANSMITTER 18:00 SCREEN OFF SCREEN OFF Google Play LANGUAGE ABOUT DEVICE WIFI VOXX VOXX LINK Kevin_Android_R&D SETUP WIFI DUAL SCREEN DUAL SCREEN APPS LINK RESET VOXX LINK (CONTINUED) VOXX LINK Tools INSTALL WFMM HDMI SmartStream IR TRANSMITTER LANGUAGE ABOUT DEVICE...
-
Page 22: Wfmm
WFMM (WIRELESS FM MODULATOR) WFMM allows you to broadcast audio content from either system 4. Touch the frequency button to select your preferred frequency, and tune monitor to your vehicle's factory audio system through an FM your radio FM to the same frequency. This will allow you to listen to the station. -
Page 23: Ir Headphone Transmitter
IR HEADPHONE TRANSMITTER 1. Select SETUP in the Main Menu. 3. Touch the ON or OFF button to turn ON or OFF the IR Transmitter. 4. Select the desired Channel (A or B) for the IR Transmitter. 2. Select IR Transmitter inside the SETUP screen. It is recommended to select Channel A for one monitor and Channel B for the other monitor. -
Page 24: Language
USER INTERFACE LANGUAGE 3. Select your preferred language. 1. Select SETUP in the Main Menu. 2. Select Language inside the SETUP screen. -
Page 25: About Device - Check For Update
ABOUT DEVICE - CHECK FOR UPDATE 3. A notification message will appear on screen if a software update is 1. Select SETUP in the Main Menu. available for the monitor. Each system monitor will need to be updated independently. Press Yes to begin the download process, or press No to update the software at another time. - Page 26 ABOUT DEVICE - CHECK FOR UPDATE (CONTINUED) 1. This message will appear on the screen if the monitor is not NOTES: As long as the system monitors are connected to a Wi-Fi connected to a Wi-Fi hotspot. hotspot, the monitors will be able to receive software updates when they become available.
-
Page 27: Device Name & Accounts
DEVICE NAME ACCOUNTS Select SETUP in the Main Menu, then select "ABOUT DEVICE" Select SETUP in the Main Menu, then select "ABOUT DEVICE" in the in the SETUP screen. SETUP screen. 2. Tap "DEVICE NAME" three times to display the keyboard. When 2. -
Page 28: Time Zone & Reset
TIME ZONE RESET 1. Select SETUP in the Main Menu. 1. Select SETUP in the Main Menu. 2. Select "ABOUT DEVICE" in the SETUP screen, touch the "ZONE" 2. Select "RESET" inside the SETUP screen. Touch the "Factory Setting" button to set the time zone to your local time zone. button to reset all monitor settings back to factory defaults. -
Page 29: Volume & Brightness Control
VOLUME CONTROL & BRIGHTNESS CONTROL VOLUME CONTROL (WIRED HEADPHONES ONLY) BRIGHTNESS CONTROL 1. Touch the Volume Button inside the Info Bar to change the volume 1. Touch the Brightness Button inside the Info Bar to change the settings for optional wired headphones connected to the 3.5mm brightness settings. -
Page 30: Dvd Playback (Sb10Md1)
DVD PLAYBACK (SB10MD1 MONITOR) DVD Region Code Supported Disc Types DVD-Video: DVD contains video The DVD player is preset to a region code at the factory depending on DVD +/- R: DVD contains video where the DVD player is sold. A DVD from a different region cannot be CD-DA: CD contains audio played in this unit and the unit will display "WRONG REGION”. -
Page 31: Media Type And File Type Compatibility
MEDIA & FILE TYPE COMPATIBILITY Media Compatibility Supported Formats This system is compatible with the media formats listed in the table Format Extension Supported Variations/Codecs below. VC-1 .wmv, .asf MPEG-2 Part 2, WMV .avi H.264, MPEG-2 Part 2, MPEG-4 Part 2 •... -
Page 32: Troubleshooting
Check to make sure the disc is inserted with the label side facing towards the user. Check if the disc is defective by trying another disc. Check the type of disc being played. Disc will not play (SB10MD1) This unit only plays DVD (Single, Dual Layer), DVD-R/+R, DVD+R Dual layer, DVD-RW/+RW, CD, CD-R, and CD-RW. - Page 33 TROUBLESHOOTING (CONTINUED) Symptom Remedy Some mobile devices may require a special HDMI cable and/or adapter. Contact your HDMI device supplier for the HDMI cable and/or adapter. Some devices may need to boot up before showing picture. HDMI input not working Ensure you are using an OEM branded (Apple, Samsung, etc.) HDMI cable and/or adapters.
-
Page 34: General Specifications
GENERAL SPECIFICATIONS Display Type 10.1" Capacitive Touch Screen, Resolution: 1024 (RGB) x 600 LCD Backlight Type LED Backlight Life: 20,000 Hours Supported Disc Types DVD (Single, Dual Layer), DVD-R/+R, DVD+R Dual layer, DVD-RW/+RW, CD, CD-R, CD-RW Operation Voltage: 10.5VDC ~ 16VDC, Operation Power: 18W max @ 12VDC, General Operation Temperature: 32 ~ 131°F (0 ~ 55°C) Frequency Response... -
Page 35: Compliance Information
COMPLIANCE INFORMATION FCC Notice DVD Video Playback This device complies with Part 15 of FCC Rules and Industry Canada This item incorporates copy protection technology that is protected by license-exempt RSS standard(s). Operation is subject to the following two U.S. patents and other intellectual property rights of Rovi Corporation. conditions: (1) this device may not cause interference, and (2) this device Reverse engineering and disassembly are prohibited. - Page 36 COMPLIANCE INFORMATION FLAC HDMI Copyright © 2000-2009 Josh Coalson The terms HDMI and HDMI High-Definition Multimedia Interface, Copyright © 2011-2013 Xiph.Org Foundation and the HDMI Logo are trademarks or registered trademarks of HDMI Redistribution and use in source and binary forms, with or without Licensing, LLC in the United States and other countries.
- Page 37 NOTES...
- Page 38 © 2019 Voxx Electronics Corp.,180 Marcus Blvd Hauppauge, NY 11788 700066 REV 06...
Need help?
Do you have a question about the SB10MD1 and is the answer not in the manual?
Questions and answers
Power and home buttons flashing red and blue none stop. I've done the reset button and no response
If the power and home buttons on the Voxx Electronics SB10MD1 are flashing red and blue continuously, it means the system is booting up. This flashing should last for approximately 12 to 15 seconds, after which the buttons will remain solid red.
This answer is automatically generated