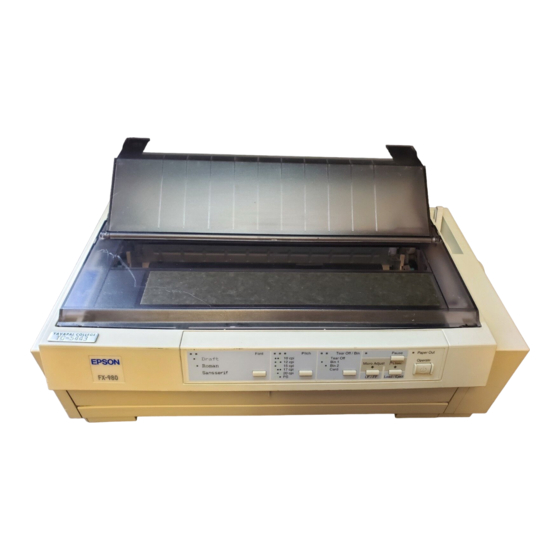
Epson FX-980 User Manual
9-pin dot matrix printer
Hide thumbs
Also See for FX-980:
- User manual (247 pages) ,
- Service manual (72 pages) ,
- Manual (28 pages)
Advertisement
Quick Links
®
9-Pin Dot Matrix Printer
All rights reserved. No part of this publication may be reproduced, stored in a retrieval system,
or transmitted in any form or by any means, electronic, mechanical, photocopying, recording,
or otherwise, without the prior written permission of SEIKO EPSON CORPORATION. The
information contained herein is designed only for use with this EPSON printer. EPSON is not
responsible for any use of this information as applied to other printers.
Neither SEIKO EPSON CORPORATION nor its affiliates shall be liable to the purchaser of
this product or third parties for damages, losses, costs, or expenses incurred by the purchaser
or third parties as a result of: accident, misuse, or abuse of this product or unauthorized
modifications, repairs, or alterations to this product, or (excluding the U.S.) failure to strictly
comply with SEIKO EPSON CORPORATION's operating and maintenance instructions.
SEIKO EPSON CORPORATION shall not be liable for any damages or problems arising from
the use of any options or any consumable products other than those designated as Original
EPSON Products or EPSON Approved Products by SEIKO EPSON CORPORATION.
EPSON and EPSON ESC/P are registered trademarks of SEIKO EPSON CORPORATION.
Microsoft, Windows, and Windows NT are registered trademarks of Microsoft Corporation.
IBM is a registered trademark of International Business Machines Corporation.
General Notice: Other product names used herein are for identification purposes only and
may be trademarks of their respective owners. EPSON disclaims any and all rights in those
marks.
Copyright © 1999 by SEIKO EPSON CORPORATION, Nagano, Japan.
User's Guide
Advertisement

Related Manuals for Epson FX-980


Summary of Contents for Epson FX-980
- Page 1 SEIKO EPSON CORPORATION. The information contained herein is designed only for use with this EPSON printer. EPSON is not responsible for any use of this information as applied to other printers.
- Page 2 Model: P922A Conforms to the following Directive(s) and Norm(s): Directive 73/23/EEC: EN 60950 Directive 89/336/EEC: EN 55022 Class B EN 61000-3-2 EN 61000-3-3 EN 50082-1 IEC 801-2 IEC 801-3 IEC 801-4 March 1999 H. Horiuchi President of EPSON EUROPE B.V.
- Page 3 Printer Parts edge guides paper guide base paper guide cover printer cover paper release lever front paper guide knob (closed) control panel paper thickness lever ribbon cartridge serial interface shield plate parallel interface paper tension unit tractor front edge guides front paper guide (open)
- Page 5 Control Panel Buttons and Lights Font button Pitch button Pause button Paper Out light Selects the font. Selects the font size. Stops printing On when no paper is See Chapter 5. See Chapter 5. temporarily, and loaded in the selected resumes printing when paper source or paper is Font lights...
- Page 7 Contents Printer Parts ........iii Control Panel Buttons and Lights .
- Page 8 Chapter 2 Printing on Continuous Paper Setting the Paper Release Lever ......2-2 Setting the Paper Thickness Lever ......2-4 Using the Rear Push Tractor .
- Page 9 Printer driver settings overview ..... . 4-21 Using the EPSON Remote! Utility ......4-23 Installing EPSON Remote! .
- Page 10 About the EPSON Status Monitor 2 Utility....6-2 Installing EPSON Status Monitor 2 ......6-3 Accessing EPSON Status Monitor 2 .
- Page 11 Appendix A Enhancing Your Printer With Options Options ..........A-2 Paper handling options .
- Page 12 Command Lists ......... C-13 EPSON ESC/P control codes ......C-14 IBM 2380 Plus emulation control codes .
- Page 13 Getting to Know Your Printer ® Your EPSON FX-980 9-pin dot matrix printer provides high-quality printing and great performance in a compact design. Features include: R a variety of paper paths to suit your printing needs R the ability to handle a wide range of paper types, including...
- Page 14 If you load paper in the rear or front push tractor, you can use the tear-off feature to advance your continuous paper to the printer’s tear-off edge when you finish printing. Then you can easily tear off printed sheets and save paper normally lost between documents.
- Page 15 paper release lever R Use the micro adjust feature to adjust the top-of-form and tear-off positions. (See the Glossary for explanations of the top-of-form and tear-off positions.) The micro adjust feature allows you to move the paper forward or backward in 1/216 inch increments so that you can make precise adjustments to the top-of-form and tear-off positions.
- Page 16 Printing on continuous paper You can choose from three tractor positions (front push, rear push, and pull) and three paper entry slots (front, rear, and bottom) for continuous paper printing. This section helps you determine which paper paths and tractor positions are best for your continuous paper printing needs.
- Page 17 Tractor position Description To use this tractor, load paper in the rear slot. When you print on multi-part forms that are bound on only one side by point gluing, load them in the rear paper slot; the front push tractor cannot feed this type of form. Note: Because thick multi part forms require a straight paper path, load them in the front slot.
- Page 18 You can use the front, bottom, or rear paper slot with the pull tractor. Paper slot Description If you print on thick paper such as multi-part forms or continuous paper with labels, use the front paper slot because this paper path is almost straight. This reduces the chance of paper jams.
- Page 19 Using the push and pull tractors in combination You can improve paper feeding and reduce paper jams by using two tractors at the same time. This is especially helpful for printing on continuous pre-printed forms, multi-part forms, or labels, and for printing high-quality graphics. When using two tractors in combination, you can load paper either in the front paper slot both the front push tractor and the pull tractor, or in the rear paper slot with both the rear push tractor and the pull...
- Page 20 Printing on single sheets As shown below, you can load single sheets from the top or the front of the printer. You can load ordinary single sheets from either position, even with continuous paper already loaded in the front or rear push tractor. This section helps you determine which paper slot best suits your single-sheet printing needs.
Need help?
Do you have a question about the FX-980 and is the answer not in the manual?
Questions and answers