Table of Contents
Advertisement
Quick Links
Advertisement
Table of Contents

Summary of Contents for Sontheim Verona COMhawk xt
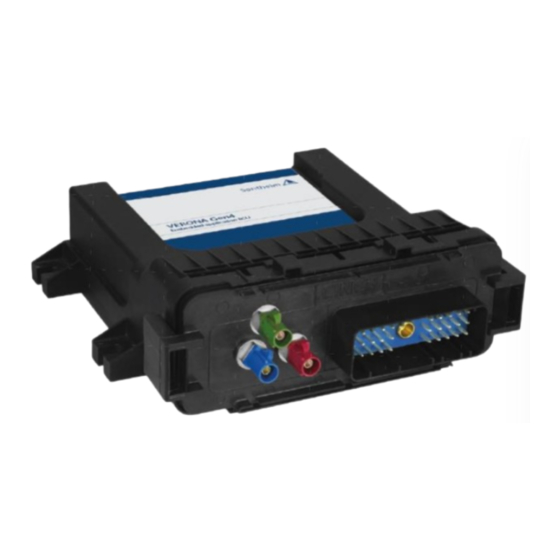
- Page 1 Verona Gen 4 (COMhawk xt) User Manual...
-
Page 2: Table Of Contents
Operating the Software via WIFI (Verona Gen 4 is powered and connected to the PC via WiFi) 13.3. WinSCP Access: ........................20 GPS Position ..........................21 Insert the SIM card ........................22 Verona Gen 4 Housing......................25 © Sontheim Industrie Elektronik GmbH 13.05.2022 page 2 of 30 Sontheim_Telemetry_Verona_Gen 4_operations manual.docx Version of the Document: 2.1... -
Page 3: List Of Figures
Table 3: System and Functional Requirements (Populated Option is Bold) ......... 13 Table 4 Bands, frequencies, maximum power and maximum antenna gain for EC ........14 Table 5 Bands, frequencies, maximum power and maximum antenna gain for FCC / ISED......14 © Sontheim Industrie Elektronik GmbH 13.05.2022 page 3 of 30 Sontheim_Telemetry_Verona_Gen 4_operations manual.docx... -
Page 4: Topic
Operations Manual 1. Topic: This document is a brief description for the next generation telemetry node from Sontheim Industrie Elektronik GmbH. This document describes to put the device into operation. 2. Document Reference Number Author Name Version Document number Table 1 Document Reference 3. -
Page 5: Preliminary Note
In case of malfunctions or uncertainties please contact the manufacturer. Tampering with the device can seriously affect the safety of operators and machinery. It is not permitted and leads to the exclusion of any liability and warranty claims. © Sontheim Industrie Elektronik GmbH 13.05.2022 page 5 of 30 Sontheim_Telemetry_Verona_Gen 4_operations manual.docx... -
Page 6: General Implementation Instructions
7.5. General Implementation Instructions Reliable operation cannot be guaranteed if samples or prototypes are used in series systems. The proposed circuits do not imply any technical liability for the system on the part of Sontheim Industrie Elektronik GmbH. Incorrect connections could cause unexpected signals at the outputs of the ECU. -
Page 7: Notes On Wiring And Circuitry
Damage resulting from improper use and/or from unauthorized interference in the component not described in this manual or data sheet render all warranty and liability claims void with respect to the manufacturer. © Sontheim Industrie Elektronik GmbH 13.05.2022 page 7 of 30 Sontheim_Telemetry_Verona_Gen 4_operations manual.docx... -
Page 8: Further Information
NOTICE: Changes or modifications made to this equipment not expressly approved by Sontheim Industrie Elektronik GmbH may void the FCC authorization to operate this equipment. Radiofrequency radiation exposure Information according 2.1091 / 2.1093 / KDB 447498 / RSS- This equipment complies with FCC radiation exposure limits set forth for an uncontrolled environment. -
Page 9: Label Information
Para maiores informações, consulte o site da ANATEL www.gov.br/anatel/pt-br Este equipamento não tem direito à proteção contra interferência prejudicial e não pode causar interferência em sistemas devidamente autorizados. © Sontheim Industrie Elektronik GmbH 13.05.2022 page 9 of 30 Sontheim_Telemetry_Verona_Gen 4_operations manual.docx... -
Page 10: Operation, Service, Maintenance And Repair, Decommissioning
When replacing the telemetry unit, make sure that no contamination can penetrate the mating connector. Only use an original spare telemetry unit from Sontheim Industrie Elektronik GmbH or from the system integrator, otherwise the functional reliability cannot be guaranteed, and the warranty will be voided. -
Page 11: Extension And Conversion
Operations Manual 8.5. Extension and Conversion The telemetry unit must not be modified. The warranty from Sontheim Industrie Elektronik GmbH only applies to the configuration as delivered. The warranty will be voided if the unit is modified or extended. 9. Verona Gen 4 Overview 9.1. -
Page 12: Comhawk Xt / Verona Gen 4 - Technical Data
-40°C … +85°C Storage temperature Extensions/Options 10/100 Mbit/s LAN for cable network connection GNSS GNSS module: GPS/GLONASS, Galileo, BeiDou with external FAKRA antenna © Sontheim Industrie Elektronik GmbH 13.05.2022 page 12 of 30 Sontheim_Telemetry_Verona_Gen 4_operations manual.docx Version of the Document: 2.1... -
Page 13: Rf Specification
LTE FDD 8 900 MHz 23dBm±2dB 0.03 LTE FDD 28 700 MHz 23dBm±2dB 1.57 LTE TDD 40 2300 MHz 23dBm±2dB 3.52 WLAN 2450 MHz 15.0 © Sontheim Industrie Elektronik GmbH 13.05.2022 page 13 of 30 Sontheim_Telemetry_Verona_Gen 4_operations manual.docx Version of the Document: 2.1... -
Page 14: Antenna Specifications
Use only the following antenna, this antenna was part of the certification: Antenna: Hirschmann (TE): CGNW 702659 LP S/FAKRAf/3.0 Or alternative: Antenna Molex 206866 © Sontheim Industrie Elektronik GmbH 13.05.2022 page 14 of 30 Sontheim_Telemetry_Verona_Gen 4_operations manual.docx Version of the Document: 2.1... -
Page 15: Software
Operations Manual 12. Software 12.1. SW Overview Figure 3 Function Overview Figure 4 Function Overview with more detailed clouded services Explanation © Sontheim Industrie Elektronik GmbH 13.05.2022 page 15 of 30 Sontheim_Telemetry_Verona_Gen 4_operations manual.docx Version of the Document: 2.1... -
Page 16: Sw Access To Comhawk Xt
13.1. Operating the Software via LAN (Verona Gen 4 is powered and connected to the PC via LAN cable) Log in from the PC to the Verona Gen 4 telemetry node via SSH using the “putty” software tool: © Sontheim Industrie Elektronik GmbH 13.05.2022 page 16 of 30 Sontheim_Telemetry_Verona_Gen 4_operations manual.docx... -
Page 17: Operating The Software Via Wifi
13.2. Operating the Software via WIFI (Verona Gen 4 is powered and connected to the PC via WiFi) Log in from the PC to the Verona Gen 4 telemetry node via SSH using the “putty” software tool over WIFI: © Sontheim Industrie Elektronik GmbH 13.05.2022 page 17 of 30 Sontheim_Telemetry_Verona_Gen 4_operations manual.docx... -
Page 18: Figure 9 Windows 10 Wlan - Networks Available
After connecting the COMhawk xt / VERONA Gen 4, open a SSH console. In this example, PuTTY was used: Enter the IP address: 10.0.0.1 Port: 22 (is automatically set) Than press open © Sontheim Industrie Elektronik GmbH 13.05.2022 page 18 of 30 Sontheim_Telemetry_Verona_Gen 4_operations manual.docx Version of the Document: 2.1... -
Page 19: Figure 11 Putty Console To Connect The Comhawk Xt
Password: root Figure 12 Enter the Login After successful login the COMhawk xt / VERONA Gen 4 can be accessed: Figure 13 COMhawk xt is connected © Sontheim Industrie Elektronik GmbH 13.05.2022 page 19 of 30 Sontheim_Telemetry_Verona_Gen 4_operations manual.docx Version of the Document: 2.1... -
Page 20: Winscp Access
The COMhawk xt directory opens (right is COMhawk xt): Figure 15 COMhawk xt Start Directory Structure (Example) Start is the 'root' directory, -> go up and change to the 'home' directory! © Sontheim Industrie Elektronik GmbH 13.05.2022 page 20 of 30 Sontheim_Telemetry_Verona_Gen 4_operations manual.docx... -
Page 21: Gps Position
The output are the GPS coordinates: LON, LAT, height in a Table. To close cgps enter: [STRG + c] (German keyboard) To close cgps enter: [CRTL + c] (English keyboard] © Sontheim Industrie Elektronik GmbH 13.05.2022 page 21 of 30 Sontheim_Telemetry_Verona_Gen 4_operations manual.docx... -
Page 22: Insert The Sim Card
Prepare the Verona Gen 4 and the SIM card. Please be careful with the orientation of the SIM card: Figure 17 prepare the SIM card with the right Orientation. Pre-set the SIM card with the right orientation to set into the holder: © Sontheim Industrie Elektronik GmbH 13.05.2022 page 22 of 30 Sontheim_Telemetry_Verona_Gen 4_operations manual.docx... -
Page 23: Figure 18 Pre-Set The Sim Card With The Right Orientation To Set Into The Holder
To insert the SIM card into the SIM connector, please the SIM card into the SIM connector on the PCB. Figure 19 Please the SIM card into the SIM Connector on the PCB. Push carefully in. SIM card is connected and automatically locked in operation-position. © Sontheim Industrie Elektronik GmbH 13.05.2022 page 23 of 30 Sontheim_Telemetry_Verona_Gen 4_operations manual.docx... -
Page 24: Figure 20 Sim Card Is Connected And Automatically Locked In Operation-Position
After setting the SIM card in, please close the housing using either the Cinch Closing tool, or by hand. Press to the front connector with both thumbs and press until you’re here the “clicks” of the locks. © Sontheim Industrie Elektronik GmbH 13.05.2022 page 24 of 30 Sontheim_Telemetry_Verona_Gen 4_operations manual.docx... -
Page 25: Verona Gen 4 Housing
All drawings aren’t in scale, please see the dimensions: Figure 21 3D view Verona Gen 4 Telemetry Figure 22 Verona Gen 4 Telemetry - Front View with Dimensions © Sontheim Industrie Elektronik GmbH 13.05.2022 page 25 of 30 Sontheim_Telemetry_Verona_Gen 4_operations manual.docx... -
Page 26: Figure 23 Verona Gen 4 Telemetry - Side View With Dimensions
Operations Manual Figure 23 Verona Gen 4 Telemetry - Side View with Dimensions Figure 24 Verona Gen 4 Telemetry - Detail View: FAKRA Antenna Connection © Sontheim Industrie Elektronik GmbH 13.05.2022 page 26 of 30 Sontheim_Telemetry_Verona_Gen 4_operations manual.docx Version of the Document: 2.1... -
Page 27: Mounting Plate
16.2. Mounting Plate: Figure 26 Mounting Scheme MOUNTING HOLES: HOLE SIZING AND / OR TAPPING AS NECESSARY FOR CUSTOMER MOUNTING HARDWARE FORMAL M5 SCREW © Sontheim Industrie Elektronik GmbH 13.05.2022 page 27 of 30 Sontheim_Telemetry_Verona_Gen 4_operations manual.docx Version of the Document: 2.1... -
Page 28: Verona Gen 4 Pinout
Ethernet according to EIA/TIA 568A (network cable): Signal Pin Color white/green green white/orange blue white/blue orange white/brown brown Figure 29 Ethernet RJ45-Plug and Network-Cable © Sontheim Industrie Elektronik GmbH 13.05.2022 page 28 of 30 Sontheim_Telemetry_Verona_Gen 4_operations manual.docx Version of the Document: 2.1... - Page 29 425 00 00 873 Wiring harness fusing: Set a fuse 10 A into the wiring harness for KL30 and KL15 supply lines for safe operations. © Sontheim Industrie Elektronik GmbH 13.05.2022 page 29 of 30 Sontheim_Telemetry_Verona_Gen 4_operations manual.docx Version of the Document: 2.1...
- Page 30 Sontheim Overview and Portfolio We are looking forward to your enquiry. For personal advice and detailed information please refer to our specialists: We live electronics! www.sontheim-industrie-elektronik.de...
Need help?
Do you have a question about the Verona COMhawk xt and is the answer not in the manual?
Questions and answers