
Related Manuals for OneScreen TL6


Summary of Contents for OneScreen TL6
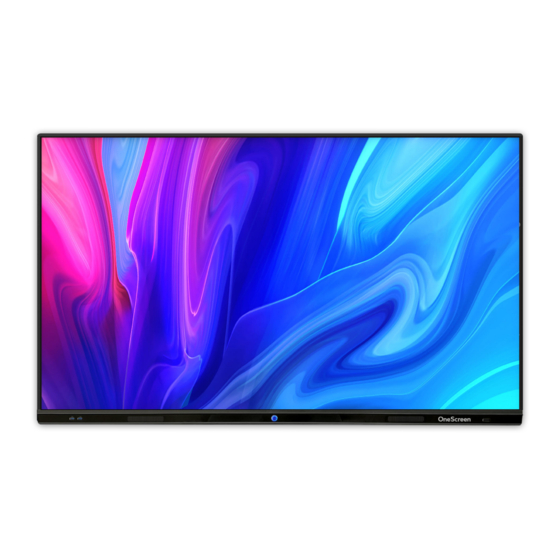
- Page 1 OneScreen All your collaboration tools are right here 65” 75” 86” Interactive Display Hardware Manual 800-992-5279 | sales@onescreensolutions.com...
- Page 4 OneScreen All your collaboration tools are right here 1. What’s included 1.1 OneScreen Touchscreen 1.2 Accessories...
- Page 5 It discusses the specifications and set up of OneScreen Touchscreen (TL6). The chapters included also cover how to install the unit and provide schematics of the various components for better understanding. The guide will help you set up your hardware quickly and easily and will also discuss how you can utilize the hardware with your own computer.
-
Page 6: Safety First
The exclamation mark within a triangle is The installation of this product should be intended to alert the user to the presence completed by an OneScreen Trained Installer. of important operating and maintenance (ser66vicing) instructions. 3.2 Safety Information - OneScreen NOTE Provides additional information to supplement operation in the main text. - Page 7 Few examples of unstable surfaces are, inclined plane, a shaky stand, desk or platform. Do not open the back case of OneScreen. High voltage components are present at the back so there is a danger of electric shock due to the presence of high voltage.
- Page 8 OneScreen All your collaboration tools are right here WARNING Do not install the product in an improper place. Do not install the product in humid places, such as the bathroom, the shower room, near windows, or outdoor environments that experience rain, snow or other harsh weather. Avoid installation near hot spring vapor.
-
Page 9: Getting Ready
OneScreen All your collaboration tools are right here 4. Getting Ready! 4.1 Installing the Wall mount For mounting the unit, check the integrity of the wall, whether it can endure the load of the unit. After that, clean the surface on which the unit is to be installed. Make sure your technician has the proper tools to install the wall mount. - Page 10 OneScreen All your collaboration tools are right here Screen Size VESA Mounting Standard 65 inches 500 x 400 75 inches 600 x 400 86 inches 800 x 400...
-
Page 11: Hardware Details
OneScreen All your collaboration tools are right here 5. Hardware Details... -
Page 12: Front Ports
OneScreen All your collaboration tools are right here 5.1 Front Ports 1. USB Port 3.0 2. USB Port 3.0 3. Power Button... - Page 13 OneScreen All your collaboration tools are right here 5.2 Bottom Ports 1. Earphone port 6. VGA port 2. AV out port 7. LAN in port 3. AV in port 8. LAN out port 4. YPBPR port 9. Power rocker switch 5.
- Page 14 OneScreen All your collaboration tools are right here 5.3 Left side Ports 1. HDMI 2 Port 4. RS-232 port 2. HDMI 1 Port 5. USB 2.0 port 3. Touch USB-B input (for HDMI & VGA) 6. USB 2.0 port...
-
Page 15: Setting Up Your Unit
Connect the standard USB end of the USB Touch Cable to your laptop and the other end to the port on OneScreen Touchscreen. The USB Touch Cable will be connected to the USB Touch Port at the left side of the screen for both... -
Page 16: Usage Guide
7.1 Home Screen Pressing the OneScreen home button will take you to the Android Home Screen as shown below. Here you will see the time, date, connectivity status and other essential buttons on which the details are given on the next page. -
Page 17: Icons On The Home Screen
PLAY STORE: Pressing the Play Store icon will launch the Play store, which is used to access the Play Store and download relevant applications for the unit. (Note: You may have to sign HYPE: Pressing the Hype icon will launch the Hype application, OneScreen premiere video conferencing software (Note: You may have to sign in). - Page 18 Clicking on the “source button” opens up the source menu on the left side. Simply select the source, and then click on the central black screen to switch to the source selected. 7.1.3 My Apps “My apps” lets you access the applications that have been installed on the OneScreen unit.
- Page 19 OneScreen All your collaboration tools are right here 7.1.4 Settings Settings allow you to change Personal, Network, Display, Sound and App settings (among others). For more details, refer to page 26. 7.1.5 My Files All downloaded/saved content, or external folder content can be accessed from “My Files”. Simply select the folder,...
- Page 20 The EShare application can be accessed by clicking on the “EShare” button. Further information about the multi- screen interaction platform can be found on page 29. 7.1.7 Write “OneScreen Write” is an interactive whiteboard application giving users an unrivaled experience for collaboration, teaching, document editing and brainstorming situations.
- Page 21 4. Pen Tool 10. Flip location of options key 5. Eraser tool 11. More options 6. Select tool 7.1.8 Hype Pressing the “Video Conf” icon opens the OneScreen Hype, which is the video conferencing software (more information on page 28).
-
Page 22: Play Store
All your collaboration tools are right here 7.1.9 Play Store The “Playstore” opens up the Google Play Store, used to download applications onto the OneScreen unit. (Note: you have to sign in with your google account in order to access Google Play) 7.1.10 YouTube... -
Page 23: Google Chrome
OneScreen All your collaboration tools are right here 7.1.11 Google Chrome The YouTube application can be accessed by clicking on the YouTube icon (Used for video sharing and accessing social media content) 7.2 Toolbars 7.2.1 Bottom toolbar Swiping up from the bottom of the screen brings the bottom toolbar. -
Page 24: Side Toolbar
OneScreen All your collaboration tools are right here Icon Function Tap this button to decrease the volume. Tap this button to increase the volume. This button takes you to the home screen. This button will take you to the previous window. - Page 25 All your collaboration tools are right here Icon Function This button opens up the annotation (OneScreen write) application, and allows you to Write on any surface on the OneScreen. This button allows you to change the volume of the OneScreen unit.
-
Page 26: Floating Toolbar
OneScreen All your collaboration tools are right here 7.2.4 Floating Toolbar You can use the floating toolbar to open various tools and applications. Drag the toolbar from the side of the screen and tap on it once to open the options. -
Page 27: Device Settings Menu
Shared front USB, Intelligent Recognition, USB Drive lock. Toggle and/or change wi-fi and wired networks, create a WLAN hotspot, connect through Bluetooth or check the network status of the OneScreen. Change the Screen Saver settings, Wallpaper Settings, or the Color Temperature Adjustment. - Page 28 Uninstall or disable apps. Allow or revoke app permissions. Overview and manage your internal storage through this option. Change the date and/or time. Change the language and input methods. Manage user accounts for the OneScreen. Reset the device i.e., delete all data, settings and downloaded applications.
- Page 29 & stylus. OneScreen Write saves your work in multiple formats such as .png, .jpeg, .ppt & pdf while also allowing .wmv files to save the audio and annotations simultaneously. This can be particularly useful for classroom sessions so that...
- Page 30 EShare is a multi screen interaction application for smart phones, tablets or computers to interact with OneScreen. Using EShare you can mirror your phone, tablet and computer screen to the OneScreen and vice versa. It also allows remote control of your OneScreen. EShare allows up to nine users to simultaneously project their screens on OneScreen and is an ideal choice when it comes to mirroring/wireless screen sharing software.
- Page 31 Use the clip of the web-camera to pin it on top of the screen. Insert the USB cable of the camera into either the USB port of the OneScreen to use it on the android OS or the USB port of the OPC to use it on the Windows OS.
- Page 32 10.1 Settings for RS 232 Control Use a Straight through Female - Female cable. Connect RS-232 cable between control Processor and OneScreen display. Set your program RS-232 port to the setting below. Control is one-way serial. However, you may receive feedback when sending the power on/off commands.
- Page 33 OneScreen All your collaboration tools are right here Required Command Function Switch to VGA 1 52 50 08 01 00 00 85 E7 Pause 52 50 08 01 00 00 1F E7 Play 52 50 08 01 00 00 20 E7...
-
Page 34: Technical Specifications
OneScreen All your collaboration tools are right here 11 Technical Specifications 11.1 Touchscreen Specifications Details Specification Screen Type LED Backlit Display Resolution 3840(H) ×2160 (V) Response Time <6ms Touch Capability 20 Points (Finger or Pen) Surface Protection Anti-glare Glass Panel Size 65"... -
Page 35: Troubleshooting
All your collaboration tools are right here 12 Troubleshooting It is always advisable to contact OneScreen technical support team in case of any problem. Technical Support team can be reached by clicking on the Screen Skills Guru button on your screen (camera, mic and Internet connection required), calling +1855-898-8111 or sending an email to support@onescreensolutions.com. - Page 36 OneScreen. 2. Go to Settings>Display>Enable screen saver, and choose Never 3. OneScreen can be awoken when the screen saver is visible with a tap on the screen. OneScreen not reading 1. Ensure that the camera is connected 1.
- Page 37 OneScreen All your collaboration tools are right here Issue Do’s Don’ts OneScreen won’t detect 1. Ensure you have added the right security settings while adding the hidden network network. 2. Bring the router closer to the screen for the first connection.
-
Page 38: Remote Control
OneScreen All your collaboration tools are right here 13 Remote Control... - Page 39 OneScreen All your collaboration tools are right here 14 OneScreen TL6 Training To schedule free training with the OneScreen Guru team for the TL6 and/or any OneScreen software, scan the QR code below, or email support at support@onescreensolutions.com...
- Page 40 OneScreen All your collaboration tools are right here Canada 8168 Miramar Road, Suite # 731, 3-304 Stone San Diego, CA 92126 Road West, Guelph, ON, N1G 4W4 Phone: +1(858) 552-0290 Fax: +1(858) 552-0910 Phone: 800-992-5279 sales@onescreensolutions.com Colombia Office C60, 4th Floor Transversal 93 No.53-32...
Need help?
Do you have a question about the TL6 and is the answer not in the manual?
Questions and answers