Table of Contents
Advertisement
Quick Links
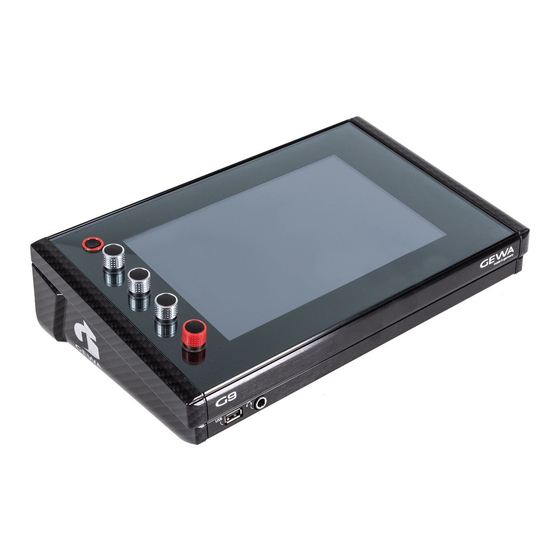
G9 Drum Workstation
Model
Dokument
Wersja
Data opracowania
Proszę
rozpoczęciem użytkowania a w szczególności część
dotyczącą bezpieczeństwa. Proszę zachować ten
dokument.
Kompletny dokument do ściągnięcia na
gewamusic.com:
https://pl.gewamusic.com/downloads
S
PIS TRESCI
Informacje dotyczące bezpieczeństwa ............................................... 1
1
1.1 Symbole używane w instrukcji ....................................................................1
1.2 Procedury bezpieczeństwa .........................................................................1
1.3 Przechowywanie .........................................................................................3
1.4 Niewłaściwe użytkowanie (przykłady) .........................................................3
1.5 Norma CE ...................................................................................................4
1.6 Recycling ....................................................................................................4
Częsci dostarczane z GEWA G9 .......................................................... 5
2
Instrukcja złożenia ................................................................................ 7
3
G9
Instrukcja obsługi
1.0
2022-09-13
przeczytać
instrukcję
www.gewaelectronics.com
obsługi
przed
G9 - Instrukcja obsługi
POLSKI
Producent
GEWA music GmbH
Oelsnitzer Straße 58
08626 Adorf
NIEMCY
I
Advertisement
Table of Contents

Related Manuals for Gewa G9

Summary of Contents for Gewa G9
-
Page 1: Table Of Contents
1.1 Symbole używane w instrukcji ..............1 1.2 Procedury bezpieczeństwa .................1 1.3 Przechowywanie ..................3 1.4 Niewłaściwe użytkowanie (przykłady) ............3 1.5 Norma CE ....................4 1.6 Recycling ....................4 Częsci dostarczane z GEWA G9 ............5 Instrukcja złożenia ................7 G9 - Instrukcja obsługi... - Page 2 8.2 Moduł 2 ....................23 8.2.1 Opcje zestawów (Kit Options)..............23 8.2.1.1 Detekcja Trigerów (Trigger Detection) ............23 8.2.1.2 Detekcja przesterowania (Peak Detection) ........... 24 8.2.1.3 Style werbla (Snare Style) - Rimshot, Crosstick oraz X-Fade ...... 25 G9 - Instrukcja obsługi...
- Page 3 9.2 Moduł 2 ..................... 37 9.2.1 Instrument Select ..................37 9.2.1.1 Drum Kit ......................37 9.2.1.2 Pad Components ................... 37 9.2.1.3 Sound Select ....................38 Sound Browser – Properties ................. 38 9.2.1.4 Source – Internal ....................39 9.2.1.4.1 G9 - Instrukcja obsługi...
- Page 4 Assignment of Second Sounds ..............53 9.3.4 Hi-Hat Volume Control ................53 9.4 Moduł 4 ....................54 9.4.1 Pad Equalizer / Compressor ..............54 Efekty (Effects) ..................57 10.1 Effect Parameters ..................57 10.2 Effects Modules – Mutual Parameters ............58 G9 - Instrukcja obsługi...
- Page 5 11.2.1.1.1 11.2.1.2 Trigger Bank ....................75 11.2.1.3 Presets - Setup and Trigger Bank ..............75 Loading Presets ....................77 11.2.1.3.1 Saving New Presets ..................78 11.2.1.3.2 Direct Storage of Parameter Values - Setups ..........78 11.2.1.3.3 G9 - Instrukcja obsługi...
- Page 6 11.4.1.1 Pad Monitor ....................95 11.4.1.2 X-Talk Monitor ....................95 Ogólne ustawienia (General Settings) ..........97 12.1 Moduł 1 ....................97 12.1.1 Master Outs ....................98 12.1.2 Direct Outs ....................98 12.1.3 Digital In/Out ..................... 99 G9 - Instrukcja obsługi...
- Page 7 Routing MIDI Signals ..................114 12.3.1.1.1 Local Control....................115 12.3.1.1.2 MIDI Channel ....................115 12.3.1.1.3 MIDI Control ....................115 12.3.1.1.4 12.3.2 Drumkit Program Change ................ 116 12.3.2.1 Program Pairing ..................117 12.3.2.2 Channels (Transmit/Receive) ..............117 G9 - Instrukcja obsługi...
- Page 8 13.1.4 Working with Setlists ................132 13.1.4.1 Pdf Viewer ....................132 13.2 Czytnik PDF (PDF Reader) ..............134 13.2.1 Przeglądarka plików (File Select Browser) ..........135 13.2.1.1 Właściwości ....................135 13.2.1.2 Otwieranie Plików PDF ................136 G9 - Instrukcja obsługi VIII...
- Page 9 13.5.4 Delete Sounds from the Library ............... 153 13.5.5 Limity importu i zarządzanie dźwiękiem ........... 153 13.5.5.1 Fakty ......................153 13.5.5.2 Scenariusze ograniczeń importu ..............154 13.5.5.3 Reagowanie na limity importu ..............154 13.5.5.4 Utrata danych ....................154 13.6 Sklep (Shop) ................... 155 G9 - Instrukcja obsługi...
- Page 10 13.6.1 Connecting to the Cloud ................155 13.6.2 Billing Process..................158 13.6.3 Digital Property Rights ................158 13.6.4 Sale or exchange of a G9 device ............. 158 Useful Information ................159 14.1 Explanation of Terms ................159 14.2 Gwarancja ....................160 Problemy i możliwe ich rozwiązania ..........
-
Page 11: Informacje Dotyczące Bezpieczeństwa
Informacje dotyczące bezpieczeństwa Drogi użytkowniku, Dziękujemy za zakup naszego modułu GEWA G9! Wybrałeś najwyższej jakości cyfrową konsolę perkusyjną, która zapewnia imponujący dźwięk i wrażenia z gry, dzięki ogromnej bazie brzmień, łatwości w użyciu i dostępu do wielu ciekawych funkcji. Twoje bezpieczeństwo jest dla nas bardzo ważne! Proszę więc uważnie przeczytać informacje dotyczące bezpieczeństwa i zastosować... - Page 12 Wyłącz konsolę lub odłącz ją natychmiast od zasilania, jeśli nastąpi: nagła utrata dźwięku, gdy konsola jest używana konsola emituje niezwykły zapach lub dym. Niezbędne jest sprawdzenie konsoli bębna przez dział obsługi klienta GEWA. Uszkodzenie UWAGA Niedopasowanie napięcia elektrycznego może uszkodzić konsolę. Obsługuj cyfrową...
-
Page 13: Przechowywanie
(w związku z tym patrz rozdział 16, Dane techniczne). Tylko i zawsze korzystaj z zasilaczy certyfikowanych przez GEWA i upewnij się, że są prawidłowo podłączone. Zastosowany zasilacz musi również spełniać specyfikację napięcia w danym kraju (tabliczka znamionowa na adapterze). -
Page 14: Norma Ce
Informacje dotyczące bezpieczeństwa Łączenie niekompatybilnych urządzeń / urządzeń wyjściowych itp. Lub innych urządzeń interfejsu innych producentów. ORMA Twoja konsola bębna GEWA G9 jest zgodna z wymaganiami dyrektyw UE: Dyrektywa 2014/53/EU Normy, do których deklarowana jest zgodność: EN55020:2007+A11:2011 EN55024:2010 EN55032:2012... -
Page 15: Częsci Dostarczane Z Gewa G9
Częsci dostarczane z GEWA G9 GEWA G9 ZĘSCI DOSTARCZANE Z Oryginalne opakowanie zawiera następujące elementy. Sprawdź dokładnie kompletność zakupionego produktu: G9 Drum Workstation 10,5-12,7 mm Uchwyt montażowy Karta produktu Instrukcja Quick Start/Szybki start USB Pendrive (wielojęzykowa) Kabel zasilający 2 m (IEC C18) - Page 16 Częsci dostarczane z GEWA G9 G9 - Instrukcja obsługi...
-
Page 17: Instrukcja Złożenia
Instrukcja złożenia NSTRUKCJA ZŁOŻENIA ONTAŻ MOCOWANIA ODŁĄCZ SWOJE WYPOSAŻENIE DO KONSOLI 3.2.1 ANEL PRZEDNI G9 - Instrukcja obsługi... -
Page 18: Panel Tylni
Instrukcja złożenia 3.2.2 ANEL TYLNI Upewnij się, że zasilanie jest wyłączone podczas podłączania modułu do urządzeń zewnętrznych. G9 - Instrukcja obsługi... -
Page 19: Talerze
ALERZE 3.2.3.1 GEWA ALERZE Talerze GEWA są wyposażone w dwa gniazda stereo (standard TRS 6,35 mm - 1/4”). W połączeniu z modułami GEWA istotne jest tylko gniazdo najbliżej środkowego otworu talerza. 3.2.3.2 NNI PRODUCENCI Jeśli chodzi o blachy analogowe innych producentów, użyj odpowiednich gniazd wejściowych w następujący sposób:... -
Page 20: Analogowe Talerze Z Osobnym Kanałem Do Kopułki
11.3.2.3 Typów trigerów (Trigger Type) na str 3.2.3.3 NALOGOWE TALERZE Z OSOBNYM KANAŁEM DO KOPUŁKI Talerze z dodatkowym wyjściem na kopułka (Bell) można łączyć się z konsolami GEWA na różne sposoby. Zobacz poniższą tabelę dla wszystkich możliwych kombinacji kanałów dla Łuku / Krawędzi i kopułki: GEWA –wejścia dla analogowych talerzy z osobnym kanałem dla kopułki... -
Page 21: Wyjaśnienie Funkcjonowania Fizycznych Regulatorów
Panel & Ekran – Standardowe funkcje Włącznik/wyłącznik Włączenie i wyłączenie urządzenia Pokrętło Tempo metronom Pokrętło Głośność monitorowa / Sumy Pokrętło Głośność słuchawek Pokrętło/Przycisk Suma głośności (Master XLR) Naciśnij, aby powrócić do ekranu głównego Ekran dotykowy Różne gesty i funkcje G9 - Instrukcja obsługi... -
Page 22: Włączenie Urządzenia
Poczekaj aż uruchomi się oprogramowanie. Uwaga: Aby oszczędzać energię, G9 zapewnia funkcję „Auto Power”. Dzięki tej funkcji stacja robocza wyłączy się automatycznie, pozostawiając ją bezczynną przez ponad 30 minut. Zmień tę właściwość w General Settings Moduł 4 Device Auto Off... -
Page 23: Zanim Zaczniesz
STAWIENIE TRIGERÓW Konsola bębna GEWA zapewnia wstępne ustawienia dla różnych dostępnych konfiguracji padów. Jeśli zakupiłeś jeden z kompletnych zestawów G9, to wybierz jedną z poniższych konfiguracji, aby przywołać optymalne ustawienia: GEWA Studio | GEWA PRO 5 | GEWA PRO 6 Postępuj zgodnie z instrukcjami bezpieczeństwa zawartymi w sekcjach 1-5 podręcznika Szybki start /... -
Page 24: Bluetooth, Wi-Fi Oraz Automatyczne Wyłączenie
UTOMATYCZNE WYŁĄCZENIE Uzyskaj dostęp do opcji bezprzewodowych i wyłącz zegar w Ustawieniach ogólnych (General Settings). Hasło Bluetooth: 4392 Naciśnij włącz-nik Start G9 Dotknij ikonę Advanced General Settings Bluetooth Hasło Bluetooth 4392 Wi-Fi Automatyczne wyłączanie (Auto Off) G9 - Instrukcja obsługi... -
Page 25: Interfejs Użytkownika- Podstaw
Interfejs użytkownika- podstaw NTERFEJS UŻYTKOWNIKA PODSTAW This section covers general aspects of using the G9 Drum Workstation. You will learn how to work with physical and digital Dials, learn about the Interface Structure and gain a fundamental understanding of using the built in Touch Screen. -
Page 26: Praca Z Pokrętłami
[Master], aby zamknąć pasek głośności. Poruszając się w górę, następne pokrętło steruje głośnością słuchawek (Headphone), trzecie pokrętło reguluje głośność wejścia miksu (Mix-Input), a najwyższe pokrętło kontroluje prędkość metronomu. G9 - Instrukcja obsługi... -
Page 27: Struktura Interfejsu
(Master XLR). TRUKTURA NTERFEJSU G9 jest podzielony na kilka sekcji zwanych trybami. Domyślnie konsola uruchamia się w łatwym trybie. Możesz przejść do trybów zaawansowanych jednym dotknięciem przycisku [Zaawansowane] w prawym dolnym rogu. Ikony trybów zaawansowanych znajdują się na pasku bocznym po prawej stronie ekranu. -
Page 28: Ekran Dotykowy
Stuknij raz strzałkę zmiany, aby przełączyć na wielkie litery. Po wprowadzeniu pierwszej litery klawiatura automatycznie przełączy się z powrotem na małe litery. Aktywuj blokadę caps lock poprzez podwójne stuknięcie i dezaktywację caps lock, naciskając ponownie klawisz Shift. G9 - Instrukcja obsługi... - Page 29 Interfejs użytkownika- podstaw Główne funkcje klawiatury Opis Pojedyncze kliknięcie Podwójne kliknięcie Małe litery Wielkie litery Caps lock włączony Duże litery Małe litery Caps lock Włączony Małe litery Skasuj Usuń literę przed kursorem Potwierdź Potwierdź i zamknij klawiaturę G9 - Instrukcja obsługi...
-
Page 31: Tryb Występu (Performance)
[+], aby poruszać się w przód i w tył wewnątrz biblioteki zestawów perkusyjnych. Jeśli już wiesz, który zestaw chcesz wybrać, możesz również dotknąć pola [Number] bezpośrednio wprowadzić nowy numer zestawu. Klawiatura numeryczna zamyka się ponownie, dotykając raz pola numerycznego. G9 - Instrukcja obsługi... -
Page 32: Zarzadzanie Zestawami Perkusyjnymi (Presety)
RESETY Stuknięcie Pole [Drum Kit] otwiera przeglądarkę zestawów perkusyjnych, która zapewnia paletę funkcji do zarządzania biblioteką zestawów perkusyjnych, w tym eksport zestawu perkusyjnego. Przeglądarka zestawów G9 Drum Drum Kit Browser Sorted by Preset Drum Kits User Drum Kits Name Category... -
Page 33: Moduł 2
ETECTION Panel Trigger Detection umożliwia monitorowanie ogólnych ustawień dla każdego pojedynczego Padu (kanału wejściowego) w trybie Performance. W tym widoku nie możesz zmienić ustawień trigera, ale otrzymasz wizualną informację zwrotną o czułości i poziomie. Czerwony kolor G9 - Instrukcja obsługi... -
Page 34: Detekcja Przesterowania (Peak Detection)
Panel wykrywania trigger, aktualizuje i zapisuje swoją wizualną informację zwrotną do ręcznego zresetowania widoku. Auto: Panel wykrywania trigger jest resetowany automatycznie po upływie około 3 sekund po wykryciu ostatniego sygnału wejściowego. Reset (Kasowanie): Dotknięcie powoduje odświeżenie wartości w polu Trigger Detection. G9 - Instrukcja obsługi... -
Page 35: Style Werbla (Snare Style) - Rimshot, Crosstick Oraz X-Fade
8.3.1 DTWARZANIE UTWORÓW LAYER Odtwarzacz utworów pozwala grać razem z podkładami i pomaga opanować trudne części piosenek podczas ćwiczeń. Wykorzystuje przeglądarkę File Select do ładowania wszystkich popularnych formatów plików audio, takich jak mp3, wav, i flac. G9 - Instrukcja obsługi... -
Page 36: Przeglądarka Plików (File Select Browser)
Windows Media Audio Microsoft 8.3.1.1 RZEGLĄDARKA PLIKÓW ELECT ROWSER Przeglądarka File Select jest zaimplementowana w różnych aplikacjach w G9, takich jak Odtwarzanie utworów (Song Player), Czytnik PDF (PDF Reader) Narzędzia do importowania (Import Tool). Jednak w zależności od aplikacji otwiera się z różnymi aktywnymi filtrami, aby wyświetlać... -
Page 37: Otwieranie Plików Audio
[SD]. Nawiguj do preferowanego pliku. Kliknij dwukrotnie nazwy folderów, aby je otworzyć (lewa kolumna). Przejdź w górę ścieżki, dotykając [biały pasek] (lewa kolumna). SYSTEM/ Wybierz plik, który chcesz otworzyć, klikając dwukrotnie pozycje listy w prawej kolumnie. G9 - Instrukcja obsługi... -
Page 38: Funkcje Odtwarzacza Piosenek
Alternatywnie, naciśnięcie dowolnego punktu na osi czasu, co spowoduje przesunięcie kropki do naciśniętego obszaru. Obie metody działają w każdym stanie odtwarzania (gra, pauza, stop). 00:02:43 00:06:27 8.3.1.2.2 RYBY DTWARZANIA G9 - Instrukcja obsługi... -
Page 39: Tryb Ddtwarzania Z Urządzeń Zewnętrznych
MIX IN tyłu konsoli. W tym przypadku funkcja pętli nie jest dostępna, a zamiast niej korzystasz z funkcji sterowania zewnętrznego odtwarzacza. Jak połączyć G9 z zewnętrznym urządzeniem za pomocą Bluetooth jest opisane w 12.4.3 Bluetooth na str 120. -
Page 40: Zmiana Tempa (Vari Speed)
Dotknij raz pokrętła oprogramowania i przeciągnij suwak. Stuknij raz w pole Tempo i ustaw metronom za pomocą klawiatury numerycznej, która się pojawi. Wybij tempo uderzając palcem w ikonę TAP. Można również spersonalizować miejsce nabicia tempa. G9 - Instrukcja obsługi... -
Page 41: Tryb Wizyalny (Visual Mode)
Aby zmienić wygląd trybu wizualnego, masz 2 opcje: Zmień sygnaturę czasową (Time Signature) wzdłuż linii zgodnie z opisem w poprzedniej sekcji. Obserwuj, jak zmienia się zawartość trybu wizualnego. Kliknij [Mute (Wycisz)] [Unmute (Wyłącz wyciszenie)], aby wyłączyć lub aktywować dźwięk kliknięcia. G9 - Instrukcja obsługi... -
Page 42: Ustawienia Metronomu (Metronome Settings)
8.4.3.2 HANNEL You can also select a custom tap channel instead of using the [Tap] button. This function can be found under the function set Metronome Settings. To choose a custom tap device, proceed as follows: G9 - Instrukcja obsługi... - Page 43 (Pad or Rim etc.). All functions on the right-hand side of the Tap Channel field are identical with those in the function set Metronome. Thus, make sure that is set to “on” and Click Volume is not muted. G9 - Instrukcja obsługi...
-
Page 45: Edytor Zestawu (Kit Editor)
*Drum Kit Name ODUŁ 9.1.1 HANNEL ELECT The main purpose of the channel select feature is to select connected pads for reasons of assigning different sounds (Kit Editor) or editing their trigger parameters (Trigger Settings). 9.1.1.1 NPUT HANNELS G9 - Instrukcja obsługi... -
Page 46: Auto Select
Aux 2 Aux 3 Aux 4 G9 Ports – Input Channels Peak row remembers the highest Velocity value detected while playing and for each pad separately. It works in the same way as the peak rows available in other modules and returns the maximum velocity across all pad components. -
Page 47: Moduł 2
22). In Kit Editor, we will focus on preset management Zarzadzanie zestawami perkusyjnymi (Presety) na str, utilizing the functionalities of its Feature Shelf. 9.2.1.2 OMPONENTS Pad Component Icons Bęben Naciąg Obręcze X-Stick Talerze Łuk Krawędź Kopułkę G9 - Instrukcja obsługi... -
Page 48: Sound Select
When gaining an understanding of the G9 Kit Editor, it is important to point out that all function sets and parameters of module 3 and 4 always refer to the selected pad under... -
Page 49: Source - Internal
How it works: In the Sound Browser list entry names end with a suffix indicating the type of component sample. G9 - Instrukcja obsługi... - Page 50 14” US Vintage S 14” US Vintage CS 14” US Vintage Rim Sound 14” US Vintage X-Stick Grouping Broadkaster VBE CS The following table sums up the relationship between Sound Grouping and list entries of the Sound Browser: G9 - Instrukcja obsługi...
-
Page 51: Drum Kit Presets - Parameters
9.2.1.5 RESETS ARAMETERS Drum Kit Presets store values of all parameters associated with a recorded drum set. In the G9 interface, accessible drum kit parameters are spread over several thematically divided modes: Performance, Kit Editor and Effects. - Page 52 Kit Editor Moduł 2 Drum Kit Drum Kit Przykład *Drum Kit Nazwa All relevant drum kit parameters of the Kit Editor can be found in modules 3 and 4 including the sound referencing of the Sound Select field (module 2). G9 - Instrukcja obsługi...
-
Page 53: Preset Management - Elements
LEMENTS The parameters presented above form a Drum Kit preset, which can be saved as an individual user Drum kit. The G9 provides a variety of features to handle these presets. All these functions can be found in the Drum Kit Browser which is explained in detail in the Performance mode section of this documentation. -
Page 54: Loading Drum Kits
Import The bottom section of the Drum Kit Browser hosts the Feature Shelf which contains all preset management options. The number of options varies depending on the type of preset. The G9 distinguishes between user presets factory presets. Factory presets cannot be edited or deleted;... -
Page 55: Rename Drum Kits
Feature Shelf. 9.2.1.7 XCHANGE With drum kit exchange the G9 allows for exporting drum kits to create backup files of favorite kits including effects. This feature is hosted in the feature shelf of the Drum Kit Browser and allows for sharing your drum kits with other G9 devices via the built-in import feature. -
Page 56: Export
The import browser by default opens the standard export directory (DrumKits). Hint: A factory reset of the G9 will retain all data stored on the internal SD card. Your drum kit backups are protected. 9.2.1.7.2... - Page 57 Internal SD Card (opens root directory) External USB device (opens root directory) Go to root directory of the active path. Move up one level in the folder hierarchy Search Imports highlighted Kit into the Drum Kit Browser. Import G9 - Instrukcja obsługi...
-
Page 58: Pad Midi Settings
MIDI OUT (analog) USB OUT (digital) An example when a deviation from the internal key assignments of the G9 might be necessary is the fact that some manufacturers use a shifted key setup internally (e.g. assignment starts at a different octave of the keyboard). -
Page 59: Moduł 3
The on/off buttons are an instance of the module switches in the Effects mode. When you turn off a module in Effects, you also mute it in G9 - Instrukcja obsługi... -
Page 60: Sound Edit
9.3.2 OUND Although GEWA invested in multi-dimensional sampling of sounds, it is almost impossible to record any drum of any size and depth with any combination of differences in tension between top and resonant head. The number of required samples would be sheer endless and would exceed today’s capacities of memory. -
Page 61: Attack
The shape of the multiplier curve is a dynamic combination of a hold feature (multiplier = 1) and the tail with decreasing factors for longer time frames. This complex relationship is fixed and not editable in its parameters. The illustration above gives an idea, how the Release feature shapes the G9 - Instrukcja obsługi... -
Page 62: Second Sound Edit
Sound Browser with the difference that sound grouping and imported sounds are not available for layering (Zobacz również sekcję 9.2.1.4 Sound Browser – Properties na str. 38). G9 Sound Browser Sound Browser Sorted by Instrument Category G9 - Instrukcja obsługi... -
Page 63: Assignment Of Second Sounds
(module 1) and the desired component icon is highlighted in Select. It is recommended to keep Auto Select turned off (module 1) to Moduł 2 Instrument avoid changing the pad accidentally. 9.3.4 OLUME ONTROL G9 - Instrukcja obsługi... -
Page 64: Moduł 4
QUALIZER OMPRESSOR The G9 offers a 3-band full parametric equalizer function as well as a compressor for every input channel/pad. Both features are implemented as insert type features. This way it is possible to shape the sound of each connected pad individually. Pad EQ and compressors are part of the drum kit parameters and are part of the mix audible in direct outputs and digital outs as well. - Page 65 A selection of factory presets is provided to enhance your sound without deep knowledge in sound engineering. Load a preset and see how it affects the sound and the curve shapes of equalizer and compressor in module 4. The following presets are available: G9 Presets – Pad EQ and Compressor Equalizer Compressor...
- Page 66 Since the functioning of pad equalizers and pad compressors is identical with those available for the main stereo outputs (Master, Monitor and Headphones), we will focus on these features in General Settings mode. (Zobacz sekcję 12.2.1.1 Equalizer na str. 105 oraz 12.2.1.2 Compressor na str. 107) G9 - Instrukcja obsługi...
-
Page 67: Efekty (Effects)
Kit Editor mode, Effects allow for storing each parameter directly into the kit. For effect parameters that are characteristic of the effect, the G9 also provides the preset option. This enables the user to copy effects from one kit to another. The indirect preset method of parameter storage creates an additional node in the parameter hierarchy, so that the drum kit stores the preset name, which references the different parameter values contained. -
Page 68: Effects Modules - Mutual Parameters
-12 dB -12 dB -12 dB Kick Snare Tom 1 Tom 2 Tom 3 Tom 4 Ride Hi-Hat Crash1 Crash2 Aux 1 Aux 2 Aux 3 Aux 4 FX Sends Multi Effects with switchable Dry Signal: G9 - Instrukcja obsługi... -
Page 69: Effect Preset Parameters
Grouping of cymbals and toms is active by default and User/Device specific. The G9 remembers the last state for the next start. Grouping values are NOT stored with the drum kit! 10.3... -
Page 70: Effects Presets
10.4 FFECTS RESETS The G9 provides a variety of options to manage preset libraries. You can access the library and its functions by tapping on a [Preset] Field next to a group of preset parameters. The G9 distinguishes... -
Page 71: Loading Presets
IRECT TORAGE OF ARAMETER ALUES The G9 allows for storing parameter values directly into the Drum Kit without saving a preset. Instead of a preset name, the preset fields will display “Custom Setting” This is the case, when parameter values differ from an existing preset. It is still possible to save custom settings as a preset later and make certain parameter values available for other drum kits. -
Page 72: Preset Overwrite
Confirm by tapping [OK]. 10.4.6 ELETING RESETS Proceed as follows: Tap the [Preset] field. Tap once on a preset name in the drop-down list. [Delete] in the Feature Shelf. 10.5 ODUŁ 10.5.1 FX1 A MBIENCE AMPLES G9 - Instrukcja obsługi... -
Page 73: Moduł 2
Instrument Reverb exclusively. Factory presets provided for Instrument Reverb focus on instrument specific effects but derive their characteristics from the same parameters and value ranges. 10.6.1.1 EVERB YPES AND ARAMETERS G9 - Instrukcja obsługi... - Page 74 (= Low Cut) and lets the high frequencies through. frequency ● ● Pre-High-Pass 0 - 1000Hz threshold below low frequencies are cut off. The fall- off curve avoiding sharp cuts is fixed and not editable. G9 - Instrukcja obsługi...
-
Page 75: Moduł 3
FX 4 M ULTI FFECTS Effects in this module comprise everything that is not associated with Ambience, Instrument Reverb Room Reverb as for example frequency modulation. Results are obtained by using algorithms to create a certain effect. G9 - Instrukcja obsługi... - Page 76 Drum Kit or creating/overwriting an effect preset. Wah-Wah The Wah-Wah effect is created by dynamically “brushing” through the frequency spectrum of the dry signal utilizing a specific audio filter. Instead of the classic pedal control, the G9 uses the Velocity of the stroke to control the movement of the filter along the frequency spectrum.
- Page 77 Creates a fuller sound by the illusion of multiple instruments being played simultaneously. The effect is achieved by doubling the dry sound and offsetting the detuned duplicate slightly in time (fixed delay time of 20 ms). The G9 - Instrukcja obsługi...
- Page 78 Phaser The G9 models the effect using a 6-notch filter directly applied to the dry signal. Like Wah-Wah, the effect is generated by “brushing” with the filter through the frequency spectrum. However, while the dynamics of movement of Wah-Wah are controlled by the intensity of the stroke, the movement using Phaser is controlled by a sine LFO waveform.
- Page 79 Mono, Stereo FX Type signal for the stereo effect is inserted in between the Mono signal on the opposite speaker. Consequently, this doubles the feedback frequency (or cuts the Delay Time into half). G9 - Instrukcja obsługi...
- Page 80 100% (max damping). Choose higher 0-100 High Damp values to create a delay that runs away into distance, while low damping values let the delay stay in the vicinity of the dry sound. G9 - Instrukcja obsługi...
-
Page 81: Ustawienia Trigerów (Trigger Settings)
Zaleca się używanie ustawień fabrycznych dla elektrod (jeśli są dostępne) poprzez przeglądanie menu Trigger Bank i Setup. Jednak G9 oferuje szereg funkcji do kalibracji dowolnej analogowych padów z trigerami do twojego stylu gry. Dowiedz się, jak tworzyć niestandardowe banki trigerów i konfiguracje oraz zrozumieć podstawowe ich parametry. -
Page 82: Input Channels
Aux 1 Aux 3 Aux 4 G9 Ports – Input Channels Peak row remembers the highest velocity value detected while playing and for each pad separately. It works in the same way as the peak rows available in other modules and returns the maximum velocity across all pad components. -
Page 83: Auto Select
However, since the new trigger bank exists, you can always make up for this by assigning the correct trigger bank preset and saving the setup again. G9 - Instrukcja obsługi... -
Page 84: Standard Setups
These Setups assign default Trigger Bank presets to all Input Channels available which store parameter values optimized for GEWA pad components and can be found in the Trigger Bank Selection browser under Default Presets. Standard Setups are designed to match common GEWA configurations of pads available. -
Page 85: Trigger Bank
Sound Select field in the kit editor, the trigger bank field is a preset field, which adds another step in the hierarchy of parameter value storage. It follows the rules and principles of the G9 preset management system. 11.2.1.3 RESETS... - Page 86 Ustawienia trigerów (Trigger Settings) The G9 distinguishes between Factory Presets (preceding lock icon) and User Presets (without lock icon). Both appear in the list that pops up when tapping a preset field. Regarding Setups, fields and browsers look as follows:...
-
Page 87: Loading Presets
Presety użytkownika The next sections discuss the functionalities of the feature shelf. 11.2.1.3.1 OADING RESETS Proceed as follows: Tap on the [Preset] field. Tap once on the preset you want to load. [Load] in the Feature Shelf. G9 - Instrukcja obsługi... -
Page 88: Saving New Presets
11.2.1.3.3 IRECT TORAGE OF ARAMETER ALUES ETUPS The G9 allows for storing parameter values directly into the setup without saving individual presets for trigger banks. Instead of a preset name, the Trigger bank field will display “Custom Setting”. This is the case, when parameter values differ from an existing preset. -
Page 89: Overwrite Presets
However, not all components of the trigger bank might be accessible due to a different hardware design of the channel on the trigger board. When gaining an understanding of the G9 Trigger Settings, it is important to point out that all function sets Hi-Hat... -
Page 90: Moduł 3
11.3 ODUŁ This module hosts all relevant accessible parameters to fine tune the trigger performance of your pads. Here you can calibrate your G9 to 3 party equipment and optimize the communication between pads and console. In case of trigger issues, please start based of the... -
Page 91: Trigger Settings
* 3Way is a specialty of Roland™ analogue ride cymbals, where bell and other components are separated by their own plug/jack. When using these cymbals choosing the Ride input channel of the G9, Aux 1 will be automatically configured as Bell channel. Optional channels are Aux 1-3, where the following Aux channel is always defined as the bell channel. -
Page 92: Gain
Use this feature, if you are happy with the progression in velocity of your custom-built trigger pad and you feel that the overall volume produced cannot compete with other pads connected to your G9. This feature might come in handy when connecting 3 party pads from other manufacturers as well. -
Page 93: Threshold
11.3.1.2 HRESHOLD With this dial you adjust the velocity threshold from which on the G9 accepts signals sent by the detecting sensor (voltage). Low thresholds are preferable for sensitive players, but often cause auto triggering due to vibrations of the environment. Such signals are not desired since they produce sounds which don´t stem from striking a pad. -
Page 94: High Level
Period before marking the signal as registered and making it ready to be sent via MIDI. Next, the G9 scans all Trigger Inputs for registered signals again. The exact system latency (from stroke to sound) consists of the delay from sensor to input, 1 fixed... -
Page 95: X-Talk
CC messages visible in Monitor. When using Pad Monitor CC messages as a guidance you need to achieve such a configuration that CC messages are not sent by the G9 in extreme pedal positions. High Position Parameter Value Range: 0-127 11.3.1.8... -
Page 96: Chick Sensitivity (Hi-Hat Pedal Only)
15% powyżej określonej wartości dolnej pozycji. Po kalibracji mogą być konieczne drobne ręczne regulacje parametru Low Position, aby skompensować charakterystykę pracy Hi- Hatu. Poniższa tabela wyjaśnia działanie kreatora kalibracji: G9 - Instrukcja obsługi... - Page 97 (pozwoli to na pełną kontrolę Hi-Hatu) przed naciśnięciem [Calibrate] Cancel Next Hi-Hat Calibration Wysoka pozycja High Position Zwolnij całkowicie pedał i naciśnij [Calibrate]. Następnie nasićnij [Finish]. Low position Calibrate Zdejmij nogę całkowicie przed nacięsnięciem [Calibrate] Cancel Finish G9 - Instrukcja obsługi...
-
Page 98: Advanced Settings
Dyn Level Dyn Time will tell G9 to suppress false triggering harder (crosstalk between inputs and double triggering). Raising them too high may cause the G9 to miss some hits on fast/press rolls. Dyn Level sets how hard the G9 will try to suppress false triggering. -
Page 99: Curve Settings
This skew in detection needs to be corrected, so that the software picks a set of sound samples which matches the intensity of stroke in real world. To this end, the G9 ships with a limited number of curves representing different degrees of detection skews. Choosing adequate velocity curves depends on the choice of components of different manufacturers (technical specifications) and the personal expectations in sound progression of the player. - Page 100 Setup field (module 2). Setup Custom Setup Highlight a user Setup where you want to store the curve and tap [Save]. Alternatively tap [New] in the Feature Shelf to create a fresh Setup. Trigger Setup Selection G9 - Instrukcja obsługi...
- Page 101 Curve Settings field: Curve Settings Presets User (Editable) Linear Custom 1 Convex 1 Custom 2 Convex 2 Custom 3 Convex 3 Custom 4 Convex 4 Custom 5 Convex 5 Custom 6 Convex 6 Custom 7 Concave 1 G9 - Instrukcja obsługi...
-
Page 102: Curve Editor
Therefore, finding the perfect compensation curve is always a matter of trial and error. The following section guides you through a typical process of creating custom curves in the G9. 11.3.2.5.1... - Page 103 Curves that are already assigned to higher trigger preset orders will update in trigger banks and setups immediately after saving the curve shape (step 9). In this case the following steps are optional. Proceed as follows: G9 - Instrukcja obsługi...
-
Page 104: Moduł 4
Save (Saves the curve points as seen in the UI) 11.4 ODUŁ 11.4.1 RIGGER ONITOR Trigger Monitor Pad Monitor X-Talk Monitor Kick Snare Tom 1 Tom 2 Tom 3 Tom 4 Ride Hi-Hat Crash1 Crash2 Aux 1 Aux 2 Aux 3 Aux 4 G9 - Instrukcja obsługi... -
Page 105: Pad Monitor
11.4.1.2 ONITOR The Crosstalk Monitor detects every signal of each pad sent to the G9 while playing. Its main purpose is to observe trigger signals sent by pad components you haven´t hit at all. Often vibrations G9 - Instrukcja obsługi... - Page 106 After this period, the X-Talk Monitor clears all values, resulting in a blank monitor screen. X-Talk Monitor Kick Snare Tom 1 Tom 2 Tom 3 Tom 4 Ride Hi-Hat Crash1 Crash2 Aux 1 Aux 2 Aux 3 Aux 4 G9 - Instrukcja obsługi...
-
Page 107: Ogólne Ustawienia (General Settings)
Wi-Fi. Moduł ten służy także w celu aktualizacji oprogramowania, resetowania fabrycznego i pobierania instrukcji bez konieczności odwiedzania zewnętrznych stron internetowych. 12.1 ODUŁ This module controls global properties for all standard outputs offered by the G9 Workstation. Next to exclusively stereo outputs like Master Outs you can manage... -
Page 108: Master Outs
Outs can be configured as either Dual Mono outputs or Stereo outputs. The choice in configuration will take effect in the routing matrix Routing Drums (Zobacz sekcję 12.1.4 Routing Drums & Routing Others na str. 99). G9 - Instrukcja obsługi... -
Page 109: Digital In/Out
This is very useful if you are working in several studios or venues. Once you return to a studio or mixing desk, you can adapt your G9 to the given circumstances in just a few taps and recall the work settings stored before. - Page 110 Ogólne ustawienia (General Settings) The G9´s routing function is divided into 2 input categories: Routing Drums Routing Others. While their routable channels vary, the functionality and appearance are the same. Thus, the contents of the following subchapters apply to both input categories likewise.
-
Page 111: Editing The Routing Matrix
(stereo). L/R icons for direct outs are switchable in the routing matrix, too. Change mono/stereo settings of the Direct Outs by simply tapping the according buttons in the routing matrix, or: Close the Routing Matrix and go to General Settings Moduł 1 Direct Outs. G9 - Instrukcja obsługi... -
Page 112: Presets - Routing
– R RESETS OUTING The G9 provides a variety of options to manage preset libraries. You can access the library and its functions by tapping on a [Preset] field next to a group of preset parameters. In the drop down, that... -
Page 113: Loading Presets
In preparation please check whether the Routing Preset field contains the name “Custom Setting”. This indicates that values have changed and differ from those stored in the device database. With Custom Setting visible proceed as follows: Tap the [Routing Preset] field. G9 - Instrukcja obsługi... -
Page 114: Overwrite Presets
The second module of the General Settings mode hosts Equalizer Compressor features for outputs as well as Control settings for peripheral devices such as Foot Switch pedals or control via a pad using an AUX input channel. 12.2.1 ASTER HANNEL EADPHONE ONITOR G9 - Instrukcja obsługi... -
Page 115: Equalizer
Consequently, the G9 only provides a constant linear factory preset for output channels which serves as a starting point. Recurring settings can be remembered by saving out user presets. -
Page 116: Editing Eq Curves
3 alternative ways: By tapping directly on a dial in the parameter bar By turning the hardware dials assigned each parameter By tapping on one of the upper three software dials next to the hardware dials G9 - Instrukcja obsługi... -
Page 117: Compressor
12.2.1.2 OMPRESSOR While the Equalizer allows for shaping sound by addressing certain frequency ranges selectively, compressors will take effect across the whole frequency spectrum. In the G9, Pad Compressors are implemented as Insert type Compressors (Input Channels Editor), so that the sound of each pad can be shaped individually. -
Page 118: Parameters And Description
Boost, Ratio and Threshold settings update the input-output curve. Knee, Attack and Release values are not visible in the input-output curve. 12.2.1.2.2 DITING OMPRESSOR URVES The following steps are a guideline for setting up a compressor: Turn Compressor [on]. G9 - Instrukcja obsługi... -
Page 119: Presets - Equalizer And Compressor
(either as a preset or directly). The device database does not require any separate storage, otherwise there is no difference in the structure of the preset hierarchy. You can simply replace the word “Drum Kit” with “Device Database” in the following Illustration: G9 - Instrukcja obsługi... -
Page 120: Loading Presets
Ogólne ustawienia (General Settings) The G9 provides a variety of options to manage preset libraries. You can access the library and its functions by tapping on a [Preset] field next to a group of preset parameters. In the drop-down lists... -
Page 121: Saving New Presets
(without preceding lock icon). Tap the [Preset] field. Tap once on a preset name in the drop-down list. [Rename] in the Feature Shelf. Enter a new name for the preset using the keyboard. Confirm by tapping [OK]. G9 - Instrukcja obsługi... -
Page 122: Deleting User Presets
ONTROL In this function set it is possible assign and mange control settings for peripheral devices choosing options from a predefined list. The G9 allows for choosing between two types of control: Foot Switch To be chosen in conjunction with standard foot switch pedals sending stereo signals. -
Page 123: Moduł 3
LOBAL ETTINGS This function set centers around connecting the G9 with other MIDI devices to form an in-line signal path for MIDI control data to travel through. Utilizing the MIDI 1.0 protocol, it is consequently possible to remote control certain functionalities between the connected devices. -
Page 124: Routing Midi Signals
This section exclusively focuses on the MIDI implementation of the G9 and how it can live in a chain of connected MIDI devices. Incoming MIDI Data can be routed to other MIDI devices by utilizing either the analogue... -
Page 125: Local Control
(off). Setting Local control to “off” is recommended in conjunction with sequencers that rout the recorded MIDI information received from the MIDI out of the G9 back into the console to drive the internal sound processor. In this setup the G9 sound processor would receive 2 identical sets of control data if Local Control was set to “on”. -
Page 126: Drumkit Program Change
RUMKIT ROGRAM HANGE This feature set defines the rules for MIDI program changes. Since the G9 is a rhythm device, it can´t be compatible with the standard MIDI protocol. The programs to change are the drum kits available in the... -
Page 127: Program Pairing
(Optional) Repeat steps 1-2 for other drum kits. The settings of the function set apply to the following ports of the rear panel. Make sure that the G9 is connected to the external device in order to let the settings have effect: Ports –... -
Page 128: Moduł 4
Turns program change off completely (default). Only the G9 controls programs of external MIDI devices by changing the drum kit. The G9 only reacts to external MIDI program changes by changing the kit according to the linkage of programs in program chain. -
Page 129: Start Screen
UI T HEME The appearance of the G9 is customizable by different UI Themes. Tap on the field and select a theme using the selection wheel. There are also themes dedicated to different types of color blindness. These themes are named after medical terms and utilize only color values from the perceivable spectrum of the concerned group of people. -
Page 130: Bluetooth
LUETOOTH AMES If your G9 is in the close neighborhood of other G9 devices, you can change the Bluetooth name of your G9 to make it uniquely recognizable for other external devices and facilitate the pairing process. Bluetooth names are stored in the global device database automatically and are... -
Page 131: Fabryczny Reset (Factory Reset)
Dźwięki zakupione w sklepie muszą zostać pobrane i ponownie zaimportowane. Aktualizacja firmware z drugiej strony zachowa wszystkie ustawienia i zestawy perkusyjne. Przed kontynuowaniem zapisz niestandardowe zestawy perkusyjne. Aby przywrócić ustawienia fabryczne G9, wykonaj następujące czynności: Idź do General Settings Moduł 4 Factory Reset... -
Page 132: Information
– F OWNLOAD OBIERANIE IRMWARE NSTRUKCJA Zarówno strona internetowa, jak i moduł G9 czerpią swoje pliki z tego samego źródła, zatem to od Ciebie zależy, którą drogę wybierzesz. 12.4.6.1.1 OWNLOADS OBIERANIE Z GEWAMUSIC Wejdź na gewamusic.com Service Downloads Lub skorzystaj z linku poniżej:... -
Page 133: Pobieranie Bezpośrednie Z Urządzenia
Ogólne ustawienia (General Settings) 12.4.6.1.2 OBIERANIE BEZPOŚREDN IE Z URZĄDZENIA Funkcja bezpośredniego pobierania pozwala uniknąć zakłóceń nośników pośrednich, co skutkuje szybką i łatwą procedurą aktualizowania G9. Wykonaj następujące kroki: Upewnij się, że ustanowiłeś działające połączenie Wi-Fi. Idź do General Settings Moduł 4 Update Naciśnij na... -
Page 134: Aktualzuj Urządzwnie
Skopiuj oprogramowanie (edrum_fw_*.swu) do katalogu ROOT pamięci USB. Wyłącz G9, naciskając przycisk zasilania. Podłącz pamięć USB do portu USB na panelu przednim. Włącz G9, naciskając ponownie przycisk zasilania i poczekaj na zakończenie aktualizacji (wyskoczy z komunikatem o stanie aktualizacji). Wyjmij pamięć USB z portu USB. -
Page 135: Aktualizuj Procedurę Za Pomocą Modułu
Jeśli zauważysz wersję trigerów V0, koniecznie ponowne uruchom moduł. Wskazówka: W połączeniu z bezpośrednim pobieraniem oprogramowania można pobrać również rozpakowane oprogramowanie z domyślnego folderu pobierania i skopiować je na pamięć USB za pomocą Menedżera plików (File Manager) G9. Domyślna ścieżka pobierania plików oprogramowania to INTERNAL SD/SYSTEM/Firmware. - Page 136 Ogólne ustawienia (General Settings) Poczekaj na zakończenie autonomicznej procedury aktualizacji (komunikat o powodzeniu). Potwierdź naciskając [Reboot (Uruchom ponownie)]. G9 - Instrukcja obsługi...
-
Page 137: Narzędzi (Tools)
To open the On Stage tool, tap the [Tools] mode icon and tap Stage]. On Stage PDF Reader Import Tool Shop Menedżer plików Narzędzi This opens the default On Stage screen: On Stage - Default Set List Editor Drum Kit Studio Record Set G9 - Instrukcja obsługi... -
Page 138: Tiles - Assignable Media Types
Tile Edit – Icons and their Meaning Edit Tile Attach PDF File (Tap) – Remove File (Hold down 2 seconds) G9 - Instrukcja obsługi... -
Page 139: Setlist Presets
Sheet”. This preset loads default values without any pdf attachment. If you are already familiar with preset management in other modes such as Editor or Effects, you can skip this section. Setlists - Preset Field and Browser Preset Field G9 - Instrukcja obsługi... -
Page 140: Loading Setlists
Top 40 Set 1 Top 40 Set 2 Load Save Rename Delete As with all other G9 presets, the feature shelf updates depending on the chosen preset type (Factory or User): Preset Management - Dostępne funkcje Funkcje Kategoria Ściągnij Zapisz... -
Page 141: New Setlists
In the preset browser highlight a user setlist to be overwritten (tap once). [Save] in Feature Shelf. This overwrites the chosen preset with the current tile layout. 13.1.3.4 ENAME ETLISTS G9 - Instrukcja obsługi... -
Page 142: Delete Setlists
134). It (Zobacz na str. provides only the most important functions for reading chart music. During live performances you need to turn pages quickly and have fast access to the [Play/Stop] buttons of the On Stage mode G9 - Instrukcja obsługi... - Page 143 The allocation of these functions at the bottom minimizes the distance to the player and thus speeds up the workflow. PDF Viewer Pdf Viewer Document Pdf Viewer Exit to On Stage Screen (Closes Pdf Viewer) Next page Previous page Zoom Turn page clockwise G9 - Instrukcja obsługi...
-
Page 144: Czytnik Pdf (Pdf Reader)
The following table explains buttons and icons of the start screen: Czytnik PDF (PDF Reader) - Functions Open File Select Browser Next page Previous page Zoom Rotate page clockwise in Increments of 90° Expand bookmark hierarchy G9 - Instrukcja obsługi... -
Page 145: Przeglądarka Plików (File Select Browser)
Narzędzi (Tools) Collapse bookmark hierarchy 13.2.1 RZEGLĄDARKA PLIKÓW ELECT ROWSER Przeglądarka File Select jest zaimplementowana w różnych aplikacjach w G9, takich jak Odtwarzanie utworów (Song Player), Czytnik PDF (PDF Reader) Narzędzia do importowania (Import Tool). Jednak w zależności od aplikacji otwiera się z różnymi aktywnymi filtrami, aby wyświetlać... -
Page 146: Otwieranie Plików Pdf
Tap on the thumbnail to open the Page Select browser. Tapping once on a thumbnail in Page Select will open the selected page directly without working your way through the bookmark hierarchy. Page G9 - Instrukcja obsługi... -
Page 147: Menedżer Plików (File Manager)
The ability to store your own files in the G9 makes a USB dongle obsolete. You can access your files wherever you go without carrying any other storage medium. -
Page 148: Menedżer Plików Vs. Importowanie Próbek Dźwięku
Sound Library of the G9. It does not transfer data onto the internal SD card, but takes sound files from any source and encrypts the sample file into the G9´s native library format. Samples are encrypted and filed under the matching instrument category in the library. Consequently, samples are finally stored on the... -
Page 149: Task Bar
Rename Files/Folders (only one list entry at the same time) Delete Files (batch processing) Transfer buttons (Move/Copy) to start the transfer Job. The following table explains the icons of the Task Bar: Task Bar G9 - Instrukcja obsługi... -
Page 150: Collections - Concept And Overview
(SD, USB) within the same split window. During this process, the G9 remembers the path directories of all selected items in the background, allowing to navigate seamlessly between sources and their folder hierarchies and without losing track of the files and folders selected. - Page 151 While traditional file managers discard file selections as soon as you leave a folder to open a different directory, the G9 file manager remembers these selections, allowing to add more files from other directories. Thus, a collection consists of selections spread out on different directories and storage mediums.
-
Page 152: Compiling Collections
13.3.6.1 ARENTING The G9 file manager uses the concept of parenting, which applies to selecting folders of a hierarchy. When checking a folder (Parent), all contained files and folders (Children) are checked likewise. If you check a parent and open the folder afterwards to uncheck files and folders to be excluded from the collection, the parent will remain checked. -
Page 153: Refresh Vs. Uncheck All
System calculates free disc space (SD, USB) before and after transfer, executes the job or returns error message. Delete Collection based, affects all members of the collection in the active split window. Always asks for permission before executing the job. G9 - Instrukcja obsługi... -
Page 154: Organize - New Folder And Rename
This feature only makes sense when dealing with photos, where you still have a thumbnail to identify the image. The G9 is a pro audio device and priorities in functionality are set accordingly. -
Page 155: Closing The App
YSZUKIWANIA EARCH The search function of the G9 is viewed as a plug-In which is not exclusive of the File Manager. It can appear in other file browsers as well. It is designed as an inline tool which can be utilized as an alternative to linear path navigation (open folders by double tapping) and... -
Page 156: Conception
Search rule: “contains one or more words of the search term” Searches in the active folder and the hierarchy below. Lists files and folders. Navigation up the path (Buttons: Root Directory, one Level up) G9 - Instrukcja obsługi... -
Page 157: Filter Manager
Consequently, sorting functions and filter types are organized in the filter manager menu. Filters and sorting rules can be activated or deactivated globally in the Task Bar. G9 - Instrukcja obsługi... -
Page 158: Properties
Narzędzi (Tools) 13.4.2.1 ROPERTIES Each file browser of the G9 provides filtering and ordering options which operate independently from each other. Consequently, the Filter Manager only affects browsers, where it is available. Opens by tapping the Filter Manager button ... -
Page 159: Importowanie Próbek Dźwięku (Import Tool)
Narzędzi (Tools) The following table shows the complete list of sorting Filter Manager options and categorized Sort By Filter Filters available. The G9 Audio Name A-Z Filter Manager orders file categories by relevance Name Z-A to minimize the need of... -
Page 160: Importerze (Importer)
With the Narzędzia do importowania (Import Tool) it is possible to import files which are meant to be accessible in the sound library. Apart from the copy process, these files need to be encrypted into a G9 native format. If you just want to transfer files to the internal drive, please use the Menedżer plików (File... -
Page 161: Import Custom Samples (Single Layer)
The File Select browser is explained in detail in Performance mode (Zobacz sekcję 8.3.1.1 Przeglądarka plików (File Select Browser) na str. 26). G9 File Select Browser/Przeglądarka plików – Wybór nosników lub szukanie Intern Search Navigation/Nawigacja – w górę ścieżki SYSTEM/ G9 File Select Browser/Przegladarka plików (WAV) File Select G9 - Instrukcja obsługi... -
Page 162: Import Sounds From The Cloud
14” Collectors Maple X-Stick 14” US Vintage C Import 14” US Vintage S 14” US Vintage CS 14” US Vintage Rim Sound 14” US Vintage X-Stick Grouping Broadkaster VBE CS 13.5.3 MPORT OUNDS FROM THE LOUD G9 - Instrukcja obsługi... -
Page 163: Delete Sounds From The Library
Sounds purchased in the Sound Store will appear in the Storage column after they have been downloaded to your local device using the G9 Sklep (Shop) application (Zobacz sekcję 13.6.1 155). The import process is identical with the import of custom sounds. -
Page 164: Scenariusze Ograniczeń Importu
Sklepu (Shop) (patrz sekcja 13.6.3 Digital Property Rights na str 158). Jeśli chodzi o import próbek WAV, zalecamy utworzenie folderu „importuj” na wewnętrznej karcie SD za pomocą Menedżera plików i skopiowanie dźwięków do urządzenia przed jakimkolwiek G9 - Instrukcja obsługi... -
Page 165: Sklep (Shop)
Once registered and connected via Wi-Fi, you are ready to communicate with the Cloud. Note that the G9 Sklep (Shop) application enables you to only download your purchased sounds. To make them available in your local sound library, sounds must be imported in a second step, utilizing the G9 Narzędzia do importowania (Import Tool) - Page 166 Narzędzi (Tools) On start-up you are disconnected from the cloud by default and the landing page of the shop browser asks you to connect you G9 to the Cloud. Tap on the [Status] button in the bottom left corner of the shop screen.
- Page 167 “connected” (highlighted in green). Close the Login dialogue by tapping [X]. The Pop-up closes, and you should see your purchased items listed in the Sounds tab. Browse the sounds sub tabs to view your purchased sounds by category. G9 - Instrukcja obsługi...
-
Page 168: Billing Process
The buyer will have access to the sounds as long as the serial number of the sold device remains listed in the GEWA sound store account of the seller. It is the seller’s responsibility to remove the serial number of the sold device from his GEWA sound store account before the sale. -
Page 169: Useful Information
Choke, Crash (Edge) and Bell Signals. Unlike a piezo ceramic element, which produces electrical voltage when being deformed, FSR films always carry a low voltage which is decreases by applying pressure to the film (decreasing resistance). G9 - Instrukcja obsługi... -
Page 170: Gwarancja
Jeśli podejrzewasz, że masz roszczenie objęte warunkami gwarancji na produkt GEWA, skontaktuj się ze sprzedawcą. -
Page 171: Problemy I Możliwe Ich Rozwiązania
Upewnij się, że podkładka i konsola oraz kable stereo są Słyszę tylko jeden komponent/trigger (np. całkowicie podłączone. Jeśli chodzi o talerze i moduły Główkę lub obręcz) GEWA, kabel stereo należy podłączyć do gniazda skierowanego w stronę piezoelektrycznego talerza. Nie słyszę żadnego dźwięku (ani zestawu perkusyjnego, ani żadnych innych dźwięków, Sprawdź, czy słuchawki lub głośniki są... -
Page 172: Dane Techniczne
Dane techniczne 16 D ANE TECHNICZNE G9 Drum Workstation – Specyfikacja techniczna Drum-Kits / zestawy 40 Preset + nieograniczony User Presets Instruments / Instrumenty ponad 400 Effect Types / rodzaje Pad Compressor: 3-zakresowy parametryczny EQ na każdy Pad efektów Output Compressor & 4 zakresowy parametryczny EQ na każde z wyjść Output Room: 12 rodzajów / Multi: 9 Algorytmów...
Need help?
Do you have a question about the G9 and is the answer not in the manual?
Questions and answers