
Related Manuals for Sony FX 6


Summary of Contents for Sony FX 6
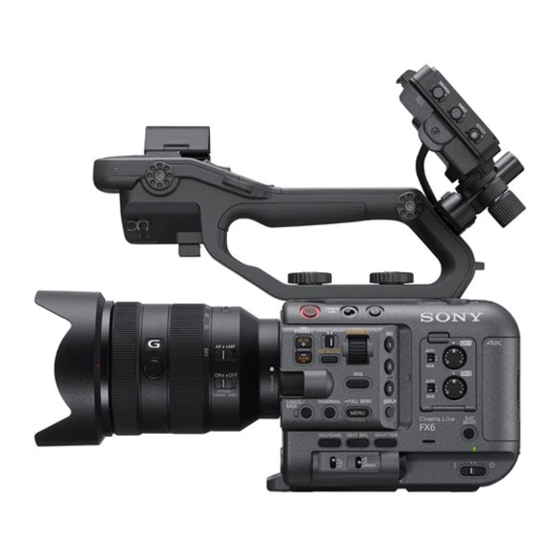
- Page 1 Sony FX 6 firmware version 2.0 Quick Start Guide and Tips Centre for Digital Arts Concordia University 2022...
-
Page 2: Table Of Contents
Contents Introduction, P. 3 Cine EI Shooting Mode, P. 97 Important Features, P. 6 Cine EI Option One: Exposing Slog 3 with the s709 LUT, P. 103 APR warning, P. 9 Cine EI Option Two: Importing custom LUTs, Power and Batteries, P. 10 P. -
Page 3: Introduction
Introduction Sony FX 6... - Page 4 Introduction This guide summarizes key information on the Sony FX 6 in one resource. The guide is not written for the absolute beginner but it does explain some fundamental concepts common to all video cameras. It is ideal for the somewhat experienced person who wants to quickly familiarize themselves with the camera.
- Page 5 Introduction The FX 6 is a full frame sensor Sony “cinema” camera. The image quality is fantastic and the camera can serve as a good introduction to the world of digital cinematography. If you have never used a digital cinema camera that can import LUTs, read the section on Cine EI shooting mode carefully.
-
Page 6: Important Features
Important features: Camera Specifications In addition to NTSC and PAL options there is also a 4K (digital cinema) 24 fps option. 4.2K Full Frame sensor: very good low light performance! Shooting Resolutions: HD 1920 x 1080, 4K UHD 3840 x 2160, 4K DCI 4096 x 2160 Standard frame rates (called frequency scan): NTSC: 59.94p, 29.97p, 23.98p, PAL: 50p, 25p, DCI:... - Page 7 There are two shooting modes: Custom and Cine EI. If you want to shoot in Slog 3 then you must shoot in Cine EI mode. This is common to all Sony cinema cameras. In this guide, the Custom shooting mode is presented first, as it is the easiest choice.
- Page 8 Important Features: Dual Sensitivity ISO Base Sensitivity Settings (higher numbers mean more sensitive to light): Low: Custom (709) Low: 320 ISO Cine EI Low: 800 ISO High: Custom (709) High: 5000 ISO Cine EI High: 12800 ISO The Base Sensitivity (ISO) settings change according to the shooting mode. See the sections on Shooting Modes and Exposure.
-
Page 9: Apr Warning
APR warning When you first power up the camera, it may ask you to “execute APR”. This is the automatic pixel restoration feature that minimizes noise in the LCD when lighting conditions change. Put the lens cap on and press OK. It only takes 5 seconds. If you cancel this option, do it next time. -
Page 10: Power And Batteries
Power and Batteries Power button on side of camera. AC power on the back right side of camera (bottom connector). Smaller battery (BP-U35): 150 minutes Larger battery: (BP-U100): 400 minutes Shooting high frame rates will diminish the battery time. The batteries take several hours to charge. Charge them overnight. -
Page 11: Recording Media
Recording Media Sony FX 6... - Page 12 Recording Media: saving files Connect the card reader to the computer. There is a USB C and USB A cable in the bag. The .MXF video files are contained in the XDROOT/Clip folder on the card. Simply back up those files. You can also back up the accompanying .XML files.
- Page 13 Recording Media: Two Codecs The camera comes with two 160 GB CF Express A cards. These can record XAVC I 4K up to 120 fps. The camera has two internal codecs: XAVC I (I Frame) XAVC L (Long G.O.P) Always use the XAVC I codec unless you need the extra recording time. XAVC I is a 4:2:2 10 bit codec in HD and 4K.
- Page 14 Recording Media: XAVC I Recording time per card XAVC I recording times per card: XAVC I HD 24p: 207 min. 30p: 168 min. XAVC I 4K 24p: 83 min. 30p: 66 min. XAVC I File sizes: XAVC I HD 30p: 950 MB per minute XAVC I 4K UHD 24p: 1.8 GB per minute...
- Page 15 Recording Media: XAVC L Recording time per card Only use XAVC L if you require a longer recording time. The 10 bit HD 50 Mbps image quality is very good. The 8 bit 4K image will be noisier in low light. XAVC L recording times per card: XAVC L HD (35 Mbps): 500 min.
- Page 16 Recording Media: Codec Bit Rates XAVC I files are easier to play back than XAVC L. However, older computers may struggle with the XAVC I 4K higher frame rate bit rates. XAVC I bit rates: HD and 4K 24-30p: 240-300 Mbps HD and 4K 50-60p: 500-600 Mbps HD and 4K UHD 120 fps:...
- Page 17 Recording Media: Proxy recording and Simultaneous Record Proxy Recording: Proxy recording creates compressed .mp4 duplicate video files while you record. I don’t recommend it. The proxy files are not useful in an online/offline workflow as they do not have the identical file names of the full resolution files. I recommend creating offline files using Adobe Media Encoder and the Pro Res 422 Proxy codec.
-
Page 18: The Kit Zoom Lens
The kit zoom lens Sony FX 6... - Page 19 About the lens The included lens is a Sony FE 24-105mm F4 G OSS Lens (E-mount). F stop 4 is available throughout the range from wide to telephoto. This lens is designed for full frame cameras. Always use full frame lenses on this camera when shooting 4K. You can use APS C or Super 35 lenses when shooting HD but then you must change the Imager Scan setting to Super 35 (status page 1).
- Page 20 About the lens There is an Autofocus button on the side of the lens in addition to an auto or manual focus switch on the front of the camera (see the section on focusing on how to operate the camera in hybrid focus mode). When in manual focus you can lock the focus with the large button under the ”G”.
-
Page 21: Menu Navigation
Menu Navigation Sony FX 6... - Page 22 Menus: About the touch screen The viewfinder (VF) is a 720p touch screen for some functions. Because this is the only screen use it sparingly as a touch screen. Don’t use the touch screen to scroll through menus! Use the touch screen for auto focus (see section on focusing). Otherwise, I recommend keeping your fingers off the screen! If the screen becomes dirty, it can be cleaned only with a microfiber cloth.
- Page 23 Menus: Three Options There are three different menu interfaces to change the settings in the camera. There is some redundancy between the interfaces. In this guide I usually refer to one method of changing a setting. 1. The status pages give quick access to the most common settings. 2.
- Page 24 Menu navigation Once you have pressed the FULL MENU Menu dial Access to status pages and menu. button on the side the camera you can get into two of the three menus (read on). The easiest way to navigate the camera menus is to use the large dial on the side of the camera.
- Page 25 Three Menu Options: the status pages The status pages appear when you press the full menu button quickly: they look like this: This menu is convenient for changing most settings before you start shooting.
- Page 26 Three Menu Options: the direct menu Press the display button on the side of the camera. On the grip of the camera, button 5 takes you to the direct menu (or button 8 on the top handle) that allows you to change aperture, shutter speed, ND filter setting, auto exposure, gain, white balance and other things directly on the display with the dial or multi-selectors.
- Page 27 Three Menu Options: the menu The full menu appears if you keep holding down the full menu button. It looks like this. This menu has all the options. This guide will not present them all.
- Page 28 Menu/ User/Assignable Button In this guide I refer to the user assignable buttons on the camera. I am using them in their default setup but you can assign different functions to the buttons as you wish. When you get the camera from the depot it is possible that the last user has changed their function.
-
Page 29: Audio
Audio Sony FX 6... - Page 30 Never use the internal camera microphone as your primary source of audio. Use the Sony ECM-VG1 super-cardioid mono condenser microphone. This is a reasonable option for recording if the subject is close to the camera (speaking no more than 6ft to 8ft away and directly at the camera).
- Page 31 Each XLR input has three options: Line, Mic, Mic +48V. Mic +48V is for condenser microphones like the Sony ECM- VG1. Mic is for dynamic microphones and Line is for an output from an audio mixer or other line level device (output from an external recorder for example).
- Page 32 Audio: Input On status page 3, change the input for the channel. In this case, I have XLR input 1 going to channels 1 and 2 for a two channel mono recording (the same sound on each channel).
- Page 33 Audio: Volume Level Controls There is a switch for automatic or manual volume level recording control. Open the door to switch from auto to manual level control and control the level.
- Page 34 Audio: Reference Sensitivity If the recording is too loud or too quiet with either auto or manual control, adjust the reference sensitivity of the channel. The default reference sensitivity is -50 dB. This is generally a good setting. Changing to a higher number like -60 dB will raise the recording level, -40 dB will lower the recording level.
- Page 35 Audio: Internal camera microphone You can record the internal camera microphone to one or more channels as a reference for synchronizing audio recorded to an external recorder (but it also helps to use a slate). By default the internal microphone level is on AUTO. The Audio Input level is the manual recording level for the internal microphone.
- Page 36 Audio: Low Cut option There is a switch on the microphone for a low frequency cut to the signal. This is not necessary unless there is a persistent low hum in the environment that you want to remove. M is no cut. V is the low cut.
- Page 37 Audio: Headphone Jack The headphone jack is placed on the side of the camera. The output level for the headphone jack is in the menu/ audio/ audio output/ volume. You can also select in that menu whether this is a stereo or mono output.
- Page 38 Audio: Fan Noise The sensor is large and requires cooling (or heating). Menu/Technical/Fan Control: AUTO mode is the default for the fan. In this mode the fan may run while you are recording. If the microphone is on the camera, or near the fan, it will record this noise.
- Page 39 Audio: Other Microphone Options The microphone wind cover on the Sony ECM- VG1 can help reduce wind noise. In the audio basic menu there is also a wind cut option for each channel. However, the CDA field recording kit is a superior option for recording audio outdoors.
-
Page 40: Shooting Modes: Introduction
Shooting Modes: Introduction Sony FX 6... - Page 41 Shooting Modes: Custom and Cine EI There are two shooting modes: Custom and Cine EI. This guide will explain these two options in detail. Custom mode also appears in the menu/status pages as Custom (709). Custom mode will create video files that will not require much correction in postproduction.
- Page 42 When working in Cine EI mode you can apply a LUT to the viewfinder and on the SDI/HDMI outputs. Working with a LUT makes exposing Slog 3 much easier than shooting Slog with other non-cinema Sony cameras. Slog 3 images require more work in postproduction to normalize and correct, but you can also use a LUT for correction.
- Page 43 Shooting Modes: Custom and Cine EI This guide covers the shooting modes in two separate sections, but even if you are only interested Cine EI mode also read the Custom shooting mode section. Many of the exposure controls are the same for both shooting modes.
-
Page 44: Custom Shooting Mode Settings
Custom Shooting Mode Settings Sony FX 6... - Page 45 Custom Shooting Mode: Base Settings In Menu/User/Base Setting pick SDR (BT.709) for the Target Display. This guide only covers shooting in the Rec.709 colour space, called SDR(BT.709) in this camera. The majority of display devices in the world are Rec.709 devices. HDR(HLG) target display is chosen when you are shooting for extra bright HDR TVs.
- Page 46 Custom Shooting Mode: Project Settings Once the Menu/User/Base Setting/Target Display is set to SDR(BT.709) setting, Custom mode will appear as Custom (709) in the status pages. On status page 4, you can also change the Shooting Mode. This is the project page. Look at the other selections on this page: 4K UHD at 23.98p using the full sensor of the camera and the best internal codec (XAVC I).
- Page 47 Custom Shooting Mode: Project Menu Status page 4/ Project Settings: Shooting Mode: CUSTOM (709) Change this first! Imager Scan: FF This means full frame: using the full sensor. Always shoot full frame unless you are shooting HD with Super 35 or APS C lenses. Codec: XAVC I Always choose XAVC I unless you need more recording time.
- Page 48 Image Resolutions: three options 1. 4K UHD 3840 x 1080 is the 4K broadcast/web standard. The aspect ratio is 16:9, the same as HD video. 2. 4K DCI 4096 x 2160 is only for cinema. The aspect ratio is 17:9. Web versions will have to be cropped or pillar-boxed.
- Page 49 Frame Rates: Frequency/Scan The camera calls standard frame rates frequency/scan. For 4K UHD or HD pick one of the two NTSC frame rates: 23.98p and 29.97p. With large sensor CMOS cameras like the FX6, motion looks better when shooting at 29.97p. 29.97p also looks better on (NTSC) TVs, computer screens and data projectors.
- Page 50 Custom Shooting Mode: Main settings In this image, you can see that there is some duplication of settings from status page 4, the frame rate (frequency/scan), Imager Scan and Codec. But on this page you can set the Scene File, Base ISO/Sensitivity and the Shutter. See next page. Very important!
- Page 51 Custom Shooting Mode: Main Settings Scene File/ S-Cinetone. This is the best choice! More about this later. Shutter: always set to twice the frame rate: 1/48 for 23.98p and 1/60 for 29.97p. The ECS shutter speeds are for eliminating rolling lines when shooting monitors, screens and projections.
- Page 52 (luminance) range possible out of the sensor. The FX 6 camera is a dual sensitivity camera so it performs very well at two distinct Low and High ISO settings. There is a slight increase in image noise at the High setting.
- Page 53 When in Custom(709) Shooting Mode, there are four preset Scenes ( looks) to choose from: Still, Standard, ITU 709 and S-Cinetone. S-Cinetone is a new gamma curve and color matrix based on the look of Sony’s Venice cinema camera. The look is similar to shooting Slog 3 with the s709 LUT applied.
- Page 54 Custom Shooting Mode: the other Scenes Still is high contrast Scene with saturated colours. Avoid it! Superficially it can look great but it gives you no room to adjust in post if the exposure is incorrect. Oversaturated colours will also look noisy in the shadow areas. Standard is a lower contrast, less saturated look than S-Cinetone but with aggressive highlight compression.
-
Page 55: Custom Shooting Mode: Exposure
Custom Shooting Mode: Exposure Sony FX 6... - Page 56 Exposure: Base ISO/Sensitivity As explained in the section on Custom mode settings, the FX 6 camera is a dual sensitivity camera so it performs optimally at two distinct Low and High ISO settings. These settings change with the Shooting Mode. The ISO settings...
- Page 57 Exposure: Base ISO/Sensitivity When shooting in Custom mode, Base Low is the lowest ISO possible on the camera. You can only add ND to cut sensitivity. Always try to start with this ISO setting when shooting outdoors or in bright settings. Ideally, try to shoot with either the Base Low or High setting without GAIN or ISO adjustments.
- Page 58 On a video camera, ISO and GAIN adjustments do the same thing: amplify the signal from the sensor. Most video camera sensors have one sensor rating, one sensitivity. The FX 6 has two: Base low and high. Any ISO setting below or above those two base sensitivities is an adjusted signal.
- Page 59 Exposure: Gain Preset Settings Menu/Shooting/ISO/Gain/EI: This sets whether the L,M,H switch on the side of the camera uses GAIN or ISO presets settings. Change the Mode to dB for GAIN. The image on the left shows how I like to set the GAIN presets for the three options.
- Page 60 Exposure: GAIN settings 3 dB of GAIN has been applied to this shot. The base ISO is low (320 ISO) and the lens is wide open at f 4.5. The best option would be to increase the amount of light on the subject but if this cannot be done, then a small amount or GAIN can be applied.
- Page 61 Exposure: ISO Preset settings (really important) Using ISO is more complicated. Look at these examples for Custom Shooting mode: When using ISO at the Base Low setting (320 ISO), try not to amplify the signal to more than double the base ISO: 640. 800 ISO can look OK too. When using the Base High setting (5000 ISO): try not amplify at all or beyond 10000 ISO.
- Page 62 Exposure: Changing GAIN and ISO in smaller increments The L,M,H switch provides an easy way to change your GAIN or ISO in presets but you can also change in smaller increments using the direct menu. The ISO/GAIN button on the side of the camera will allow you to adjust in smaller increments in the direct menu.
- Page 63 Exposure: Judging Image Noise Be strict about your use of GAIN or ISO for optimal image quality. You cannot judge image noise in the 720p LCD viewfinder. It is too small. Image noise appears first in the shadow areas of an image. If you are working in a studio consider attaching a large HDMI screen to the camera to judge noise.
- Page 64 Exposure: White/Gray card A really useful item, that you can purchase cheaply at a camera shop, is a white/gray card. It is a 90 percent white card and 18 percent (middle gray) gray card. The white side reflects 90 % of the light hitting it and the gray card only reflects 18 %. Both sides can be used for setting exposure and the white side for white balance.
- Page 65 Exposure: Manual White Balance Once your Shooting mode, Scene, Base sensitivity and Shutter speed are set, set the White balance. To perform a manual white balance, switch the setting on the side of the camera to A or B. Set the iris exposure to auto (in the direct menu) or expose correctly and hold a white card in front of the lens.
- Page 66 Exposure: White Balance You must perform a white balance each time your lighting source changes. The colour temperature remains stored in the A or B setting and is indicated in the display. As an aside, note the information in this display: 4K UHD at 29.97p, Full Frame, XAVC I, Custom shooting mode with S-Cinetone scene, Base High sensitivity, 1/60th shutter speed and...
- Page 67 Exposure: Preset White Balance Turn the switch on the side to Preset. Go into the Full menu: Shooting/White/Preset White and set the color temperature to your liking. Common Color Temperature Settings: LCD monitor: 6500K Daylight (at mid-day): 5500 K Florescent indoor: 4300K Tungsten Indoor light: 3200K Street lights (not LED) : 3200K Incandescent indoor light: 2500K...
- Page 68 Exposure: Iris control Manual control of the iris (aperture) can be quickly performed by pressing the iris button on the side of the camera and then using the wheel on the handgrip, handle or dial on the front of the camera. Shifting slightly to the left with the multi-selector or dial will highlight the M next to the iris setting.
- Page 69 Exposure: AUTO Iris There is no “one button” AUTO exposure mode with this camera but that is not a bad thing! When shooting video we don’t want the camera to randomly change shutter speed since this will change how motion appears. The shutter should remain at twice the frame rate unless you want a motion special effect.
- Page 70 Exposure: AUTO ND instead of AUTO Iris Another good option is to automate the ND filter instead of automating the iris. ND filters are used to cut light to the sensor. They are mostly used when you cannot lower the exposure in any other way. Make sure that you never have any GAIN applied before using ND filters.
- Page 71 Exposure: ND Presets The traditional way to work with ND filters is by selecting a preset. There is a section for ND on the side of the camera. Turn ND ON Press ND AUTO button until it goes off (if a light was on). Switch to ND PRESET: this allows you to toggle between the three ND preset settings (made in the Full Menu/Shooting menu/ND Filter).
- Page 72 Exposure: ND Presets The ND preset settings can also appear in the display and can be changed with the direct menu as well. Changing presets in the middle of a shot will be noticeable. Don’t do it. Presets are not the best way to work with ND.
- Page 73 Exposure: Variable ND filter adjustment This is the best way to work with the ND filters. Sony developed this technology. Press the ND ON button Turn the ND switch to ND Variable and then adjust the dial. This way you can maintain the manual iris setting you want while applying incremental amounts of ND.
- Page 74 Exposure: ND Auto The best way to maintain a consistent manual iris setting is to use ND Auto. Keep the iris on Manual. Press the ND ON button, switch it to ND Variable and then hold down the AUTO ND button until AUTO ND appears in the LCD display.
- Page 75 Exposure: the Waveform Monitor I don’t tend to display the vectorscope or histogram in the VF. But I often use the waveform monitor. The waveform monitor shows luminance values in the image. It can be read from left to right, exactly like the subjects in the image. The lines on the waveform monitor from bottom to top are: 0, 25, 50, 75, 100.
- Page 76 Exposure: Zebra Zebra stripes and levels are used to judge overexposure. They can be turned on with Zebra button on the side of the LCD. Striped lines appear over the image to indicate overexposure at 100 percent IRE or at another value. Button 9 turns on the waveform monitor (or histogram or vectorscope as you keep pressing it) in the display.
- Page 77 Exposure: Zebra Stripes Menu/Monitoring/Zebra: There are two Zebra levels. Zebra 2 level should always be at 100 percent to judge overexposure. But Zebra level 1 can be set to another amount to judge exposure. For example, here I have set level 1 to 81 percent for exposing a white card in Custom shooting mode using the S- Cinetone scene.
- Page 78 Exposure: Zebra Level In this image, the white card is being exposed at 81 percent. the white card 81 %...
- Page 79 Exposure: S-Cinetone Exposure With the S-Cinetone gamma curve, contrast changes occur with exposure: contrast increases in the shadows and decreases in the highlights (starting at 70 IRE). Underexposing will create an more contrasty image, and overexposing will create a less contrasty, more subdued, image. You can judge exposure simply by looking in the viewfinder.
- Page 80 Exposure: S-Cinetone Exposure For a slightly underexposed image, Alister Chapman suggests exposing a white card at 81 percent. The white card can be exposed as high as 88 percent and as low as 78 percent on the waveform monitor. Skin tones can be exposed as low as 60 percent and as high as 70 percent.
- Page 81 Expsosure: S-Cinetone Exposure This image was exposed in a mixed lighting situation in Custom Shooting Mode with the S- Cinetone scene. Middle range skin tones were exposed at 65 percent on the waveform monitor. Avoid overexposing or blowing out highlights, especially on skin tones. There are tools to diffuse lighting in the EV Depot.
-
Page 82: Focusing
Focusing Sony FX 6... - Page 83 Focusing: Manual, Hybrid and Total Auto With the Sony kit lens (or other Sony lenses) working in conjunction in the camera, there are three possible focus “modes”: manual, hybrid, and total auto. Leaving aside the “total” manual option, because it is largely redundant, this section will concentrate on the Hybrid and Total Auto Focus modes.
- Page 84 Focusing: Menu Settings Here are the menu settings in Menu/Shooting/Focus for the options discussed in this section. There are many more options but I am concentrating on one method. I will look at some of these settings in detail but take the time to enter these settings if you want to follow this method.
- Page 85 Focusing: Hybrid Focus In Hybrid mode, leave the lens on AF and change the focus switch on the front of Focus switch on MAN the camera to MAN. You can focus manually with the focus ring on the lens and also use the PUSH AUTO button when you want to auto focus.
- Page 86 Focusing: Manual Focus In Hybrid mode, simply turn the focus ring on the lens to begin focusing manually. There are two aids to help. Button 7 on top handle enables the focus magnifier in the VF. Push twice to increase magnification. The Focus Peaking button is on the side of viewfinder (VF), if you prefer that aid.
- Page 87 Focusing: Total Auto Focus mode AUTO on camera. If you have the lens on AF and the Focus switch on the camera on AUTO, then you are in TOTAL AUTO FOCUS. In this mode, it is not practical to manually focus. You can push the PUSH AUTO button on the front of the camera to temporarily enable manual focus but as soon as you stop pushing it, the camera goes back to auto focus.
- Page 88 Focusing: Two Types of Auto Focus With the menu/shooting/focus settings, that I showed on page 84, there are two types of auto focus: flexible spot auto focus and auto focus tracking. Button 3 on the side of the camera toggles between the two auto focus types, flexible spot and focus tracking, whether you are in Hybrid or Total Auto Focus mode.
- Page 89 Focusing: Flexible Spot Auto Focus Flexible spot Pressing button 3 will highlight the focus area. It will appear as an orange square. This flexible spot can be moved with your finger on the LCD screen or simply tap the screen to move it to a different part of the image.
- Page 90 Focusing: Default Flexible Spot Area Menu/Shooting/Focus/Focus Area (AF-S) sets the default target area for the flexible spot in auto focus and PUSH AUTO. But if you move the flexible spot with your finger it stays at the last spot. It does not return to this default location unless you press and hold one of the multi- selectors on the camera (handle or the grip).
- Page 91 Focusing: Other focus area options The Menu/Shooting/ Focus/Focus Area specifies the target for the auto focus operation (and PUSH AUTO focus in Hybrid mode). By default it is set to Wide. This is the least precise option. You can also specify a Zone, that is somewhat more precise. Specifying a zone might be a good idea when filming a stage, for example, where all the subjects are on the same plane.
- Page 92 Focusing: Auto Focus Tracking The second type of auto focus is auto focus tracking. To auto focus track objects, you first have Tracking box to exit the flexible spot auto focus by pressing button 3. When the flexible spot square is not orange, then you have exited that type of auto focus.
- Page 93 Focusing: Auto Focus Tracking AF Trans. Speed The Menu/Shooting/Focus/AF Trans. Speed determines how quickly the focus changes from one object to another when you select that new object in the touch screen. A faster setting is good for sports. A slower setting is good for a “pull focus”...
- Page 94 Focusing: Difference in Auto Focus Tracking when in Hybrid Focus and Total Auto Focus There is a major difference between auto focus tracking in hybrid focus mode and total auto focus mode. The settings I have chosen in Menu/Shooting/Focus give you a choice of how you want to handle the auto focus tracking by selecting Hybrid or Total Auto focus.
- Page 95 Focus Tracking: Difference between Hybrid Focus and Total Auto Focus In hybrid focus mode, the camera can track any object and the focus will remain on that object. In total auto focus mode, faces and eyes have priority. You can initially track any object but as soon as a person enters the frame, the camera will automatically shift focus to their face and eyes.
- Page 96 Focusing Recap: Two Auto Focus Types When you see the orange square in the VF then the camera is in flexible spot auto focus, or, if you like, the regular auto focus with the flexible spot option chosen. When you see the white square following an object, or the white squares following a person’s eyes, then the camera is in auto focus tracking.
-
Page 97: Cine Ei Shooting Mode
Cine EI Shooting Mode: Settings and Exposure Sony FX 6... - Page 98 Cine EI Shooting Mode Most of the previous section on Custom Shooting Mode Exposure applies to Cine EI mode. The controls for iris, white balance, and ND filters are the same. However, Cine EI is for exposing Slog 3 images so there are differences in how you arrive at the optimal exposure.
- Page 99 Cine EI is for shooting Slog 3 Exposing Slog 3 in Cine EI mode is different from how you may have exposed Slog 3 in other “non-cinema” Sony cameras. This section goes through the details of how to expose Slog 3 correctly with the FX6.
- Page 100 Cine EI is for shooting Slog 3 Cine EI shooting mode is for exclusively shooting Slog 3. Slog (pronounced “S Log”) is Sony’s LOG format which has (optimally) 15 stops of dynamic luminance range, preserving detail in shadows and highlights.
- Page 101 Cine EI: Slog 3 and LUTs Slog video images must be “normalized”. They appear low contrast on more linear displays (like TVs and computers) as they perceive brightness in a logarithmic way, the same manner as our eyes. The quickest normalization method is by applying a LUT, a look-up table: a file with a .cube extension that will apply color and contrast transformations to the file.
- Page 102 Cine EI: Slog 3 and LUTs The great advantage of shooting Slog 3 with the FX6 (rather than the FS5 or Z90) is that you can import a LUT or use one of the built-in LUTs to correct the image in the viewfinder (and the SDI and HDMI outputs). Working with a LUT makes exposing the image much easier.
-
Page 103: Cine Ei Option One: Exposing Slog
Cine EI Option One: Exposing Slog 3 with the s709 LUT Sony FX6... - Page 104 Cine EI: Project Status Page Settings In Menu/User/Base Setting pick SDR (BT.709) for the Target Display and Cine EI as the shooting mode. You can also go to status page 4 and change the shooting mode to Cine EI. Always choose the XAVC-I codec in Cine EI.
- Page 105 Cine EI: choose the built-in s709 LUT Choose the s709 LUT on status page one. This is the default LUT. Base Look/LUT...
- Page 106 Cine EI: Turning on a LUT in the viewfinder Go to status page 5 to turn on the LUT for the viewfinder and the SDI and HDMI outputs. Always turn on the LUT for the SDI/HDMI outputs when you are using the LUT in the viewfinder (even if you are not using an external monitor or recorder).
- Page 107 Cine EI: Turning on a LUT for the viewfinder (VF) VERY IMPORTANT! It helps to use the waveform monitor in the VF to judge Slog 3 exposure. The waveform in the VF measures the output from the SDI and HDMI outputs, even if there is no recorder or monitor attached. So, to avoid confusion, even if you are not using an external recorder, turn on the LUT for the SDI and HDMI outputs if you are turning on a LUT for the viewfinder.
- Page 108 Cine EI: Turning on a LUT for the viewfinder From top to bottom on the right hand side of the display it is indicated that you are recording in Slog 3 (because the camera is in Cine EI mode), that you have the s709 LUT applied (the selected LUT) and the waveform is measuring the signal adjusted by the s709 LUT because you have a LUT turned ON for the SDI/HDMI outputs.
- Page 109 Cine EI: Slog 3 exposure with the s709 LUT With the s709 LUT applied, you can judge the exposure by eye in the viewfinder. For more accurate exposure, follow these instructions from Alister Chapman: expose a white card at 77 percent or expose a gray card just below 50 percent.
- Page 110 Cine EI: Slog 3 exposure with the s709 LUT Here is the setting in Menu/ Monitoring/Zebra. Zebra Level 1 is set to 77 percent. A line will appear in the waveform monitor at the 77 percent level. I keep Zebra 2 Levels at 100 percent to judge overexposure.
- Page 111 Cine EI: Slog 3 exposure with the s709 LUT In this image the white card is lined up with the 77 percent line in the waveform monitor. This is the optimal exposure for Slog 3 with the s709 LUT applied. 77 perc.
- Page 112 Cine EI: Base Sensitivity and EI When you are exposing Slog3 images with a LUT applied, it is easiest to keep the EI preset at the same value as the base sensitivity ISO value. In the image you can see that the Base High Sensitivity ISO and the EI preset value are the same: 12800.
- Page 113 Cine EI: What is EI? ISO is the camera’s sensitivity to light. The camera has two ISO (Base Sensitivity) settings in Cine EI: Base Low (800 ISO) and Base High (12800 ISO). You cannot change the ISO (or add GAIN). The ISO will always be one of these two settings.
- Page 114 Cine EI: EI Presets PRESET SWITCHES In Cine EI mode, you have to use the Base Low (800 ISO) or Base High sensitivity (12800 ISO). You cannot change the ISO as you can in Custom shooting mode. In Cine EI mode, the L,M and H ISO/GAIN preset switches on the side of the camera control EI (exposure index) ratings.
- Page 115 Cine EI: EI Presets Alister Chapman suggests the following setup for the L, M, H EI presets. Preset H setting exposes Slog 3 normally: using the same EI setting as the same Base Sensitivity (ISO) setting. Preset M or L changes the brightness of the LUT. Lowering the EI value below the Base Sensitivity value will lower the brightness of the LUT, you will then have to increase exposure (open up the iris) to expose the Slog 3 image correctly.
- Page 116 Cine EI: EI Presets Here is how the presets have been entered in Menu/Shooting/ISO/Gain/EI: At Base Low ISO (800 ISO): At Base High ISO (ISO 12800):...
- Page 117 Cine EI: EI Presets and Overexposure When working with all Sony cameras, you can always slightly overexpose Slog 3 images but you never want to underexpose them. Overexposing slightly can diminish image noise, since it increases the shadow luminance range, or pushes the image information out of the image shadow areas that have the most noise.
- Page 118 Cine EI: EI Presets Once you have the EI preset applied you can then determine the correct exposure using the 77 percent line for the white card. In these VF details you can see how the iris value changes as the EI preset changes. Also, the luminance values become a little more compressed in the waveform monitor as you increase the exposure.
- Page 119 Cine EI: EI Presets and Image Noise Base High 12800 ISO, EI Preset 12800 300 percent enlargement...
- Page 120 Cine EI: EI Presets and Image Noise Base High 12800 ISO, EI Preset 3200 300 percent enlargement...
- Page 121 Cine EI: auto exposure and Cine EI It is better to use manual exposure when shooting in Cine EI. The camera’s auto exposure does not take into account the EI rating, so if the EI preset value is different from the Base Sensitivity ISO rating, the auto exposure will be incorrect.
- Page 122 LUT, another LUT, or correcting the image from scratch. The s709 LUT is available from Sony on this page: https://pro.sony/en_CA/technology/professional-video-lut-look-up-table The s709 LUT is not completely neutral. It has a certain look. Shooting with the S- Cinetone look in Custom mode will make images similar to Cine EI mode with the s709 LUT.I don’t recommend it, but you can shoot in both modes in the same...
- Page 123 Cine EI: Applying the s709 LUT in Adobe Premiere Here I have applied the s709 LUT to a clip using the Lumetri Color tool. LUT applied If you want to normalize an entire sequence in Premiere you can add an adjustment layer and apply just one instance of the Lumetri color tool to that layer (see next page).
- Page 124 Cine EI: Adobe Premiere adjustment layer Here I have an adjustment layer with the s709 LUT LUT applied applied. I am using only one instance of the Lumetri color tool to normalize all the clips underneath the layer. When making an adjustment layer, make sure to have Adjustment layer...
- Page 125 Cine EI: Premiere 2022 colour management Premiere 2022 now interprets the colour space of a clip when it is imported into the software. So, in addition to a sequence having a specific working colour space, a clip also has an assigned colour space: HDR or Rec.709. In this guide we have been focused on shooting videos in the Rec.709 colour space, whether in Custom or Cine EI mode.
- Page 126 Cine EI: Premiere 2022 colour management The FX 6 can shoot Rec.709 and HDR video. On page 45 of this guide I described the following setting: In the Menu/Project/Base Setting there are two important settings: the Shooting Mode, that you can set to Custom or Cine EI and the Target Display.
- Page 127 Cine EI: Premiere 2022 colour management Premiere 2022 should interpret Rec.709 video files from the FX6 correctly. When you make a sequence from an imported video clip, the sequence settings should have Rec.709 as the working colour space. Then you can apply the LUT to the file or to multiple files (as I have just described) to normalize the image(s).
- Page 128 Cine EI: Premiere 2022 colour management Premiere 2022 should also correctly interpret the colour space of the video file. If for some reason the file is incorrectly interpreted it will look overexposed with “blown out” highlights. Right click the file in the Premiere project window and go to “Modify/Interpret Footage”.
-
Page 129: Cine Ei Option Two: Importing Custom Luts
Cine EI Option Two: Importing custom LUTs Sony FX6... - Page 130 Cine EI: Using other LUTs If you apply other built-in LUTs or custom LUTs, they will have different brightness levels and will have to exposed differently than the built-in s709 LUT. Once a LUT is applied, you should be able to judge exposure by eye but if you want to be more accurate, look for any documentation that comes with the LUT.
- Page 131 Cine EI: Loading Custom LUTs You can load your own LUTs into the camera. The LUTS must be 3D .cube LUTs: 17x or preferably 33x cube LUT’s designed for use with S-Log3 and SGamut3.cine. It is even better if they are designed for use with the FX6. Put the LUTS in the location shown below on the media card in Slot B of the camera.
- Page 132 Cine EI: Loading Custom LUTs Put card B in the camera and then go to Menu/Paint/Look/Base Look/Import. There are several free spaces for loading LUTs. Pick one of them (it will say NO LUT). Here I am loading a LUT for a sci-fi look called “Space Adventure Final”.
- Page 133 Cine EI: Loading Custom LUTs In this particular case, I chose the first free space with No LUT. The custom LUT will now appear in this list when you select a LUT on status page 1. It will appear in the VF in Cine EI mode once you have the LUT turned ON for the VF and for the SDI/HDMI outputs (as described in Cine EI: Option One).
- Page 134 Cine EI: Custom LUTs from the Sony site The custom LUT that I use in this example was taken from the Sony site. There are a few interesting LUTs to download here: https://pro.sony/en_GB/technology/professional-video-lut-look-up- table...
- Page 135 Cine EI: Gamma Display Assist If you are using a LUT, then you don’t use the Gamma Display Assist. You can use the Gamma Display assist if you wish, instead of the a LUT. Turning on Gamma Display Assist will make Slog 3 images look normal in the camera viewfinder.
-
Page 136: Cine Ei Option Three: Exposing Slog 3 Without
Cine EI Option Three: Exposing Slog 3 without a LUT Sony FX6... -
Page 137: Lut
Cine EI: Slog 3 exposure without a LUT If you are used to working with Slog 2 or 3 in other non-cinema Sony cameras, then you may prefer to shoot Slog 3 with the FX6 without a LUT applied. Without a LUT on for the viewfinder, the image in the VF will be low contrast and desaturated. - Page 138 Cine EI: Slog 3 exposure without a LUT In this case, in Cine EI mode status page 1 choose the No LUT option under Base Look/LUT. There are several choices with No LUT since these are empty fields into which you can load custom LUTs.
- Page 139 Cine EI: Slog 3 exposure without a LUT In status page 5, choose SG3C/Slog3 for the SDI, HDMI outputs and the VF. This means that no LUT is applied to the viewfinder and the outputs. It is very important that the settings are the same for the outputs and the VF.
- Page 140 Cine EI: Slog 3 exposure without a LUT With the s709 LUT off, no LUT at all, Alister Chapman suggests exposing a white card at 61 percent. You can make these values zebra settings that will appear on the waveform monitor: Menu/monitoring/zebra/zebra level 1 Keep zebra level 2 at 100 percent if you need to judge overexposure.
- Page 141 Cine EI: Slog 3 exposure without a LUT In this image the white card is exposed at 61 percent. The waveform monitor is reading the signal from the Slog 3 image, not the applied LUT, because there is no LUT applied to the SDI/HDMI outputs. Note that the Base Sensitivity (ISO) and EI preset match: 12800.
- Page 142 Cine EI: Slog 3 exposure without a LUT In Cine EI mode, shooting without a LUT applied, you are restricted to shooting at Base Low (800 ISO) and Base High (12800 ISO) sensitivity. There is no way to change ISO or GAIN. The L, M and H preset switches control EI values but changing these values has NO EFFECT because there is no LUT to adjust.
-
Page 143: S And Q Shooting
S and Q Shooting Sony FX 6... - Page 144 S & Q shooting S & Q shooting is for shooting slow motion or fast motion and time lapse: something other than a standard frame rate. S and Q slow motion shooting works by capturing the video at a different frame rate than the frame rate at which the video clip will be played back.
- Page 145 S & Q: slow motion shooting When shooting in S & Q for slow motion, the video is captured at a higher frame rate than the frame rate at which it is played back. The length of the clip is extended on playback. For example, if the project frame rate is 29.97 fps (30p) and the S &...
- Page 146 S and Q: frame rates In 4K, you can set the frame rate between 1 fps (frames per second) to 120 fps (there is a 10 percent image crop at 120 fps). In HD, you can set the frame rate up to 240 fps in HD but there is some image quality loss above 120 fps.
- Page 147 S & Q: menu settings 1. The base frame rate: On status page 1, the frequency/scan has been set to 29.97 fps. This is the project frame rate and the rate at which all clips will be played back. 2. The S & Q frame rate: In Menu/Shooting/S &...
- Page 148 S and Q: button 1 Enable S and Q motion by pressing button 1 on the side of the camera. This button toggles S and Q mode on and off.
- Page 149 S and Q: shutter speed VERY IMPORTANT When you switch to S & Q mode it does not pick the correct shutter speed for you. The shutter speed will match the frame rate. This is not correct! Change the shutter speed. Remember that when shooting standard motion or slow motion, the shutter speed should be set to double the frame rate for a normal amount of motion blur in the image.
- Page 150 S & Q: shutter speed The camera will initially pick a shutter speed that matches the frame rate. For slow motion, change the shutter speed to double the S & Q frame rate. The S & Q frame rate is indicated in the top left, followed by the base (project) frame rate.
- Page 151 S & Q: Time Remaining The time remaining on the media cards changes once S & Q motion is ON. This is based on the number of frames that are being captured. In this case, the remaining time is simply divided by four.
- Page 152 S & Q: shutter speed After exiting S & Q mode, remember to change the shutter speed back to the normal setting!
- Page 153 S & Q: fast motion and timelapse Setting a lower S & Q rate than the frequency/scan rate will result in fast motion. A S & Q rate of 1 fps will be timelapse. For example, if your base (project) frame rate is 24p and you record 10 minutes at the S &...
- Page 154 Interval Recording and Time Lapse You can also use interval recording to create timelapse sequences. Menu/Project/ Interval Rec The interval time is the amount of time between each exposure. The number of frames is the amount of frames that the camera takes during the interval time.
- Page 155 S & Q: Interval Recording and Shutter Speed For this image, the interval rec. settings were as illustrated below. The shutter speed was 16 F with a base frame rate of 23.98 fps. Note the motion blur on the pedestrians.
-
Page 156: Attaching The Viewfinder Loupe
Attaching the Viewfinder Loupe Sony FX 6... - Page 157 Viewfinder (VF) Specs. The camera’s viewfinder (VF) is a 720p Rec.709 screen. Slog 3 images look low contrast in this screen unless a LUT is applied. The VF cannot show all the highlight detail in uncorrected Slog 3 images. You need to apply a LUT and “normalize” the image to see the highlight details inside the Rec.709 colour space.
- Page 158 Viewfinder: Flipping and Rotating Image On the bottom of the VF there is a switch for rotating and flipping the image (very convenient if you are shooting yourself). The shade can be detached if necessary.
- Page 159 Viewfinder: Buttons and Shade Three buttons on the side: display focus peaking and zebra stripes and the custom 9 button displays the waveform monitor and other scopes by default. The shade provides sunlight protection in many situations but you may want to use the loupe in extremely bright situations or situations where you need to see details and focus manually.
- Page 160 Viewfinder: Attaching the Loupe The Sony bracket is too weak to support the loupe so first attach the more sturdy Vocas bracket. Do not attach the loupe to the VF without attaching the Vocas bracket first. The Vocas bracket allows the VF and loupe to be tilted but the VF will not have the same range of vertical positions.
- Page 161 Viewfinder: Attaching the loupe Detach the cable for the VF from the right side of the camera. Press the sides of the plug to detach it. Be careful as there are many small pins on this plug.
- Page 162 Viewfinder: Attaching the loupe Now that the VF cable is free, detach the VF from the camera handle by Leave this in place turning the dial. Leave the post that is mounted to the handle in place. Turn this dial...
- Page 163 Viewfinder: Attaching the loupe Attach the Vocas viewfinder bracket to the same post that you just removed the VF from. Tighten with the red Tighten with red handle handle.
- Page 164 Viewfinder: Attaching the Loupe Slide the VF into the bracket. See the following pages for more detail on this part.
- Page 165 Viewfinder: Attaching the Loupe This image from Vocas, gives you a better idea of how the FX6 VF fits into the bracket. Ignore that a loupe is already attached to the VF in this image. The VF pictured is a Sony FX6 VF.
- Page 166 Viewfinder: Attaching the Loupe Tighten the VF on the bracket with the dial. Plug the VF cable back into the camera taking care to line up the pins correctly.
- Page 167 Viewfinder: Attaching the Loupe Remove the shade from the VF and attach the Zacuto loupe on to the VF using the top clasp on the loupe. Be careful not to scratch the VF screen.
- Page 168 Viewfinder: Attaching the Loupe Here is another view with the loupe attached to the VF and the VF secure in the Vocas bracket.
- Page 169 Viewfinder: Take apart before packing up Follow the procedure in reverse to detach the loupe. When remounting the VF to the camera, once the Vocas bracket has been removed, secure the VF right at the end of the rod. This way the VF has room to turn towards the camera when it is stored in the bag.
-
Page 170: Tripod Tips
Tripod Tips Sony FX 6... - Page 171 Tripod Tips: basic advice Tripods, having three legs, can tip. Follow this advice to avoid accidents: Always take the camera off the tripod when moving it. The quick release plate makes this easy to do. If you do need to shift the tripod slightly while the camera is on it, make sure you have one hand on the camera handle as you are shifting the tripod legs.
- Page 172 Tripod tips: the Sachtler tripods The EV depot staff will give you one of the Sachtler tripods for the Sony FX 6. There are two models, the newer model called ACE is pictured to the right. The ACE model is lighter and has a simpler quick release plate mechanism.
- Page 173 Tripod tips: older model Sachtler base plate The older, heavier, Sachtler tripod model has a very powerful quick plate release spring. Before removing the plate, make sure the tilt and pan are locked. To remove the quick release plate you must pull down on the small red disk attached below the red lever.
- Page 174 Tripod Tips: Newer Sachtler tripods • The newer Sachtler ACE tripod has a much simpler quick release mechanism. Tighten/loosen the plate with the side screw. Press the red button to release the plate. The plate can only go into the tripod in one direction (look for the arrow).
- Page 175 Tripod Tips: ACE plate In addition to a screw, the quick release plate of the ACE tripod has a pin. You can adjust the position of this pin to make sure it aligns with the hole for the pin on the bottom of the FX6. You can also remove the pin when using the tripod with a DSLR.
- Page 176 Tripod Tips: adjusting the tripod head The whole tripod head is on a bowl that can be adjusted. This is for small adjustments that cannot be done by adjusting the height of the legs. Make sure the pan and tilt are locked. Adjust the handle at the bottom of the tripod head. Use the spirit level to ensure that the tripod is level.
- Page 177 Tripod tips: legs Once the legs are at the correct height tighten the supports between the legs. This step is easy to forget. It increases stability and is important!
- Page 178 Tripod Tips: Pan and Tilt Both models have similar pan and tilt controls. Unlock the pan and tilt before adjusting. Keep one hand on the tilt handle. The fluid head has three drag levels for tilt and pan. Zero is no drag.
- Page 179 Tripod Tips: counter balance Adjust the tension on the counter balance to change how the head springs back when tilting. Counter balance...
-
Page 180: Additional Resources
Additional Resources Sony FX6... - Page 181 Additional Resources: Sony User Manual The first place to go is the Sony User Manual. The manual defines all the aspects and options that this guide has overlooked. Unfortunately, the language is somewhat opaque on the actual operation of the camera.
- Page 182 Additional Resources: tutorials Alister Chapman is a British cinematographer who has a lot of information on his site about the FX6 and other Sony cameras. The exposure level advice in this guide is from his tutorials. https://www.xdcam-user.com/category/fx6/ Doug Jensen is a nature cinematographer in the U.S. He has a lot of concise and clear video instruction on the FX6.
- Page 183 Additional Resources: reviews Philip Bloom is a filmmaker from the UK who offers idiosyncratic but always informative reviews on cameras with lots of scenic imagery. These are meandering but entertaining. I have not watched them all. His review of the camera before the firmware update: https://philipbloom.net/blog/sonyfx6review/ His review following the firmware version 2 update: https://www.youtube.com/watch?v=Vy0LwZqsAws...
- Page 184 Additional Resources: LUTs Sony LUTs: https://pro.sony/en_CA/technology/professional-video-lut-look-up- table Sony LUTs for the Venice camera. You can try them on Slog 3 images shot with the FX6: https://sonycine.com/resources/luts/ Overview of other LUTs for the FX6: https://filmplusgear.com/fx6-luts/...
- Page 185 Thank you for reading this guide. If you have any comments, questions or suggestions please email: philip.hawes@concordia.ca...
Need help?
Do you have a question about the FX 6 and is the answer not in the manual?
Questions and answers