
Related Manuals for harmoni 50


Summary of Contents for harmoni 50
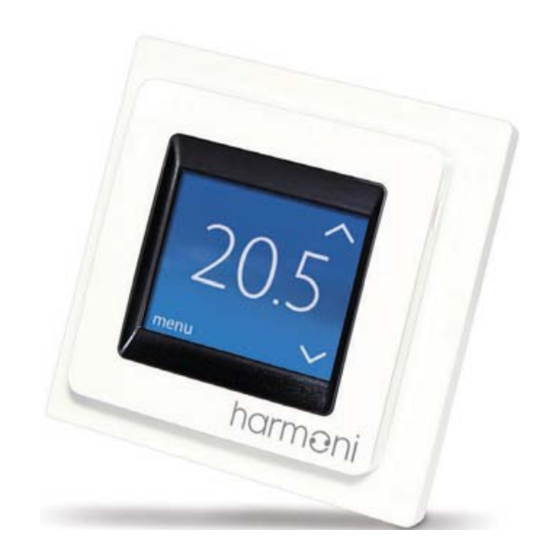
- Page 1 installation guide installation guide electronic intelligent timer thermostat www.harmonithermostat.co.uk...
-
Page 2: Table Of Contents
installation guide Contents Page 1 Introduction ............3 1.2 Safety Instructions ........7 2 Mounting Instructions ........8 3 Settings ............. 12 3.1 Initial settings ..........12 3.2 Forecast ............16 3.3 Window open ..........18 3.5 Enable/Disable timer ........23 4 Symbols ............. -
Page 3: Introduction
Introduction is an electronic programmable timer harmoni heating elements. can be used for both direct heating of the entire room Listed below are some of the thermostat’s main features: A touchscreen display with backlight. Easy-to-follow menu-driven programming and operation. - Page 4 NTC 33 kOhm at 25°C NTC 47 kOhm at 25°C Sensing values: (default NTC 15 K) 0°C 42 kOhm 20°C 18 kOhm 6 kOhm 50°C Control PWM (Pulse Wide Modulation) Ambient temperature 0° to +30°C Frost protection temperature 5°C to +9°C (default 5°C)
- Page 5 Temperature range Room temperature 5–35°C. Floor temperature 5–45°C. unrecoverable seal is broken then up to 45°C). sensor. Sensor failure monitoring The thermostat has a built-in switch off the heating if the sensor is disconnected or short- circuited. 1×4mm² or 2×2.5mm²...
- Page 6 installation guide Protection class Class II – Dimensions 85×85×20–24mm (in-wall depth: 22mm) Weight 103g Electrical safety and electro-magnetic compatibility for this product is covered by the compliance with the EN/IEC Standard, Automatic electrical controls for household and similar use: EN/IEC 60730-1 (general)
-
Page 7: Safety Instructions
Safety Instructions off before installation. Important: When the thermostat is used to control a more than 35°C. Please also note the following: The installation of the thermostat must be done by local regulations. The thermostat must be connected to a power supply via an all-pole disconnection switch. -
Page 8: Mounting Instructions
installation guide Mounting Instructions Please observe the placement guidelines below. Place the thermostat at a suitable height on The thermostat should not be placed in wet rooms, place it in an adjacent room instead. When installing the thermostat sensor only’ mode. Always place the thermostat according to local regulations on IP classes. - Page 9 Do not place the thermostat in a place that Important: more accurate temperature control and applications and is compulsory under from door openings. Equally distant and >2cm from two heating cables. countersink the conduit if necessary. The bending radius of the conduit must be a...
- Page 10 The screen of the heating Mains Maximum 220-240V– cable must be connected Load 16 (1) A 50-60 Hz IP21 to the earth conductor of the power supply cable harmoni Standby maximum 0.4W by using a separate connector.
- Page 11 Important: each side of the thermostat. Reattach the frame. Click the display module back in place. Important: Do NOT press on the display screen when clicking the display module back in place. Initially, fully charge the thermostat battery using the mains supply for 15 hours.
-
Page 12: Settings
installation guide Settings Initial Settings 1. LANGUAGE. The language LANGUAGE is set to English by default. English 2. SET TIME. Press the hour numbers using the < and > arrows to set the hour. Press 3. Press the minute numbers SET TIME using the <... - Page 13 4. Press the day, month and SET DATE year to set the date using the < and > arrows, pressing 31:01:12 to confirm. When the date is correct, press on the SET DATE INSTALLATION 5. Press SETUP WIZARD and SETUP WIZARD go to Step 6 on page 14.
- Page 14 installation guide Initial Settings 6. On the SETUP information SETUP screen press to start. WALK THROUGH THE 7. CONTROL. Use the < and > FOLLOWING arrows to select whether STEPS. only a floor sensor or a combination of room and floor sensors should be CONTROL used.
- Page 15 9. FLOORING. Use the FLOORING < and > arrows to select the flooring type. Press TILES 10. ROOM TYPE. Use the < and > arrows to select the room type. Press ROOM TYPE 11. OUTPUT [W]. Use the BATHROOM <...
- Page 16 installation guide Initial Settings 12. TIMER. Use the < and > TIMER arrows to select whether the timer should be activated or not. Press end the initial thermostat setup. Skip Step 13. If you already have one ENTER CODE thermostat set up. 13.
-
Page 17: Forecast
Forecast When Forecast is turned on, heating will start earlier so and the timer is set to 6am, the temperature will be 22°C at 6am. However, if Forecast is switched off, heating won’t start until 6am and will take a while to reach 22°C. - Page 18 installation guide Forecast 3. Press FORECAST. OPTIONS 4. Press ON to optimise SAFETY LOCK heating start/stop. Or press OFF to simply let FORECAST the heating start/stop at DIM LEVEL the specified time. Press FORECAST / OFF Note: To return to the normal temperature display, press the back arrow ( ) in the upper left corner of the screen until you get to the main menu.
-
Page 19: Window Open
Window Open How to turn ‘window open detection’ on or off. 21.5 1. Touch the thermostat display to activate it. Press menu. 2. Press SETTINGS in the menu bottom right corner of the menu. Press OPTIONS. 3. Press WINDOW OPEN. - Page 20 installation guide How to set the maximum 21.5 1. Touch the thermostat display to activate it. Press menu. 2. Press SETTINGS in the menu bottom right corner of the menu. Press INSTALLATIONS and MANUAL SETUP. TIMER AWAY 3. Press MAX. FLOOR. 12:52 Use the <...
- Page 21 If you break the small plastic seal on the back of the display module (eg, using a only a room sensor. However, this isn't recommended Important: When the thermostat is used to control a Note: is placed. can be up to 10 degrees hotter than the top.
- Page 22 installation guide Thermal Examples of Details Approx. resistance setting for (m2K/W) temperature 8mm HDF based laminate < 800 kg/ 0.05 28°C m³ 650 – 800 0.10 14mm beech parquet 31°C kg/m³ > 800 kg/ 0.13 22mm solid oak plank 32°C m³...
-
Page 23: Enable/Disable Timer
Enable/Disable Timer How to enable and disable the timer. 1. Press the button on the side of the thermostat. 2. Press ENABLE TIMER to ENABLE TIMER turn the timer function on, or DISABLE TIMER to turn AWAY the timer function off. -
Page 24: Symbols
installation guide Symbols The symbols shown below may appear in the upper left corner of the temperature display: Symbol Meaning The thermostat is in manual mode, ie, the timer function is off. The timer lets you automatically switch between economy and comfort temperatures according to a An away period has been planned. -
Page 25: Disposal Information
Disposal Information Warranty The harmoni 50 thermostat comes with a 5-year warranty as standard. - Page 26 Warranty Name ................Address ................................County ........Postcode......Address ................Phone ................Email ................Please note In order to obtain the harmoni warranty, an authorised Electrician Installation /installer .......... date ....Thermostat Article name ..........number ....Stamp:...
- Page 27 Notes...
- Page 28 E: sales @ harmonithermostat.co.uk www.harmonithermostat.co.uk harmoni reserves the right to alter its products without notice. This also applies to products already on order trademarks in this material are the property of harmoni. harmoni and the harmoni logotype are trademarks of Edison House Ltd. All rights reserved.