Advertisement
Available languages
Available languages
Quick Links
Advertisement

Related Manuals for Kohler K-8520


Summary of Contents for Kohler K-8520
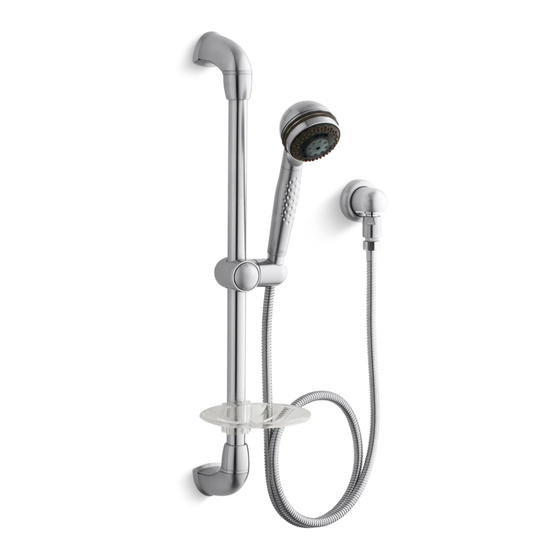
- Page 1 Installation Guide Hotel Handshower and Slide Bar K-8520 M product numbers are for Mexico (i.e. K-12345M) Los números de productos seguidos de M corresponden a México (Ej. K-12345M) Français, page “Français-1” Español, página “Español-1” 088148-2-AC...
-
Page 2: Tools And Materials
Observe all local plumbing and building codes. Shut off the main water supply. Replace waste or supply tubing if necessary. Kohler Co. reserves the right to make revisions in the design of products without notice, as specified in the Price Book. 088148-2-AC... - Page 3 Thread the escutcheon and wall elbow to the nipple. Securely tighten with a sturdy screwdriver inserted into the outlet. Apply thread sealant to the wall elbow threads, and install a vacuum breaker to the wall elbow. Securely wrench tighten. Kohler Co. 088148-2-AC...
- Page 4 NOTE: Do not use wall anchors. Position the bracket against the finished wall, and loosely attach it to the finished wall with the provided screw and washer. Fit the housing over the bracket, and snap it into place. 088148-2-AC Kohler Co.
- Page 5 For tile or solid surface materials, drill a hole at the marked locations. NOTE: Wall anchors are not required for this installation. Attach the bracket to the finished wall with the screws and washers provided. Tighten securely. Kohler Co. 088148-2-AC...
- Page 6 Press the stop in place in the bracket. Fit the housing over the bracket, and snap it into place. Assemble the ring to the housing with the indent over the housing tab. Install the soap dish to the housing. Secure with the provided screw. 088148-2-AC Kohler Co.
- Page 7 Securely tighten the top housing screw to ensure maximum strength. Assemble the ring to the top housing with the indent over the housing tab. Slide the top cover up and snap it firmly into place. Kohler Co. 088148-2-AC...
- Page 8 Securely wrench tighten the hose to the vacuum breaker. Flush water through the system. Install the screen washer in the remaining end of the hose. Securely hand tighten the handshower to the hose. Check the handshower for proper operation. 088148-2-AC Kohler Co.
-
Page 9: Guide D'installation
élevées, vous satisfaisant pendant les années à venir. Toute l’information dans ce guide est basée sur la dernière disponible au moment de la publication. A la compagnie Kohler, nous aspirons à remplir notre mission d’améliorer le niveau de vie gracieux pour chaque individu affecté... - Page 10 Avant de commencer (cont.) Replacer les tubes d’alimentation ou d’évacuation si nécessaire. Kohler Co. se réserve le droit d’apporter toutes modifications sur le design des produits et ceci sans préavis, tel que spécifié dans le catalogue des prix. 088148-2-AC Français-2...
- Page 11 Visser l’applique et le coude du mur au mamelon. Bien serrer avec un tournevis inséré dans la sortie. Appliquer un joint pour filetage aux filetages du coude et installer un reniflard à ce coude. Bien serrer à l’aide d’une clé. Kohler Co. Français-3 088148-2-AC...
- Page 12 REMARQUE : Ne pas utiliser les montants du mur. Positionner le support contre le mur fini et l’y attacher légèrement avec la vis et la rondelle fournies. Encastrer le logement sur la fixation et presser en place. 088148-2-AC Français-4 Kohler Co.
- Page 13 Pour les matériaux à surface carrelée ou solide, percer un trou aux emplacements marqués. REMARQUE : Les ancrages muraux ne sont pas nécessaires pour cette installation. Sécuriser le support au mur fini à l’aide des vis et des rondelles fournies. Bien serrer. Kohler Co. Français-5 088148-2-AC...
- Page 14 Presser l’arrêt dans le support. Encastrer le logement sur la fixation et presser en place. Assembler l’anneau dans le logement avec l’entaille sur la languette sur le logement. Installer la savonnière dans le logement. Sécuriser avec la vis fournie. 088148-2-AC Français-6 Kohler Co.
- Page 15 Positionner délicatement la barre coulissante dans la savonnière. Tourner doucement la barre coulissante de manière à ce qu’elle s’engage à la languette de la savonnière. Tirer le logement supérieur et la barre coulissante et les maintenir en place. Kohler Co. Français-7 088148-2-AC...
- Page 16 Installer la barre coulissante (cont.) Bien serrer la vis du logement supérieur pour assurer une force maximale. Assembler l’anneau dans le logement supérieur avec l’entaille sur la languette du logement. Glisser le couvercle supérieur et l’engager en place fermement. 088148-2-AC Français-8 Kohler Co.
- Page 17 Sécuriser le tuyau au robinet casse-vide à la clé. Purger l’eau dans le système. Installer la rondelle à grille dans l’extrémité restante du flexible. Sécuriser à la main la douchette au flexible. Vérifier le bon fonctionnement de la douchette. Kohler Co. Français-9 088148-2-AC...
-
Page 18: Guía De Instalación
Gracias por elegir los productos Kohler Gracias por elegir los productos Kohler. Su producto de Kohler Company refleja la verdadera pasión por el diseño, la mano de obra, la artesanía y la innovación que forman parte de Kohler Company. - Page 19 Antes de comenzar (cont.) Reemplace los tubos de desagüe o suministro de ser necesario. Kohler Co. se reserva el derecho de modificar el diseño de los productos sin previo aviso, tal como se especifica en la lista de precios. Kohler Co.
- Page 20 Apriete bien con un destornillador robusto insertado dentro de la salida. Aplique cinta selladora de roscas a las rocas del codo mural e instale una válvula rompevacío en el codo mural. Apriete bien con una llave. 088148-2-AC Español-3 Kohler Co.
- Page 21 NOTA: No utilice anclajes de pared. Coloque el soporte sobre la pared acabada y fíjelo sin apretar a la pared acabada con el tornillo y la arandela suministrados. Coloque el alojamiento sobre el soporte y encájelo en su lugar. Kohler Co. Español-4 088148-2-AC...
- Page 22 Para los azulejos o materiales de superficie sólida, perfore un orificio en los lugares marcados. NOTA: Los anclajes de pared no son necesarios en esta instalación. Monte el soporte a la pared acabada con los tornillos y arandelas suministrados. Apriete bien. 088148-2-AC Español-5 Kohler Co.
- Page 23 Coloque el alojamiento sobre el soporte y encájelo en su lugar. Monte el anillo en el alojamiento, con la muesca sobre la lengüeta del alojamiento. Instale la jabonera en el alojamiento. Fije con el tornillo provisto. Kohler Co. Español-6 088148-2-AC...
- Page 24 Coloque con cuidado la barra deslizante en la jabonera. Gire la barra deslizante levemente, de manera que encaje en la lengüeta de la jabonera. Jale hacia abajo el alojamiento superior y la barra deslizante y sosténgalos bien en su lugar. 088148-2-AC Español-7 Kohler Co.
- Page 25 Apriete bien el tornillo del alojamiento superior para asegurar la máxima resistencia. Monte el anillo en el alojamiento superior con la muesca sobre la lengüeta del alojamiento. Deslice la cubierta superior hacia arriba y encájela bien en su lugar. Kohler Co. Español-8 088148-2-AC...
- Page 26 Haga circular agua por el sistema. Inserte la arandela de rejilla en el otro extremo de la manguera. Apriete con la mano fijando la ducha de mano en la manguera. Compruebe que la ducha de mano funcione correctamente. 088148-2-AC Español-9 Kohler Co.
- Page 27 088148-2-...
- Page 28 USA/Canada: 1-800-4KOHLER México: 001-877-680-1310 kohler.com ©2009 Kohler Co. 088148-2-AC...
Need help?
Do you have a question about the K-8520 and is the answer not in the manual?
Questions and answers