Advertisement
Quick Links
Advertisement

Related Manuals for Erbe compact

Summary of Contents for Erbe compact
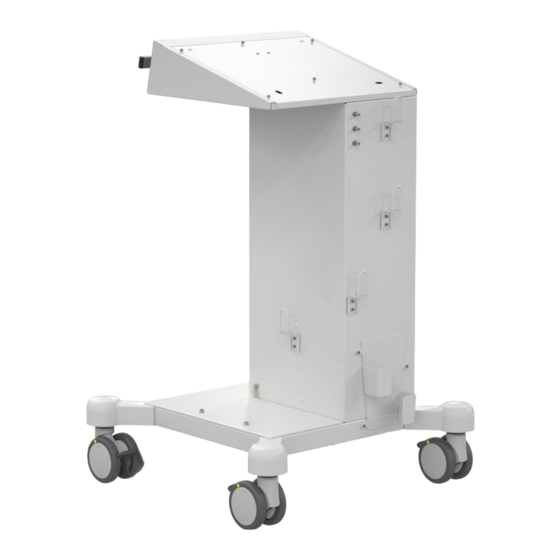
- Page 1 MOUNTING- INSTRUCTION System carrier compact/ compact plus 30180-102_V0 2022-05...
- Page 2 EN ISO 9001 EN ISO 13485 System carrier compact Art. No. 20180-100, System carrier compact plus Art. No. 20180-101 All rights to this Mounting Instruction, in particular rights of duplication, dissemination and translation, are re- served. No part of this Mounting Instruction may be reproduced in any form (by photocopying, microfilming or other methods) or processed, duplicated or disseminated by the use of electronic systems without the written consent of Erbe Elektromedizin GmbH.
- Page 3 This is an interactive table of contents. Click on the unit/accessory that you would like to install on the system carrier. You are then taken automatically to the correct installation sequence. Caution, read safety instructions before installation compact plus: Making connections compact: Making connections Anschlüsse compact Anschlüsse compact plus POAG Power POAG Power supply...
- Page 4 Table of Contents / 60 30180-102_V0 2022-05...
- Page 5 Safety Instructions Safety Instructions Sicherheitshinweise zur Montage von Geräten/Zubehör finden Sie in der Gebrauchsanweisung des Sys- temträgers. Lesen Sie diese Sicherheitshinweise bevor Sie Montagetätigkeiten ausführen. Safety instructions about installing units/accessories are available in the user manual for the system carrier. Read these safety instructions before starting the installation. Prière de consulter le mode d’emploi du support système pour connaître les consignes de sécurité...
- Page 6 Safety Instructions Seadmete/tarvikute paigaldamise ohutusjuhised leiate süsteemikanduri kasutusjuhendist. Lugege enne paigaldustegevuste teostamist neid ohutusjuhiseid. Drošības norādījumus par ierīču/piederumu uzstādīšanu skatīt sistēmas pamatnes lietošanas instruk- cijā. Izlasiet šos drošības norādījumus, pirms veicat uzstādīšanu. Prietaisų ir reikmenų montavimo saugos nuorodas rasite sistemų laikiklio naudojimo instrukcijoje. Prieš imdamiesi montavimo darbų...
- Page 7 Safety Instructions 儀器台車的使用說明書介紹了儀器 / 配件的裝配安全須知。 裝配操作前請您閱讀本安全 須知。 장치 / 액세서리 장착에 관한 안전 지침은 시스템 캐리어의 사용 설명서를 참조하십시오 . 장착 작업을 수행하기 전에 이 안전 지침을 읽으십시오 . Uputstva o bezbednosti za montažu sredstava/pribora pronaći ćete u uputstvu za upotrebu nosača sistema.
- Page 8 Safety Instructions / 60 30180-102_V0 2022-05...
- Page 9 Installing the cable holders Installing the cable holders Normal use Permitted installation points Maximum loading: For compact, 4 items for compact plus, 3 items Omitted for compact plus / 60 30180-102_V0 2022-05...
- Page 10 Installing the cable holders Scope of delivery IMPORTANT! Only use original Erbe accessories. Erbe REF 20180-460 M4 x 8 Tools required Torque screwdriver (1 Nm) hex socket 2.5 / 60 30180-102_V0 2022-05...
- Page 11 Installing the cable holders 1.0 Nm M4 x 8 Back to Table of Contents / 60 30180-102_V0 2022-05...
- Page 12 Installing the cable holders / 60 30180-102_V0 2022-05...
- Page 13 Installing footswitch support for large one-pedal footswitch Installing footswitch support for large one- pedal footswitch Normal use This footswitch support is compatible with the following Erbe one-pedal footswitches:: VIO S and VIO 3 one-pedal footswitch • IES 3 one-pedal footswitch •...
- Page 14 Installing footswitch support for large one-pedal footswitch Scope of delivery IMPORTANT! Only use original Erbe accessories. Erbe REF 20180-463 M4 x 8 Tools required Torque screwdriver (1 Nm) hex socket 2.5 / 60 30180-102_V0 2022-05...
- Page 15 Installing footswitch support for large one-pedal footswitch 1.0 Nm M4 x 8 Back to Table of Contents / 60 30180-102_V0 2022-05...
- Page 16 Installing footswitch support for large one-pedal footswitch / 60 30180-102_V0 2022-05...
- Page 17 Installing footswitch support for small one-pedal footswitch Installing footswitch support for small one- pedal footswitch Normal use This footswitch support is compatible with the following Erbe one-pedal footswitches:: VIO C one-pedal footswitch • EIP 2 one-pedal footswitch • Maximum loading: 1 item...
- Page 18 Installing footswitch support for small one-pedal footswitch Scope of delivery IMPORTANT! Only use original Erbe accessories. Erbe REF 20180-464 M4 x 8 Tools required Torque screwdriver (1 Nm) hex socket 2.5 / 60 30180-102_V0 2022-05...
- Page 19 Installing footswitch support for small one-pedal footswitch 1.0 Nm M4 x 8 Back to Table of Contents / 60 30180-102_V0 2022-05...
- Page 20 Installing footswitch support for small one-pedal footswitch / 60 30180-102_V0 2022-05...
- Page 21 Installing IES 3 Installing IES 3 Permitted positioning / 60 30180-102_V0 2022-05...
- Page 22 Installing IES 3 Erbe fastening set IMPORTANT! Only use original Erbe accessories. Erbe REF 20180-152 M8 x 16 Keep for later use Tools required Torque screwdriver (1,5 Nm) hex socket 6 Torque screwdriver (1,5 Nm) hex socket 2,5 Cutter Preparation IMPORTANT! Before installing the units on the system carrier, remove all cables, tubing, and instruments.
- Page 23 Installing IES 3 M8 x 16 Do not tighten screws fully! Keep screws and cover M6 x 10 M4 x 10 for later use. 1.5 Nm 1.5 Nm M8 x 16 M4 x 10 Back to Table of Contents / 60 30180-102_V0 2022-05...
- Page 24 Installing IES 3 / 60 30180-102_V0 2022-05...
- Page 25 Installing EIP 2 Installing EIP 2 Permitted positioning / 60 30180-102_V0 2022-05...
- Page 26 Installing EIP 2 Erbe fastening set IMPORTANT! Only use original Erbe accessories. Erbe REF 20180-153 M8 x 16 Keep for later use Tools required Torque screwdriver (1,5 Nm) hex socket 6 Torque screwdriver (1,5 Nm) hex socket 2,5 Cutter Preparation IMPORTANT! Before installing the units on the system carrier, remove all cables, tubing, and instruments.
- Page 27 Installing EIP 2 M8 x 16 Do not tighten screws fully! Keep screws and cover M6 x 10 M4 x 10 for later use. 1.5 Nm 1.5 Nm M8 x 16 M6 x 10 M4 x 10 Back to Table of Contents / 60 30180-102_V0 2022-05...
- Page 28 Installing EIP 2 / 60 30180-102_V0 2022-05...
- Page 29 Installing VIO C series Installing VIO C series Permitted positioning / 60 30180-102_V0 2022-05...
- Page 30 Installing VIO C series Erbe fastening set IMPORTANT! Only use original Erbe accessories. Erbe REF 20180-151 M4 x 8 Keep for later use Tools required Torque screwdriver (1 Nm) hex socket 2.5 Torque screwdriver (0.5 Nm) Torx 10 Preparation IMPORTANT! Before installing the units on the system carrier, remove all cables, tubing, and instruments.
- Page 31 Installing VIO C series 0.5 Nm Keep screws for the next M6 x 10 M3 x 10 M6 x 10 M3 x 10 installation step. 1.0 Nm M4 x 8 Back to Table of Contents / 60 30180-102_V0 2022-05...
- Page 32 Installing VIO C series / 60 30180-102_V0 2022-05...
- Page 33 Installing VIO S or VIO 3 series Installing VIO S or VIO 3 series Permitted positioning VIO S series VIO 3 series / 60 30180-102_V0 2022-05...
- Page 34 IMPORTANT! Order the protective caps for the via of the units (see Step 1) separately as needed; they are not part of this fastening set 20180-150. Protective cap for VIO 3 via Erbe REF 40160-112 (1 item needed), pro- tective cap for VIO S via Erbe REF 40140-099 (2 items needed).
- Page 35 Installing VIO S or VIO 3 series VIO S units VIO 3 units Only for VIO S units 1.0 Nm Use marked internal drill holes M4 x 16 for Step 4! 1.0 Nm M4 x 8 / 60 30180-102_V0 2022-05...
- Page 36 Installing VIO S or VIO 3 series Attachment points on the system carrier Attachment points on the unit left right Back to Table of Contents / 60 30180-102_V0 2022-05...
- Page 37 Only compact plus: Installing APC 2 and VIO S series Only compact plus: Installing APC 2 and VIO S series Permitted positioning VIO 200 S or VIO 300 S APC 2 / 60 30180-102_V0 2022-05...
- Page 38 Only compact plus: Installing APC 2 and VIO S series Tools required Hex socket 2.5 Preparation IMPORTANT! Before installing the units on the system carrier, remove all cables, tubing, and instruments. Erbe fastening sets IMPORTANT! Only use original Erbe accessories.
- Page 39 Only compact plus: Installing APC 2 and VIO S series Fastening set for VIO on APC Erbe REF 20180-134 M4 x 10 Keep for later use / 60 30180-102_V0 2022-05...
- Page 40 Only compact plus: Installing APC 2 and VIO S series APC 2 Use marked internal drill holes for Step 3! M4 x 16 Attachment points on the system carrier M4 x 8 / 60 30180-102_V0 2022-05...
- Page 41 Only compact plus: Installing APC 2 and VIO S series Attachment points on the unit left right Continue to next page / 60 30180-102_V0 2022-05...
- Page 42 Only compact plus: Installing APC 2 and VIO S series VIO S M4 x 10 Back to Table of Contents / 60 30180-102_V0 2022-05...
- Page 43 Only compact plus: Installing APC 3 and VIO 3 series Only compact plus: Installing APC 3 and VIO 3 series Permitted positioning VIO 3 APC 3 / 60 30180-102_V0 2022-05...
- Page 44 Only compact plus: Installing APC 3 and VIO 3 series Tools required Hex socket 2.5 Preparation IMPORTANT! Before installing the units on the system carrier, remove all cables, tubing, and instruments. Erbe fastening sets IMPORTANT! Only use original Erbe accessories.
- Page 45 Only compact plus: Installing APC 3 and VIO 3 series Fastening set for VIO on APC: Erbe REF 30135-030 Bracket: Erbe REF 40160-065 M4 x 8 M4 x 16 Keep for later use Keep for later use / 60 30180-102_V0...
- Page 46 Only compact plus: Installing APC 3 and VIO 3 series APC 3 M4 x 16 M4 x 8 Attachment points on the unit Attachment points on the system carrier / 60 30180-102_V0 2022-05...
- Page 47 Only compact plus: Installing APC 3 and VIO 3 series left right Continue to next page / 60 30180-102_V0 2022-05...
- Page 48 Only compact plus: Installing APC 3 and VIO 3 series VIO 3 M4 x 8 M4 x 16 Back to Table of Contents / 60 30180-102_V0 2022-05...
- Page 49 Only compact plus: Stowing argon gas bottle Only compact plus: Stowing argon gas bottle Permitted positioning / 60 30180-102_V0 2022-05...
- Page 50 Only compact plus: Stowing argon gas bottle Tools required No tool needed. Preparation IMPORTANT! Remove the power cord from the system carrier. / 60 30180-102_V0 2022-05...
- Page 51 Only compact plus: Stowing argon gas bottle Back to Table of Contents / 60 30180-102_V0 2022-05...
- Page 52 Only compact plus: Stowing argon gas bottle / 60 30180-102_V0 2022-05...
- Page 53 Making connections compact: Making connections Potential equalization and mains connection IMPORTANT! Only use original Erbe cables. VIO unit EIP 2 IES 3 / 60 30180-102_V0 2022-05...
- Page 54 Making connections ECB connection (optional, for communication between the units) IMPORTANT! Only use original Erbe cables. VIO unit APC module EIP 2 IES 3 Back to Table of Contents / 60 30180-102_V0 2022-05...
- Page 55 Making connections compact plus: Making connections Potential equalization and mains connection IMPORTANT! Only use original Erbe cables. VIO unit APC module EIP 2 IES 3 / 60 30180-102_V0 2022-05...
- Page 56 Making connections ECB connection (optional, for communication between the units) IMPORTANT! Only use original Erbe cables. VIO unit APC module EIP 2 IES 3 / 60 30180-102_V0 2022-05...
- Page 57 Making connections APC connection Please read the User Manual for the APC 2 or the User Manual for the APC 3. Back to Table of Contents / 60 30180-102_V0 2022-05...
- Page 58 Making connections / 60 30180-102_V0 2022-05...
- Page 60 Manufacturer Service Hotline Erbe Elektromedizin GmbH Tel +49 7071 755 437 Waldhörnlestr. 17 Fax +49 7071 755 189 72072 Tübingen, Germany techservice@erbe-med.com erbe-med.com © ERBE Elektromedizin GmbH...
Need help?
Do you have a question about the compact and is the answer not in the manual?
Questions and answers