Advertisement
Table of Contents
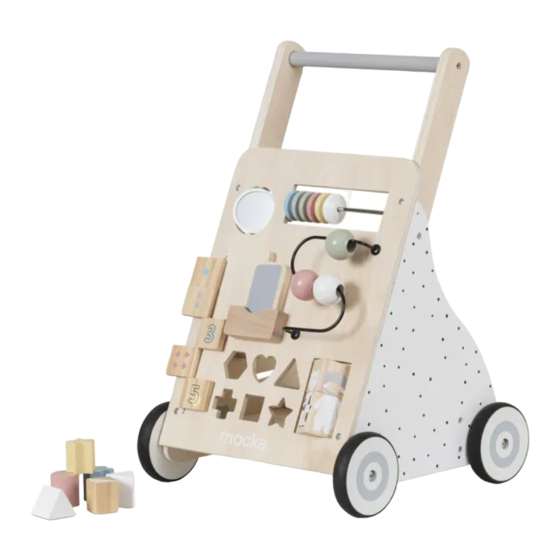
Ashby Activity Trolley
Assembly Instructions
Thank you for your purchase.
Please follow the instructions below for correct assembly.
A
B
wheels
washer
x4
x4
E
bolt and plug
x4
Hardware Supplied
Cross screwdriver required.
ALL nuts and bolts must be checked and tigethened
before first use. Regularly check all screws are
tight to ensure safety.
mocka.co.nz | mocka.com.au |
C
D
short screw
long screw
x2
x8
G
allen key
WARNING:
Due to the small size of the hardware and the
sharp points of the screws, they are potentially hazardous.
Keep all assembly parts and packaging materials out of reach of
children.
Retain packaging information for future reference.
Adult assembly required.
Age recommendation 12 months +
1
Advertisement
Table of Contents

Summary of Contents for Mocka Ashby Activity Trolley
- Page 1 Ashby Activity Trolley Assembly Instructions Thank you for your purchase. Please follow the instructions below for correct assembly. wheels washer short screw long screw bolt and plug allen key Hardware Supplied WARNING: Due to the small size of the hardware and the Cross screwdriver required.
- Page 2 Ashby Activity Trolley Assembly Instructions Attach 2 x arms [1] and 1 x handle [2] together and secure with 2 x Attach front [3] to assembled frame and secure with 2 x screws (D) and screws (D). Tighten with a screwdriver.
- Page 3 Ashby Activity Trolley Assembly Instructions Slide panel [4] into position as shown. Attach panel [5] to assembled Attach 4 x wheels (A) to assembled frame and secure with 4 x washers frame and secure with 4 x screws (D). Tighten with a screwdriver.
Need help?
Do you have a question about the Ashby Activity Trolley and is the answer not in the manual?
Questions and answers