
Subscribe to Our Youtube Channel
Related Manuals for Flieks MF289097


Summary of Contents for Flieks MF289097
- Page 1 TWIN OVER TWIN BUNK BED ASSEMBLY INSTRUCTIONS SKU MF289097 Weight Limit 250 Lbs Weight Limit 350 Lbs Weight Limit 70 Lbs PAGE 1 OF 8...
- Page 2 TWIN OVER TWIN BUNK BED ASSEMBLY INSTRUCTIONS SKU MF289097 SAFETY WARNING 1.This bed is designed for use only mattress (es) meeting the following specifications on the upper bunk, and lower bunk: Upper bunk (bunk bed and tribed included) Bed type...
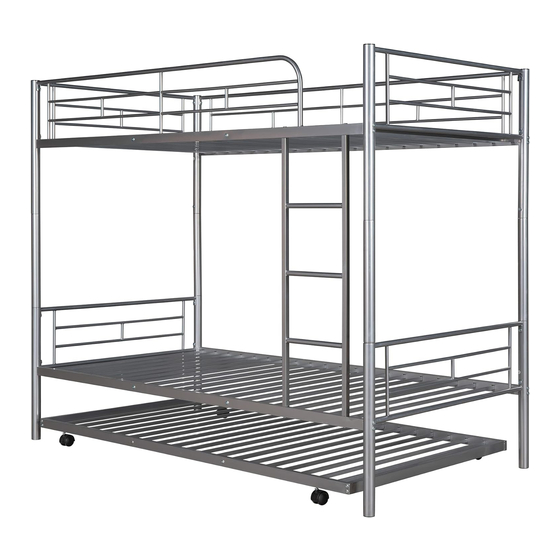
- Page 3 TWIN OVER TWIN BUNK BED ASSEMBLY INSTRUCTIONS SKU MF289097 DETAIL VIEW PAGE 3 OF 8...
- Page 4 TWIN OVER TWIN BUNK BED ASSEMBLY INSTRUCTIONS SKU MF289097 PART LIST 1 Post 2 Post Side rail 2PCS 2PCS 2PCS 6 Guard rail End guard rail Guard rail 4PCS Side rail Side rail Shelf Hole 10 Ladder 11 Slats 12 Slats...
- Page 5 TWIN OVER TWIN BUNK BED ASSEMBLY INSTRUCTIONS SKU MF289097 STEP 1 : Following below illustration Assembly Frame #1.Using hardware #A, #C, #D connect #1 , #2 with #3, #4 to complete Frame #1. A 2PCS 1/4*60 C 8PCS 1/4*15 D 4PCS Hole inside Ø42...
- Page 6 TWIN OVER TWIN BUNK BED ASSEMBLY INSTRUCTIONS SKU MF289097 STEP 3 : Following below illustration Assembly Frame #3. Using hardware #C connect #5, #6 with #11, #12 to complete Frame #3. C 4PCS 1/4*15 NOTE In this step, DO NOT tighten any bolt until you connect all part together.
- Page 7 TWIN OVER TWIN BUNK BED ASSEMBLY INSTRUCTIONS SKU MF289097 STEP 5 : Following below illustration Assembly Frame #5. Using hardware #A, #C connect Frame #1, Frame #2 with Frame #3, Frame #4 to complete Frame #5. Frame #3 Frame #2...
- Page 8 TWIN OVER TWIN BUNK BED ASSEMBLY INSTRUCTIONS SKU MF289097 STEP 7 : Following below illustration Assembly Frame #7. Using hardware #A connect Frame #6 with #10 to complete Frame #7. A 4PCS 1/4*60 NOTE In this step, DO NOT tighten any bolt until you connect all part together.
Need help?
Do you have a question about the MF289097 and is the answer not in the manual?
Questions and answers