Advertisement
Quick Links
Sledz
User manual
Index
1. Safety instructions and notes
1.1. Safety instructions
1.2. Notes
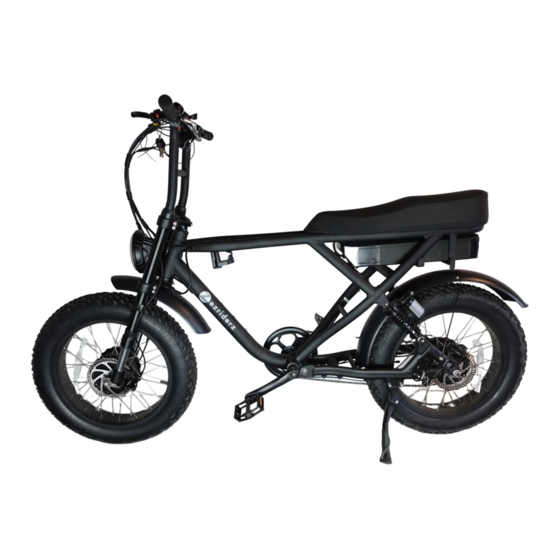
2. Basic structure and name.
3. Assembly method and requirements
3.1. Installation of big headlight and front
fender
3.2. Installation of front wheel
3.3. Installation of front brake
3.4. Installation of steering handle
3.5. Requirements of installation torsion for all
parts 4. Operation and adjustment
4.1. Introduction to boosting system
4.2. Charging
Ezriderz - copyright 2022
Advertisement

Summary of Contents for Ezriderz Sledz
- Page 1 3.1. Installation of big headlight and front fender 3.2. Installation of front wheel 3.3. Installation of front brake 3.4. Installation of steering handle 3.5. Requirements of installation torsion for all parts 4. Operation and adjustment 4.1. Introduction to boosting system 4.2. Charging Ezriderz - copyright 2022...
- Page 2 5.4 Lubricating the e-bike 6. Riding technology 7. Troubleshooting Items in the package: Please check if the following items are inside. electric bicycle - 1pc battery - 1set charger - 1pc pedal - 1pair Accessory: tools bag - 1pc Ezriderz - copyright 2022...
- Page 3 ★ If the storage battery is disabled for a long time, make sure to charge it enough, and it need be additionally charged once if its storage is more than a month. ★ The battery can not be discarded randomly, so Ezriderz - copyright 2022...
- Page 4 Please keep appropriate air pressure inside tires, avoid increasing resistance when riding, and easily wearing tires and deforming the Rim. 3 Assembly method and requirements 3.1. Installation of front wheel Ezriderz - copyright 2022...
- Page 5 ①Hook ② Front wheel axis nut M10mm ③Front fork foot contact pin ④Front fender stick ★ When fastening the front wheel nut axis, press down the Front fork by force so that the front Ezriderz - copyright 2022...
- Page 6 Seat post ring is 15 to 18N.m H. The tightening torque of the Brake handle is not less than 10 to 12N.m I. The tightening torque of the Derailleur is 8 to 10N.m 4. Operation and adjustment Ezriderz - copyright 2022...
- Page 7 1:1 boosting system comprises a controller, sensor and induced cartridge. ① Controller ② Sensor ③ Induced cartridge 4.2. Charging Ezriderz - copyright 2022...
- Page 8 The charger configured or designated by eRider Cycles must be used for charging otherwise it might damage the battery, and may even lead to fire and other danger. 4.2.1. Installation and charging of battery(as shown in Figure 1 and Figure 2) Ezriderz - copyright 2022...
- Page 9 AC power supply. 4. At this time, the power indicator light and the charge indicator light of the charger are indicating that charging been connected. 5. After charging, should first pull out the AC Ezriderz - copyright 2022...
- Page 10 After the battery is fully discharged, the one-time charging time is 6 to 8 hours, and after the charge indicator light is red from green, the power capacity of the battery has been basically sufficient. Ezriderz - copyright 2022...
- Page 11 * When the battery is not used for a long term, the battery power should be emptied before the battery is preserved, and must be re-charged once every month or so. 4.4 Safety heightmark Ezriderz - copyright 2022...
- Page 12 1 Loosen the handle core screw rod; 2 Move the Vertical handle stems to the appropriate height, and pay attention to not exceeding the safety mark (that is, the safety line); 3 Fasten the core screw rod; Ezriderz - copyright 2022...
- Page 13 The braking system typically includes a Brake handle, brake (disk brake, V brake and many other types of brakes) and brake cable. Ezriderz - copyright 2022...
- Page 14 Stems; if the brake is tight when the handle of the Brake handle is almost approaching to the grip of the Across handle Stems, distance between the brake shoe block and the Rim is too large, it needs to be adjusted. Ezriderz - copyright 2022...
- Page 15 4.5.2 Disk brake type brake 1 Stroke adjusting bolt 2 Position adjusting bolt 3 Rocker arm 4 Permanent seat 5 Brake shoe block 6 Shoe block adjusting bolt Ezriderz - copyright 2022...
- Page 16 . The brake cable should be regularly taken out to be oiled, to avoid too large resistance arisen from rust. . The brake cable in a linear way has the best Ezriderz - copyright 2022...
- Page 17 * If the brake cable is ripped, it may cause the brake cable to be broken and this is very dangerous, please replace it timely. 4.6 Speed control system Ezriderz - copyright 2022...
- Page 18 4.7 Derailleur Type of Derailleur (as shown) Ezriderz - copyright 2022...
- Page 19 When the backward speed grip rotates to the riding direction, big teeth change to small teeth, and on the contrary small teeth change to big teeth. Ezriderz - copyright 2022...
- Page 20 H bolt will be locked. But if it is too tight, the chain can not climb to the biggest fluted disc. L bolt: when the chain is toward the inside fluted disc and the chain Ezriderz - copyright 2022...
- Page 21 Ezriderz - copyright 2022...
- Page 22 Back fender to the lowest shift (the smallest tooth of the flywheel) to check whether the chain sag is more than 15mm (as shown). If it more than 15mm, the chain is too long, please go Ezriderz - copyright 2022...
- Page 23 * The chain, fluted disc, flywheel, Derailleur should be always washed, wiped, and lubricated (oiled appropriately). * The derailleur should avoid the jump-class Ezriderz - copyright 2022...
- Page 24 (dry braking distance 4m, wet braking distance 15m). advise against performing maintenance operations that involve removing parts components. necessary, please contact your Authorized Dealer’s Customer Service. WARNING: 1. As with all mechanical components, the bicycle Ezriderz - copyright 2022...
- Page 25 Protect the battery from water or other moisture. Protect the discharge and charge terminals of the battery from rain or water logging. Operating temperature range when charge: 0~45℃ Operating temperature range when discharge:-20~ 45℃; Humidity while battery in working state: Ezriderz - copyright 2022...
- Page 26 If the charging is finished, disconnect the connection to the wall outlet, and then disconnect it to the battery. h. Avoid children touching it while charging. i. Never disassemble or refit the charger. Ezriderz - copyright 2022...
- Page 27 5 .4 Bicycle inspection and care 5.4.1 Regular Cleaning Ezriderz - copyright 2022...
- Page 28 Check that the tires are not worn or cut. e. Check that the tires are correctly inflated. f. Check that the battery contacts on the frame are not dirty or oxidized. Ezriderz - copyright 2022...
- Page 29 Grease the brake pins, front wheel hub, saddle post and pedal pins every 1–2 months, or in case of excessive friction. Do not lubricate or grease the speed controller, brake pads or wheel rim. 7. Troubleshooting Ezriderz - copyright 2022...
- Page 30 Ezriderz - copyright 2022...
Need help?
Do you have a question about the Sledz and is the answer not in the manual?
Questions and answers