Table of Contents
Advertisement
Quick Links
Advertisement
Table of Contents

Summary of Contents for arkmeds Waller
- Page 1 PATIENT SIMULATOR User Guide.
-
Page 3: Table Of Contents
Table of Contents INTRODUCTION ----------------------------------------------------- 4 SAFETY INFORMATION ------------------------------------------- 5 ACRONYMS AND DEFINITIONS --------------------------------- 6 PACKAGING --------------------------------------------------------- 6 UNDERSTANDING THE DEVICE -------------------------------- 7 TURNING ON THE DEVICE ------------------------------------- 12 TEST MODULES ---------------------------------------------15 NON-INVASIVE BLOOD PRESSUR- - -- - -- -- - 15 ELECTROCARDIOGRAM ----------------------- 21 TEMPERATURE ---------------------------------- 26 INVASIVE BLOOD PRESSURE --------------- 30... -
Page 4: Introduction
It is used in performance tests of multiparameter monitors, electrocardiographs, Pulse Oximeters, Polygraphs, Maps, sphygmomanometers, and related devices. Waller allows the simulation of: ECG and Respiration functions Non-invasive Invasive Blood Temperature series... -
Page 5: Safety Information
If you notice any irregularity with the device, do not put it into operation. Depending on the problem, the device may suffer irreversible damage, which will lead to costly maintenance or discontinuity. Whenever the device fails, set it aside and contact the Arkmeds Support Team through the channel: https://www.arkmeds.us/support... -
Page 6: Acronyms And Definitions
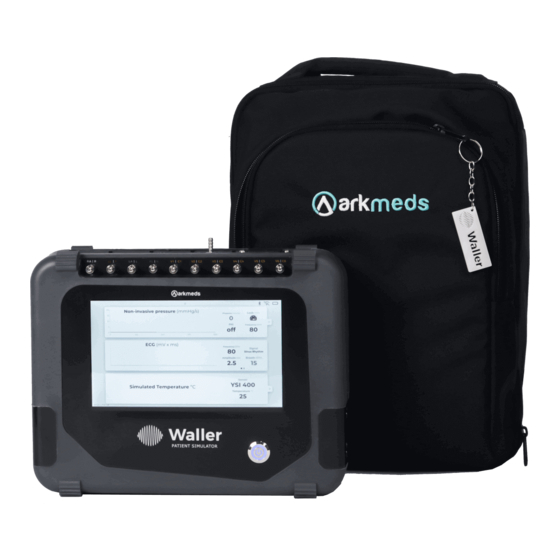
Range - Variation Range • RPM - Respirations per Minute PACKAGE CONTENT Waller Patient Analyzer comes with the following items: 1 x Waller (PN 42000004) 1 x Yagi (PN 42000007)* 1 x User Manual (PN 12000039) 1 x Calibration Certificate... -
Page 7: Understanding The Device
UNDERSTANDING THE DEVICE Next, the device will be shown with the identification of its connectors and controls. FRONT VIEW: ECG Connectors. Touchscreen. On/Off Button. - Page 8 UPPER VIEW: Power cord with fuse NIBP connector. holder. IBP connector. LEFT SIDE VIEW Temperature SPO2 Connector. Connector.
- Page 9 RIGHT SIDE VIEW Air circulation. BACK VIEW Serial number identifi cation tag.
- Page 10 YAGI UPPER VIEW: Yagi identifi cation tag. BOTTOM VIEW: Serial number identifi cation tag.
- Page 11 BACK VIEW: Ethernet connector for connection to Waller.
-
Page 12: Turning On The Device
TURNING ON THE DEVICE Press the “on/off” button to turn on the device. The device will perform internal communication tests and display the settings screen of each module to be tested. SCREEN Dragging the screen downwards, have access to the menu with options Bluetooth Wi-Fi... - Page 13 Bluetooth: Enables connection to the cell phone and integration with Arkmeds Software. Wifi: It allows the device to be connected to the internet to aid in remote access by the manufacturer. By clicking on the icon, a list of available networks will appear.
- Page 14 Card 1: with only this option enabled, it is possible to view the NIBP module on full screen. Card 2: with only this option enabled, it is possible to view the ECG module on full screen. Card 3: with only this option enabled, it is possible to view the Temperature module on full screen.
-
Page 15: Test Modules
TEST MODULES In this section are each of the Waller Patient Simulator functionalities. NON-INVASIVE BLOOD PRESSURE The automatic non-invasive measurement of blood pressure is performed by the oscillometric method. In this method, during cuff inflation and deflation, the compressed blood in the artery generates a pressure oscillation when the cuff pressure is between systolic and diastolic pressure, with the peak of this oscillation occurring at mean pressure. - Page 16 Settings On Waller’s home screen, the first option at the top is the non-invasive blood pressure module. There we can see the following options: Pressure. Leakage. NIBP. Frequency. Chart.
- Page 17 Pressure: indicates the numerical value of system pressure. Leakage: option to perform pressure tests and verify leakage in the system. By clicking on this option it is possible to select the test time and start the verification. After counting the selected time, the pressure variation obtained in the test is shown.
- Page 18 1. Connect a T (adapter) between the pressure line to be tested; 2. On one side of the T (adapter), connect a hand pump system; 3. On the other, connect the device or system to validate leakage; 4. Connect the third outlet to Waller.
- Page 19 NIBP: option to select different non-invasive blood pressure values. Waller allows six different pre-configured NIBP points, allowing tests with systolic pressures from 60 to 170 mmHg and diastolic pressures from 30 to 125 mmHg. Simply click on the desired option and return to the home screen.
- Page 20 Chart: in this space, the pressure curve is represented in real-time. Thus, you can visualize the operation dynamics during the performance test, whether simulating a patient signal or checking for leakage.
-
Page 21: Electrocardiogram
ELECTROCARDIOGRAM The electrocardiogram (ECG) is the recording of the heart’s electrical activity through electrodes placed on the body surface. It represents the sum of all electrical activities that occur at each instant of the cardiac cycle. The sequence of electrical events that result in the systole/diastole cycle propagates through the conductive volume of the thorax. - Page 22 The device is prepared to meet the IEC (International Electrotechnical Commission) and AHA (American Heart Association) standards. *last page...
- Page 23 Assembly It is necessary to place the electrodes on each point to perform the ECG test, as indicated in Waller.
- Page 24 Settings The second module presented in the Waller home screen is the ECG module. There we can see the following options: Signal. Amplitude. Frequency. Respiration. Signal: option to select different types of signals. When clicking on the option, a screen with the available choices will be displayed.
- Page 25 Amplitude: option to select different amplitude levels of the chosen signal. The amplitude level ranges from 0.5 mV to 2.5 mV, changing from every 0.5 mV. Frequency: option to select different frequency values. The frequency value changes according to the chosen signal type. Respiration: option to select different respiration values.
-
Page 26: Temperature
When enabling it, the choice of reference derivation between DII and DIII must be made. This varies for each monitor. Simply check with the data of the test device in question and select the option to test. When returning to the previous menu, the respiration value selection option becomes active, allowing the respiration rate to be chosen from 15 to 150 respirations per minute. - Page 27 TEMP ºC YSI 400 (Ω) YSI 700 (A - Ω) YSI 700 (B - Ω) 2252Ω 6000Ω 30000Ω 1599Ω 4260Ω 21430Ω 1533Ω 4084Ω 20570Ω 1471Ω 3918Ω 19740Ω 1412Ω 3760Ω 18960Ω 1355Ω 3610Ω 18210Ω 1301Ω 3466Ω 17490Ω 1249Ω 3328Ω 16800Ω 1200Ω 3196Ω...
- Page 28 ASSEMBLY To perform the Temperature test, connect one side of the temperature cable to the Waller P10 connector and the other to the Monitor to be tested.
- Page 29 Settings The third module presented on Waller’s home screen is the temperature module. There we can see the following options: Sensor. Temperature. Sensor: option to select between the 400 series or 700 series standard. Temperature: option to select the temperature.
-
Page 30: Invasive Blood Pressure
P10 STEREO (1/4”) PLUG CONNECTION Signal (+), Hot Signal (-), Cold Ground Signal (+), Hot Signal (-), Cold Ground INVASIVE BLOOD PRESSURE The Invasive Blood Pressure module makes it possible to test different IBP values, in static and dynamic modes, configuring the sensitivity and BPM. - Page 31 It is necessary to connect the IBP cable to perform the IBP test, as follows. Settings In the Waller home screen, by sliding the NIBP screen to the left, we have access to the IBP module. On this screen, we can see the following options:...
- Page 32 Sensitivity: option to select between 5 or 40 uV/V/mmHg. Static: option to select the desired static pressure level for testing. This option has priority over dynamic pressure, so to perform tests in dynamic pressure, leave static pressure off. Dynamic: option to select dynamic pressure values.
-
Page 33: Oximetry
BPM: option to select different frequency values. The value ranges from 55 to 300 BPM. 1 - Power + (VDD) 2 - N. C 3 - Signal + (S+) 4 - Power - (GND) 5 - N. C 6 - Signal - (S-) PI Connector pinout, Front View OXIMETRY The SpO2 module makes it possible to test different saturation ranges and... - Page 34 Assembly It is necessary to connect the oximetry sensor of the test device to perform the SpO2 test. Place the red and infrared LED of the oximetry sensor on the top window of Yagi (part of the sticker with the Yagi Logo) and the sensor photoreceiver on the bottom of Yagi (part of the sticker with the Yagi serial number).
- Page 35 Settings On Waller’s home screen, we have access to the SpO2 option by sliding the temperature screen to the left. There we can see the following options: Sensor. BPM Saturation Sensor: This option presents several cataloged sensors, which can be...
-
Page 36: Software And Application
Waller through the Arkmeds application. To do so, simply create a checklist in the Arkmeds CMMS system and link it to a procedure that will be connected to the test device. In this checklist is set the configuration changes for each test and has a field for entering the data found in the device under test. -
Page 37: Problems And Solutions
REMOTE ACCESS If your device has a problem, Waller has the option of remote access that allows a better understanding of the failure in the field and its appropriate corrections, if applicable, in addition to updates. In case of failure, please contact our Support Team. -
Page 38: Maintenance
Otherwise, the device may not operate as specified by the manufacturer and damage its internal components. B ATT ERY In Waller, the battery level indicator is displayed in the upper right. Status Symbol Empty... -
Page 39: Technical Specifications
TECHNICAL SPECIFICATIONS GENERAL Operating 10 °C to 40 °C (50 °F to 104 °F) Temperature Storage -20 °C to +60 °C (-4 °F to +140 °F) Temperature Humidity 10% to 90% non-condensing Size (L)261mm x (H)212mm x (W)88mm Screen 7 inches Communication Wifi and Bluetooth Supply... - Page 40 Amplitude 0,5 to 2,5 mV Amplitude Variation Sinus Rhythm - 30 - 300 bpm Irregular Rhythm - 30 - 300 bpm Atrial Fibrillation - 30 - 300 bpm Asystole - 30 - 300 bpm Frequency Fine Ventricular Fibrillation - 200 - 300 bpm Coarse Ventricular Fibrillation - 200 - 300 bpm Triangular Wave - 120 - 300 bpm Sine Wave - 120 - 300 bpm...
- Page 41 NIBP Frequency 80 to 140 bpm Pressure Range 300 mmHg Pressure Variation +/- 1 mmHg Test Range 60/30 80/50 100/65 120/80 (mmHg) 150/100 170/125 Test Pressure +- 4mmHg Variation * Measurement Unit mmHg Leakage 0 to 99 min and 59 sec Test Time RESPIRATION Derivations...
- Page 42 Sensitivity 5 and 40 Dynamic Pressure 60/30 80/50 100/65 120/80 150/100 170/125 Range (mmHg) Static Pressure 0 - 300 Range (mmHg) BPM range 55 - 300 SpO2 Frequency 30 to 240 bpm Saturation 80/85/90/95/97/98/99/100% Notes: More than 15 models of multiparametric monitors from several well-known brands tested and validated the device.
-
Page 43: Faq
FA Q In case of doubts, problems, or suggestions, please contact the Arkmeds Customer Success Team at: https://www.arkmeds.us/support *External image, source: https://www.cablesandsensors.com/pages/ 12-lead-ecg-placement-guide-with-illustrations evolving people, companies, and markets. P A T I E N T S I M U L A T O R...
Need help?
Do you have a question about the Waller and is the answer not in the manual?
Questions and answers