Table of Contents
Advertisement
Advertisement
Table of Contents

Related Manuals for KQQ T36S

Summary of Contents for KQQ T36S
- Page 1 KQQ MIRROR DASH CAM Model: T36S Detachable Split Dash Camera User Manual...
-
Page 3: Table Of Contents
CONTENT 1. Appearance --------------------------------------------------------1 2. Introduction -------------------------------------------------------2 3. Precautions --------------------------------------------------------2 4. Warnings ------------------------------------------------------------4 5. Installation and Operating ------------------------------------5 6. Introduction of Functions ------------------------------------9 7. Product Specifications ---------------------------------------17 8. Common Issues and Trouble Shooting -----------------17 9. About the User Manual ---------------------------------------20 10. -
Page 4: Appearance
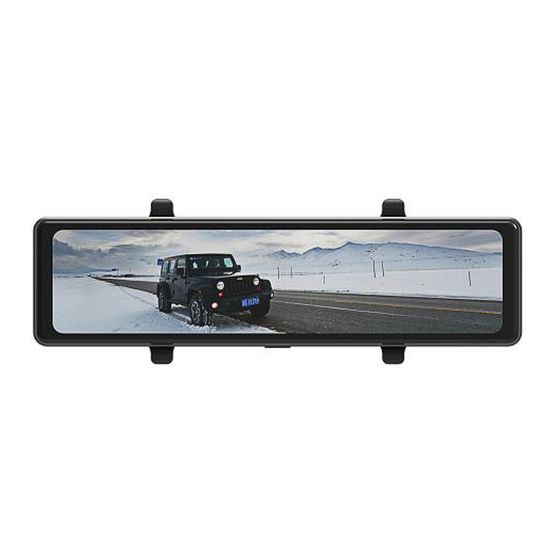
1.Appearance T36S Mirror Dual Dash Cam - 1 -... -
Page 5: Introduction
2. Introduction Thank you for purchasing KQQ T36S Mirror Dash Cam. This Dash Cam is a very elegant, convenient, and durable multi-vehicle driving recorder. This product provides high-quality image capture and irrefutable evidence for what goes on from the perspective of your dashboard. - Page 6 TF memory card installation Please insert the external TF card from KQQ store before using it. The TF memory card is used to store the image or video files of the driving recorder. *Important: (1) Please use a high-speed TF memory card (above Class 10) with a capacity of not less than 8GB (supports max to 128GB).
-
Page 7: Warnings
4. Warnings Failure to comply with safety warnings and regulations can result in serious injury or death. Please read and understand all instructions before using this product. If any damage is caused by failure to follow the instructions, the warranty will be voided. 4.1 For Safety: Keep all small accessories out of the reach of children. -
Page 8: Installation And Operating
The specifications and appearance of this product are subject to change without notice for improvement. Some countries or USA states prohibit drivers from mounting anything on the windshield or prohibit mounting on certain areas of the windshield. It is the owner/operator’s responsibility to mount or use this device in compliance with local laws. - Page 9 Note: Don’t remove TF card when dash cam is turned on. It will damage TF card and its data Mount T36S mirror dash cam over the original car rear view mirror with the provided rubber straps. Then adjust the angle.
- Page 10 5.4 Detached Front Camera Installation: (1) Choose installation positions of front on front windshield. (Note: It is recommended to install the front camera behind the rear view mirror.) (2) Clean and dry windshield before installation. (3) Remove protective films of double-sided stickers and stick front camera to selected positions separately.
- Page 11 Position 2: Install the rear camera on the rear windshield. Note: Position 2 is designed for live stream rear view only, not suitable for parking assistant function. 5.6 Connecting the Power Car Charger Connecting As shown in figure, run power cable along from the top of windshield, A-pillar, door frame and all the way to passenger-side glove box.
-
Page 12: Introduction Of Functions
To avoid compatibility issues, please use the T36 original hard wire kit (Contact us or visit KQQ store) 6. Introduction of Functions Please read the Instructions before Installation and Operating. - Page 13 Then It is the issue of the MEMORY CARD. (NOT THE CAMERA ISSUE) - Please Contact US. KQQ Dash Camera is High Bit-Rate Video recording device. Which requires High Speed Rating SPECIFIC Micro-SD Cards. Absolutely Do NOT Purchase it from third party seller on eBay or any online place.
- Page 14 6.3 Format TF memory card First, Click the screen and click to pause recording, Then, click the setting icon to enter the setting interface, select Format to format the TF card. *Important: Formatting will clear the memory card data and cannot be recovered after clearing, please do data backup.
- Page 15 6.6 Lock video files Click the lock icon to lock the current file. 6.7 Computer playback video files The normal video folder is "video". The photo folder is "photo". The locked video file is "event". ‘F’ is the prerecording file; ‘R’ is the Post-Recording. How to transfer videos to PC? Insert memory card via card reader to your PC/MAC to view or download them.
- Page 16 6.9 Screen brightness adjustment Click the brightness icon and slide the cursor left and right to adjust the brightness of the screen backlight. 6.10 Front and rear image switching Tap the camera switch icon or swipe the screen to the right. 6.11 Parking Monitoring This function requires a dedicated power cord to be installed ( Requires separate...
- Page 17 6.12 Setting Guideline After the rear camera is installed, connect the red line of the rear camera connection line (reversing signal detection wire) to connect the reversing lights. When the vehicle is in reverse gear, the recorder will automatically switch the reverse camera like accessibility.
- Page 18 6.16 Stream Media: Off / Front camera / Rear camera / Front and rear camera 6.17 G-sensor: Off / Low / Middle / High Select to adjust the sensitivity of G-sensor. The built-in G-sensor (Gravity Sensor) will automatically trigger emergency video recording when it detects a collision occurred, and then lock-up the video to prevent being overwritten to retain accurate evidence for accident.
- Page 19 6.24 Back Camera Flip: Off / On Select to turn on rear camera mirror, rear camera image will be upside down. [Note:] This setting appears only when rear camera is connected. 6.25 Back Camera Mirror: Off / On Select to turn on rear camera mirror, rear camera image will be reversed left and right. You can switch between mirror image and normal image to suit your habit.
-
Page 20: Product Specifications
6.37 Version: Display the software version 6.38 Lapse Recording: OFF / 1fps (1 frame per second) / 2fps (2 frame per second) / 5 fps (5 frame per second) Allow dash cam to record continuously at the set frame rate during parking and playback the video at 30fps. - Page 21 Remove the memory card → Press the RESET button (as below) with a paper clip or tip of the pen → Reinsert the SD card Other Note: 1. Make sure the power cord is original 2. Please check whether the power cord is properly connected to the USB jack on the machine 8.2 Video is fuzzy Please make sure the lens of the camera is clean and there is no dirt or grease on the...
- Page 22 Please trust us. We have sold thousands of KQQ Dash Cameras and they do NOT lag, we stand by our product and we do extensive testing. Some customers simply think the camera is bad or not stable, but that is NOT the case here.
- Page 23 8.8 The oldest video files are missing Your KQQ Dash Cam has Loop Cycle Recording. When it is set to either 1, 3, or 5-mins, it will delete the oldest files and record newer files over and over when the memory card is full.
-
Page 24: About The User Manual
8.13 My Video playback on PC is lagging. You are viewing a high-bit rate version of video files. A slower PC may have a problem with faster data processing. Please record videos at a lower resolution and try again. Contact us if the problem still persists. Please feel free to contact our world-class support at LESA_1688@163.com Most e-mails are typically replied to within 4-6 hours. -
Page 25: Thanks
11. Thanks Thank you for purchasing your new KQQ Dash Cam. We hope you find your new dash cam useful and fun to use. If you are having difficulties setting it up, please email us at LESA_1688@163.com. - Page 26 Email: LESA_1688@163.com Check us out here! We have professional customer service! - 23 -...
Need help?
Do you have a question about the T36S and is the answer not in the manual?
Questions and answers
Hello, Can I have manual for KQQ T37A mirror dash cam? thank you