
Related Manuals for GeeMo G130


Summary of Contents for GeeMo G130
- Page 1 WIRELESS HANDHELD VACUUM CLEANER INSTRUCTION MANUAL G130 For any questions and malfunctions of the appliance during use, please contact our customer service email: usa@igeemo.com...
-
Page 3: Table Of Contents
CONTENT IMPORTANT SAFEGUARDS OVERVIEW PART INSTALLATION INSTRUCTIONS DESCRIPTION OF PRODUCT USE DAILY MAINTENANCE OF THE PRODUCT... -
Page 4: Important Safeguards
Important Safeguards Before using this product, read the following safety instructions and follow all normal safety precautions, any actions that do not comply with this instruction may result in damage to the product. *This product is not intended for use by persons with physical, sensory or intellectual disabilities or persons with inexperience and common sense ,including children, unless they are supervised or directed by others to ensure their safe use. -
Page 5: Overview
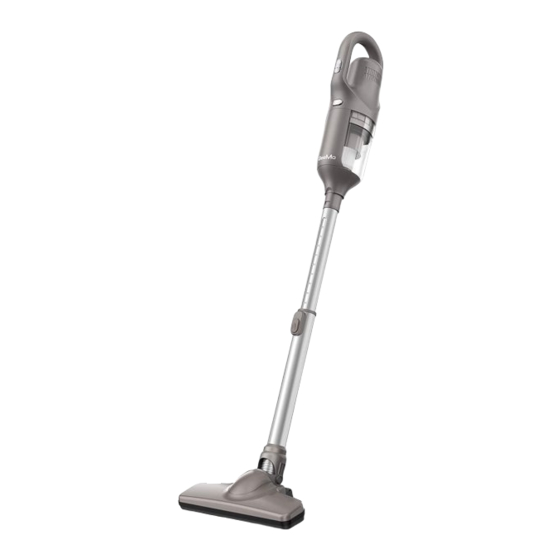
Product schematics Dust cup latch Dust cup Tube Floor brush Switch Main unit Crevice tool 2 in 1 brush Adapter Wall hanger Specifications Model G130 Input 100-240V/50-60Hz Output 26V/800mA Battery Voltage 22.2V Rated Power 130W Standard Mode 7kpa/29min High Mode 10kpa/20min Charging Time 2.5H... -
Page 6: Part Installation Instructions
Part installation instructions Host direct access to attachments *Depending on the area to clean, insert the attachment directly into the host port after a reasonable selection of the attachment. Main unit + tube + accessories First the tube is inserted into the main unit, and according to the area to be cleaned, the accessories is inserted directly into the other end of the tube after a reasonable selection of the accessories. -
Page 7: Description Of Product Use
Description of product use Product charging Power LIGHT Plug the adapter into the wall socket, then the end of the adapter is inserted into the machine charging jack, and the charging light flashes in turn. About the LED. Product work The number of lights on three indicators indicates how much the battery is consuming when the appliance is charging. - Page 8 Work begins Press the machine switch button, the machine low-grade operation, and then press the switch button, the machine high-end operation, and then press the button, the machine shut down, so cycle, as needed to suck up the type of garbage, reasonable choice of machine gear.
- Page 9 Remove the middle HEPA filter and the dust can be empty. Remove HEPA Empty the dust Dust cup: Please dump the dust in the dust cup regularly. HEPA filter: Please clean the HEPA filter regularly and replace it with new one once 3~6 months.
-
Page 10: Daily Maintenance Of The Product
Daily maintenance of the product Product maintenance To maintain product performance, it is recommended that you maintain the machine and components Main unit Please let the machine stop working before cleaning. Tube the surface of the main unit with water or neutral detergent and do not seep water into the body. - Page 11 Troubleshooting Common fault analysis and handling FAULT POSSIBLE CAUSES THE SOLUTION The vacuum cleaner Battery low Charging the battery does not work Clean up the product vacuum The suction port is blocked Reduced suction Clean dust cups and Filter ingress with dust。 filtration components of the product Clean up or replace filtered...
Need help?
Do you have a question about the G130 and is the answer not in the manual?
Questions and answers
Where can I get a replacement filter for G130