Table of Contents
Advertisement
Quick Links
WELCOME AND INTRODUCTION ........ 1-1
Technical Approvals ................................ 1-2
GENERAL SAFETY ............................... 2-1
new Caravan. .......................................... 2-1
Ventilation ............................................... 2-2
High-Level Ventilation ............................. 2-2
Low-Level Ventilation .............................. 2-2
Ventilation in Separate Bedrooms ........... 2-2
Gas Dispersal Holes ............................... 2-2
Petrol/Diesel Fumes ................................ 2-2
Fire Safety ............................................... 2-2
In Case Of Fire ........................................ 2-2
Fire Retardant Foams ............................. 2-2
Escape Paths .......................................... 2-2
Your Caravan Payload Explained ........... 2-3
PREPARING FOR THE ROAD ............... 3-1
Caravan Towing Vehicle Weight Ratio .... 3-1
Loading ................................................... 3-1
Internal Loading & Checks ...................... 3-1
External Loading & Checks ..................... 3-2
Pre-Tow Checklist & Hitch-Up ................. 3-2
TOWING AND DRIVING ......................... 4-1
Reversing ................................................ 4-1
Speed Limits ........................................... 4-1
Setting Off ............................................... 4-1
Caravan Handling ................................... 4-1
motorway driving ..................................... 4-2
towing covers .......................................... 4-2
Tyre and wheel checks ........................... 4-2
ARRIVING ON SITE ............................... 5-1
Check Site Regulations ........................... 5-1
Selecting a Pitch ..................................... 5-1
or Steep Hill ............................................ 5-1
Entering and Exiting the Caravan ........... 5-1
(all except Buccaneer) ............................ 5-2
Leveller Jack ........................................... 5-2
Ramp ...................................................... 5-2
(all except buccaneer) ............................. 5-2
(Buccaneer only) ..................................... 5-3
GETTING STARTED .............................. 6-1
Electricity ................................................. 6-1
Power Supply Charger ............................ 6-1
12v Systems: .......................................... 6-1
Generator/Charger .................................. 6-1
Electricity Mains Supply .......................... 6-1
Arrival at Site ........................................... 6-1
When Leaving Site .................................. 6-2
Overseas Electrical Connection .............. 6-2
Gas Safety Advice ................................... 6-3
Facts about LPG ..................................... 6-3
Exhaust ................................................... 6-3
LPG Gas System .................................... 6-3
Gas Supply ............................................. 6-4
Connection .............................................. 6-4
Changing a Gas Cylinder ........................ 6-4
Gas Regulator ......................................... 6-4
(Where Fitted) ......................................... 6-5
High Pressure Gas Hoses ...................... 6-6
Control® .................................................. 6-7
ELECTRICAL SYSTEM .......................... 7-1
12v Power Supply ................................... 7-1
Battery Installation .................................. 7-1
Battery Maintenance ............................... 7-1
Generators / Charger .............................. 7-1
230v Power Supply ................................. 7-2
Mains Unit ............................................... 7-2
Resetting the RCD .................................. 7-2
Automatic Charging System ................... 7-2
Internal Lights ......................................... 7-2
(Where Fitted) ......................................... 7-2
(Where fitted) .......................................... 7-3
(Where fitted) .......................................... 7-3
(Where Fitted) ......................................... 7-3
Electrical Control Panels ......................... 8-1
Control Panel (Xplore) ............................ 8-2
Control Panel (Avante/Casita) ................ 8-3
iVan Control Panel .................................. 8-3
(Affinity/Capiro) ....................................... 8-4
CONTENTS-1
CONTENTS
MY2023 EHG Caravan Handbook
Advertisement
Table of Contents
Troubleshooting

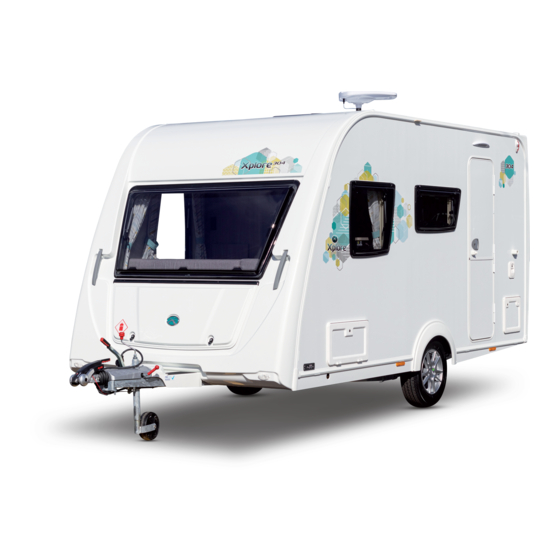
Summary of Contents for Xplore 304
-
Page 1: Table Of Contents
EQUIPMENT ........... 8-1 (all except buccaneer) ......5-2 Electrical Control Panels ......8-1 The E&P Hydraulics Levelsystem Control Panel (Xplore) ......8-2 (Buccaneer only) ........5-3 Control Panel (Avante/Casita) ....8-3 GETTING STARTED ......6-1 iVan Control Panel ........8-3 Electricity .......... - Page 2 CONTENTS Control Panel (Crusader/Camino Use of the Burners ........ 8-43 and Buccaneer) ........8-4 K1520 (All ranges except Xplore) ..8-43 Whale Heating System (Xplore) ....8-5 Use of the Electric Hotplate Whale Space Heater - User Operation ... 8-6 (if applicable) .........
- Page 3 CONTENTS Gas Locker Door Glass Fibre Reinforced Plastic (Pivoting Door) ........8-66 (GRP - Where Applicable) ..... 10-1 Gas Locker Door Acrylic Windows ........10-1 (Crusader/Camino & Buccaneer) ..8-66 Window Blinds & Flyscreens ....10-2 Internal Doors ........8-67 Winterisation/Storage ......
- Page 4 CONTENTS WIRING DIAGRAMS ......14-1 GENERAL QUESTIONS ...... 15-1 GLOSSARY .......... 16-1 SERVICE DOCUMENTS ...... 17-1 NOTIFICATION OF CHANGE OF OWNERSHIP ........18-1 NOTIFICATION OF CHANGE TO NAME AND ADDRESS ......19-1 INDEX ........... 20-1 CONTENTS-4...
-
Page 5: Welcome And Introduction
INTRODUCTION By following the instructions provided in this WELCOME AND INTRODUCTION handbook and maintaining your caravan in a Congratulations on selecting your new first class roadworthy condition, you are sure Touring Caravan. to have many years of carefree use. This Owner’s Handbook has been prepared To ensure the very best quality and reliability for your guidance to help you derive the all touring caravan designs and new... -
Page 6: Erwin Hymer Group Uk Technical Approvals
INTRODUCTION Your feedback is incredibly important to us and helps shape the future of our leisure vehicles. We would be delighted if you would also complete our accompanying online Customer Questionnaire. Both our Registration form and our Customer Questionnaire can be found on our Homepage: www.elddis.co.uk Please note that this is not for warranty purposes. -
Page 7: General Safety
GENERAL SAFETY (viii) Never exceed your caravans Maximum GENERAL SAFETY Technical Permissible Laden Mass. Please read before using your new (see Caravan Towing Vehicle Weight caravan. Ratio). In order for you to get the most out of your (ix) Ensure heavy and large items are new caravan it is necessary for you to be secured before towing your new aware of the following:... -
Page 8: Ventilation
GENERAL SAFETY VENTILATION FIRE SAFETY All caravans manufactured by Erwin Hymer It is recommended that one dry powder fire Group UK are ventilated at both high and low extinguisher complying with EN 3-7 of at level in accordance with BSEN 721 Safety least 1kg capacity or equivalent is provided Ventilation. -
Page 9: Your Caravan Payload Explained
GENERAL SAFETY YOUR CARAVAN PAYLOAD Optional equipment payload (OEP) EXPLAINED This is an amount of weight provided for factory fitted options. Definitions Please note: Any options fitted by the Plated maximum technical retailer will reduce the overall payload permissible laden mass (PMTPLM) available to the customer. - Page 10 GENERAL SAFETY...
-
Page 11: Preparing For The Road
PREPARING FOR THE ROAD LOADING PREPARING FOR THE ROAD Always lower and secure the jockey wheel CARAVAN TOWING VEHICLE and the four corner steadies (with the brace WEIGHT RATIO provided) before entering the caravan. This This ratio has a major influence on stability. It will ensure that the caravan does not tip up is recommended that: when you are inside. -
Page 12: External Loading & Checks
PREPARING FOR THE ROAD External Loading & Checks CABLES Gas cylinders should only be stored, For peace of mind, you may wish to check correctly positioned, and secured in the the ability of the cables to be able to cope gas bottle locker. - Page 13 PREPARING FOR THE ROAD long as the AKS 3004 is not placed on Checking the efficiency of the left/right the ball, the handle will remain open. Put friction pads: the opened coupling onto the clean 1) Couple up AKS 3004 towball.
- Page 14 PREPARING FOR THE ROAD Manoeuvring operation For easier manoeuvring (on campsites etc), pull the stabiliser lever to the ‘up’ position. Please do not use the stabiliser lever as an manoeuvring handle. Please use the handles on the Caravan or fit the AL-KO manoeuvring handle to your jockey wheel (available separately).
- Page 15 PREPARING FOR THE ROAD BREAKAWAY CABLE Fixed tow ball systems The law requires that any trailer with a The cable with spring clip should be passed MTPLM (GVW) exceeding 750 kg must have behind the towbar assembly (where cable a braking system and it must work. If such a length is sufficient) and then clipped back on trailer becomes detached from the tow vehicle itself.
- Page 16 PREPARING FOR THE ROAD Where NO designated attachment point is Detachable tow bar systems provided on the towbar: Vehicles with a detachable tow bar system Fixed ball may have a securing point provided on the tow bar assembly. This securing point should Loop the cable around the neck of the be part of the towbar assembly fitted to the towball.
-
Page 17: Towing And Driving
TOWING AND DRIVING SPEED LIMITS TOWING AND DRIVING • Always adhere to the speed limits in REVERSING force. It is advisable to have a second person • When national speed limits apply, when assisting when reversing the caravan. towing on a single carriageway, the Start practising by choosing a left-hand bend speed limit is reduced to 50mph. -
Page 18: Motorway Driving
TOWING AND DRIVING MOTORWAY DRIVING When your caravan was first manufactured the tyres fitted were chosen because they Important Points: would carry the load that the caravan was 1. Caravans may not be towed in the designed to carry. outside lane of a three or four lane Note that it may be possible to increase the motorway. -
Page 19: Arriving On Site
ARRIVING ON SITE ARRIVING ON SITE CHECK SITE REGULATIONS On arrival at a site, you should always check the site regulations. This will help avoid any unnecessary conflict with site management and other site users. WARNING: Care has to be taken to prevent grounding when traversing ramps or other ground obstacles. -
Page 20: Side-To-Side Levelling
ARRIVING ON SITE SIDE-TO-SIDE LEVELLING FRONT & BACK LEVELLING (ALL EXCEPT BUCCANEER) (ALL EXCEPT BUCCANEER) This should be done only when the lateral A quick glance at your pitch should tell you if levelling is complete. you are likely to need side to side levelling i.e. levelling across the axle. -
Page 21: The E&P Hydraulics Levelsystem (Buccaneer Only)
ARRIVING ON SITE THE E&P HYDRAULICS • Using the E&P hydraulics levelling LEVELSYSTEM (BUCCANEER ONLY) system for other purposes than supporting the caravan is officially General Operating instructions forbidden according the E&P Hydraulics Before taking into service, the following points Limited warranty. - Page 22 ARRIVING ON SITE Remote Control: Touch Panel System Components Pump Unit Hydraulic jacks Touchscreen Operating system In advance The Touchpanel consists of a removable touchscreen and a mounting frame. The touchscreen can be used in a fixed (connected to the vehicle) and remote/handheld situation. (separated from the mounting frame in the vehicle).
- Page 23 ARRIVING ON SITE After removing the Touchscreen from the mountingframe, the touchscreen must be activated by pushing the ON/OFF button on the back-side of the touchscreen. By doing this the startup screen will appear in a “portrait” orientation. ON/OFF Button “portrait”...
- Page 24 ARRIVING ON SITE After pushing the icon “GENERAL” it is possible to make your personal choice for the preferred display language and NEW PIN/access code. These two options will be found after pressing the icons “LANGUAGE” AND “ACCESS CODE”. After doing this the touchscreen is ready to use. press general set language enter new pincode...
- Page 25 ARRIVING ON SITE • change settings CONFIGURATION icon • only appears in remote use of the NO SIGNAL indicator touchscreen, when there is no communication between touchscreen and operating unit. BATTERY STATUS indicator • 5 lines indicates “fully loaded” BATTERY STATUS indicator •...
- Page 26 ARRIVING ON SITE Operating the Levelsystem AUTOMATIC Levelling Before starting the automatic levelling procedure: make sure that the handbrake is engaged. Also ensure that everyone has exited the caravan - including yourself. IMPORTANT: Before levelling the vehicle (in case of considerable slope) it is advisable to put some extra materials (e.g.
- Page 27 ARRIVING ON SITE After pushing the “AUTO” button, on the bottom of the screen a “STOP BUTTON” appears. During operating with this button you are able to stop the automatic levelling procedure. In case you have stopped the procedure you have to press the button “retract all jacks” to start the procedure again.
- Page 28 ARRIVING ON SITE MANUAL levelling Before starting the manual levelling procedure: make sure that the handbrake is engaged. Also ensure that everyone has exited the vehicle, including yourself. The manual levelling function is mainly used when automatic levelling is not possible due to a large tilt of the vehicle.
- Page 29 ARRIVING ON SITE Step 2 Lift the vehicle at the axle by pushing the button “LEFT SIDE” button. The hydraulic pump starts working, hold the button down until the left axle jack has reached the ground. Hold the button down a little longer to allow the vehicle to lift approximately 3cm on the left side.
- Page 30 ARRIVING ON SITE Step 5 Depending on the lean of the vehicle with the aid of the buttons: “FRONT SIDE”, “REAR SIDE”, “LEFT SIDE” OR “RIGHT SIDE” level the vehicle. Keep each button pressed until the level system automatically stops levelling; the ORANGE arrow(s) on the indicator LED will go out automatically at this point.
- Page 31 ARRIVING ON SITE Step 2 Push the button 1 time to “RETRACT ALL JACKS”. Now the hydraulic pump starts working to start retracting the jacks. By pushing the button “RETRACT ALL JACKS” a “STOP” sign appears on the screen, this is to give the user the possibility to stop the retract procedure immediately. 5-13...
- Page 32 ARRIVING ON SITE Schematic diagram of the hydraulic Levelsystem Below the schematic view/diagram of the E&P Hydraulics Levelsystem. 5-14...
- Page 33 ARRIVING ON SITE Remarks and recommendations • The system can’t handle all angles (limit in levelling). The limit values differ per Below is an overview concerning remarks caravan - depending on the length of the and recommendations (tips) of the hydraulic caravan.
- Page 34 ARRIVING ON SITE Troubleshooting In case of an error message, check the caravan is not standing too high at the front (jockey wheel must be lowered), whether the battery has sufficient voltage, whether the oil level is correct, whether there is any damage to the jacks and check all the cables. If this does not lead to a solution for the fault, the fault could be located in the drive units.
- Page 35 ARRIVING ON SITE Maintenance optimal performance under extreme conditions (-30 degrees) we The E&P Hydraulics Levelsystem does not recommend the use of a special have parts that need to be maintained hydraulic oil for low temperatures periodically. When parts have been taken (consult an authorised dealer).
- Page 36 ARRIVING ON SITE • Immediately contact E&P Hydraulics directly before trying to perform a repair or change to your E&P Hydraulics product. Claims for alleged damages to products are only allowed if E&P Hydraulics has had the opportunity to check the claim. The warranty becomes invalid when: •...
-
Page 37: Getting Started
GETTING STARTED CONNECTING TO MAINS SUPPLY ON GETTING STARTED ARRIVAL AT SITE You have arrived at your destination and now Before connecting the caravan installation to want to start to enjoy your new caravan. The the mains supply, check that: following is a step by step guide to connecting your services and getting The mains supply is suitable for your... -
Page 38: Disconnecting Mains Supply When Leaving Site
GETTING STARTED WIRING OF CONNECTING CABLE AND CARAVAN MAINS INLET WARNING: It is essential that connections are made exactly as shown. If terminal markings are not in accordance with the above diagram they must be ignored. (iii) Disconnect the female 3 pin plug from the other end of the flexible orange the caravan and store the cable in an supply cable. -
Page 39: Gas Safety Advice
GETTING STARTED GAS SAFETY ADVICE LPG GAS SYSTEM The gas system within your vehicle has been Erwin Hymer Group UK do not recommend installed by an STGW approved installer and the use of any external cylinders. All cylinders tested in line with BS EN 1949:2011+A1:2013. in use should be within the gas locker provided. -
Page 40: Gas Supply
GETTING STARTED GAS SUPPLY Changing a Gas Cylinder Your caravan is designed to operate using Before commencing to change a gas cylinder either propane or butane liquefied petroleum ensure that the valve on the cylinder is turned gas at 30M/bar. Gas can be obtained from fully off. -
Page 41: Auto Changeover Gas Regulator (Where Fitted)
GETTING STARTED Auto Changeover Gas Regulator Instructions for use (where fitted) The two inlets of the regulator are to be The Whale Auto connected by means of two high pressure Changeover Gas hoses complying with the specfications of Regulator, Type 924N Standard EN1949. -
Page 42: High Pressure Gas Hoses
GETTING STARTED High Pressure Gas Hoses You should only connect to this regulator using a length of approved high-pressure hose not exceeding 450mm from the gas cylinder to the regulator. These approved high-pressure hoses are available from your Erwin Hymer Group UK Retailer. These hoses are connected using screw thread fittings, which will make a seal if connected and tightened using a spanner. -
Page 43: Whale High Flow Pump With Intelligent Control
GETTING STARTED Step Three Whale High Flow Pump with ® Intelligent Control Insert plug and secure by using the socket lid Your caravan has been fitted with the Whale to lock in place. ® High Flow Pump with Intelligent Control Water System Before using you water system for the first time, you must prime the water system and... - Page 44 GETTING STARTED To calibrate the Water System ® Now that the water system has been primed, you must calibrate the Intelligent Control unit, which is located at the back of the water socket (inside the caravan). 5 easy steps to calibrate your Watermaster IC Pump ®...
- Page 45 GETTING STARTED Water System - Diagnostics ® To aid with trouble shooting the green LED on the Intelligent Control unit will flash to indicate different fault types. Code Tap open and pump running Fast Flash In Calibration Mode (flash every 1 second or less) 5 Second Flash Calibrated and ready for use (flash every 5 seconds)
- Page 46 GETTING STARTED Storing Your Water Pump The socket lid must be closed while not in use. The pump must be removed from the socket before moving the caravan. The pump must be stored in a cool, dry place when not in use. When refilling your water container, the pump can be placed as shown to keep it clean.
- Page 47 GETTING STARTED Water System - Maintenance Whale Watermaster Pump with Intelligent ® Control is designed to be maintenance free and does not contain any serviceable parts. Please note: The Intelligent Control unit is enclosed to protect the electronics and must not be opened.
- Page 48 GETTING STARTED 6-12...
-
Page 49: Electrical System
ELECTRICAL SYSTEM ref table. Discharging a battery below this ELECTRICAL SYSTEM figure will cause permanent damage. 12v POWER SUPPLY Overheating and gassing will occur when re- connected to the mains supply. Battery Installation Your caravan will be fitted with a BCA Leisure 12 Volt Battery State of Charge charging and power distribution unit. -
Page 50: 230V Power Supply
ELECTRICAL SYSTEM 230v POWER SUPPLY it may trip the site circuit breaker. Please check the available mains output with your Mains Unit site operator. The following items need to be The Mains Unit replaces the conventional added together if used simultaneously. fuse box. -
Page 51: Connecting A Solar Panel And/Or Satellite Dish (Where Fitted)
ELECTRICAL SYSTEM Connecting a Solar Panel and/or Satellite Dish (Where fitted) If you ordered your caravan with the entertainment pack option fitted then your caravan will have both a solar panel connection point and a satellite TV connection point within the battery box. External Solar Panel Connection (Where fitted) To connect a solar panel insert the panel... - Page 52 ELECTRICAL SYSTEM MAINS UNIT - XPLORE...
- Page 53 ELECTRICAL SYSTEM MAINS UNIT - AVANTE/CASITA...
- Page 54 ELECTRICAL SYSTEM MAINS UNIT - AFFINITY/CAPIRO...
- Page 55 ELECTRICAL SYSTEM MAINS UNIT - CRUSADER/CAMINO...
- Page 56 ELECTRICAL SYSTEM MAINS UNIT - BUCCANEER...
-
Page 57: How To Use Your Caravan'sequipment
HOW TO USE YOUR CARAVAN’S EQUIPMENT HOW TO USE YOUR CARAVAN’S EQUIPMENT Within this section of your caravan’s handbook we will give you brief details on how to operate all of the caravan’s equipment from the gas cooking equipment to the window blinds. -
Page 58: Control Panel (Xplore)
HOW TO USE YOUR CARAVAN’S EQUIPMENT CONTROL PANEL (XPLORE) Please note: Please note the light switch on the control panel only controls the high level lighting in the front lounge area. -
Page 59: Control Panel (Avante/Casita)
HOW TO USE YOUR CARAVAN’S EQUIPMENT CONTROL PANEL (AVANTE/CASITA) iVan Control Panel Integrated Controls Water Heater Control Room Heater Mains Electric Connected Control (Amps in use - Heating System) Pump Power Clock Battery Status Heater Timers Space Heater Reset Button Home/Set Up and Options Water Heater (Glows red when gas is lit) -
Page 60: Control Panel (Affinity/Capiro)
HOW TO USE YOUR CARAVAN’S EQUIPMENT CONTROL PANEL (AFFINITY/CAPIRO) (i) To operate the 12V systems for your caravan depress the left rocker switch. (ii) To operate the pump for your water system depress switch marked with a tap symbol. (iii) When the pump is running the neon light will illuminate. (iv) When the left hand button is depressed the available battery Voltage will be displayed. -
Page 61: Whale Heating System (Xplore)
HOW TO USE YOUR CARAVAN’S EQUIPMENT WHALE HEATING SYSTEM (XPLORE) The Whale Space Heater and Whale Water Heater are both operated by using the Whale Duo Control Panel. To operate the Space Heater or Water Heater on gas only, a 12 V d.c. supply must be connected at all times. -
Page 62: Whale Space Heater - User Operation
HOW TO USE YOUR CARAVAN’S EQUIPMENT To adjust the temperature: Whale Space Heater - User Operation Use the temperature control buttons to adjust the temperature. For Gas Operation: Press to increase the temperature. Press the Space Heater Function Key Press to decrease the temperature until the Gas icon is illuminated The temperature setting will be shown on the... -
Page 63: Whale Water Heater - User Operation
HOW TO USE YOUR CARAVAN’S EQUIPMENT Whale Water Heater - User For Gas & Electric Operation: Operation For faster water heat up, the Water Heater For Gas Operation: can be operated on both gas and electric. Press the Water Heater Function Key To select 750W and Gas:- Press the Water Heater Function Key until the Gas icon is illuminated... -
Page 64: Whale Heating System - Troubleshooting
HOW TO USE YOUR CARAVAN’S EQUIPMENT Whale Heating System - Troubleshooting The Whale Space Heater and Whale Water Heater are equipped with an electronic diagnostic system which will detect fault conditions ranging from poor gas or d.c. supply to internal heater malfunctions. -
Page 65: Whale Space Heater - Reset Button Location (All Other Models)
HOW TO USE YOUR CARAVAN’S EQUIPMENT Whale Space Heater - Reset Button Whale Space Heater - Lockout Clearing Location (304 and 422 models only) Procedure If the Space Heater lockout condition has been identified by 1, 3, 4 or 5 flashes, the lockout must be cleared by turning the d.c. - Page 66 HOW TO USE YOUR CARAVAN’S EQUIPMENT WATER HEATING Whale Water Heater - Fault Finding If the Water Heater diagnostic LED is lit as shown:- Press together to identify the problem. The number of bars that light on the Temperature Gauge indicate the fault code, e.g. 1 bar lit equals fault code 1, 2 bars lit equals fault code 2 etc.
- Page 67 HOW TO USE YOUR CARAVAN’S EQUIPMENT Whale Heating System - Maintenance The Space Heater or Water Heater must not be operated in the following situations: The outside surfaces of the Space or Water • When refuelling the vehicle, refuelling the Heater do not normally require cleaning.
- Page 68 HOW TO USE YOUR CARAVAN’S EQUIPMENT Whale Space Heater Whale Water Heater When operating the Space Heater, a Before operating the Water Heater, the user minimum of one hot air outlet vents must be must ensure that the caravan water system, permanently open.
-
Page 69: Whale Heating System (Avante/Casita)
HOW TO USE YOUR CARAVAN’S EQUIPMENT WHALE HEATING SYSTEM Safe Operation of the Heater (AVANTE/CASITA) • Keep all air inlets and outlets clear at all A Safe Operating Environment times (BS EN 624). For safe use carefully read, understand and •... - Page 70 HOW TO USE YOUR CARAVAN’S EQUIPMENT WARNING: In the unlikely event of leaks in • Do not smoke the gas system, or if there is a smell of • Shut off gas operation gas: • Leave the vehicle • Extinguish all naked flames Immediately ensure that the system is •...
-
Page 71: Ivan Control Panel - Instructions For Use
HOW TO USE YOUR CARAVAN’S EQUIPMENT IVAN CONTROL PANEL - Instructions for Use Fault Indicator Timer in use Frost Setting On Night Setting On Temperature inside the Vehicle Electric Setting Gas in use Space Heater Icon Room Heater Control Screen 8-15... - Page 72 HOW TO USE YOUR CARAVAN’S EQUIPMENT Icon Description Icon Description 0.75kW Electric On 0.75kW Electric Off 1.50kW Electric On 1.50kW Electric Off 3.00kW Electric Off 3.00kW Electric On Gas Off Gas On Fan On Fan Off Off Button Inactive Off Button Active Night Mode (10°C - 18°C) Off Night Mode (10°C - 18°C) Active Night Mode Selected...
- Page 73 HOW TO USE YOUR CARAVAN’S EQUIPMENT 1. Select Temperature 6°C - 10°C 10°C - 18°C 2. Activate Gas Power 3. Activate Electric Setting 8-17...
- Page 74 HOW TO USE YOUR CARAVAN’S EQUIPMENT Usable Electric Settings 0.75kW 230V a.c. 1.50kW 230V a.c. 3.00kW 230V a.c. 4. Setting Timers 5. Activating Timers 8-18...
-
Page 75: Troubleshooting
HOW TO USE YOUR CARAVAN’S EQUIPMENT Troubleshooting Step 1 - Space Heater Lockout Step 2 - Identify Lockout Step 3 - Recommended Action Fault type #1 - Inadequate gas supply 1. Check gas 2. 30mbar LPG 3. Go to step 4 Fault type #2 - Overheat 1. - Page 76 HOW TO USE YOUR CARAVAN’S EQUIPMENT Step 4 - Clear Lockout If problems persist, please contact Whale Support on +44 (0)845 217 2933. 8-20...
-
Page 77: Whale Ivan Control Panel - Water Heater
HOW TO USE YOUR CARAVAN’S EQUIPMENT Whale iVan Control Panel - Water Heater Integrated Controls Water Heater Control Room Heater Mains Electric Connected Control (Amps in use - Heating System) Pump Power Clock Battery Status Heater Timers Space Heater Reset Button Home/Set Up and Options Water Heater (Glows red when gas is lit) - Page 78 HOW TO USE YOUR CARAVAN’S EQUIPMENT Water Heater Control Icons and Descriptions Icon Description Icon Description 0.75kW Electric On 0.75kW Electric Off 1.50kW Electric On 1.50kW Electric Off Gas Off Gas On Off Button Active Off Button Inactive Frost Protection Mode (5°C) Frost Protection Mode (5°C) Active Frost Protection Mode...
- Page 79 HOW TO USE YOUR CARAVAN’S EQUIPMENT 2. Activate Electric Setting Water Heater Control Screen Electric Select ® Whale iVan Control Panel - Usable Electric Settings for Water Heater Usable Electric Settings 0.75kW 230V a.c. 1.50kW 230V a.c. 3. Setting Timers for the Water Heater 8-23...
- Page 80 HOW TO USE YOUR CARAVAN’S EQUIPMENT 4. Activating Water Heater Timers Operating Instructions - Drain Valve The Water Heater must be drained before travelling or if it is not being used for a period of more than 3 days, or if there is a danger of freezing (unless Frost Protection setting is active). Check the heater has fully drained if there is a risk of freezing.
-
Page 81: Winterising
HOW TO USE YOUR CARAVAN’S EQUIPMENT Winterising Please Note: Water will drip from the discharge pipe of the pressure-relief valve If the Water Heater is not going to be used for during heating up. The pressure relief valve more than 3 days, disable the Water Heater must be operated regularly (at least twice a on the control panel, isolate the gas supply year) by turning the yellow lever in the anti-... - Page 82 HOW TO USE YOUR CARAVAN’S EQUIPMENT Whale iVan Control Panel iVan“ is equipped with an electronic diagnostic system which will detect fault conditions ranging from poor gas or d.c. supply to internal Water or Space Heater malfunctions. In the unlikely event of a fault, this will be indicated by a red ‘!’...
- Page 83 HOW TO USE YOUR CARAVAN’S EQUIPMENT Step 2 Identity Lockout Step 3 Recommended Action Fault type #6-11 - Internal Fault Example 1. Go to step 4 2. Call Whale Support +44 (0)345 9090 911 Fault type #15 1. Power off 2.
-
Page 84: Alde Heating (3030 Control Panel) (Affinity/Capiro/Crusader/Camino/Buccaneer)
HOW TO USE YOUR CARAVAN’S EQUIPMENT ALDE HEATING (3030 CONTROL PANEL) (AFFINITY/CAPIRO/CRUSADER/CAMINO/BUCCANEER) Turning the boiler on and off Start the system by pressing the On/Off button on the control panel (Fig. 1). The start image is displayed (Fig. 2) and the system starts with the last selected settings. When the heating system and control panel are on, a green diode lights up on the On/Off button. -
Page 85: Set The Desired Temperature
HOW TO USE YOUR CARAVAN’S EQUIPMENT Symbol description of the top row of the status screen (Fig. 4) Indoor temperature shows the current temperature and whether the circulation pump is active (O). Tap the icon to change the desired temperature. Zone icons (dual zones). -
Page 86: Energy Sources
HOW TO USE YOUR CARAVAN’S EQUIPMENT • “Boost”, (prioritised hot water production). Tap the slider to the right of the text that reads “Boost 30 minutes”. The boiler will now prioritise the production of hot water for 30 minutes. After 30 minutes have passed, the boiler returns to its previous setting. -
Page 87: Settings Menu
HOW TO USE YOUR CARAVAN’S EQUIPMENT Settings menu To reach the Settings menu from sleep/standby screen, press the “MENU” button. Features marked with asterisks(*) are accessories. The Settings menu provides the following features: The Settings menu (Fig. 8) Night Mode. Automatically changes select features during the night. -
Page 88: Glycol Fluid
HOW TO USE YOUR CARAVAN’S EQUIPMENT The Settings menu (Fig. 9) continued Display. Select panel brightness: Low, Medium or High. You can also choose whether the status screen should be Normal, Inverted or Dark. If Dark is selected, the panel will go dark after 30 seconds and will light up again if touched. -
Page 89: Service Information & Reset
HOW TO USE YOUR CARAVAN’S EQUIPMENT Service Information & Reset Tap “Service Information” to get to the service menu (Fig. 12). Here, you will see values from the heating system (Fig. 13); the values are updated continuously. Touch “Reset” (Fig. 12) to reset the Control Panel to factory settings. After resetting, the system will be set as follows: •... -
Page 90: Oven (All Ranges)
HOW TO USE YOUR CARAVAN’S EQUIPMENT OVEN (ALL RANGES) • Never extinguish a cooking fire with water. Turn the burner off and cover the Safety flame with a lid or a fire blanket. • This appliance may be used by children •... -
Page 91: Before Using The Appliance
HOW TO USE YOUR CARAVAN’S EQUIPMENT • Care should be taken not to overload Before using the appliance: the oven, allowing adequate spacing • Ensure that all packaging materials have to ensure free circulation of heat. been removed. • Do not use steam cleaners or •... -
Page 92: Oven Shelf: (Applies To K1520 Only)
HOW TO USE YOUR CARAVAN’S EQUIPMENT surface. Wipe off any excess oil, then Maintenance and cleaning heat the hotplate on a medium setting for Thetford recommends an annual inspection 1 minute. Occasional seasoning will help service by an approved service centre. to maintain the hotplate’s appearance. -
Page 93: Troubleshooting
HOW TO USE YOUR CARAVAN’S EQUIPMENT Troubleshooting Problem Possible cause Solution Burners do not burn of Gas bottle is empty Change gas bottle burn unevenly Gas tap is closed Open tap Burner caps are not Allow caps to cool, then correctly positioned reposition them Burners are wet or clogged... -
Page 94: Triplex (Xplore Only)
HOW TO USE YOUR CARAVAN’S EQUIPMENT TRIPLEX (XPLORE ONLY) Main Components Glass lid Pan supports Spark ignition (optional) Oven shelf Grill/oven Control panel Gas burners Electric hotplate (Dual fuel only) Grill pan The types of burners may vary depending on the type of appliance. Refer to Technical specifications for further details. -
Page 95: Use Of The Electric Hotplate (If Applicable)
HOW TO USE YOUR CARAVAN’S EQUIPMENT Use of the electric hotplate Use of the grill (if applicable) For the exact location of the control knob, For the exact location of the control knob, see see Main components. Main Components: Turning on: Turning on: •... -
Page 96: Use Of The Oven
HOW TO USE YOUR CARAVAN’S EQUIPMENT If the burner has not lit within 15 Ignition must always be carried out seconds turn the control knob back to with the oven door open. the 0 position and release it. Wait at If the burner accidentally extinguishes least 1 minute and repeat the steps turn the control knob to the 0 position... - Page 97 HOW TO USE YOUR CARAVAN’S EQUIPMENT • Ensure that there is at least a 10mm gap between the pans and the edges of the hob. • Turn the pans so that the handles do not overhang the front of the appliance. •...
-
Page 98: Temperature Control
HOW TO USE YOUR CARAVAN’S EQUIPMENT Temperature control The temperature in the oven is controlled by a thermostatic gas tap and is variable over the range 130°C to 240°C. The table provides a guide to the approximate temperatures at each of the shelf positions with respect to the gas mark setting. -
Page 99: Use Of The Burners
HOW TO USE YOUR CARAVAN’S EQUIPMENT K1520 (ALL RANGES EXCEPT XPLORE) Main Components Glass lid Pan supports Gas burners Spark ignition (optional) Grill Oven Oven shelf Grill pan Control panel 10 Electric hotplate (Dual fuel only) The types of burners may vary depending on the type of appliance. Refer to Technical specifications for further details. -
Page 100: Use Of The Electric Hotplate (If Applicable)
HOW TO USE YOUR CARAVAN’S EQUIPMENT Use of the electric hotplate Use of the grill (if applicable) For the exact location of the control knob, For the exact location of the control knob, see see Main components. Main Components: Turning on: Turning on: •... -
Page 101: Use Of The Oven
HOW TO USE YOUR CARAVAN’S EQUIPMENT • Although the grill heats up quickly, it is If the burner accidentally extinguishes recommended that a few minutes preheat turn the control knob to the 0 position be allowed. A 12 Volt cooling fan and wait at least 1 minute before re- operates automatically above the grill igniting the burner. -
Page 102: Temperature Control
HOW TO USE YOUR CARAVAN’S EQUIPMENT restrict good circulation of heat, which may increase cooking times. • Do not leave the appliance unattended when in use. • Do not use the appliance while the vehicle is moving. • Turn the control knob back to the 0 position after cooking. -
Page 103: Refrigerator
HOW TO USE YOUR CARAVAN’S EQUIPMENT Refrigerator Closing and securing the refrigerator door • Press the door shut until you clearly hear Operating the refrigerator it click at the top and bottom. The main menu is divided into three lines: •... -
Page 104: Defrosting The Refrigerator
HOW TO USE YOUR CARAVAN’S EQUIPMENT Defrosting the refrigerator Cleaning and maintenance Note: Do not use mechanical tools or a hair WARNING: Always disconnect the dryer to remove ice or to loosen frozen items. refrigerator from the energy supply before cleaning and servicing it. -
Page 105: Microwave (Where Fitted)
HOW TO USE YOUR CARAVAN’S EQUIPMENT MICROWAVE (Where Fitted) Microwave cooking Press the “POWER” button once and “P100” will display and flash. Turn the “TIMER/WEIGHT” to select the microwave power. “P100”, “P90”, “P80”, “P70”, “P60”, “P50”, “P40”, “P30”, “P20”, “P10” and “P00” will display in order. -
Page 106: Battery Charger
HOW TO USE YOUR CARAVAN’S EQUIPMENT BATTERY CHARGER Alarm Test The battery charger for the caravan battery The alarm must be properly attached to the will automatically switch on when the caravan base plate before it can be tested. is connected to a mains supply. The battery •... - Page 107 HOW TO USE YOUR CARAVAN’S EQUIPMENT ALARM SMART SILENCE • During the reduced sensitivity reset cycle, the red LED on your alarm will continue to DANGER: If your smoke alarm emits the full flash more rapidly than normal, alarm signal and you are not testing the unit, approximately once every second.
-
Page 108: Carbon Monoxide Alarm
HOW TO USE YOUR CARAVAN’S EQUIPMENT MAINTENANCE CARBON MONOXIDE ALARM Your smoke alarm has been designed to be Carbon monoxide and how it can affect as maintenance-free as possible, however you and your family there are several things you must do to keep Carbon monoxide is a dangerous poisonous it working properly. - Page 109 HOW TO USE YOUR CARAVAN’S EQUIPMENT 800ppm Dizziness, nausea and convulsions Do not: within 45 minutes. • IGNORE ANY WARNING FROM YOUR Unconsciousness within 2 hours. CO DETECTOR! Death within 2-3 hours. • Burn charcoal inside your home, Should you suspect CO may be affecting you caravan, tent or cabin.
- Page 110 HOW TO USE YOUR CARAVAN’S EQUIPMENT Operating Features Cover the sounder vents with one hand. Press and hold the Test/Reset Your detector offers many features which set button down with your thumb/finger it apart from other CO detectors on the until the Power LED illuminates market today.
- Page 111 HOW TO USE YOUR CARAVAN’S EQUIPMENT four loud beeps and the Power LED batteries and the product is still within to illuminate green for a short time. warranty then contact Technical Support for This is the end of the test. The Power advice.
-
Page 112: Thetford C-260 Cassette Toilet Range
HOW TO USE YOUR CARAVAN’S EQUIPMENT THETFORD C-260 CASSETTE TOILET Holding Tank is covered. Far more RANGE information on Thetford toilet fluids, see last page of this manual. Screw the cap Introduction back onto the emptying spout and turn The Thetford Cassette Toilet is a high quality back to its original position. - Page 113 HOW TO USE YOUR CARAVAN’S EQUIPMENT Standard Optional features Note: Optional features can be bought from Thetford dealerships. PARTS Control panel (with optional features) Removable Seat and Lid Swivelling Toilet Bowl Blade Handle Flush Button Waste Holding Tank Level Indicator Water Filling Door (only if toilet has own flush-water tank) Rotating Emptying Spout...
-
Page 114: Using The Toilet (Standard)
HOW TO USE YOUR CARAVAN’S EQUIPMENT Using the toilet (standard) Emptying 10. Turn the bowl to the desired position with The Waste Holding Tank has a capacity of 18 the lid closed and using both hands. litres and requires emptying when the red 11. -
Page 115: Cleaning And Maintenance
HOW TO USE YOUR CARAVAN’S EQUIPMENT Note: The Waste Holding Tank Level Clean seat and lid The seat and lid can Indicator will flash when the holding tank is easily be removed: Lift the seat and lid not present. In this case the toilet will not assembly and pull the round pins (inside flush. -
Page 116: Cleaning And Maintenance For Optional Features
HOW TO USE YOUR CARAVAN’S EQUIPMENT regularly cleaned with water and treated with Open the access door on the outside of Thetford High Grade Seal Lubricant. This will your caravan or camper and empty the ensure that the seals remain flexible and in Waste Holding Tank at an authorised good condition. - Page 117 HOW TO USE YOUR CARAVAN’S EQUIPMENT 8-61...
-
Page 118: Rooflights
HOW TO USE YOUR CARAVAN’S EQUIPMENT ROOFLIGHTS To open in the intermediate position: Your caravan is fitted with at least one type of (i) Open the toggle catches on either side of the following roof lights. the rooflight. (ii) Grasp the metal bar in the middle; snap it The Omivent (12v) Rooflight out of its holder, swivel down and press (Where Fitted) -
Page 119: Midi Heki Rooflight (Where Fitted)
HOW TO USE YOUR CARAVAN’S EQUIPMENT • Close HEKI 2 completely before moving MPK Rooflight (Where Fitted) off. Operation • Do not leave your caravan when HEKI 2 is open. • Please consult your supplying dealer if you have any problems or defects. •... -
Page 120: Stargazer Rooflight (Where Fitted)
HOW TO USE YOUR CARAVAN’S EQUIPMENT Use only clear water and a soft sponge. Stargazer Rooflight (Where fitted) Solvents may attack the plastic and make it brittle. After cleaning, maintain the sliding surfaces with a thin layer of Vaseline or WD40. This makes the extension mechanism glide more easily. -
Page 121: Windows
HOW TO USE YOUR CARAVAN’S EQUIPMENT WINDOWS BLINDS & FLYSCREENS Your caravan will be fitted with Polyplastic Blinds framed windows. (i) Pull blind down by its centre catch. Do Polyplastic Window Opening not pull down by one side of the blind. This will inevitably lead to problems. -
Page 122: Shower
HOW TO USE YOUR CARAVAN’S EQUIPMENT SHOWER GAS LOCKER DOOR (CRUSADER/CAMINO & Using your Caravan Shower BUCCANEER) To safely enjoy showering in your new Some models are fitted with pantograph caravan, the following guidelines should be hinges, once the central button has been used. -
Page 123: Internal Doors
HOW TO USE YOUR CARAVAN’S EQUIPMENT INTERNAL DOORS OTHER INTERNAL DOORS Other internal doors such as the wardrobe Toilet/Shower Room Doors and table storage locker are fitted with a 2- Operation from within the shower position button lock. Push the button to lock room the door and the button should remain flush with the door. -
Page 124: High Level Locker (Crusader/Camino)
HOW TO USE YOUR CARAVAN’S EQUIPMENT HIGH LEVEL LOCKER MAGNETIC CATCHES (WHERE FITTED) (CRUSADER/CAMINO) Magnetic catches work on contact with the metal plate on the rear of the door. Simply close the door until the magnet engages and holds the metal plate. Pulling the door towards you with a To open the locker, push the handle... -
Page 125: Bed Make-Up
HOW TO USE YOUR CARAVAN’S EQUIPMENT BED MAKE-UP (XPLORE) Parallel Lounge The two single beds can be easily converted into a double bed by pulling out the bed slats, stored beneath the chest of drawers or stored in the bed slat box at the front/end of the caravan. - Page 126 HOW TO USE YOUR CARAVAN’S EQUIPMENT Day and Night Bed Makeup - 304 8-70...
- Page 127 HOW TO USE YOUR CARAVAN’S EQUIPMENT Day and Night Bed Makeup - 585 8-71...
- Page 128 HOW TO USE YOUR CARAVAN’S EQUIPMENT BED MAKE-UP (AVANTE/CASITA) Parallel Lounge (where applicable) The two single beds can be easily converted into a double bed by pulling out the bed slats, stored beneath the chest of drawers or stored in the bed slat box at the front/end of the caravan. Arrange seat cushions appropriately.
- Page 129 HOW TO USE YOUR CARAVAN’S EQUIPMENT Day and Night Bed Makeup - 585 8-73...
- Page 130 HOW TO USE YOUR CARAVAN’S EQUIPMENT Day and Night Bed Makeup - 840 8-74...
- Page 131 HOW TO USE YOUR CARAVAN’S EQUIPMENT BED MAKE-UP (AFFINITY/CAPIRO) Parallel Lounge The two single beds can be easily converted into a double bed by pulling out the bed slats, stored beneath the chest of drawers or stored in the bed slat box at the front/end of the caravan. Arrange seat cushions appropriately.
- Page 132 HOW TO USE YOUR CARAVAN’S EQUIPMENT BED MAKE-UP (CRUSADER/CAMINO) Parallel Lounge The two single beds can be easily converted into a double bed by pulling out the bed slats, stored beneath the chest of drawers or stored in the bed slat box at the front/end of the caravan. Arrange seat cushions appropriately.
- Page 133 HOW TO USE YOUR CARAVAN’S EQUIPMENT Day and Night Makeup - Borealis 650 8-77...
- Page 134 HOW TO USE YOUR CARAVAN’S EQUIPMENT BED MAKE-UP (BUCCANEER) Parallel Lounge The two single beds can be easily converted into a double bed by pulling out the bed slats, stored beneath the chest of drawers or stored in the bed slat box at the front/end of the caravan. Arrange seat cushions appropriately.
- Page 135 HOW TO USE YOUR CARAVAN’S EQUIPMENT Day and Night Bed Makeup - Aruba 8-79...
- Page 136 HOW TO USE YOUR CARAVAN’S EQUIPMENT Day and Night Bed Makeup - Barracuda 8-80...
- Page 137 HOW TO USE YOUR CARAVAN’S EQUIPMENT Day and Night Bed Makeup - Bermuda 8-81...
-
Page 138: Removable Drawers
HOW TO USE YOUR CARAVAN’S EQUIPMENT REMOVABLE DRAWERS FRONT WRAP ROUND SEATING To remove from the caravan, first locate and (Option) release the retaining strap on the side of the If you have purchased the wrap round unit. seating option for your new caravan please Once the strap has been released the unit note that the centre seat can be extended by can be slid left as Figure A. -
Page 139: Lift Up Bed Extensions (Where Fitted)
This lever must also be depressed in order to lower the flap. Drop Down Bunk (304 only) Fig 3 Bolt catch in the closed position Starting with the bunk locked in the upright position as shown in Figure 1. -
Page 140: Radio With Mp3 Connectivity
HOW TO USE YOUR CARAVAN’S EQUIPMENT Radio with MP3 Connectivity Details on how to set up and use the Radio will be contained in your document wallet. TELECO TV AERIAL Instructions for the reception of horizontal or vertical polarity signals In some areas certain TV signals are transmitted with horizontal polarity while others are transmitted with vertical polarity. - Page 141 HOW TO USE YOUR CARAVAN’S EQUIPMENT Connection to the amplifier Connect the lead exiting from the pole to the ANT input of the amplifier. Connect with the relevant lead, the TV connector of the amplifier with the television. Connect the amplifier to 12 Vdc source, making sure you do not invert the + and - terminals.
-
Page 142: How To Use Your Tv Aerial
HOW TO USE YOUR CARAVAN’S EQUIPMENT HOW TO USE YOUR TV AERIAL TROUBLESHOOTING GUIDE Digital TV set-up guide Check aerial/radio fuse If there is no power, check the 5 amp fuse Connect aerial and power located within the PDU marked radio is in Fix the TV to a working order. - Page 143 HOW TO USE YOUR CARAVAN’S EQUIPMENT Note: Sometimes transmitters are being repaired or upgraded Go to: http://www.digitaluk.co.uk/help_and_advice/engineering_works Check if signal is OK that day / week. Check there are no obstructions Is the vehicle outside in an open space? Check that the vehicle has no obstructions: House lean to/canopy Trees (also blowing in the wind) House or other buildings...
-
Page 144: Protect - Autowatch Alarm System (Where Fitted)
HOW TO USE YOUR CARAVAN’S EQUIPMENT PROTECT - AUTOWATCH ALARM Emergency Disarm SYSTEM (WHERE FITTED) Insert the touch-key briefly into the socket. Manufactured by Autowatch, The system is The alarm will turn off. designed to give years of trouble free Silent Arm and Disarm operation. -
Page 145: Al-Ko Trailer - Control
HOW TO USE YOUR CARAVAN’S EQUIPMENT AL-KO Trailer - Control AL-KO Automatic Trailer Control is an electronic control system that reacts quickly to maintain the stability of the car and caravan. The system continually monitors the stability of the caravan during a journey and operates when an unstable condition is encountered. -
Page 146: Whale Easi-Slide Socket
HOW TO USE YOUR CARAVAN’S EQUIPMENT Whale Easi-Slide Socket Additional Safety Information for Onboard Tank Fill, On Board Tank Fill +12v and How to open the socket lid Water In / Out Sockets ( Where Applicable) • For use in recreational vehicles with a typical water system pressurised up to 3 bar. -
Page 147: Mobile Internet (Option)
HOW TO USE YOUR CARAVAN’S EQUIPMENT Mobile Internet (Option) If this option is applicable, your router has already been installed in the optimum position within your vehicle. The location of the internal router may vary depending on vehicle layout. The information below outlines the basic setup and how to get online. - Page 148 HOW TO USE YOUR CARAVAN’S EQUIPMENT Getting Online 1. Turn on router and allow 2 to 3 minutes for the router to boot. Now your Roam is installed and you have inserted the SIM card, its time to get When ready, the router name will be connected.
- Page 149 HOW TO USE YOUR CARAVAN’S EQUIPMENT Factory Reset • Web User Interface to the username and At any time, the Roam router can be reset to password listed on the front of the router. its factory settings using the reset button on the side of the router.
-
Page 150: Pop-Up Wireless Charging And Usb Device (Where Fitted)
HOW TO USE YOUR CARAVAN’S EQUIPMENT Pop-up Wireless Charging and USB Device (Where Fitted) Your vehicle is fitted with a wireless charging device, as shown in the image below. Your device must contain wireless charging technology to be compatible with this charging station. -
Page 151: Security
SECURITY CRIS - THE CENTRAL SECURITY REGISTRATION AND Theft deterrent, prevention and security of IDENTIFICATION SCHEME your touring caravan is taken very seriously at CriS is the Central Registration & Erwin Hymer Group UK. That is why we have Identification Scheme that issues touring provided a combination of standard features caravan registration documents, equivalent to and optional extras designed to deter and... -
Page 152: Al-Ko Secure Wheel Lock (Option)
SECURITY AL-KO SECURE WHEEL LOCK Note: Read the operating instructions and (Option) act in accordance with them. Keep the operating instructions for general use. Follow You must register your key, should you fail to the safety instructions as well as the warning do this you will not be able to order a spare information. - Page 153 SECURITY Fig. 1 Fig. 2 Fig. 3 Fig. 4 Fig. 6 Fig. 5 Fig. 7 Fig. 8 Fig. 9 Fig. 10...
-
Page 154: Window & Chassis Marking
SECURITY WINDOW & CHASSIS MARKING ELECTRONIC TAGGING In conjunction with the CriS registration scheme, all touring caravans are electronically tagged during manufacture for added security and to ease vehicle identification. The security tag containing the individual identity of your caravan is concealed within the caravan body and can only be read by using a special decoder. -
Page 155: Care Of Your Caravan
CARE OF YOUR CARAVAN WHEELS CARE OF YOUR CARAVAN Do not use acidic cleaning products on the This section of the guide is devoted to the wheel bolts. care, cleaning and general preservation of your caravan in order to retain its showroom GLASS FIBRE REINFORCED PLASTIC condition. -
Page 156: Window Blinds & Flyscreens
CARE OF YOUR CARAVAN WINDOW BLINDS & FLYSCREENS COOKING EQUIPMENT To clean the blinds and flyscreens, moisten a All parts should be cleaned using warm soapy soft cloth or sponge with a small amount of water. Do not use abrasive cleaners, steel water and mild soap suds and gently wipe wool or cleansing powders. -
Page 157: Winterisation And Storage
CARE OF YOUR CARAVAN Taking care of your carpets: SHOWER TRAYS, SHOWER ROOM AND WASH BASIN FITTINGS Soiling (dirt, dust and abrasive matter) is the greatest threat to carpet. Door mats should Only clean your shower tray using soap and be cleaned frequently to prevent them from water. -
Page 158: Water Containers
CARE OF YOUR CARAVAN that the solution at full strength appears WATER CONTAINERS at all taps/showers). Allow to stand for All water remaining in any water the recommended period of time. container should be disposed of so that (iv) Drain the system down completely. the container is empty. -
Page 159: Chassis Mounted Spare Wheel Carrier
CARE OF YOUR CARAVAN CHASSIS MOUNTED SPARE WHEEL exposing the casing is detected. If the tyre CARRIER has suffered a violent impact e.g. against a kerb, it should be examined by a specialist as To gain access to your spare wheel lift the soon as possible. -
Page 160: Jacking
CARE OF YOUR CARAVAN (ii) Slacken off the wheel bolts on the wheel (x) Raise the corner steadies. to be changed. (xi) Lower the caravan to the ground. (iii) Ensure all corner steadies are in the up (xii) The wheel bolts should be tightened position before commencing jacking of ensuring that the torque is applied the caravan. -
Page 161: The Alko Caravan Chassis
CARE OF YOUR CARAVAN THE ALKO CARAVAN CHASSIS Damage to chassis members through impact etc. must not be straightened or welded. Chassis members Damaged chassis members must be The recommended tow vehicle coupling replaced. height is 350-420mm from the ground to the Drilling or welding of parts or centre of the ball when the vehicle is fully accessories... -
Page 162: Operating Instructions
CARE OF YOUR CARAVAN Operating instructions Stabiliser Unit: • To operate the Stabiliser (once coupled to the towball), simple press the stabiliser lever down as far as it will go (Fig. 4/Item Fig 1 Coupling handle (Fig. 1/Item 1), Stabiliser Fig 4 Lever (Fig. - Page 163 CARE OF YOUR CARAVAN 3) Close Stabiliser lever until resistance is Noises whilst driving felt (ie friction pads are in contact with the As a rule, the friction pads of the AKS 3004 ball but not yet under pressure). do not make a noise during driving. Any 4) If the arrow on the arm (Fig.
-
Page 164: Braking System Adjustment
CARE OF YOUR CARAVAN Overrunning device Jockey wheel The device housing is packed with grease on Lubricate wheel and screw thread assembly, but will require periodic periodically with grease. maintenance to ensure smooth operation of Brake linkage the braking system. All moving parts should be lubricated 1) Regrease the shaft bearings via the periodically to ensure their satisfactory... - Page 165 CARE OF YOUR CARAVAN pulled out it should extend between 5 and 8 mm (Fig. 8). (On tandem axles a double abutment is fitted to the front axle only). • Repeat for other wheel or wheels. • On tandem axles the brake cables from the rear axle should pass over this axle and cross over each other...
- Page 166 CARE OF YOUR CARAVAN • Finally, if the alloy road wheels have Chassis Lubrication Points been removed, re-tighten using a calibrated Torque Wrench to 130 Nm (Newton Metres) (96 lb-ft) - on all M12 wheel bolts - in sequence, i.e. North, South, East, West not clock or anticlockwise.
-
Page 167: Storage
STORAGE (xiii) It is recommended that you use a STORAGE suitable dehumidifier or place a bowl of LONG TERM & WINTER STORAGE salt within your caravan to absorb any moisture during the winter months. If the caravan is to be stored for any length of time, especially over the winter period, the CARAVAN COVERS following operations are recommended:... - Page 168 STORAGE 11-2...
-
Page 169: Caravan Warranty Cover
WARRANTY Three year manufacturer’s warranty CARAVAN WARRANTY COVER Year 1 warranty - Covers all original Introduction components, forming part of the original At Erwin Hymer Group UK we are confident product specification including plastic front that our new caravans are engineered using and rear panels, excluding normal wear and the latest manufacturing techniques and tear e.g. - Page 170 WARRANTY Reporting a fault service must be completed no more than 60 days either side of the In the unlikely event that you experience a anniversary of the date of purchase. problem with your caravan please contact your retailer. b) In Years 3 and 10 the service must be completed no more than 60 days It is with the retailer that your contract of sale on or before the anniversary of the...
-
Page 171: Non Warranty Repairs
WARRANTY Warranty work may only be undertaken • A maximum of Six Years’ Water Ingress by an Erwin Hymer Group UK Approved and Body Integrity Warranty Retailer/Service Centre. • Erwin Hymer Group UK will pay the costs The warranty is subject to the usual terms of remedial work to the repairer, only and conditions’... -
Page 172: Remedial Work
WARRANTY REMEDIAL WORK Erwin Hymer Group UK, together with its suppliers is continually undertaking extensive research into testing, remedial work procedures and materials such as structural bonding adhesives, gaskets and tapes. Therefore, if for any reason your new caravan is damaged or requires remedial work then we would recommend an approved Erwin Hymer Group UK Retailer or Service Centre should undertake such work. -
Page 173: Caravan Construction - Main Components
CARAVAN CONSTRUCTION WINDOWS CARAVAN CONSTRUCTION - Windows are all of a double glazed acrylic MAIN COMPONENTS construction and the door frame is extruded The following is a brief description of the aluminium. main components used in your caravan. More comprehensive descriptions can be INSULATION found in the equipment manufacturers Erwin Hymer Group UK caravans are built to... - Page 174 CARAVAN CONSTRUCTION 13-2...
- Page 175 ELECTRICAL DRAWINGS WIRING DIAGRAM - XPLORE 14-1...
- Page 176 ELECTRICAL DRAWINGS ROAD LIGHTS - XPLORE 14-2...
- Page 177 ELECTRICAL DRAWINGS WIRING DIAGRAM - AVANTE/CASITA 14-3...
- Page 178 ELECTRICAL DRAWINGS ROAD LIGHTS (AVANTE/CASITA) 14-4...
- Page 179 ELECTRICAL DRAWINGS WIRING DIAGRAM - AFFINITY/CAPIRO 14-5...
- Page 180 ELECTRICAL DRAWINGS ROAD LIGHTS - AFFINITY/CAPIRO 14-6...
- Page 181 ELECTRICAL DRAWINGS WIRING DIAGRAM - CRUSADER/CAMINO 14-7...
- Page 182 ELECTRICAL DRAWINGS ROAD LIGHTS - CRUSADER/CAMINO 14-8...
- Page 183 ELECTRICAL DRAWINGS WIRING DIAGRAM - BUCCANEER 14-9...
- Page 184 ELECTRICAL DRAWINGS ROAD LIGHTS - BUCCANEER 14-10...
-
Page 185: General Questions
GENERAL QUESTIONS GENERAL QUESTIONS Q: What is SoLiD construction? A: SoLiD construction is unique and our jointing system, coupled with Henkel’s tried and tested structural bonding adhesives, spreads the stresses and strains evenly across all joints and creates an impervious barrier to water ingress. Q: Where Can I Obtain Your Latest Brochure? A: Our latest brochures are available from Approved Retailers or can be viewed and printed from our website www.elddis.co.uk. - Page 186 GENERAL QUESTIONS Q: My Interior Lights Are Not Working, What Do I Do? A: It is possible that all of the 12V mains electrical equipment may not be operated simultaneously. Check fuses, battery connections and power supply (master light switch). Refer to your Retailer or Service Centre for further assistance.
- Page 187 GENERAL QUESTIONS duplicate certificate of conformity. Additionally, due to the age of your vehicle we are unable to account for any modifications made following the initial purchase. If you are looking to export the vehicle, we recommend the vehicle is taken for an Individual Vehicle Approval (IVA) or similar in the country of intended registration.
- Page 188 GENERAL QUESTIONS 15-4...
-
Page 189: Glossary
GLOSSARY Bunk Bed GLOSSARY This is a sleeping place, usually higher up 13 pin plug than a conventional bed. Often (but not The plug used to connect the caravans always) this can be folded or removed to electrical system to your towing vehicle to provide additional living space. - Page 190 GLOSSARY Dinette Gross Train Weight This is a popular style of seating This is also known as Combined Weight. The arrangement where two seats or settees face maximum permitted weight of an outfit as each other across a table. specified by the tow vehicle manufacturer. Earth Leakage Circuit Breaker Gross Vehicle Weight (GVW) ELCB Earth leakage circuit breaker - see...
- Page 191 GLOSSARY Kerb Weight NCC - National Caravan Council The only trade association representing This is the empty weight of a motor vehicle manufacturers, retailers and suppliers within as defined by the manufacturer. the vehicle industry. Layout Nose weight This is the interior design and details where The weight exerted on the tow bar.
- Page 192 GLOSSARY Road Lights Towing Limit The external lights used while the vehicle is See manufacturer’s braked towing limit and travelling. manufacturer’s unbraked towing limit. Roof Lights - See Roof Vent. Towing Mirrors Additional rear vision mirrors added to a Roof Vent towing vehicle to provide a greater width of Is an opening unit in the ceiling which lets in view to see past a caravan.
-
Page 193: Service Documents
SERVICE DOCUMENTS SERVICE DOCUMENTS TOURING CARAVANS - ANNUAL SERVICE RECORD In order to ensure your warranty remains valid an annual service must be carried out in accordance with the requirements of this handbook. You are responsible for any charges incurred for the service of your vehicle. If the annual service is performed by an authorised Erwin Hymer Group UK Approved Retailer / Service Centre or NCC Approved Workshop then Erwin Hymer Group UK Limited deems that the service has been performed correctly. - Page 194 SERVICE DOCUMENTS UNDERBODY (Caravans Only) (continued) Item Condition Remove brake drums - clean & check hub bearings & seals Clean brake shoes & check condition (incl. springs and expanders) Brake rods, cables & supports-check operation, lubricate and adjust Refit brake drums – fit new hub nuts and torque to manufacturers settings, adjust brakes &...
- Page 195 SERVICE DOCUMENTS APPLIANCES (check gas and electric operation) Item Condition Fridge - check operation from 12V, 230V & gas Hob - check operation Oven - check operation Grill and fan - check operation Water boiler – Check operation Heater - check operation and top up header tank with anti-freeze (where applicable), bleed as necessary Any additional permanently fitted appliances WATER SYSTEM...
- Page 196 SERVICE DOCUMENTS BODYWORK Item Condition Doors and windows - check all catches are present and operating correctly. Blinds and flyscreens - check condition and operation Roof - check condition of roof. Cab seats - check condition of the seats and seats belts Floor - check condition of floor Furniture - check condition of the furniture Damp Test - undertake a damp test and record all readings taken.
- Page 197 SERVICE DOCUMENTS 5th SERVICE 6th SERVICE DATE: DATE: RETAILERS STAMP: RETAILERS STAMP: I/We certify that an annual service has I/We certify that an annual service has been carried out in accordance with the been carried out in accordance with the manufacturers’...
- Page 198 SERVICE DOCUMENTS 17-6...
-
Page 199: Notification Of Change Of Ownership
CHANGE OF OWNERSHIP NOTIFICATION OF CHANGE OF OWNERSHIP If you purchase this vehicle as a used vehicle it may be possible to transfer the unexpired term of the warranty cover (up to a maximum of six years commencing at the original date of purchase from new). - Page 200 CHANGE OF OWNERSHIP 18-2...
-
Page 201: Notification Of Change To Name And Address
CHANGE OF ADDRESS NOTIFICATION OF CHANGE TO NAME AND ADDRESS In order that we can provide you with the very best level of service we ask that you keep us informed of any changes to your contact details. Should your details change please complete the attached form and post to us: Erwin Hymer Group UK Limited Customer Care Delves Lane Consett... - Page 202 CHANGE OF ADDRESS 19-2...
-
Page 203: Index
INDEX INDEX Water Systems - Sterilisation 10-4 Care of your caravan Alarm Changing a Wheel ....10-5 Autowatch Alarm System ..8-88 Charging System ......7-2 Alko Chassis ......13-1 Code of Practice ATC (Automatic Trailer Control) 8-89 Remedial Work ..... 12-4 Control Panel ...... - Page 204 Refrigerator ......8-47 Avante/Casita ....... 14-3 Reversing ........4-1 Affinity/Capiro ....... 14-5 Road Lights Buccaneer ......14-9 Affinity/Capiro ....... 14-6 Crusader/Camino ....14-7 Avante/Casita ....... 14-4 Xplore ........14-1 Buccaneer ......14-10 Crusader/Camino ....14-8 Xplore ........14-2 Rooflights ......... 8-62 20-2...
- Page 205 INDEX 20-3...
- Page 206 INDEX © Designed and Printed by Preset Graphics Ltd. Tel: 01332 549278. (MY2023. Ref: 21821) 20-4...
Need help?
Do you have a question about the 304 and is the answer not in the manual?
Questions and answers