
Subscribe to Our Youtube Channel
Related Manuals for MaxxGarden 21012


Summary of Contents for MaxxGarden 21012
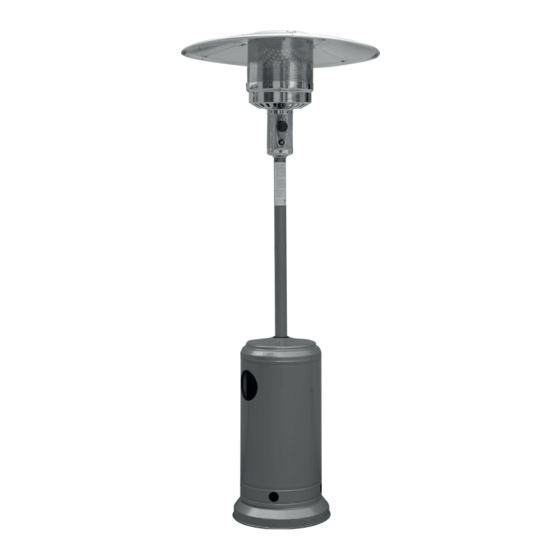
- Page 1 Terrasverwarmer GEBRUIKERSHANDLEIDING INSTRUCTION MANUAL NL: Terrasverwarmer EN: Electric heater Model: 21012...
-
Page 2: Table Of Contents
INHOUD Waarschuwing ............................3 Stand en locatie terrasverwarmer ......................5 Gasvereisten ............................... 5 Lekkagetest ..............................5 Werking en opslag ............................. 5 Reiniging en onderhoud ........................... 6 Onderdelen en specificaties ........................6 Montageonderdelen en procedures ...................... 7 Checklist voor problemen ........................10 - 2 -... -
Page 3: Waarschuwing
[NL] Gebruikershandleiding Bewaar de instructies voor toekomstig gebruik WAARSCHUWING VEILIGHEIDSVOORSCHRIFTEN LEES DEZE INSTRUCTIES ZORGVULDIG DOOR VOORDAT U UW NIEUWE TERRASVERWARMER GEBRUIKT. VOOR JOUW VEILIGHEID Als u gas ruikt: 1. Sluit het gas naar het toestel af. 2. Doof open vuur. 3. - Page 4 WAARSCHUWING LEES DE VOLGENDE VEILIGHEIDSRICHTLIJNEN ZORGVULDIG DOOR VOORDAT U HET TOESTEL GEBRUIKT • Gebruik de terrasverwarmer niet binnenshuis, dit kan persoonlijke letsels of materiële schade veroorzaken. • Deze terrasverwarmer is niet bedoeld voor installatie op recreatievoertuigen en / of boten. •...
-
Page 5: Stand En Locatie Terrasverwarmer
HEATER STAND AND LOCATION The heater is primarily for outdoor use only. Always ensure that PLAFOND CE I LIN G adequate fresh air ventilation is provided. STAND EN LOCATIE VAN DE TERRASVERWARMER 100 cm Always maintain proper clearance to combustible materials, i.e. top 100 cm •... -
Page 6: Reiniging En Onderhoud
more before turning the knob to desired temperature position. TO TURN OFF THE HEATER 1.Turn the variable control knob to PILOT position. 2.Press and turn the variable control knob to OFF position. DE KACHEL UITZETTEN 1. Draai de variabele bedieningsknop naar de PILOT-stand. -
Page 7: Montageonderdelen En Procedures
A. Constructie en kenmerken • Verplaatsbare terras- / tuinverwarmer met tankbehuizing • Behuizing in staal met poedercoating of roestvrij staal ASSEMBLY PARTS AND PROCE • Warmteafgifte van reflector B. Specificaties Tools needed: • Gebruik alleen propaan- of butaangas • Max. wattage: 13000 watt Open end wrench 10 &... - Page 8 Moer Tankbehuizing STEP 1 STAP 1 STAP 1 STEP 1 1-1. Plaats de 3 stuks paalbeugels op elke positie op 1-1. Put the 3 pcs post brackets on each position on the base as de basis zoals weergegeven in de afbeelding. shown in the picture.
- Page 9 STEP 4 STAP 4 STAP 4 STEP 4 4-1. Verwijder de 4 bouten van de brander. 4-1. Remove the 4 bolts from the burner. STEP 4 4-2. Steek de gasslang door de paal. 4-2. Put the gas hose through into the post. STEP 4 4-3.
-
Page 10: Checklist Voor Problemen
STEP 7 STAP 7 STAP 7 STEP 7 7-1. Breng de tankbehuizing omhoog en laat deze op 7-1. Bring up the tank housing and rest it on the post plate. de paalplaat rusten. 7-2. Connect the regulator to the gas tank and tighten it with adjustable 7-2. - Page 11 CORRECTE VERWIJDERING VAN DIT PRODUCT Om te voldoen aan de Europese richtlijn 2002/96 / EG betreffende oude elektrische en elektroni- sche apparatuur en de implementatie ervan in nationale wetgeving, moeten oude elektrische apparaten worden gescheiden van ander afval en op een milieuvriendelijke manier worden afgevoerd, b.v.
- Page 12 TABLE OF CONTENTS Caution ..............................14 Heater Stand and Location ........................15 Gas Requirements ............................. 15 Leakage Test ............................. 15 Operation and Storage ..........................15 Cleaning and Care ........................... 16 Parts and Specifications ........................... 16 Assembly Parts and Procedures ......................17 Problems Check List ..........................
- Page 13 [EN] Instruction Manual Please keep this instruction for future reference. WARNlNG SAFETY RULES PLEASE READ THE FOLLOWING SAFETY RULES PRlOR TO OPERATION OF THE HEATER FOR YOUR SAFETY If you smell gas: 1. Shut off gas to the appliance. 2. Extinguish any open flame. 3.
-
Page 14: Caution
CAUTION PLEASE READ CAREFULLY THE FOLLOWING SAFETY GUIDELINES BEFORE OPERATION. • Do not use the patio heater for indoors, as it may cause personal injury or property damage. • This outdoor heater is not intended to be installed on recreational vehicles and/or boats. •... -
Page 15: Heater Stand And Location
HEATER STAND AND LOCATION HEATER STAND AND LOCATION The heater is primarily for outdoor use only. Always ensure that CE I LIN G • The heater is primarily for outdoor use only. Always ensure that adequate fresh air ventilation is provided. adequate fresh air ventilation is provided. -
Page 16: Cleaning And Care
TO TURN OFF THE HEATER 1.Turn the variable control knob to PILOT position. 2.Press and turn the variable control knob to OFF position. TO TURN OFF THE HEATER 1. Turn the variable control knob to PILOT position. 2. Press and turn the variable control knob to OFF position. 3.Turn off the valve on the gas supply cylinder completely. -
Page 17: Assembly Parts And Procedures
A. Construction and characteristics Transportable terrace/garden heater with tank housing Casing in steel with powder-coating or stainless steel A. Construction and characteristics ASSEMBLY PARTS AND PROCEDU Heat emission from reflector • Transportable terrace/garden heater with tank housing • Casing in steel with powder-coating or stainless steel B. - Page 18 STEP 1 STEP 1 STEP 1 1-1. Put the 3 pcs post brackets on each position on the base as 1-1. Put the 3 pcs post brackets on each position on the base as shown in the picture. shown in the picture. 1-2.
- Page 19 STEP 4 STEP 4 STEP 4 4-1. Remove the 4 bolts from the burner. 4-1. Remove the 4 bolts from the burner. STEP 4 4-2. Put the gas hose through into the post. 4-2. Put the gas hose through into the post. STEP 4 4-3.
-
Page 20: Problems Check List
STEP 7 STEP 7 STEP 7 7-1. Bring up the tank housing and rest it on the post plate. 7-1. Bring up the tank housing and rest it on the post plate. 7-2. Connect the regulator to the gas tank and tighten it 7-2. - Page 21 CORRECT DISPOSAL OF THIS PRODUCT To comply with European Directive 2002/96/EC concerning old electric and electronic equipment and its implementation in national laws, old electri ctools have to be separated from other waste and disposed of in an environment-friendly fashion, e.g. by taking to a recycling deport. - 21 -...
- Page 22 ONS MAXXTOOLS TEAM HELPT JE MET: Vragen over je bestelling Klachten Onderdelen en handleidingen Heb je vragen of klachten contacteer ons en we helpen je graag verder. NOTRE EQUIPE MAXXTOOLS VOUS AIDERA VOLONTIÈRE AUX CAS SUIVANTS: TELEFOONSERVICE: Questions sur votre commande +32 (0) 11 191391 Réclamations Pièces et manuels...
Need help?
Do you have a question about the 21012 and is the answer not in the manual?
Questions and answers