Advertisement
Quick Links
Advertisement

Related Manuals for Hygge Aarhus


Summary of Contents for Hygge Aarhus
- Page 1 Aarhus USER MANUAL...
-
Page 3: Table Of Contents
TABLE OF CONTENT The Purpose and Benefit of a Booklet Assembly Instructions Operation of Your Electric Bike Best Practices Adjustment and Maintenance Troubleshooting FOREWORD The following operation manual is a guide to assist you. This manual is not a complete document on all aspects for the maintenance and repair of your bike. The electric bicycle you have purchased is not a complex object however, it is recommended that you consult a repair specialist if you have concerns as to your ability to assemble, repair, or maintain this product. - Page 4 ABOUT THIS MANUAL WHY YOU SHOULD READ THIS MANUAL This manual is written to help you to get the best performance, comfort, enjoyment, and safety when riding your new E-Bike. The manual describes specific care and maintenance procedures that help protect your warranty and ensure years of trouble-free use.
- Page 5 Always Wear a Helmet! Helmets significantly reduce the possibility and severity of head injuries. Always wear a helmet that complies with your state laws when riding the E-Bike. Check with your local police department for requirements in your community. Do not wear loose clothing that can become tangled in the moving parts of the E- Bike.
- Page 6 Keep Your E-Bikes in Safe Condition Check critical safety equipment before each and every ride Know the Law Cyclists are required to follow traffic rules. Additionally, some communities regulate the use of motorized bicycles regarding minimum age requirements and necessary equipment. Check with your local police department for specific details. Correct Frame Size When selecting a new E-BIKE, the proper frame size is a very important safety consideration.
-
Page 7: The Purpose And Benefit Of A Booklet
The Purpose and Benefit of this Booklet This booklet describes assembly and safe operation of your electric bicycle. Pictures are for reference only and may show the similar component from another model. Please read the entire user’s manual before riding your new electric bicycle ... - Page 8 E-bikes are for on road or improved trail use only and should not be used for riding rough trails. Damage to the bike may occur if used off road. Do not operate your electric bike after consuming any amount of alcohol or taking any drugs.
- Page 9 It is forbidden to be overloaded for the electric bicycle. If it is overloaded, the electrical parts will be damaged. (The plastic parts may disformed for the high temperature, or the fuse socket will be damaged for the high temperature) These are not under warranty.
-
Page 10: Assembly Instructions
Assembly Instructions This bicycle was fully assembled, inspected, and tuned at the factory and then partially disassembled for shipping. Your bike arrives in the shipping carton about 90% assembled. To ship the bike, the pedals, seat, front wheel and sometimes the handlebar are loosened or removed. - Page 11 The stem must be inserted to the Minimum depth or lower as indicated on the steer post to ensure the safety, see the picture. Tighten the stem screw located on the top of the handlebar stem. You may adjust the handlebar stem height by loosening the Allen key screw located underneath the stem.
- Page 12 Some models have a light/power meter console that attaches to the handlebar. Attach this with the plastic brackets and screws provided. The adjustment of the wheel: After loosening the wheel, please adjust it according to the recommend torque. Check and adjust the Front Brake Check and adjust the Front Brake ...
- Page 13 Adjust the rear brake For models with standard bike rear brakes: Remove the bolts and safety catches from the axle. Slip the wheel into the forks. Slip on the safety catches and then the nuts on both sides. Spin the wheel in order to check that it is straight, Adjust as necessary.
- Page 14 There are some small adjusting screws on the sides of the brake pad levers that can be used to adjust the distance of each side. If the distance of the two brake pads to the rim is different then adjust the spring screw on the two- brake arm of the fixed mount till the distance of the two sides is the same, making sure that it can brake efficiently.
-
Page 15: Operation Of Your Electric Bike
Attach the Pedals Pedals are marked „L‟ and „R‟ on axle end, Screw the pedal marked „L‟ into the left side of crank and R‟ to right. The right pedal attaches to the chain side crank arm with (clockwise) thread ... - Page 16 You should use the SHIMANO gear shifter at the handlebar to set the gears appropriately according to road conditions and pedal as usual, you will find that you need to exert a lot less effort and the e-bike travels faster and at a steadier speed.
- Page 17 Always charge your battery before it gets too low. If you let your pack run completely dead, it may not re-charge. It is a good idea to turn the key to the position OFF and remove your key after any ride so that it will not be left on accidentally.
- Page 18 Derailleur The gears or derailleur should only be shifted as you pedal to keep the derailleur in adjustment. The derailleur / shifting and pedaling are completely independent of the motor. The match of the electric bicycle and people...
-
Page 19: Adjustment And Maintenance
Adjustments and Maintenance Your e-bike is designed for regular road for a single person. Using your e-bike for extreme maneuvers, such as extreme off-road use, jumping, or carrying excessive load will damage the e-bike and could cause serious injury. - Page 20 Some instructions on battery maintenance and charging Please charge the battery for 6-10 hours after its energy is consumed for 50%-70% of its total energy, in this way, the battery life will be longer. If you leave the battery pack in your stock in less energy condition, it will sleep to die easy.
-
Page 21: Troubleshooting
airiness, temperature 0℃~45℃。No solarization, fire, waterlogging and mixing the battery together with corrosive substance during battery shipping and storage. Please let the key on the head of the battery case be "on" when you charge it. Please sure that there is no short-circuit in your wall socket for fear of burning out battery and causing danger. - Page 23 Regular Inspection List Before every ride, it is important to carry out the following safety checks 1. Brakes Ensure front and rear brakes work properly Ensure brake shoe pads are not over worn and are correctly positioned in relation to the rims ...
- Page 24 3. Steering Ensure handlebar and stem are correctly adjusted and tightened and allow proper steering Ensure that the handlebars are set correctly in relation to the forks and the direction of travel Check that the headset locking mechanism is properly adjusted and tightened.
- Page 25 Check headset, wheel bearing, pedal bearings and bottom bracket bearings and lubricate it regularly Cranks and pedals Ensure pedals are securely tightened to the cranks Check headset, wheel bearing, pedal bearings and bottom bracket bearings and lubricate it regularly 8.Cranks and pedals ...
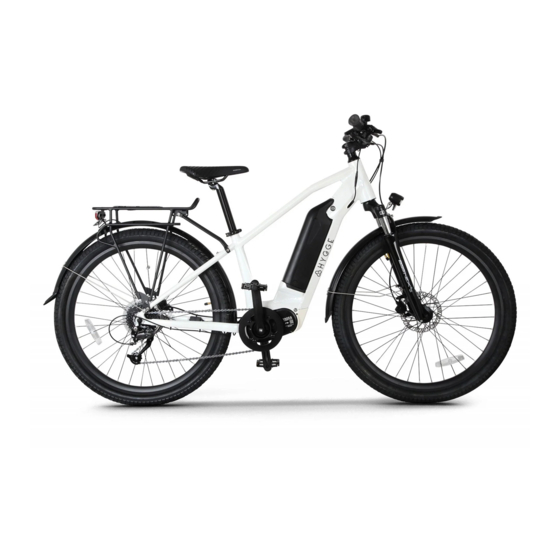
- Page 26 Aarhus Technical Specifications Model name Aarhus Wheel size Kenda 27,5''*1.95 BK Color White and Black Number Of Gears Shimano SL-M2010 9S Brakes Shimano BR-MT200 Disc Motor Fusion MID Motor 250W-YADEA Torque 80 Nm. Range 65-80 Km Max Speed 25 Km/h Bike Weight Net: 22 kg.
- Page 27 Strong, reliable, and beautifully crafted e-bikes...
Need help?
Do you have a question about the Aarhus and is the answer not in the manual?
Questions and answers