Advertisement
Quick Links
Advertisement

Subscribe to Our Youtube Channel
Related Manuals for mompush T629


Summary of Contents for mompush T629
- Page 1 T629 support@mompush.com www.mompush.com www.mompush.com...
- Page 2 WARNING: WARNING: WARNING: TO AVOID INJURY OR DEATH READ WARNING: CHECK THAT THE PRAM BODY OR SEAT THESE INSTRUCTIONS CAREFULLY BEFORE USE AND UNIT ATTACHMENT DEVICES ARE CORRECTLY ENGAGED KEEP FOR FUTURE REFERENCE. THE CHILD MAY BE BEFORE USE. HURT IF YOU DO NOT FOLLOW THESE INSTRUCTIONS. WARNING: THE PRODUCT IS NOT SUITABLE FOR WARNING: FOLLOW THE MANUFACTURERS RUNNING OR SKATING.
-
Page 3: Parts List
WARNING: Parts List • When assembling the bassinet, ensure the hook and loop tabs are fastened • over the metal rods. • Use the stroller on flat or gentle sloping surfaces. It may be unstable on • higher sloping and uneven surfaces - be aware of the possibility of the •... -
Page 4: Chassis Assembly
Chassis Assembly Chassis Assembly Unpack all contents and check that all parts are present before starting 2a. Push each rear wheel (C) into the sides of the rear wheel axle until you assembly. Please refer to the parts list. hear a “click”. Give them a tug to ensure they are attached securely. 1a. - Page 5 Bassinet Mode Chassis Assembly 1. On the rear of the seat unit (E), fasten the hook and loop panels as 3a. Insert each of the front wheel (B) pins into the center of the socket until illustrated. you hear a “click”. Give each wheel a firm tug to ensure they’re securely WARNING: attached.
- Page 6 Bassinet Mode Bassinet Mode 2b. Push the button located both sides of the seat connectors to remove the 4. Fasten the apron (G), secure the zip around the side and attach the hook seat unit from the chassis. and loop fasteners over the bumper bar. 5a.
- Page 7 Stroller Mode Bassinet Mode 1. Press buttons both sides of the seat connectors to remove the seat unit Suitable from birth in bassinet mode up to a maximum weight of 9kg or until from the chassis. the child can sit up unaided, roll over or push itself up on its hands and knees. WARNING: Never use in bassinet mode with seat unit forward facing.
- Page 8 Stroller Mode Stroller Mode 4a. The seat unit is reversible in stroller mode. It can be forward or rearward 3a. Re-attach the seat unit to the chassis. facing. Locate the backrest adjustment mechanism at the rear of the seat unit. Squeeze the clip on the reclining harness and gently pull up the backrest.
- Page 9 Harness Harness 4. To adjust the shoulder straps, move the slides as shown. 1. Slide the shoulder strap buckle onto the housing of the waist strap buckle. WARNING! Repeat for the other side. Always adjust the harness to fit your child 2.
-
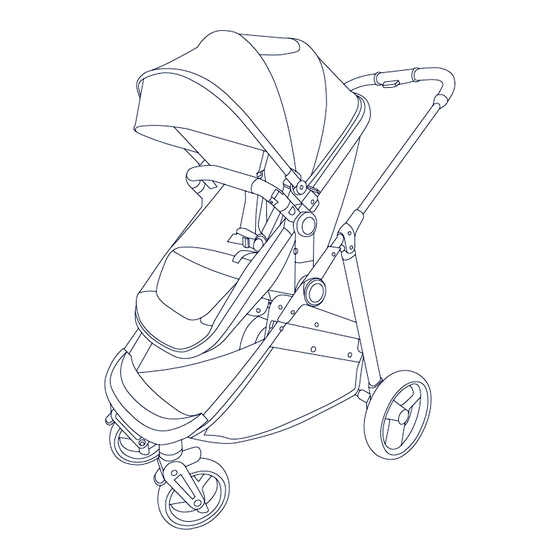
Page 10: Swivel Wheels
Canopy Adjustment Swivel Wheels 1. The canopy can be opened or closed by pulling forward or backward on When travelling along straight surfaces or uneven terrain, the front wheels may spin. the canopy rim. To lock the front swivel wheels into place, twist the top of the wheel socket so the notch is towards the front. - Page 11 Raincover Brakes Locate the raincover (H). Pull the raincover down over the stroller starting at Press down on the brake pedal to engage the brake. Listen for the “click” the top of the canopy and pulling down towards the footrest. signalling that the brake is locked.
- Page 12 Folding Folding 1a. If folding with the seat unit attached, it must be forward facing. If the seat 3a. Located on the handle, slide the folding lock button across to the right. unit is rearward facing, either remove the seat unit or change to forward facing At the same time, push up the safety lock.
-
Page 13: Care And Maintenance
Care and Maintenance • This product requires regular maintenance to ensure correct and safe • performance. • All assembly fittings are to be tightened properly. • Always check your stroller for loose screws, worn parts, torn material or • stitching. •...
Need help?
Do you have a question about the T629 and is the answer not in the manual?
Questions and answers