Table of Contents
Advertisement
Quick Links
Advertisement
Table of Contents

Summary of Contents for BUSIN TD5-C2
- Page 1 POS User’s Manual...
-
Page 2: Safety Cautions
POS User’s Manual(V1.0) Thank you for choosing BUSIN POS products, this manual is for parts of touch screen items of BUSIN, please read this manual carefully before using the products, please always keep this manual for future service or warranty. -
Page 3: Initial Setup
POS User’s Manual(V1.0) INITIAL SETUP 1. Unpacking Please check all of the parts when unpacking, please contact BUSIN if there is damages or missing parts. 2. Preparation before installation. Check shell , signs, labels, to see if they are correct. -
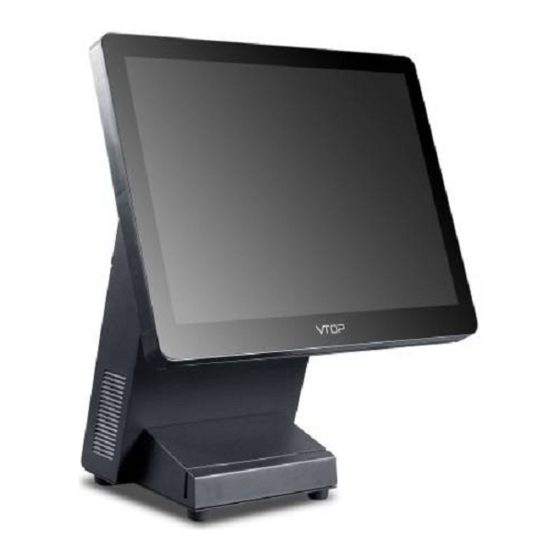
Page 4: Product Pictures
POS User’s Manual(V1.0) INTRODUCTION PRODUCT PICTURES Front View: 15" LED Display ( 1024 x 768 ) RFID Reader 15" 10 point Capacitive Touch Screen Hardware Power Switch,Power LED,HDD LED Cooling air outlet MSR slot... -
Page 5: Rear View
POS User’s Manual(V1.0) Rear View: Customer Display ( CD- V10E ) Cooling air inlet USB2.0*2 Cable entrance... -
Page 6: Mainboard Top View
POS User’s Manual(V1.0) Mainboard Top View: CLEAR CMOS INVERT AUDIO : LINE OUT/MIC IN BUZZER CUSTOMER DISPLAY ( COM1 ) USB2.0*1 USB2.0*2 PVDD1 USB2.0*2 PVDD2 LVDS POWER OUT ( 12V DC ) SATA COM2 POWER IN ( 12V DC ) COM3 KEYBOARD COM4... - Page 7 POS User’s Manual(V1.0) Mainboard Bottom View: MINIPCIE DDR3 Mainboard I/O Panel:...
-
Page 8: Product Specifications
POS User’s Manual(V1.0) PRODUCT SPECIFICATIONS MODEL TD5-C2 Processor Intel Celeron Processor 1037U 1.8Ghz System Memory 2 GB DDR3 (1 x 204-pin DDR3) Storage Device 64G SSD Power Supply 60W (12V/5A) External Power Adaptor Housing Color Dark Gray OS Support Windows XP, POSReady 2009, Windows 7, POSReady 7, Windows 8.1 Display &... -
Page 9: Connecting Cables
POS User’s Manual(V1.0) INSTALLATION GUIDES CAUTION: Before any installation or cable connection to the set, please always make certain that the system is turned off and the external power source to the set is removed to prevent electric hazard!Never touch any metal pin in the connectors or circuits to avoid high voltage hazard or electrostatic discharge damage unless the operator is well grounded. -
Page 10: Power On/Off Control
POS User’s Manual(V1.0) Step B: Put the wires through the line inlet inserted into the corresponding sockets on mainboard . Mainboard I/O ports Metal cover Mainboard Cable entrance POWER ON/OFF CONTROL Hardware Power Switch HDD LED Power LED 1. Hardware Power Switch This power switch controls the power on/off of the system. -
Page 11: Customer Display
2nd display monitor, have a qualified technician to set a software setting to supply the required power through the internal BIOS setting according to BUSIN technical information. Do not connect other monitor to this port before the power in this port is disabled. -
Page 12: Bios Setup
POS User’s Manual(V1.0) BIOS SETUP Introduction The purpose of this chapter is to describe the settings in the BIOS Setup program on this motherboard. The Setup program allows users to modify the basic system configuration and save these settings to CMOS RAM. -
Page 13: Using Setup
POS User’s Manual(V1.0) Using Setup In the BIOS setup utility, you will see General Help description at the top right corner, and this is providing a brief description of the selected item. Navigation Keys for that particular menu are at the bottom right corner, and you can use these keys to select item and change the settings. -
Page 14: Bios Reset
POS User’s Manual(V1.0) LCD Panel Type This item allows you to select flat panel type. Options: 640x480 LVDS / 800x600 LVDS /1024x768 LVDS1 (Default) / 1280x1024 LVDS / 1400x1050(RB) LVDS1 / 1400x1050 LVDS2 / 1600x1200 LVDS / 1366x768 LVDS / 1680x1050 LVDS / 1920x1200 LVDS / 1440x900 LVDS / 1600x900 LVDS / 1024x768 LVDS2 / 1280x800 LVDS / 1920x1080 LVDS / 2048x1536 LVDS BIOS RESET... - Page 15 POS User’s Manual(V1.0) Settings For Multiple Displays In WIN7 Please make sure all the cables of VGA and power plug was connected well. Use the mouse right click on the desktop,then select the Graphics Properties...
- Page 16 POS User’s Manual(V1.0) Use the mouse to click the Display options. Use the mouse to click the Multiple Displays options.
- Page 17 POS User’s Manual(V1.0) Select Display Mode.