Table of Contents
Advertisement
Available languages
Available languages
Quick Links
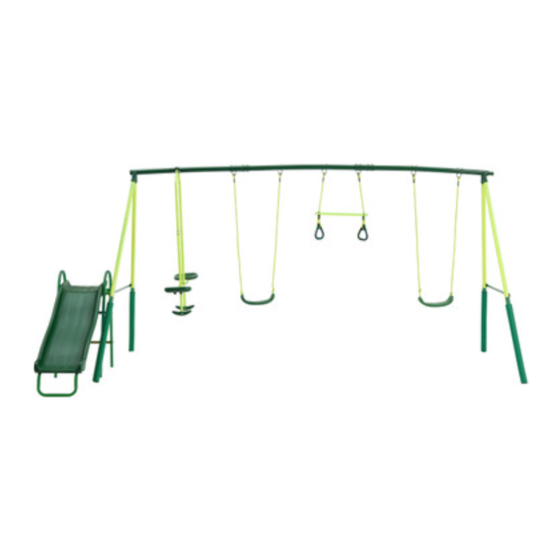
4 Unit Swing Set with Slide
ASSEMBLY, INSTALLATION, CARE, MAINTENANCE AND USE INSTRUCTIONS.
PLEASE READ ALL SAFETY INFORMATION PRIOR TO USE.
WARNING: READ THESE MATERIALS PRIOR TO ASSEMBLING
POUR LE MANUEL D'INSTRUCTIONS EN FRANÇAIS, VOIR LA PAGE 37.
WARNING: To ensure your safety, please do not attempt to assemble this swing set
without reading this instruction manual carefully. Failure to comply with this warning
may result in injury and/or property damage.
• This product includes small parts/accessories that are not suitable for children under 3
years of age as they may cause a choking hazard.
• This product should be assembled by 2 adults.
• Only use this product on a soft, flat level surface.
• DO NOT ALLOW CHILDREN TO PLAY ON THIS SWING SET UNSUPERVISED!
CONSTANT ADULT SUPERVISION IS REQUIRED.
• This product is designed for domestic use only.
S002379
Instruction Manual
ATTENTION!
AND USING THIS SWING SET
Advertisement
Chapters
Table of Contents

Summary of Contents for Uncle Bills Asia Pacific S002379
- Page 1 4 Unit Swing Set with Slide S002379 Instruction Manual ATTENTION! ASSEMBLY, INSTALLATION, CARE, MAINTENANCE AND USE INSTRUCTIONS. PLEASE READ ALL SAFETY INFORMATION PRIOR TO USE. WARNING: READ THESE MATERIALS PRIOR TO ASSEMBLING AND USING THIS SWING SET POUR LE MANUEL D’INSTRUCTIONS EN FRANÇAIS, VOIR LA PAGE 37.
-
Page 2: Table Of Contents
Languages English Français Contents Warnings Tools Required Parts List Assembly Instruction Warning Assembly Instructions Warranty information S002379 4 unit swing set... -
Page 3: Warnings
If any parts are missing, do not return to the store. Please call customer service toll-free number listed on the cover page for assistance. Store the product back in the original box and do not begin to install until all parts are obtained. S002379 4 unit swing set... - Page 4 For swings, the surface should extend, in back and front, twice the height of the suspending bar. You should consult a local contractor about ways to secure the product in your location. Do not S002379 4 unit swing set...
- Page 5 The playground equipment must be properly anchored, stored away or restricted from use during inclement weather such as heavy winds or severe weather storms. You should consult a local contractor about ways to anchor the product in your location. S002379 4 unit swing set...
- Page 6 14. ALWAYS make sure children remove their bike or other sports helmets before playing on the swing set. 15. DO NOT allow children to slide down the slide head first. S002379 4 unit swing set...
- Page 7 5. Verify that the chains are secured at both ends and tightened, so that there is no loose chain hanging that can result in choking hazard. S002379 4 unit swing set...
- Page 8 3. Twist the corkscrew anchor into the ground until only the end with the hook is above the ground and next to the leg. Insert the hook into the bottom opening of the leg. 4. Ensure that the hook is secured onto the leg opening. S002379 4 unit swing set...
- Page 9 4. Place 2 inches of brick or gravel underneath the leg 5. Use about 45 lbs. of concrete per leg 6. Cover the concrete with dirt and protective surface material 7. Allow 6-7 days for the concrete to dry properly S002379 4 unit swing set...
- Page 10 6. Reinstall any plastic parts, such as swing seats or any other items that were removed for the cold season. 7. Rake and check depth of loose fill protective surfacing materials to prevent compaction and to maintain appropriate depth. Replace as needed. S002379 4 unit swing set...
- Page 11 4. All plastic parts can be recycled, take it to your local recycling center. Do not let children play with any disassembled parts meant for disposal, such as chains, slide, tubing, bolts, nuts, screws, etc. S002379 4 unit swing set...
-
Page 12: Tools Required
Tools Required Description Included Special Socket Wrench Tape Measure Hammer Wrench Wrench Flat Head Screwdriver Philips Head Screwdriver Large Allen Key Medium Allen Key Small Allen Key S002379 4 unit swing set... -
Page 13: Parts List
Hardware for main frame assembly Part No. Description Bolt 5/16” x 2-1/2” (8 x 64mm) Bolt 5/16” x 2-3/4” (8 x 69mm) Nylon nut 5/16” (8mm) Plastic cap with Arc washer Arc washer 5/16” (8mm) Washer 5/16” (8mm) S002379 4 unit swing set... - Page 14 Bolt 5/16”x1” (8 x 25.4mm) Nylon nut 5/16” (8mm) Parts list for glide ride assembly Part No. Description L1-N Top section L3-N Glide seat support Tube Cap Small nylon bearing Large nylon bearing Glide seat Footrest S002379 4 unit swing set...
- Page 15 Cap bolt 1/4”x1/2” (6.4 x 13mm) Cap nut 1/4” (6.4mm) Nut 1/4” (6.4mm) Spring washer (large) Spring washer (medium) Parts list for swing seat assembly Part No. Description PVC covered chain Eyebolt with attachment bolt Swing seat S002379 4 unit swing set...
- Page 16 Plastic cap (with flat washer) Parts list for trapeze assembly Part No. Description Trapeze Rubber cap Eyebolt with chain Hardware for trapeze assembly Part No. Description Plastic cap (with arc washer) Nylon nut 5/16” (8mm) S002379 4 unit swing set...
- Page 17 Bolt 1/4”x1-1/2” (6.4 x 38mm) Bolt 1/4”x4-1/2” (6.4 x 114mm) Spring washer Cap nut 1/4” (6.4mm) Cap bolt 1/4”x1/2” (6.4 x 13mm) Spring washer (small) Bolt 1/4”x3” (6.4 x 76mm) Bolt 1/4” x2-1/4” (6.4 x 57mm) S002379 4 unit swing set...
-
Page 18: Assembly Instruction Warning
2. Once you have finished assembling each component of the play set, make sure to go back over each step and properly tighten all nuts, bolts and plastic caps. Check the entire unit to ensure all parts are properly assembled before allowing children to use the swing set equipment. S002379 4 unit swing set... -
Page 19: Assembly Instructions
STEP 1 -Assemble the top bar frame of the swing set Connect A1, A2 and A3 secure with B1, B3, B4 and B5 as shown below. NOTE: All round holes should be facing up and concave holes facing down. S002379 4 unit swing set... - Page 20 STEP 2 -Assemble the support legs of swing set 1. Connect A1 to A4 and secure using 81, 85, 84 and 83 as shown below. 2. Repeat the above step for the right side of the swing set (A3 and A4, A5). S002379 4 unit swing set...
- Page 21 STEP 3 - Assemble the support legs of swing set 1. Connect A4 to A5 and secure using B1, B5, B4 and B3 as shown below. 2. Repeat the above step for the right side of the swing set (A3 and A4, A5). S002379 4 unit swing set...
- Page 22 STEP 4 - Attach the crossbar to the support legs. 1. Attach A6 to the outer side of A5 and secure using B2, B6, B4 and B3. 2. Attach A7 to the outer side of A5 and secure using B2, B6, B4 and B3. S002379 4 unit swing set...
- Page 23 Assembly Instructions (cont) S002379 4 unit swing set...
- Page 24 Assembly Instructions (cont) STEP 5 - Glide Ride assembly 1. Attach L4 and L3 to A3 using N3R, L5 and N7 as shown. Use special socket wrench and screw driver to tighten N3R and N7. S002379 4 unit swing set...
- Page 25 1. Insert L1-N (straight end) into MS and secure with N4 and N12 on both sides. 2. Attach M1 to the top of L1-N (curved end). Align holes and insert M2. 3. Attach L1-N to L3 on both sides and secure with N2R and N10. S002379 4 unit swing set...
- Page 26 Assembly Instructions (cont) STEP 7- Glide ride assembly (continued) 1. Attach L3-N to L1-N on both sides and secure with N5, M3, N11 and N8. S002379 4 unit swing set...
- Page 27 Assembly Instructions (cont) STEP 8 - Glide ride assembly (continued) Attach M4 to L3-N and secure with N1, N6 and N9. S002379 4 unit swing set...
- Page 28 2. Connect swing seat to the chains by inserting J3 through K1 and secure with J3, J9 and J6 as shown in Diagram B. 3. Repeat the above steps to assemble A3 in the same manner as A1. S002379 4 unit swing set...
- Page 29 NOTE: Do not over-tighten the nuts and bolts at every step. Do not snap in the cover of plastic cap until you have finished the assembly of each step and went back to tighten all of the nuts and bolts. S002379 4 unit swing set...
- Page 30 NOTE: Do not over-tighten the nuts and bolts at every step. Do not snap in the cover of plastic cap until you have finished the assembly of each step and went back to tighten all of the nuts and bolts. S002379 4 unit swing set...
- Page 31 NOTE: Do not over-tighten the nuts and bolts at every step. Do not snap in the cover of plastic cap until you have finished the assembly of each step and went back to tighten all of the nuts and bolts. S002379 4 unit swing set...
- Page 32 NOTE: Do not over-tighten the nuts and bolts at every step. Do not snap in the cover of plastic cap until you have finished the assembly of each step and went back to tighten all of the nuts and bolts. S002379 4 unit swing set...
- Page 33 NOTE: Do not over-tighten the nuts and bolts at every step. Do not snap in the cover of plastic cap until you have finished the assembly of each step and went back to tighten all of the nuts and bolts. S002379 4 unit swing set...
- Page 34 WARNING - Do not let children use the swing set equipment until it is properly assembled and anchored. S002379 4 unit swing set...
-
Page 35: Warranty Information
Photos of the product, and scans of receipts, may be requested to assist with your claim. S002379 4 unit swing set... - Page 36 9am – 4pm Monday to Saturday (excluding Public Holidays) This product is warranted and distributed by: Uncle Bills Asia Pacific Pty Ltd. © 2019 Uncle Bills Asia Pacific Pty Ltd. . Version No: 1.0 Issue Date: January 2020 S002379 4 unit swing set...
- Page 37 Portique 4 agrès avec toboggan S002379 Manuel D’instructions ATTENTION! INSTRUCTIONS D’ASSEMBLAGE, D’INSTALLATION, D’ENTRETIEN ET D’UTILISATION. VEUILLEZ LIRE TOUTES LES CONSIGNES DE SÉCURITÉ AVANT UTILISATION. AVERTISSEMENT: LIRE ATTENTIVEMENT CES INSTRUCTIONS AVANT L’ASSEMBLAGE ET L’UTILISATION DE CE PORTIQUE AVERTISSEMENT : Pour garantir votre sécurité, veuillez ne pas essayer d’assembler ce portique avant d’avoir lu attentivement ce manuel d’instructions.
- Page 38 Langues Anglais Français Contenu Avertissements Outils nécessaires Liste des pièces Avertissements relatifs à l’assemblage Instructions d’assemblage Garantie S002379 4 unit swing set...
- Page 39 Contactez le numéro gratuit de notre service clientèle inscrit sur la page de couverture pour obtenir de l’aide. Replacez le produit dans son emballage d’origine et ne commencez pas l’installation avant d’avoir obtenu tous les éléments manquants. S002379 4 unit swing set...
- Page 40 (pour les équipements jusqu’à 8 pieds (2,44 m) de hauteur) ou de sable ou gravier fin (pour les équipements jusqu’à 5 pieds (1,52 m) de hauteur) afin d’absorber les chocs. La terre et S002379 4 unit swing set...
- Page 41 La meilleure méthode est la création d’un pied en béton qui servira de base d’ancrage. Indépendamment de la méthode choisie, le produit doit toujours être sécurisé par un dispositif d’ancrage. S002379 4 unit swing set...
- Page 42 Il est recommandé de consulter un professionnel afin de connaître les méthodes de fixation les plus adaptées au lieu d’installation de votre produit. S002379 4 unit swing set...
- Page 43 13. Les enfants doivent TOUJOURS porter une tenue adaptée pour jouer, par ex. porter des chaussures ajustées avec semelle en caoutchouc, retirer les objets amples ou pointus comme les bijoux, accessoires capillaires ou écharpes pouvant s’emmêler dans l’équipement ou entraîner des blessures. S002379 4 unit swing set...
- Page 44 4. Les éléments en acier et en plastique qui composent votre produit sont sujets à une usure normale. Une détérioration progressive des matériaux est normale, sa vitesse S002379 4 unit swing set...
- Page 45 être installé. Tous les ancrages doivent être situés sous le niveau du sol afin d’éviter les chutes. Il est recommandé de consulter un professionnel afin de choisir la méthode d’ancrage la plus adaptée au lieu d’installation de l’équipement. S002379 4 unit swing set...
- Page 46 4. Placer 5 cm de brique ou de gravier sous le pied. 5. Utiliser environ 20 kg de béton par pied. 6. Recouvrir le béton de terre puis d’un revêtement de protection. 7. Laisser sécher le béton durant 6 à 7 jours. S002379 4 unit swing set...
-
Page 47: Avertissements
Il est obligatoire de conserver une distance au sol minimale de 8 pouces (21 cm). AVERTISSEMENT Veuillez ancrer correctement le portique afin de réduire le risque de blessures ou de décès. Lorsqu’il est utilisé sans ancrage approprié, le portique peut être dangereux et se renverser. S002379 4 unit swing set... - Page 48 Remplacer si nécessaire. 3. Ratisser et vérifier l’épaisseur du revêtement de protection en vrac afin d’éviter le compactage et de conserver une épaisseur adaptée. Remplacer si nécessaire. S002379 4 unit swing set...
- Page 49 4. Tous les éléments en plastique peuvent être recyclés, veuillez les déposer dans votre centre de recyclage local. Ne pas laisser les enfants jouer avec des éléments désassemblés destinés à l’élimination, comme les chaines, le toboggan, les éléments de structure, les boulons, les écrous, les vis, etc. S002379 4 unit swing set...
-
Page 50: Outils Nécessaires
Outils nécessaires Description Inclus Clé à douille spéciale Mètre ruban Marteau Clé Clé Tournevis à tête plate Tournevis à tête cruciforme Clé Allen grand format Clé Allen moyen format Clé Allen petit format S002379 4 unit swing set... -
Page 51: Liste Des Pièces
Boulon 5/16” x 2-1/2” (8 x 65 mm) Boulon 5/16” x 2-3/4” (8 x 69 mm) Écrou nylon 5/16” (8 mm) Capuchon en plastique avec rondelle courbe Rondelle courbe 5/16” (8 mm) Rondelle 5/16” (8 mm) S002379 4 unit swing set... - Page 52 Boulon 5/16”x1” (8 x 25,4 mm) Liste des pièces pour l’assemblage de la balançoire face-à-face Pièce n°. Description Qté L1-N Barre supérieure L3-N Support d’assise Capuchon de tube Petit roulement nylon Grand roulement nylon Assise de balançoire face-à-face Repose-pieds S002379 4 unit swing set...
- Page 53 Écrou 1/4” (6,4 mm) Rondelle élastique (grande) Rondelle élastique (moyenne) Liste des pièces pour l’assemblage de la balançoire Pièce n°. Description Qté Chaine avec revêtement PVC Boulon à crochet avec boulon de fixation Assise de balançoire S002379 4 unit swing set...
- Page 54 Liste des pièces pour l’assemblage du trapèze Pièce n°. Description Qté Trapèze Capuchon en caoutchouc Boulon à crochet avec chaine Matériel pour l’assemblage du trapèze Pièce n°. Description Qté Capuchon en plastique (avec rondelle courbe) Écrou nylon 5/16” (8 mm) S002379 4 unit swing set...
- Page 55 Boulon 1/4”x4-1/2” (6,4 x 114 mm) Rondelle élastique Écrou borgne 1/4” (6,4 mm) Boulon 1/4”x1/2” (6,4 x 13 mm) Rondelle élastique (petite) Boulon 1/4”x3” (6,4 x 76 mm) Boulon 1/4” x2-1/4” (6,4 x 57 mm) S002379 4 unit swing set...
-
Page 56: Avertissements Relatifs À L'assemblage
écrous et capuchons en plastique. Vérifier l’intégralité de la structure de jeu afin de garantir que tous les éléments sont correctement assemblés avant d’autoriser les enfants à utiliser le portique. S002379 4 unit swing set... -
Page 57: Instructions D'assemblage
Connecter A1, A2 et A3, et sécuriser avec B1, B3, B4 et B5 comme indiqué ci-dessous. REMARQUE : Tous les trous ronds doivent être orientés vers le haut et les trous concaves vers le bas. S002379 4 unit swing set... - Page 58 ÉTAPE 2 - Assembler les pieds du portique 1. Connecter A1 avec A4 et sécuriser avec 81, 85, 84 et 83 comme indiqué ci-dessous. 2. Répéter l’étape précédente pour le côté droit du portique (A3 et A4, A5). S002379 4 unit swing set...
- Page 59 ÉTAPE 3 - Assembler les pieds du portique (suite) 1. Connecter A4 avec A5 et sécuriser avec B1, B5, B4 et B3 comme indiqué ci-dessous. 2. Répéter l’étape précédente pour le côté droit du portique (A3 et A4, A5). S002379 4 unit swing set...
- Page 60 ÉTAPE 4 - Fixer la barre transversale sur les pieds du portique 1. Fixer A6 sur la face extérieure de A5 et sécuriser avec B2, B6, B4 et B3. 2. Fixer A7 sur la face extérieure de A5 et sécuriser avec B2, B6, B4 et B3. S002379 4 unit swing set...
- Page 61 Instructions d’assemblage (suite) S002379 4 unit swing set...
- Page 62 1. Fixer L4 et L3 sur A3 avec N3R, L5 et N7 comme indiqué. Utiliser la clé à douille spéciale et un tournevis pour serrer N3R et N7. UTILISER LA CLÉ À DOUILLE SPÉCIALE ET UN TOURNEVIS POUR SERRER N7. S002379 4 unit swing set...
- Page 63 1. Insérer L1-N (extrémité droite) dans MS et sécuriser avec N4 et N12 des deux côtés. 2. Fixer M1 sur le haut de L1-N (extrémité incurvée). Aligner les trous et insérer M2. 3. Fixer L1-N sur L3 des deux côtés et sécuriser avec N2R et N10. S002379 4 unit swing set...
- Page 64 ÉTAPE 7 - Assemblage de la balançoire face-à-face (suite) 1. Fixer L3-N sur L1-N des deux côtés et sécuriser avec N5, M3, N11 et N8. Trous concaves vers le haut Trous ronds vers le bas S002379 4 unit swing set...
- Page 65 Instructions d’assemblage (suite) ÉTAPE 8 - Assemblage de la balançoire face-à-face (suite) 1. Fixer M4 sur L3-N et sécuriser avec N1, N6 et N9. S002379 4 unit swing set...
- Page 66 2. Fixer l’assise de la balançoire aux chaines en insérant J3 à travers K1 et sécuriser avec J3, J9 et J6 comme indiqué sur le schéma B. 3. Répéter les étapes précédentes pour assembler A3 comme A1. S002379 4 unit swing set...
- Page 67 2. Sécuriser avec S3 et P4 comme indiqué sur le schéma suivant. REMARQUE : Ne pas serrer excessivement les écrous et boulons à chaque étape. Ne pas refermer les capuchons en plastique avant l’assemblage complet et le resserage de l’intégralité des écrous et boulons. S002379 4 unit swing set...
- Page 68 REMARQUE : Ne pas serrer excessivement les écrous et boulons à chaque étape. Ne pas refermer les capuchons en plastique avant l’assemblage complet et le resserage de l’intégralité des écrous et boulons. S002379 4 unit swing set...
- Page 69 (dans le sens de l’avant du toboggan) REMARQUE : Ne pas serrer excessivement les écrous et boulons à chaque étape. Ne pas refermer les capuchons en plastique avant l’assemblage complet et le resserage de l’intégralité des écrous et boulons. S002379 4 unit swing set...
- Page 70 REMARQUE : Ne pas serrer excessivement les écrous et boulons à chaque étape. Ne pas refermer les capuchons en plastique avant l’assemblage complet et le resserage de l’intégralité des écrous et boulons. S002379 4 unit swing set...
- Page 71 1. Placer Y1 entre X1-N et A6 et sécuriser avec Y1, Z7, Z6 et Z3, Z5. REMARQUE : Ne pas serrer excessivement les écrous et boulons à chaque étape. Ne pas refermer les capuchons en plastique avant l’assemblage complet et le resserage de l’intégralité des écrous et boulons. S002379 4 unit swing set...
- Page 72 Vous avez terminé l’assemblage du portique. Veuillez vérifier soigneusement l’intégralité des éléments et le serrage des écrous et boulons avant d’utiliser l’équipement de jeu. AVERTISSEMENT - Ne pas laisser les enfants utiliser le portique avant qu’il ne soit correctement assemblé et ancré. S002379 4 unit swing set...
-
Page 73: Garantie
Des photos du produit et des copies des reçus pourront vous être demandées pour vous assister. S002379 4 unit swing set... - Page 74 De 9 h à 16 h, du lundi au samedi (hors jours fériés) Ce produit est garanti et distribué par : Uncle Bills Asia Pacific Pty Ltd. © 2019 Uncle Bills Asia Pacific Pty Ltd. . Version n°: 1.0 Date de publication : Janvier 2020...
Need help?
Do you have a question about the S002379 and is the answer not in the manual?
Questions and answers