
Summary of Contents for Lux Blox Sea Adventure Yellow Submarine
- Page 1 Sea Adventure Yellow Submarine i r u _ i l u INSTRUCTIONS 10 black squares 2 trigon wheels 180 yellow squares 4 square wheels 10 black trigons 6 #2 small axles 25 yellow trigons 4 #7 large axles For more information go to www.luxblox.com...
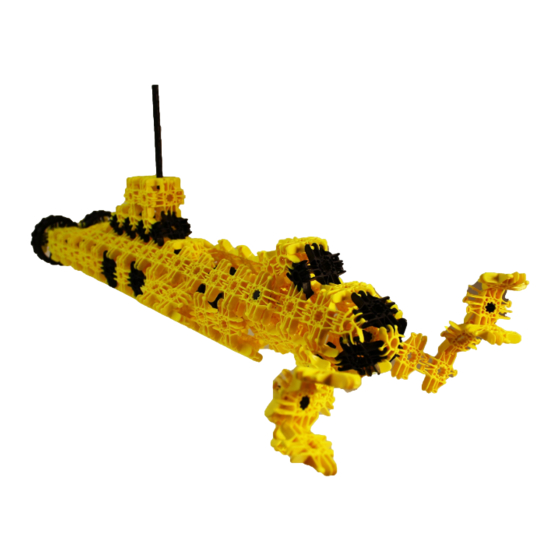
- Page 2 Constructing the Main Submarine Periscope Conning Tower Mini Submarine Bay Propeller Aft Hydroplane Forward Hydroplane Hull Snap together the main hull configuration on a flat surface...
- Page 3 Decompression chamber bulkhead Snap together the decompression chamber bulkhead so the dimples are facing out. This will permit the bulkhead to attach to the opening in the hull...
- Page 4 Attach decompression chamber Fold main hull and attach to decom- pression chamber and forward and aft bulkheads...
- Page 5 Front view of main hull Rear view of main hull Top of tower Lay out the conning tower part with the dimples facing up and then attach the conning tower sections to the rectangualr opening on the top of the hull...
- Page 6 Conning tower Top of tower assembly Attach the top of the conning tower starting at the back and going to the front, as shown.
- Page 7 Aft bulkhead assembly Pre-assemble the aft bulkeads as shown with the dimples facing up and then fold them Aft bulkheads up into cubes Attach the aft bulkheads to the main submarine hull as shown...
- Page 8 Pre-assemble the parts of the propellers and aft hydroplanes The aft hydro planes also act as rudders and should be free to move from side to side The propeller’s gears should mesh together and move each other Insert the #7 long axles so the three Assemble the three-square spacer Slide two large wheels over the axles keys and three spaces are exposed...
- Page 9 Flip the main sub and attach the bottom of the mini Pre-assemble the mini submarine bay by laying submarine bay to the botttom of the main submarine it flat with dimples facing up Attach the top of the mini submarine bay to the top two remaining sections of the main submarine forward bulkhead...
- Page 10 Conning tower Propellers and aft bulkhead Starboard bay Hull attachment arm Starboard robotic arm attachment Making the mini submarine Hull Conning tower Aft bulkhead and propellers...
- Page 11 Rear conning tower wall Assemble mini submarine hull Attach the conning tower to the rectangular opening in the top of the hull (the rear conning tower wall was already attached to the hull pre-assembly Assemble and attach the aft bulkhead to the rear hull of the mini submarine Lay out the propellers and propeller shaft, the mini submarine bay attachment arms, and the robotic arm...
- Page 12 Insert propeller shaft this far Slide on spacer and second propeller Slide on first propeller Mini submarine bay attachment arm Robotic arm attachment Robotic arm attachment Bay attachment arm Make sure that the axles go all the way into the hull so the attachments can freely turn to allow for the robotic arms and the bay attachments to work well...
- Page 13 Periscope Clamp mini submarine to main submarine here and shaft Mini submarine shaft inserts into the front of the main submarine hull for added stability and support Bay clamp...
- Page 14 Robotic Arms Pre-assemble the left and right robotic arms and their hands as shown...
- Page 15 Attach the port (left) arm to the arm attachment as shown Attach the starboard (right) arm to the arm attachment as shown You can adjust the small axles by pull- ing them so the key goes into the hole to lock your arms to hold a position. The robotic arms should have a large degree of freedom to access objects all around the vessel, including...
- Page 16 Check out more amazing Lux Blox products at www.luxblox.com...
Need help?
Do you have a question about the Sea Adventure Yellow Submarine and is the answer not in the manual?
Questions and answers