Table of Contents
Advertisement
Quick Links
Advertisement
Table of Contents

Summary of Contents for Modern Sounds Pluto
- Page 1 Pl o...
- Page 2 C LO C K P R E A D H U F F L E C H A RO N T Y X T E P T E P I N V E RT T H R E H O L D TO U C H L E V E L E Q U E N C E 1...
-
Page 3: Table Of Contents
Contents Introduction Features Overview Moons Sequence 1 + Voice 1 Sequence 2 + Voice 2 Effects Scale Back panel Power Basics N I X K E R B E RO H Y D R A W I DT H Battery Getting started Patching basics First patch... - Page 4 Listen mode MIDI MIDI in MIDI out Configuring MIDI channels MIDI control change CV out Sync Pluto to other devices Set CLOCK to external sync MIDI clock in SYNC in Sync other devices to Pluto MIDI clock out SYNC out...
-
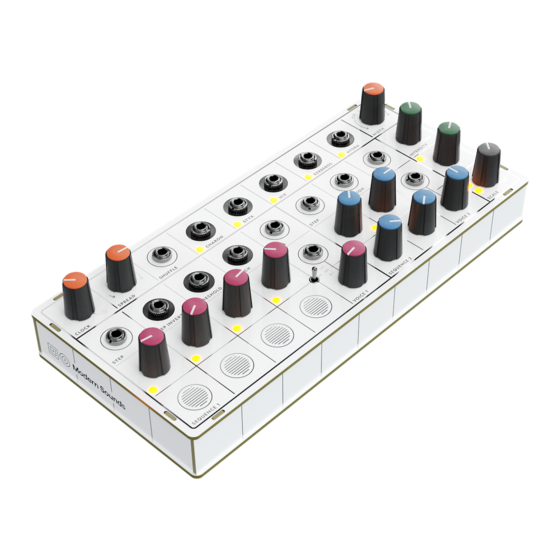
Page 5: Introduction
Introduction Pluto is a compact and portable synthesizer with abilities that belie its small size. Five channels of modulation (named for the five moons of Pluto), two voices, two sequencers, a mini-keyboard, and built-in effects make Pluto its own complete sound environment, but it can happily play other devices. -
Page 6: Overview
Overview Moons (Orange knobs) The moons of Pluto the planet were an inspiration for the main modulation sources on Pluto the instrument. Sequence 1 + Voice 1 (Magenta knobs) The first of two Sequencer-Voice combinations can be played with the four touch keypads or controlled with pulse signals. The sequencer is tied to Voice 1, which has 3 distinct modes. -
Page 7: Effects
Effects (Green knobs) Both voices run through the effects section which produces analog-style delay, glitchy delays, reverb, shimmer reverb, and loops. Scale (Gray knob) The SCALE knob controls which notes are played by the sequencers. Select from unquantized, a series of built-in scales, or control the quantization with MIDI or audio. -
Page 8: Power
Turn Pluto on by sliding the POWER switch to the ON position. Use the provided USB cable to connect Pluto to a power source. This will power Pluto and charge the internal battery. Use only a USB-C cable to power Pluto. -
Page 9: Getting Started
Getting started Patching basics To use Pluto’s patch interface, connect a 3.5mm patch cable from any output jack (filled circle) to any input jack (outlined circle.) Pluto’s interface uses pulse signals. This means the signals are either on/high or off/low. These on/off signals are used to control the timing of... -
Page 10: First Patch
First patch Here’s an idea for a first patch. Use two patch cables to make connections as shown below. This will get both sequencers and voices going. From here, just listen and explore. Turn some knobs. Patch more cables. Have fun. -
Page 11: Moons
Moons Named for the five moons of Pluto (the planet), the five outputs along the top are the main modulation sources of Pluto (the synth.) The outputs can generate a range of clock divisions, polyrhythms, and randomly evolving patterns. CLOCK The CLOCK knob sets the base tempo of the five “moons”... -
Page 12: Width
Turning SPREAD counter-clockwise from noon causes the "moons" to generate random patterns. The further counter-clockwise, the more quickly these patterns evolve. Turn SPREAD back to the noon position to lock the randomly-generated pattern. WIDTH The WIDTH knob. Adjusts the pulse width of the "moons" signals. At the noon position, the pulse width of all output signals is very narrow. -
Page 13: Shuffle
SHUFFLE Shifts the order of output signals from left to right. CHARON’s output moves to STYX, STYX to NIX, etc. And HYDRA’s output moved to CHARON. -
Page 14: Sequencers
Sequencers Sequence 1 SEQUENCE 1 determines what frequency is played by VOICE 1. The four steps of SEQUENCE 1 can be played manually with the four keypads or by patching a signal to the STEP input. This sequencer has three different modes, depending on how STEP and Voice 1 LEVEL are patched. - Page 15 2. If LEVEL is patched and STEP is unpatched ○ Touch a Keypad to make it the active step ○ LEVEL is modulated by its input signal ○ Voice 1 frequency is set to the active step 3. If STEP is patched ○...
-
Page 16: Randomization
Sequence 2 SEQUENCE 2 determines what frequency is played by VOICE 2. The four steps of SEQUENCE 2 are played by patching a signal to the STEP input. The STEP input is normalled to Voice 2 LEVEL input. When the DIRECTION input receives a high signal, SEQUENCE 2 will step in the reverse direction when STEP receives a high signal. -
Page 17: Voices
Voices Pluto has two multi-mode voices whose amplitude and timbre may be modulated. LEVEL input Each Voice has a LEVEL input that will modulate the amplitude (volume) of the voice when a control signal is patched. The envelope of the amplitude signal is automatically determined by the rate and pulse width of the input signal. -
Page 18: Voice Mode Switch
Voice mode switch Both of Pluto’s voices have three different modes. Use the toggle switch to select a mode. Voice 1 1. Classic – Blends from Sine to Triangle to Saw waveforms 2. Wavetable – Morphs between 32 different wavetables 3. -
Page 19: Effects
Effects Pluto has built-in delay and reverb effects that are applied to both Voice 1 and Voice 2. The effects range from analog-style delays to shimmer reverb to glitchy delay effects. INTENSITY The INTENSITY knob controls both the level of effect signal and other variables like the amount of delay feedback. -
Page 20: Time
TIME The TIME knob adjusts the delay time and blends between different delay and reverb effects modes. Analog-style delay From noon to the full CW position, the TIME knob adjusts the delay time like a traditional analog-style delay effect. The farther CW the knob is turned, the longer the delay time. -
Page 21: Scales
Scales SCALE knob The frequencies played by each voice are determined by the SCALE knob. The quantized scales are in the key of C. The preset scales from CCW knob position to CW position: Scale Notes Unquantized Pentatonic Major full Major Minor full D#, F,... -
Page 22: Listen Mode
When quantizing to MIDI, Pluto will quantize to the notes received via MIDI. Hold down a chord and Pluto will use those notes as a scale, quantizing both voices to those notes. -
Page 23: Midi
MIDI Pluto sends and receives MIDI data via the 3.5mm TRS MIDI jack and USB. To connect a MIDI device to the MIDI jack, use a TRS/stereo 3.5mm cable or TRS-to-MIDI DIN adapter. The MIDI jack is “Type A,” the official MIDI 2.0 spec. -
Page 24: Midi Control Change
MIDI control change Pluto sends MIDI CC messages for all knobs and toggle switches. The MIDI CC mapping is as follows: CONTROL MIDI CC CLOCK SPREAD WIDTH SEQ 1 STEP 1 SEQ 1 STEP 2 SEQ 1 STEP 3 SEQ 1 STEP 4... - Page 25 Both of Pluto’s Sequencers output control voltage (CV) signals from the CV OUT jack. The CV signal has a range of 0-5v and is calibrated to 1v/oct, used by Eurorack synths and most contemporary CV-enabled instruments. A TRS splitter (Stereo-to-Dual Mono) adapter is necessary to use both signals simultaneously.
-
Page 26: Sync Pluto To Other Devices
CLOCK knob to the full CW position. MIDI clock in Pluto receives MIDI clock data via the MIDI jack and USB MIDI. To receive a MIDI clock signal with the MIDI jack, use the slide switch to the left of the MIDI jack to select IN. The incoming MIDI clock is received at 12 PPQN. -
Page 27: Sync Other Devices To Pluto
Note: MIDI clock data is per device and not channel dependent. SYNC out To output a sync signal from SYNC jack, use the slide switch to the left of the SYNC jack to select OUT. Pluto will output a 5v sync signal in time with the CLOCK. -
Page 28: Configuration Mode
● Test the keypads. LEDs should light up when their respective keypads are touched. MIDI channels Pluto accepts MIDI input on one channel and outputs MIDI from Sequence 1 and 2 to two channels ● Switch TOGGLE 1 to set MIDI IN channel: 1, 9, 14 ●... -
Page 29: Audio Output Mode
Audio output mode Turn WIDTH knob to set the audio output mode. The LEDs along the top of Pluto will indicate the mode: Dual mono Voice 1 and 2 are panned 50% left/right Voice 1 and 2 are panned 100% left/right... -
Page 30: Firmware
2. Download the Teensy Loader app here: https://www.pjrc.com/teensy/loader.html 3. Plug in Pluto to your computer with the USB cable. Power on Pluto. 4. Unzip the firmware and open the .hex file with Teensy Loader. 5. Choose "Automatic Mode" from Teensy Loader’s Operation menu. -
Page 31: Patch Notes
Patch notes... - Page 33 Copyright ©2022 Modern Sounds LLC...
Need help?
Do you have a question about the Pluto and is the answer not in the manual?
Questions and answers