
Summary of Contents for Fernstrum GRIDCOOLER
- Page 1 GRIDCOOLER® KEEL COOLER Installation and Maintenance Manual Form 185 R.W. Fernstrum & Company...
-
Page 3: Table Of Contents
Contents PLANNING & LOCATION FORMING THE GRIDCOOLER® KEEL COOLER Determining Proper Location - Typical Determining Proper Location – PERFORMANCE ISSUES Displacement Vessels Determining Proper Location – MAINTENANCE Planing Vessels Improper (Not Recommended) REPAIR Locations Mounting Considerations - Typical STRAY-CURRENT CORROSION... -
Page 4: Planning & Location
DETERMINING PROPER LOCATION – temperature units. TYPICAL 1.1.4 When the GRIDCOOLER unit is used on a generator 1.1.1 Sea water must flow over the entire length of the set or if your application requires sizing for a hull unit. -
Page 5: Determining Proper Location - Planing Vessels
IMPROPER (NOT RECOMMENDED) LOCATIONS 1.4.1 The area of the hull where the GRIDCOOLER® Keel Cooler is installed must not vibrate or flex severely. 1.4.2 To eliminate unnecessary stress and vibration on the cooler, do not locate the unit directly below engine mounts or above the propeller(s). -
Page 6: Displacement Vessels
The bending can be done at the yard or FIG.8 U-Flow unit with E1 OPTION end mounted by R. W. Fernstrum & Company. Contact us if you anodes mounted on rake of vessel with are considering bending a unit. See Section 4.1 –... -
Page 7: Installation
2.1.1 Measure the distance between the inlet & outlet 2.3.1 Mounting gaskets supplied with the GRIDCOOLER nozzles from center to center (also measure to the Keel Cooler must be used to provide proper spacing centers of the support studs when applicable) before between the unit and the ship’s hull. -
Page 8: Aluminum Installations
If a wire reinforced rubber hose is used to connect the unit to the engine, put a screw-on coupling over the cooler nozzle threads. 2.4.6 Aluminum GRIDCOOLER Keel Coolers do not use anodes. PLUMBING NOTE: Prior to installing cooler, flush entire piping system to remove any debris. -
Page 9: Filling & Testing
Never mix ethylene and proplyene glycol-based antifreezes in your cooling system. 2.6.3 When installing a GRIDCOOLER Keel Cooler in a side mounted position, it is important that the unit is completely filled with coolant before launching the vessel. This can be accomplished by using the following procedure: 2.6.4... -
Page 10: Special Installations
3.1.1 Place a continuous bead of sealant around the marked “up” must face away from the hull. header gasket that separates the GRIDCOOLER® 3.1.6 Place the compression gasket (softer of the two unit from the outer hull. Customers have reported interior gaskets) down over the nipple as far as good success with polysulfide rubber sealants. -
Page 11: Z Option™ Installations
Pipe to side of cofferdam larger stud Z OPTION™ INSTALLATIONS 35 - 40 FT. LBS. 20 - 25 FT. LBS. 3.2.1 The Z OPTION GRIDCOOLER Keel Cooler replaces NOTE: Z OPTION units utilize our L OPTION™ support standard through-hull nozzle mounting/ plates for intermediate mounting of the cooler. -
Page 12: L Option™ Support Plate Installation
NOTE: Do not cut off the center stud on your of the keel cooler allowing the customer the option to weld GRIDCOOLER® Keel Cooler. The center stud is a mounting stud directly to the hull or to weld a short piece there to provide necessary support for your of angle to the hull as a securing means. -
Page 13: Mounting Copper-Nickel Coolers On An Aluminum Hull
ALUMINUM HULLS 3.4.1 An electrical barrier must be placed between the GRIDCOOLER® unit and the hull. R. W. Fernstrum & Company does not formally approve any method of installing a copper-nickel GRIDCOOLER Keel Cooler on unpainted aluminum hulled vessels. However, the following technique has been used on hundreds of boats. -
Page 14: Forming The Gridcooler® Keel Cooler
FORMING THE GRIDCOOLER® KEEL COOLER TWISTING A GRIDCOOLER KEEL COOLER BENDING A GRIDCOOLER KEEL COOLER To produce a twist, first fabricate a hook onto the end of a short length of pipe using barstock. Hook this bar across the When bending a cooler in a press, support the cooler from header as close to the nipple or stud as possible. -
Page 15: Performance Issues
PERFORMANCE ISSUES MOORED AT DOCK: Determining the cause of overheating can be difficult. Here Is the engine temperature rising while the vessel is moored are some things to look for: in dock? If the unit is installed near the propeller, engage the propeller to circulate water past the unit, after taking the WIRE REINFORCED RUBBER HOSE: proper safety precautions. -
Page 16: Maintenance
MAINTENANCE PAINTING: A GRIDCOOLER® Keel Cooler that is clean inside and out Coolers do not require painting. Doing so will decrease the will dissipate heat most efficiently. To keep your unit clean, a unit’s efficiency. periodic check of the cooling system is recommended. What ANODES: follows are some ways to clean your GRIDCOOLER unit. -
Page 17: Repair
The aluminum filler rod used FIG.25 Brazing repair in the GRIDCOOLER Keel Cooler is R 5554 aluminum wire. TIG WELDING: C70600 copper-nickel or monel 67 wire may be used. -
Page 18: Stray-Current Corrosion
STRAY-CURRENT CORROSION Since Fernstrum’s involvement in the design of any particular marine vessel is limited to the heat transfer requirements of the vessel, grounding or bonding of the keel cooler is best left to the person responsible for the design of the corrosion protection system. -
Page 19: Replacement Parts
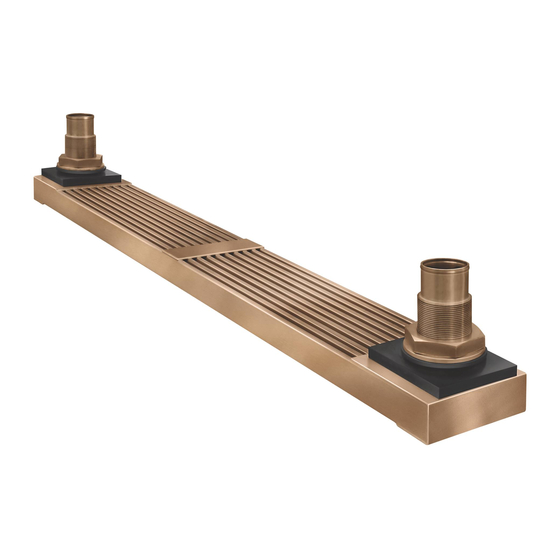
REPLACEMENT PARTS FIG.28 Single Pass Gridcooler Keel Cooler FIG.29 Multi Pass Gridcooler Keel Cooler Page 17 Installation and Maintenance Manual form 185... - Page 20 REPLACEMENT PARTS FIG.30 Z-Option Single Pass Gridcooler Keel Cooler FIG.31 Z-Option Multi Pass Gridcooler Keel Cooler NOTE: All gaskets are sold in complete sets. Gasket NOTE: Anodes are sold in kits consisting of anodes sets include all internal gaskets, exterior and mounting hardware.
-
Page 21: Limited Warranty
This limited warranty starts on the date of delivery and lasts RIGHTS AND YOU MAY ALSO HAVE OTHER RIGHTS, WHICH for 90 days for the aluminum GRIDCOOLER® Keel Cooler, and VARY FROM STATE TO STATE. lasts for 2 years for the copper-nickel GRIDCOOLER® Keel Cooler (the “Warranty Period”). -
Page 22: Recommendation Form
11 RECOMMENDATION FORM installation and maintenance manual form 170 page 19 CUSTOMER PLEASE KEEP THIS FORM ON THE VESSEL FITTED WITH THE GRIDCOOLER UNITS. THE INFORMATION BELOW WILL BE OF USE FOR FUTURE REFERENCE. PHONE ENGINE INFORMATION GRIDCOOLER INFORMATION HP/RPM... - Page 23 FERNSTRUM® and GRIDCOOLER® are registered trademarks of R.W. Fernstrum & Company. Data contained herein is confidential and proprietary to R.W. Fernstrum & Company and may not be used, disclosed, reproduced, modified, performed, or displayed R.W. Fernstrum & Company • P.O. Box 97 • Menominee, Michigan 49858...
- Page 24 Phone: 906.863.5553 • Fax: 906.863.5203 • Email: sales@fernstrum.com P.O. Box 97 • 1716 11th Avenue • Menominee, Michigan 49858 • USA © 2022 R.W. Fernstrum & Company. All Rights Reserved. FERNSTRUM® and GRIDCOOLER® are registered trademarks of R.W. Fernstrum & Company...
Need help?
Do you have a question about the GRIDCOOLER and is the answer not in the manual?
Questions and answers
sizing chart